User and Computer categories
Defining user categories so you do not have to make an application available globally – you can choose a particular group or user who can shop for it.
Managing user categories
You will probably want to determine which applications users get to see. You do this by defining user categories, which means that you do not have to make an application available globally – you can choose a particular group or user who can shop for it and it also helps organize the applications for easy selection in the Shopping Web portal. For example, if you have a software development group, you can just enable that group to shop for software development applications and not have to worry about unnecessary requests from your HR department or vice versa for HR specific applications.
Will I need to define the users themselves?
Actually, you do not need to create users – it is all handled for you automatically by Shopping. Using your AD, Shopping is able to automatically create users for the system when they browse the Shopping Website. Shopping gets the user's details as well as their department heads/managers.
The Configuration Manager client is used by Shopping to determine what site the user should be looking at, which in turn also determines what applications are made available to them in the Shopping interface and the user's email details are kept up-to-date using the AD synchronization settings described in Configuring AD synchronization.
Note
As the non-Configuration Manager application approval process relies heavily on email notifications, users must have their email addresses accessible via AD. If a user’s manager is not assigned, they will not be able to shop for applications that require a manager’s approval.
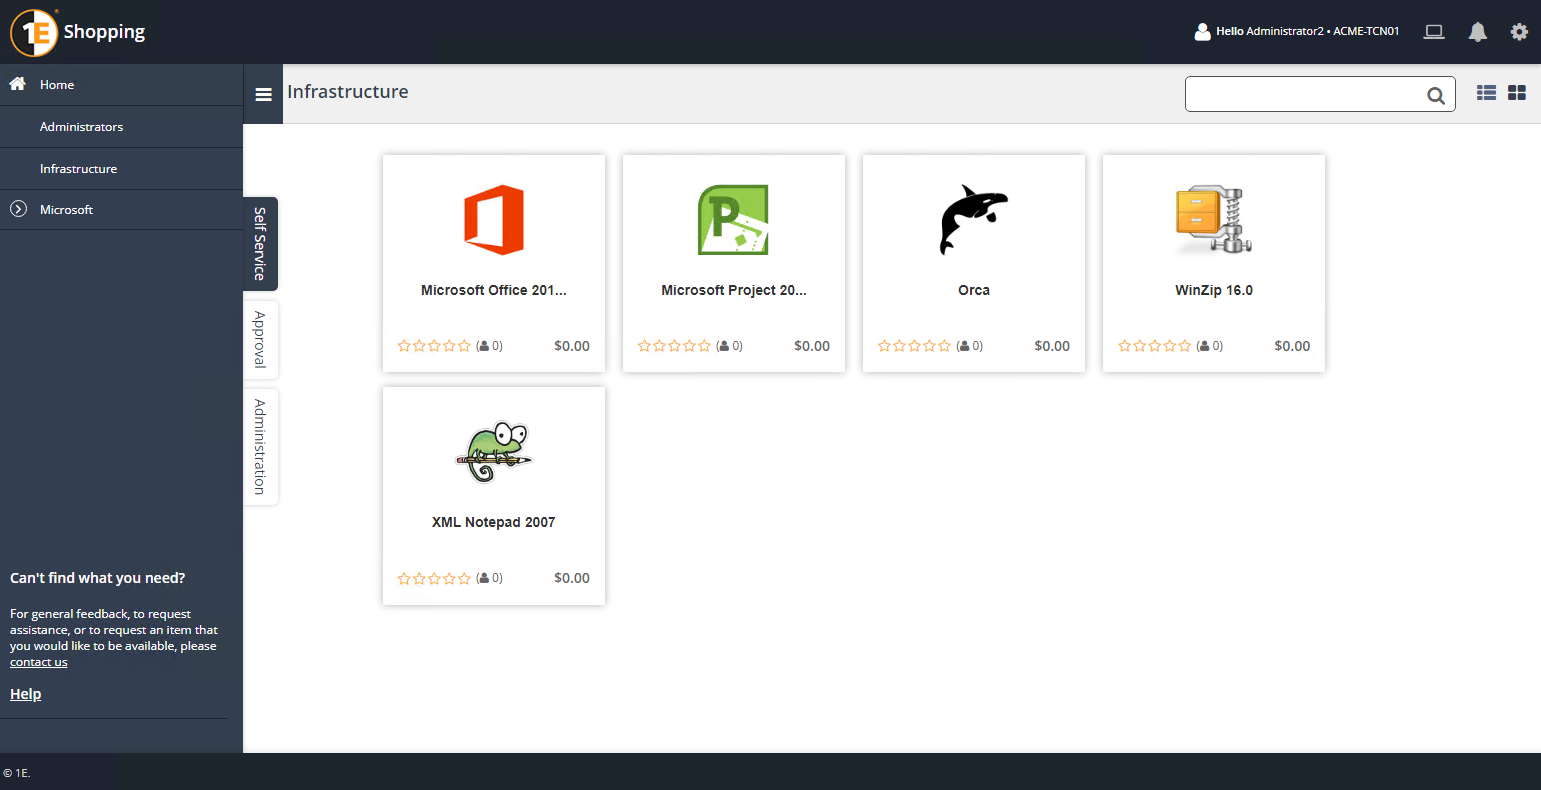
The Shopping-defined Miscellaneous user group has a special purpose – to catch all applications that do not belong to any other user categories. If you want to get Shopping up and running as quickly as possible, you can simply create applications, not use specific user categories and let your users shop from the this group. The Miscellaneous user category always appears at the bottom of the user categories list.
Creating a new user category
To create a new user category:
In the Shopping Admin Console, choose the User Categories node.
Right-click anywhere in the right-pane and from the context menu, choose New User Category.
In the New User Category wizard:
On the Welcome screen, click Next.
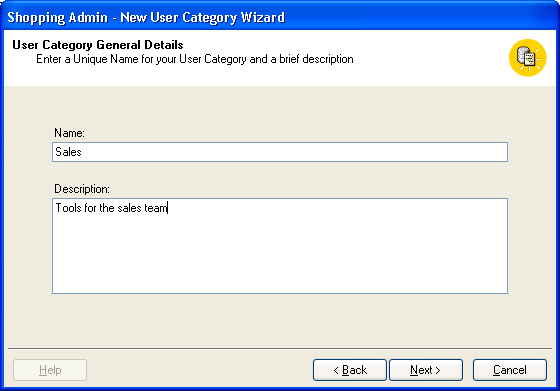
On the User Category General Details screen, provide a name and description for the user category (it is used the Shopping Admin Console and in the list of categories which is visible to users) and click Next.
On the Permissions screen, choose who can see the user category when they browse the Shopping interface:
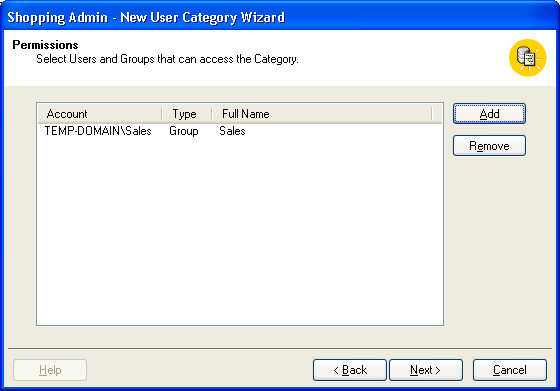
Account list – list of users or groups that have access to this user category
Add – adds users to the list of users who can view the application in the Select Users or Groups dialog. There are three sections to the browser: the object type, the location, and the object names. The combination of the parameters in these sections allows you to select AD security groups or pinpoint individuals.
Note
Although it is possible to change the scope of the browser so that it returns computer groups, only user groups should be used with User Categories.
Click OK to continue.
On the Completion screen, click Finish.
Organizing user categories into groups
To help users find the applications they want to shop for, define category folders to organize the user categories into conceptual groups. To do this, display the properties for an existing user category and select the Category Folders tab.
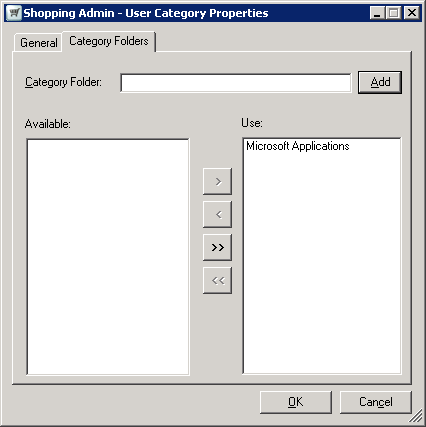
In Category Folder, type the name for the folder.
Click Add – the newly created folder appears in the Use list.
Click OK.
In the Shopping Web, click the Microsoft Applications menu item to show what's available. Users who are currently logged-in must sign-out and sign-back in again to view the changes.
Managing computer categories
Computer categories let you define computer specific approval that is controlled using individual computer accounts, AD groups or OUs. This can be extremely effective when the machines in a network have a wide geographic spread.
You can use computer categories to nominate administrators for the computers who can carry out maintenance tasks for the computers such as shopping for applications, un-installing applications and restoring applications after re-imaging. Computer categories also form the basis for branch administration for applications – this is where the branch administrator associated with the computer category is able to choose which branch administered applications are published to the computer category and their approval process. For more details see Branch management.
If you need to add a large number of computers to a computer category, it is more efficient to create an AD Group or OU and add the computers to it and then add them to the computer category.
Creating a computer category
To create a new computer category:
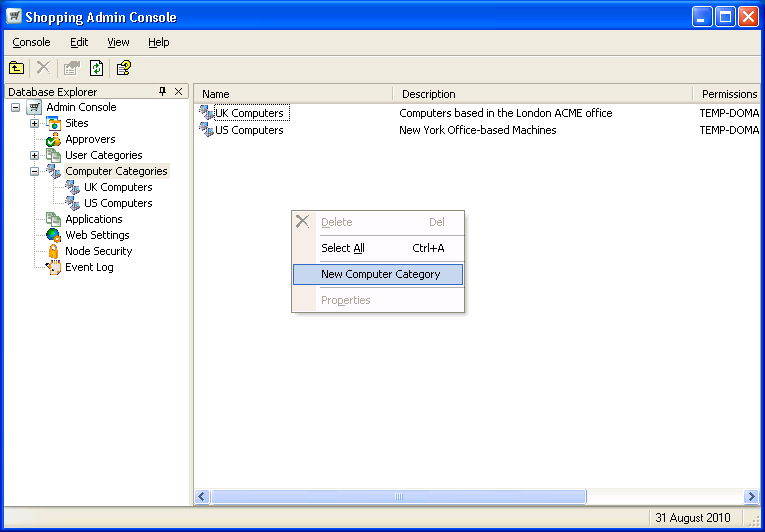
In the Shopping Admin console, click Computer Categories.
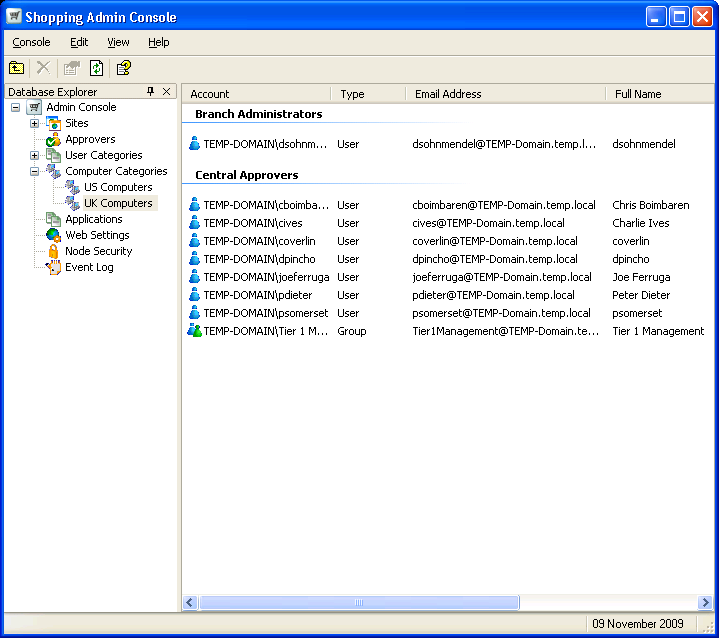
Right-click anywhere in the right-hand pane and, from the context menu, choose New Computer Category. In our example, there are two newly created categories – UK Computers and US Computers.
Defining central approvers and branch administrators
Having created the new computer category, add your central approvers and branch administrators.
To add central approvers:
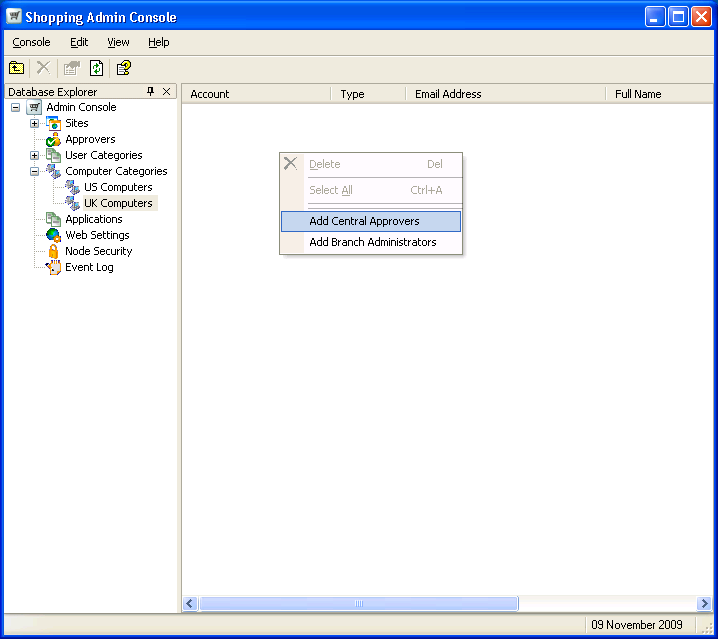
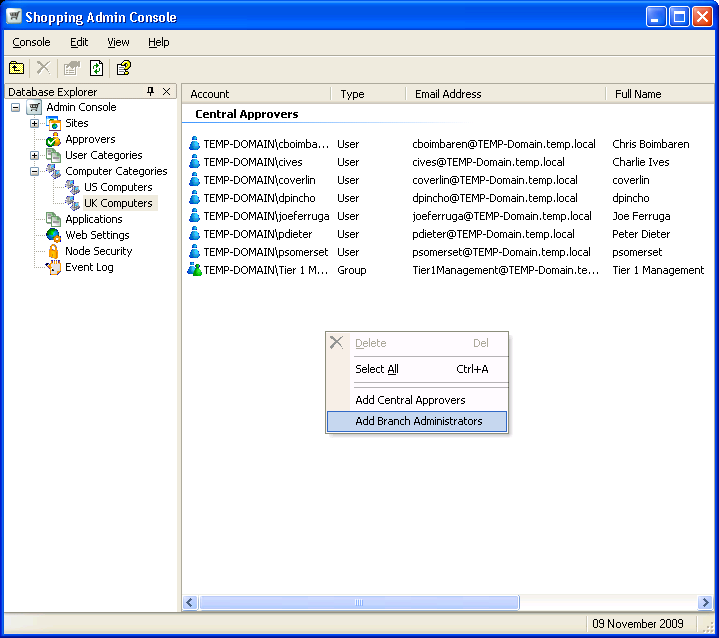
In the Shopping Admin console, choose the computer group (UK Computers in our example).
Right-click anywhere in the right-hand pane and from the context menu, choose Add Central Approvers.
In the Add Central Approvals dialog, select the approvers to add.
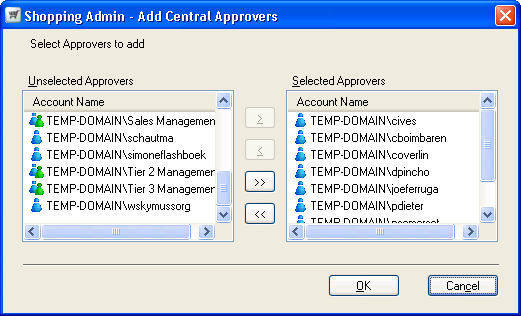
Click OK
To add branch administrators:
In the Shopping Admin console, choose the computer group (UK Computers in our example).
Right-click anywhere in the right-hand pane and, from the context menu, choose Add Branch Administrators.
From the list of administrators, choose the branch administrators for the computer category
Click OK.
Having added all your central approvers and branch administrators, they are displayed in the Shopping Admin console as follows: