Managing Configuration Manager applications
Configuration Manager Applications in Shopping are used to publish Configuration Manager Packages and Programs, Applications or Task Sequences to the Shopping portal. To create these applications the appropriate Configuration Manager Package and Program, Application or Task Sequence must already be created.
New Applications
To create a new application:
In the Shopping Admin Console, choose the Applications node.
On the right pane, right-click and from the context menu, choose New ConfigMgr/Intune Application.
Follow the New Configuration Manager/Intune Application wizard.
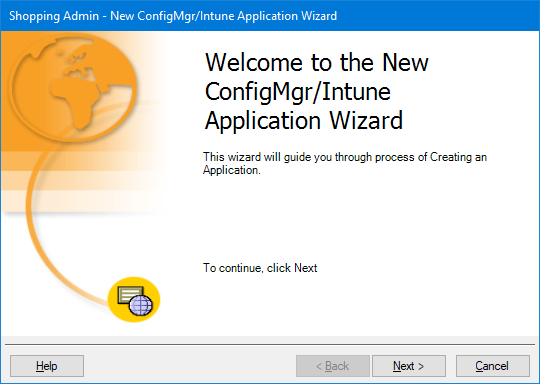
Welcome
On the Welcome screen, click Next.
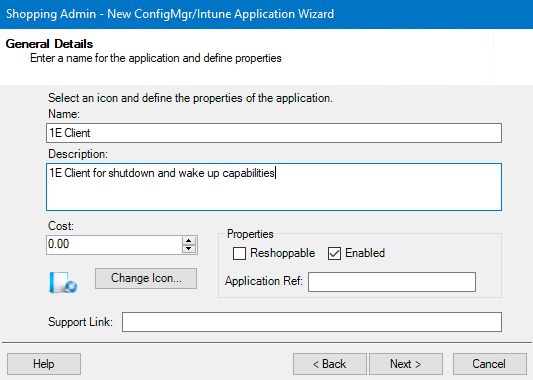
General Details
On the General Details screen, populate the attributes for the application, then click Next.
Feature | Explanation |
|---|---|
Display Name | Name of the application which is used in the Shopping Admin Console and is what the user sees in the Shopping Web portal. |
Comment | Additional information for the application. |
Cost | Cost of the application used in the Shopping Web portal, the Shopping basket and in email notifications. The cost is displayed in the currency that is set in the Shopping Central server. |
Change Icon | Changes the icon associated with the application. By default, the dialog displays the icons from the |
Properties |
NoteWhen a Configuration Manager Application is shopped for again it forces a reschedule of the advert on the computer. If the Configuration Manager package and program refers to an MSI, Shopping will reschedule the advert but the program may fail as a result of the application already being installed.
|
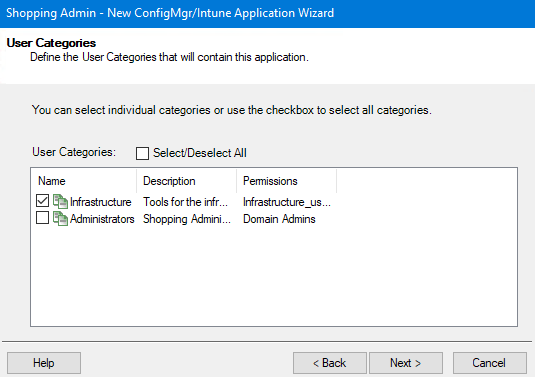
User Categories
On the User Categories screen, choose the user categories the application will be available, then click Next.
Select/Deselect All – tick the checkbox to select or deselect all the user categories from the list
User Categories – tick the checkbox next to the user category to select it.
Note
If you do not choose a user category, the application will appear in the Miscellaneous user category.
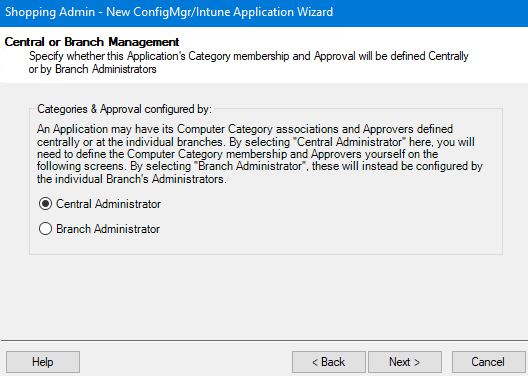
Central or Branch Management
On the Central or Branch Management screen, choose how the application is managed, in our example, we've chosen Central Administrator.
Then, click Next.
If you choose:
Central Administrator - the application is centrally managed and is administered from the Shopping Admin Console. The approval and publication for the application is determined in the Approval screen.
Branch Administrator - the application is managed at a branch level, refer to Branch management for details. The application is initially defined in the Shopping Admin Console but its approval and publication to the computer category must be completed by the branch administrator.
Note
If you choose:
Central Administrator - the Approval screen is displayed next
Branch Administrator - you'll see the Application delivery mechanism screen next.
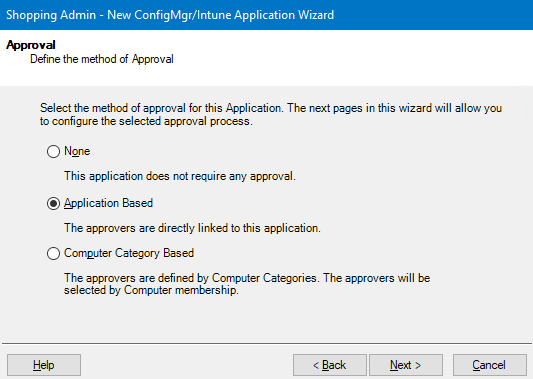
Approval
On the Approval screen, choose the type of approval for the application.
Approval type | Explanation |
|---|---|
None | No approval required. Users can request the application as long as they have permissions to view it. |
Application Based | Approvers are required for the application. If you choose this option, the Application-based Approval screen is displayed. |
Computer Category Based | Approvers are based on Shopping Computer Categories. If you choose this option, the Computer Categories screen is displayed. |
Note
Applications that require approval may need some Shopping approvers defined, refer to Approvers for details.
Alternatively, you can use the pre-defined <MANAGER> approver which will select the manager of the user, as determined by AD, as an approver.
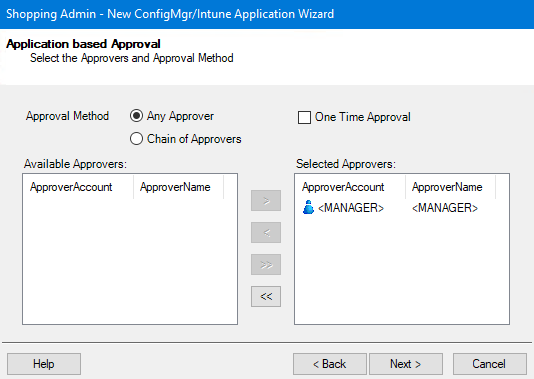
Application-based Approval
On the Application-based Approval screen, choose the approval method.
When you have selected the approvers, click Next to to go the Application delivery Mechanism screen.
Approval Method | Explanation |
|---|---|
Any Approver | All approvers in the list are sent an email notification when an application request is made. The outcome of the request is determined when the first person in the list approves or rejects the application request. |
One Time Approval | The outcome (approve or reject) for the application request is processed only once for a particular user. Subsequent requests by that user for the same application will always follow the original outcome. |
Chain of Approvers | All approvers in the list must approve the application request for it to be successful. As long as the request is not rejected, approvers are sent email notifications sequentially to ask them to approve or reject the request. When one approver rejects the request, the process stops immediately and the application request is treated as rejected. |
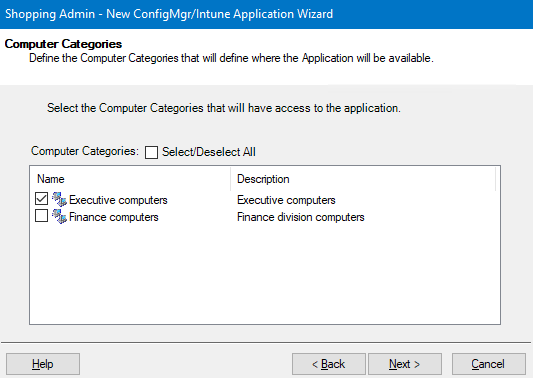
Computer Categories
Approvers are required for specific computers where the application is to be installed. If you choose this option, theComputer Categoriesscreen is displayed.
Select/Deselect All – selects or deselects all the categories in the list.
Choose the computer categories from the list by ticking the check box next to it.
Click Next.
Clicking next takes you to Computer Category based Approval screen.
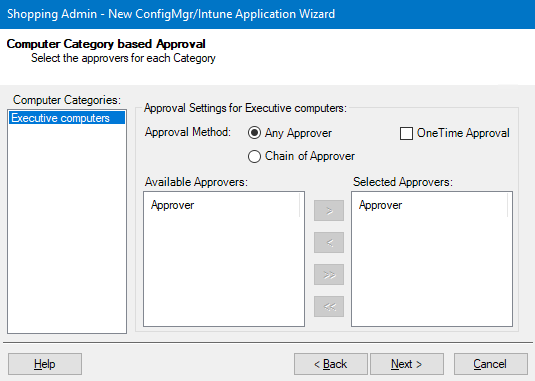
Computer Category based Approval
On the Computer Category based Approval screen, select the approval method and approvers for the computer category.
When you have set the approval settings for your chosen computer category, click Next to to go the Application delivery Mechanism screen.
Approval setting | Explanation |
|---|---|
Any Approver | All approvers in the list are sent an email notification when an application request is made. The outcome of the request is determined when the first person in the list approves or rejects the application request. |
One Time Approval | The outcome (approve or reject) for the application request is processed only once for a particular user. Subsequent requests by that user for the same application will always follow the original outcome. |
Chain of Approvers | All approvers in the list must approve the application request for it to be successful. As long as the request is not rejected, approvers are sent email notifications sequentially to ask them to approve or reject the request. When one approver rejects the request, the process stops immediately and the application request is treated as rejected. |
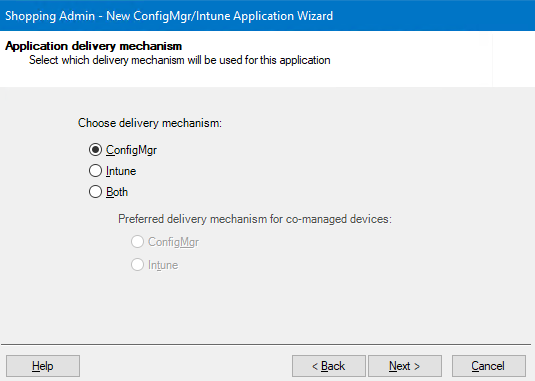
Application delivery mechanism
Choose the delivery mechanism for your application from:
ConfigMgr
Intune
Both.
If you choose Both, you'll be prompted to select your preferred delivery mechanism for co-managed devices.
If you're using an Intune package, refer to the Managing Intune applications page for details.
In our example we've chosen ConfigMgr.
Click Next.
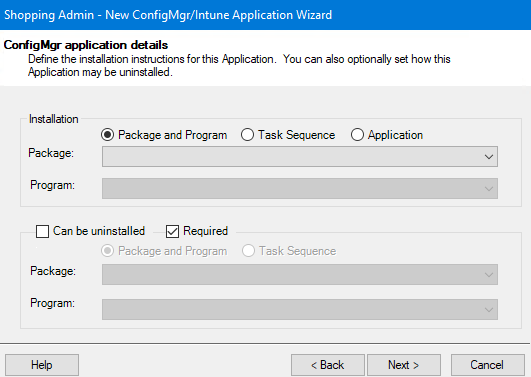
ConfigMgr application details
On the ConfigMgr application details, choose how the application is advertised and click Next.
Installation option | Explanation |
|---|---|
Package and Program | Uses a Configuration Manager package and program for the installation. You can also choose a Configuration Manager package and program or task sequence to uninstall the application. |
Task Sequence | Uses a Configuration Manager task sequence for the installation. You can also choose a Configuration Manager package and program or task sequence to uninstall the application. |
Can be uninstalled | The Package field is populated with packages from the Configuration Manager site and the Program field is populated with programs with its associated package. |
Application | Uses a Configuration Manager Application. Your options are:
NoteFor rental applications, the Can be uninstalled option must be checked i.e. you must be able to uninstall the application, refer to Configuring application rental for details.
|
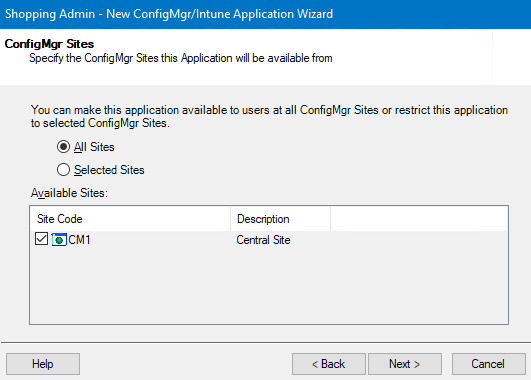
ConfigMgr Sites
On the ConfigMgr Sites screen, choose the sites where the application will be available and click Next.
All Sites and Unmanaged Clients – the application is available in all sites, including ones that are added at a later date
Selected Sites – the application is only available in the selected sites. If you choose this option and select all the sites from the list.
Note
If you choose All Sites, the application is available to any Configuration Manager site added at a later date.
If you choose to make the application available to selected sites, the application is available just to those sites regardless of what is added later – unless the application is edited to include the new sites explicitly.
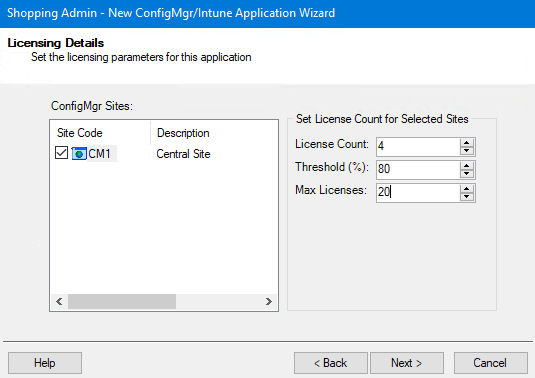
Licensing Details
On the Licensing Details screen, set the attributes for the application's licensing for the ConfigMgr Sites, then click Next.
License Count – the number of licenses used for this application
Threshold (%) – the point at which an email notification is sent to the License Manager informing them that licenses are running out
Max Licenses – the maximum number of licenses available for the application.
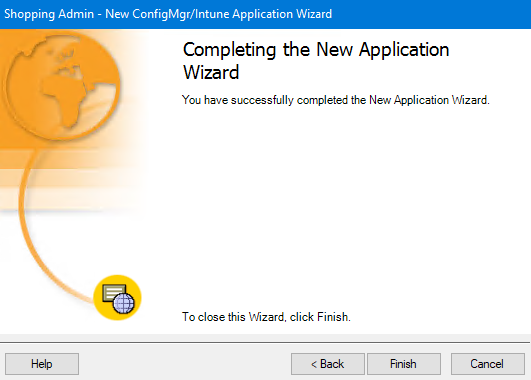
Completion
On the Completion screen, click Finish to complete the wizard or go back and review your options.