Application properties
An explanation of each property tab of a Shopping appliction.
Updating existing application properties
To update the properties of an existing application:
In the Shopping Admin console, click Applications.
Right-click the application you want to modify (Adobe Reader in our example) on the right pane and from the context menu, choose Properties.
The Application Properties dialog contains a number of tabs that allow you to modify various application properties. These values were originally defined in the New Application or New Configuration Manager wizard.
Some specific properties such as the Additional Notification Link and Translations can only be modified from the Properties dialog.
Application properties by tab
General
In the General tab, you can modify the properties for:
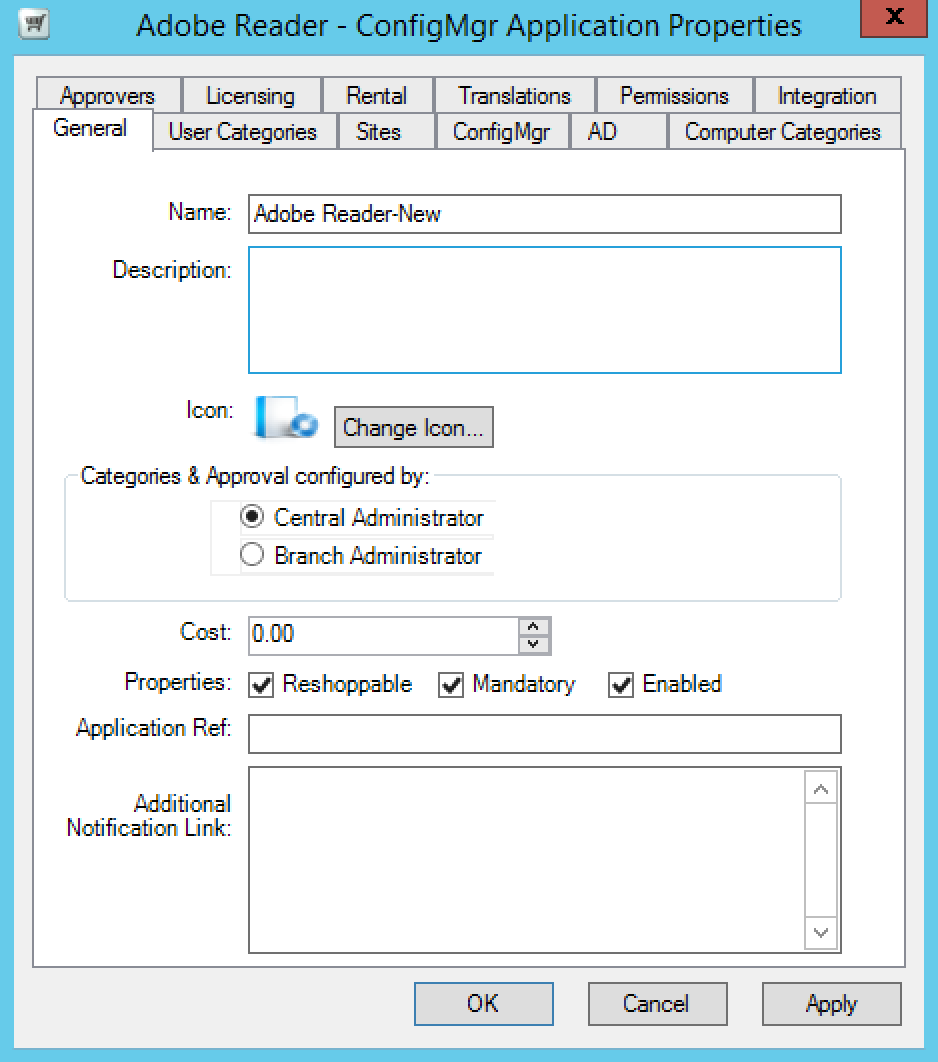 |
Name – the name of the application (limited to 50 characters). This value is used in the Shopping Admin console and in the Shopping Web portal.
Description – the description for the application (limited to 50 characters).Used in the Shopping Admin console and in the Shopping Web portal.
Change Icon – enables you to update the icon for the application. To change the icon:
Click Change Icon...
In the Select Icon from File dialog, and chose an icon (by default, it points to the
SHELL32.DLL file).If you want to use a different icon from the default set, click Browse and navigate to the location for the new icon.
Click OK.
Central Administrator – enables the application to be centrally managed from the Shopping Admin console.
Branch Administrator – the application is initiated in the Shopping Admin Console but its completion in terms of approval and publication to the Computer Category must be completed by the Computer Category Branch Administrator. Toggling between Central and Branch administration removes any associated Computer Category and approver relations for the application. You will be prompted to confirm your actions.
Cost – the cost (displayed in the currency defined in the Shopping Central server) for the application. This value is used in the Shopping Web portal, Shopping basket and in email notifications.
Reshoppable – reshoppable applications are those that will always appear in the list of applications available to users regargles if they have already shopped for that application.
Mandatory – determines if Configuration Manager deployment that delivers the application to the user is mandatory. This property is not available for non-Cofiguation Manager applications.
Enabled – enables the application to be used in the Shopping Web portal
Application Ref: – the unique ID associated with the application.
Additional Notification Link – enables you to include additional information, links or network share paths specific to the application which is used in the approval or order completed email notifications. The filed is limited to 4,000 characters.
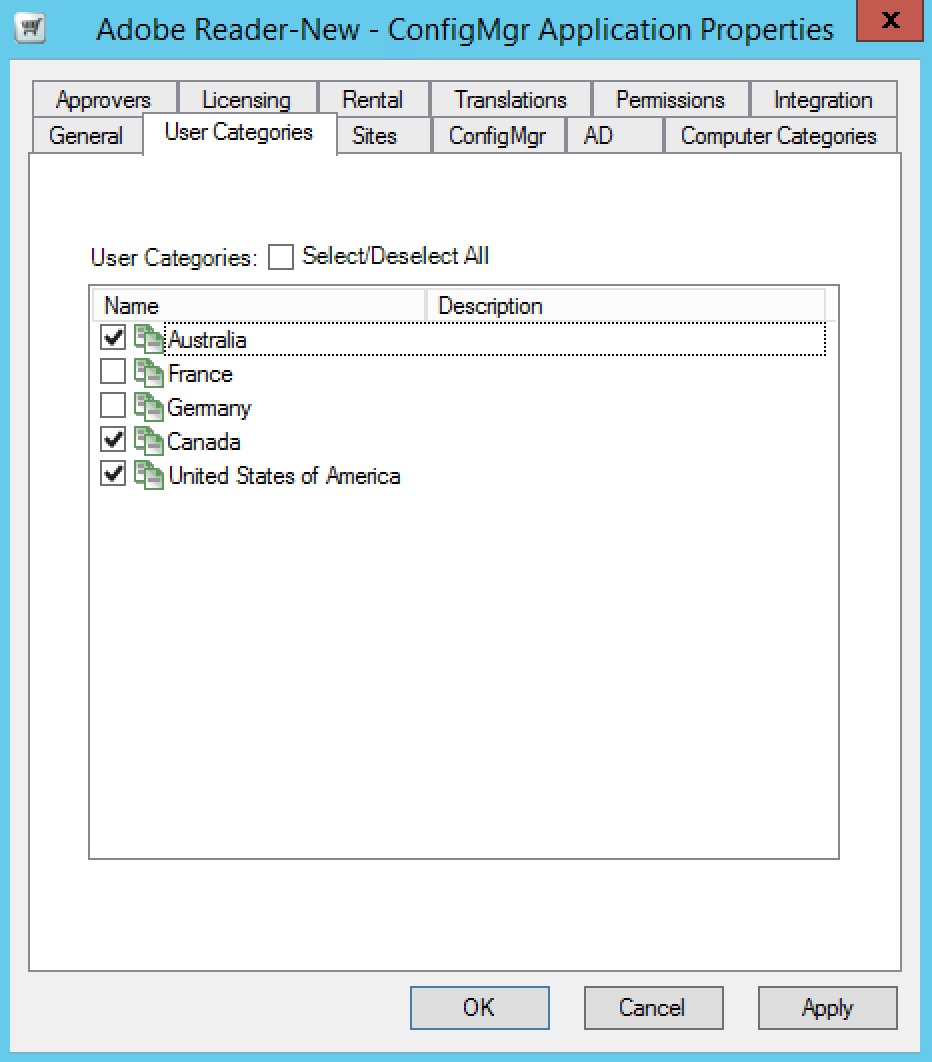
User Categories
The user categories you want the application associated with in the Shopping Web portal.
 |
Your options are:
Select/Deselect All – enables or disables all user categories in the list
User Categories List – list of user categories in which you want the application to be displayed in. Tick the box next to the category you want the application to be displayed in.
If you do not choose a category, the application automatically appears in the Miscellaneous User category.
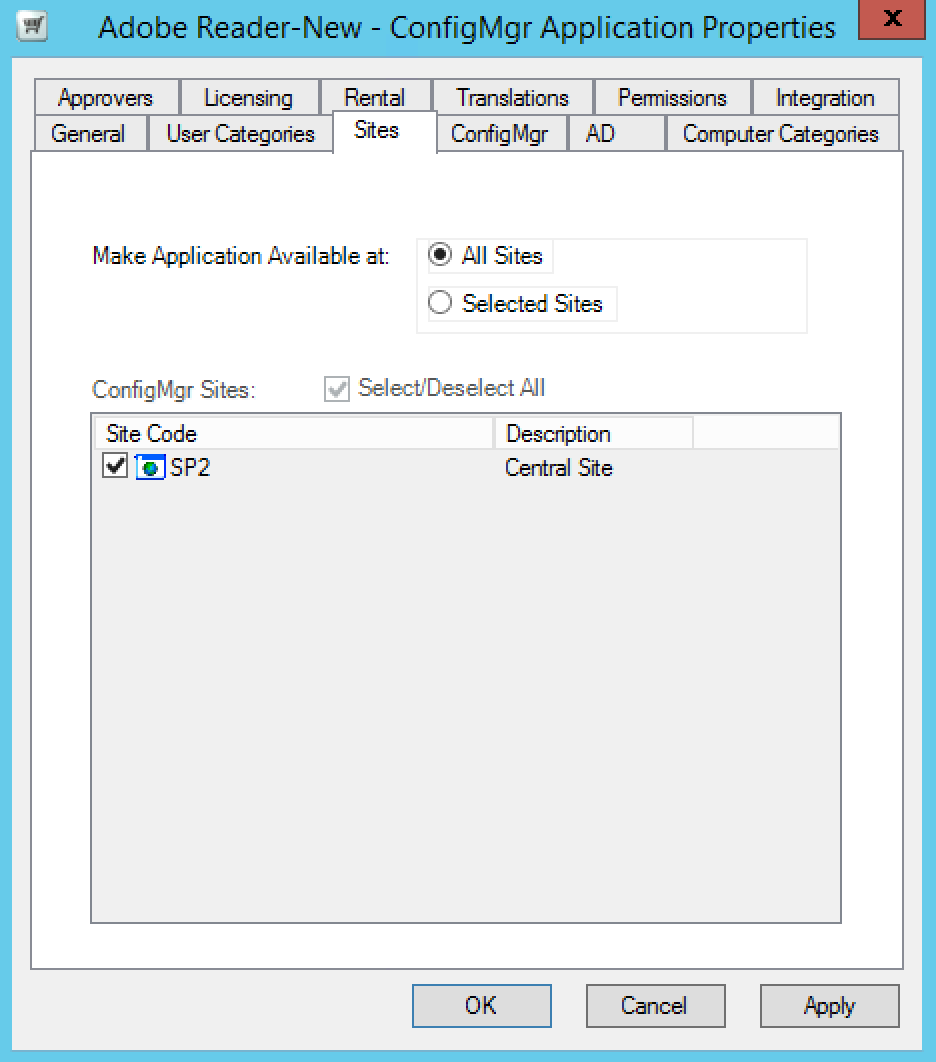
Sites
Used to modify the Configuration Manager sites where the application is available in the Shopping Web portal. The user's computers must have the Configuration Manager client installed – meaning that they belong to a particular Configuration Manager site.
 |
Your options are:
All Sites – the application is available in all Configuration Manager sites, including ones that are added at a later stage
Selected Sites – the application is only available in selected sites. Choosing this option and ticking all the sites listed under ConfigMgr Sites is not the same as selecting the All Sites option – the application is not available to new sites that are added at a later stage. You will have to explicitly add them to the new sites to make the application available.
ConfigMgr
Only applicable to Configuration Manager applications. It lets you modify the uninstall options for the application. Ticking the Can be uninstalled checkbox lets you uninstall the application. For applications that use Package and Program or Task Sequence for installation, you can change the un-installation option to use either a package and program or task sequence.
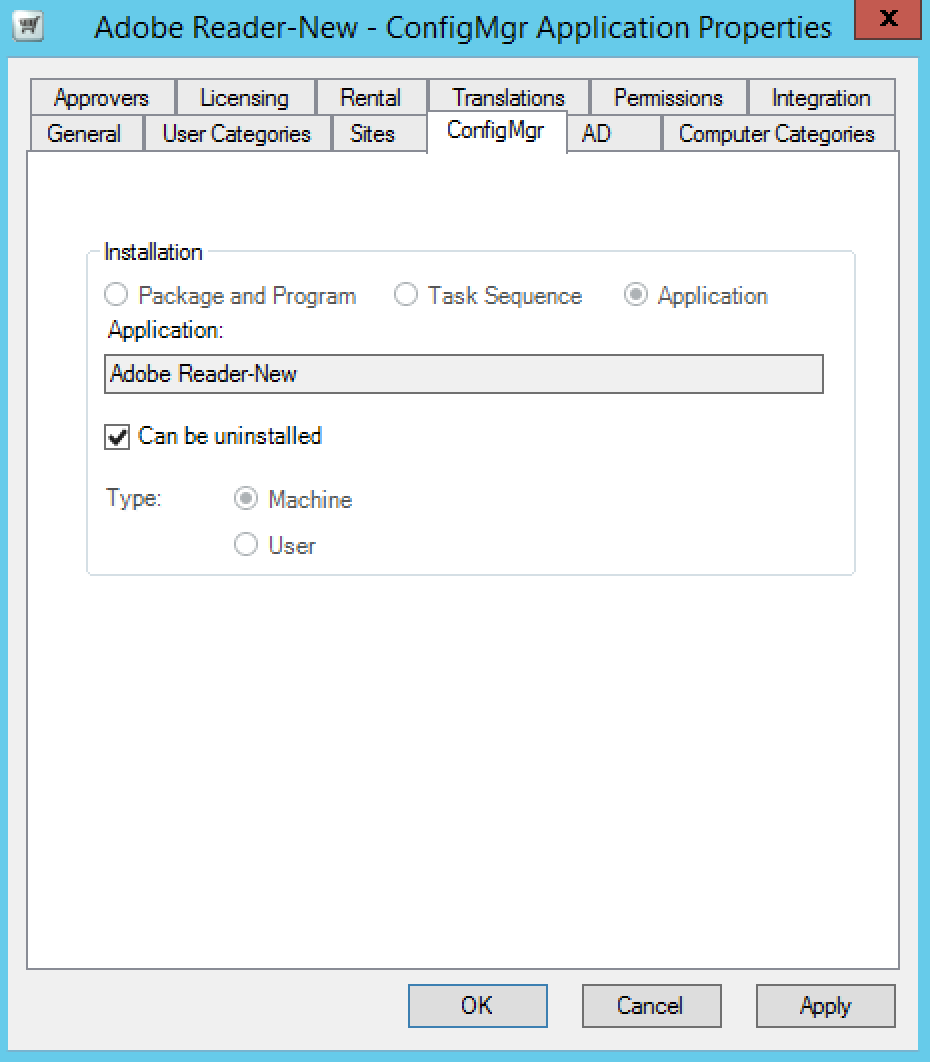 |
If you choose Package and Program, the Package field displays a list of available packages. Selecting a package populates the Program field with programs from that package.
If you choose Task Sequence, the Package field displays a list of available task sequences – the Program field is disabled.
For applications that use application for installation, you can only change the status of the Can be uninstalled checkbox.
For Rental applications, you must Can be installed must be enabled so that the user can uninstall the application themselves when they are finished with it, thereby freeing up licenses for future use.
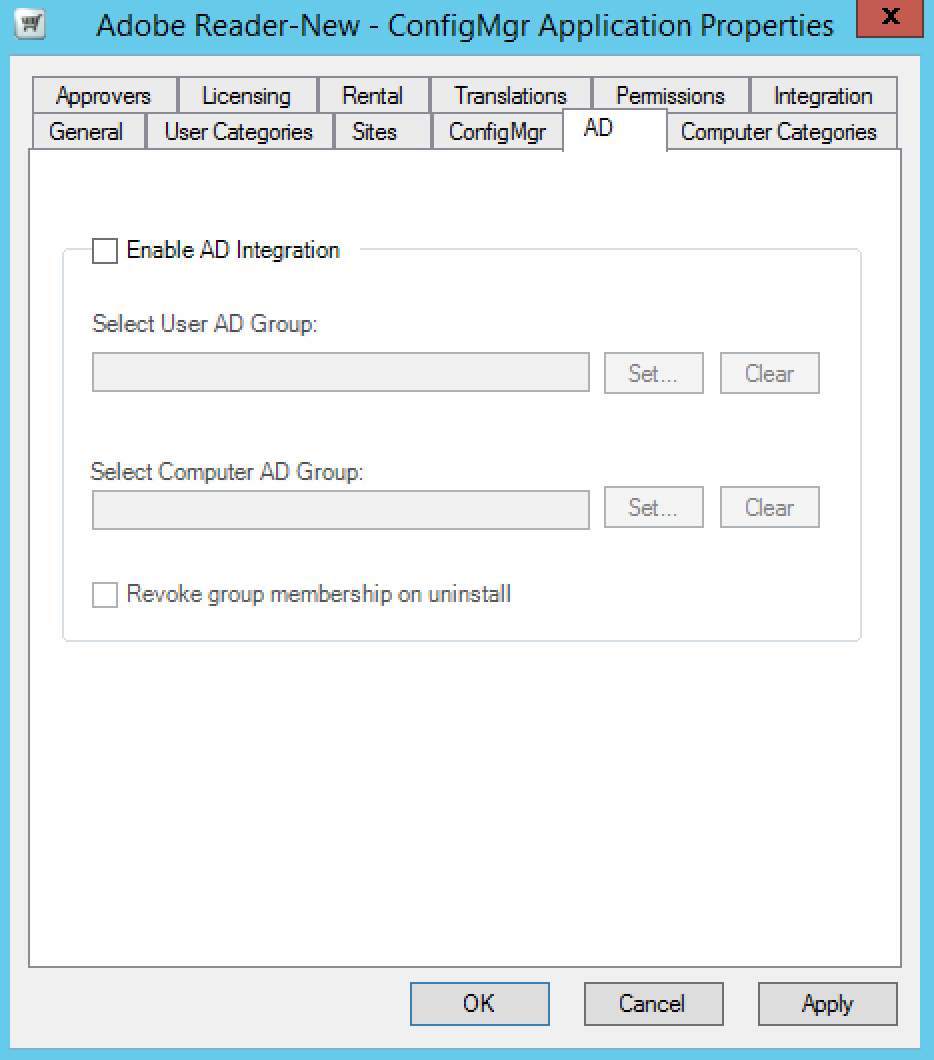
AD
Use the AD tab to associate Active Director groups with the application where users or machines shopping for it automatically become members those groups and get their memberships revoked when the application is uninstalled.
 |
Computer Categories
Used to manage computer category approvals for the application.
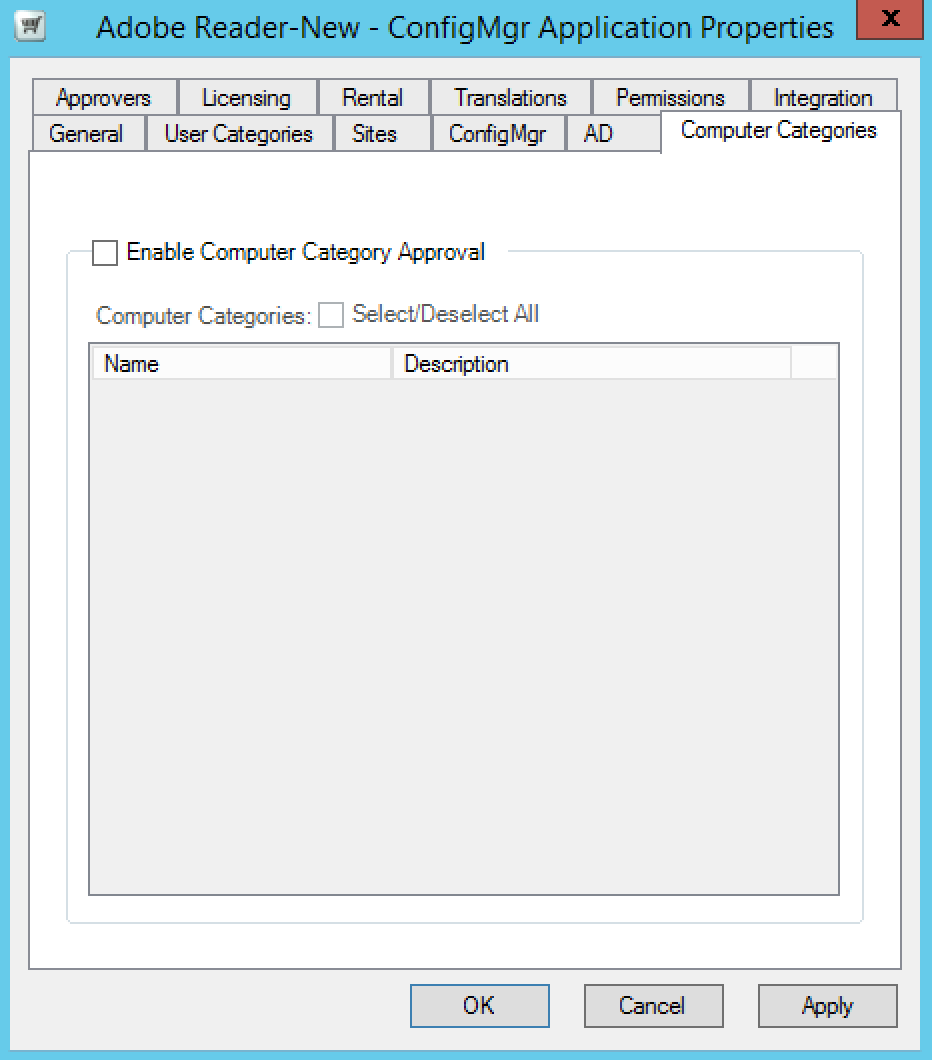 |
To enable this type of approvals:
Tick the Enabled Computer Categories Approval check box.
Tick the Select/Deselect All check box to include all the categories in the list.
Include selective categories from the list by ticking the check box next to the category.
Click OK.
Approvers
Used to manager approvers for the application.
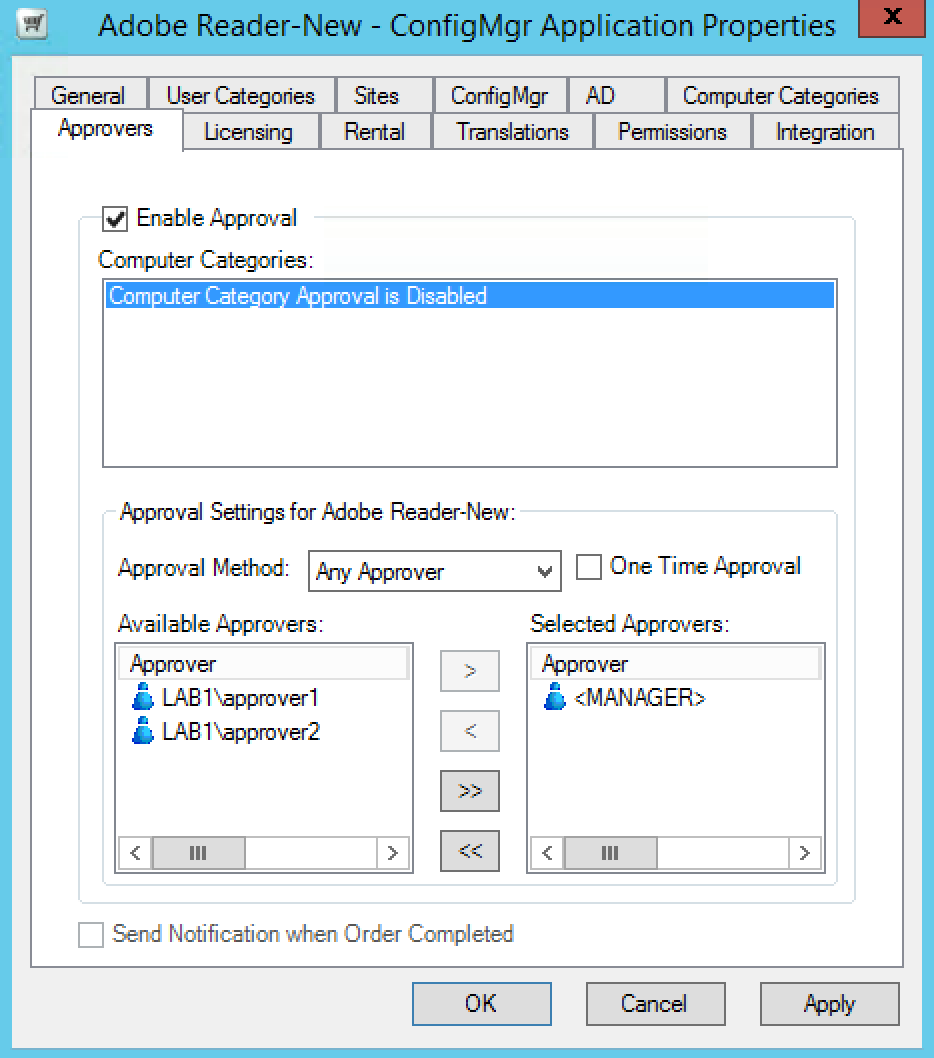 |
To enable approvals:
Tick the Enable Approval checkbox.
Choose the Approval Method (Any approver or chain of approvers).
If the application only requires a one-time approval, tick the One Time Approval checkbox.
To add an approver, drag and drop them from the the Available Approvals list to the Selected Approvers list. Alternatively, select the approvers to add from the Available Approvals list and click the button with the right pointing arrow.
To remove approvers, drag and drop them from the Selected Approvers list to the Available Approvers list. Alternatively, select the approvers to remove from the Selected Approvers list and click the button with the left pointing arrow.
Click OK
The Send Notification when Order Completed checkbox is only enabled when an application is not subject to approvals. It has more relevance for non-Configuration Manager applications and is used to send an email notification when an order has been processed. For example, if access to a specific share is granted to anyone who requests it, the notification email can be used to provide instructions for accessing the share when used in conjunction with the Additional Notification Link text in the General tab.
Licensing
Managing the licensing aspects for the application in Configuration Manager sites which can be for all Configuration Manager sites or on a per-site basis.
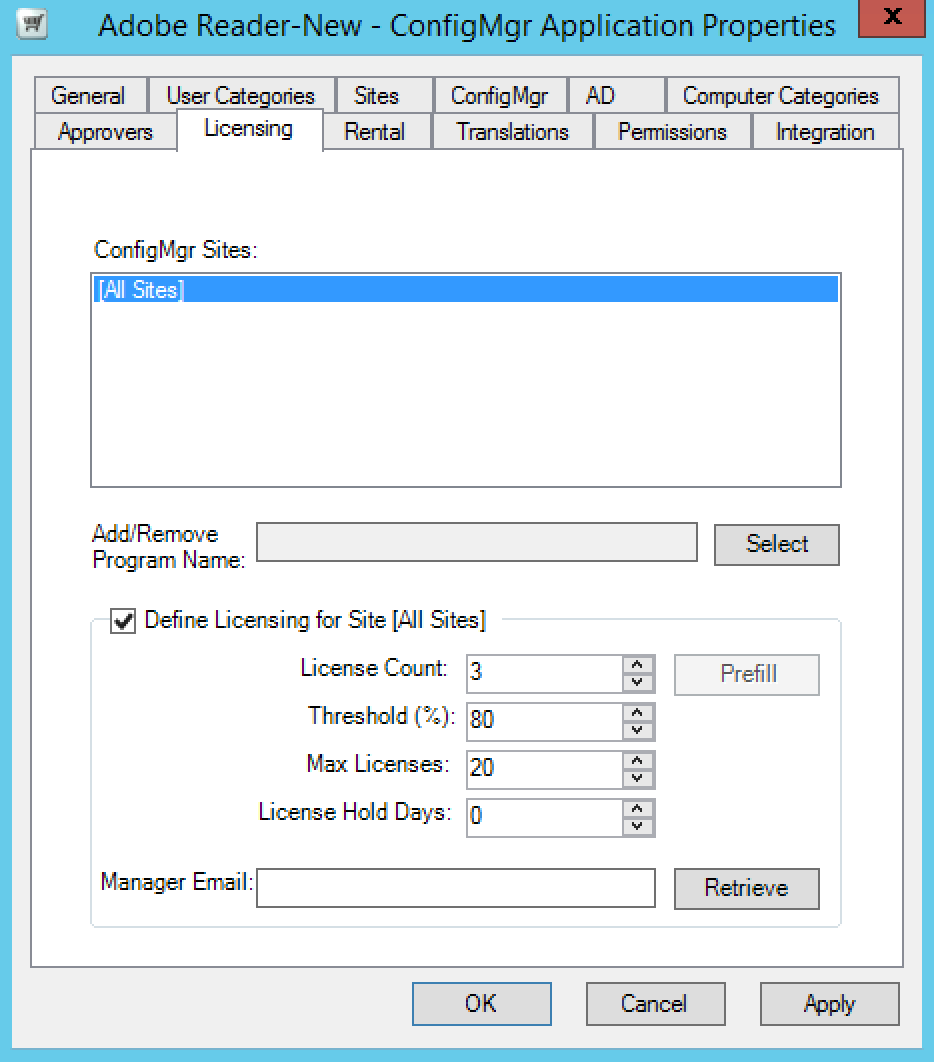 |
When you define the licensing for a site, note the following:
The maximum value for License Count is 1,000,000,000
The maximum value for Threshold (%) is 100
The maximum value for Max Licenses is 1,000,000,000
The maximum value for License Hold Days is 100,000
Rental
Only enabled for Configuration Manager applications if Can be uninstalled is checked Configuration Manager tab and for non-Configuration Manager applications if AD group membership is defined and Revoke group membership on uninstall is checked in the AD tab. It also enables an application or AD group membership to be shopped for on a rental basis. It means that users get the use of an application for a set period of time after which it will be uninstalled.
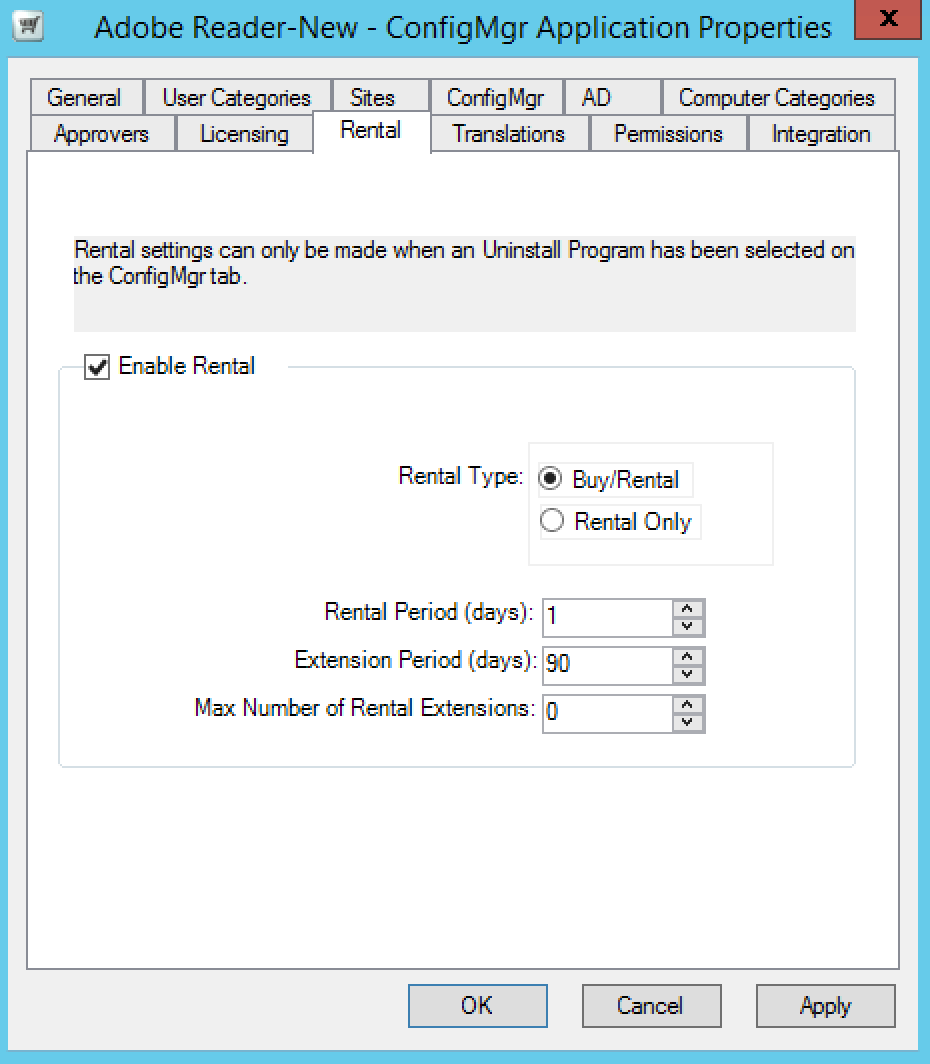 |
Use this tab to determine if the application is exclusively for rental of if it can be purchased, set the rental period, set the extension duration and the maximum number of times it can be extended as a rental application. When you set the rental attributes for the application, note the following:
The maximum value for Rental Period (days) is 10,000
The maximum value Extension Period (days) is 120
The maximum value for Max Number of Rental Extensions is 100,000
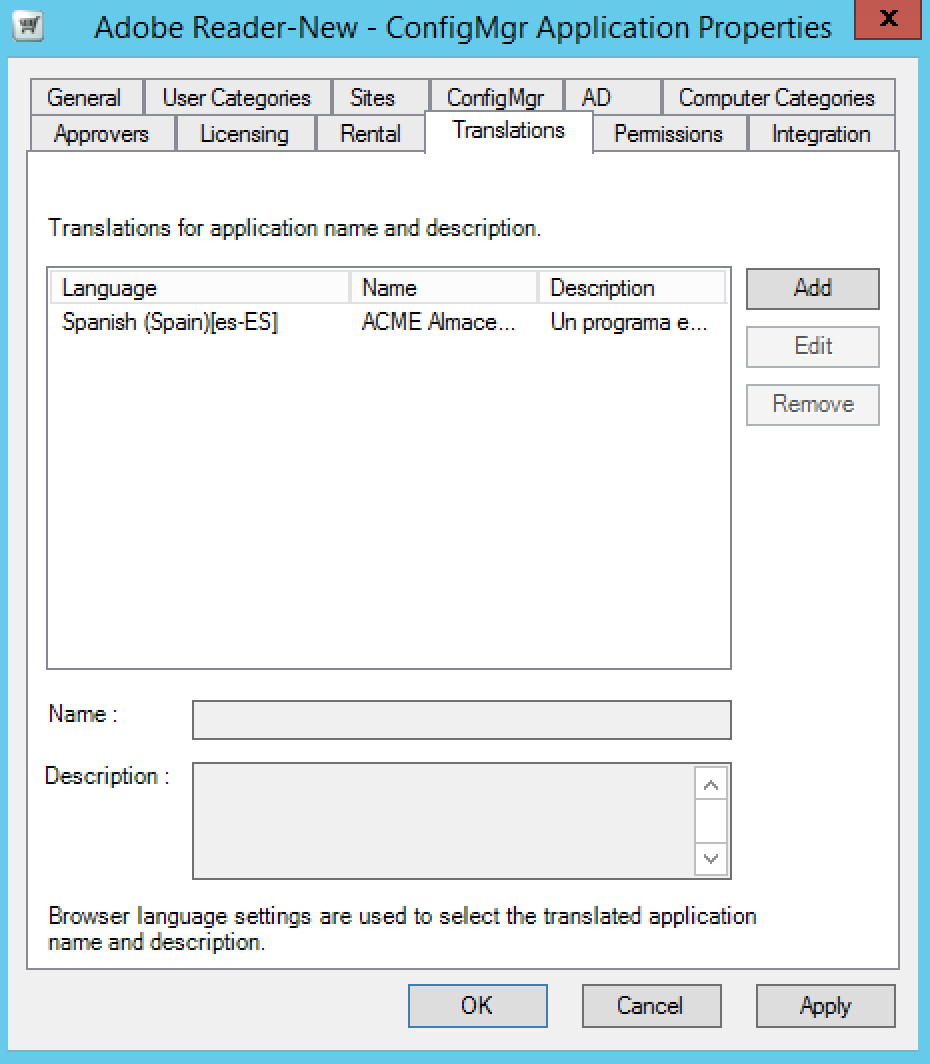
Translations
Use this to manage localisation for application names and their descriptions. To add a translation:
Click Add.
From the Add Translations dialog, choose a language to add.
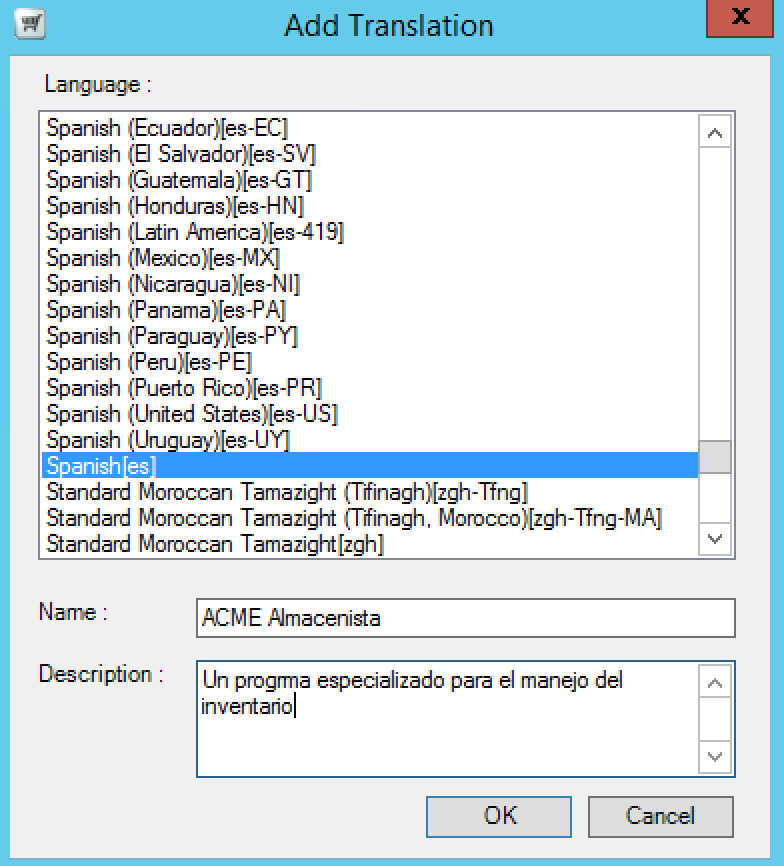
Click OK.
In the Translations tab, click Apply.
Permissions
The permissions is used to manage permissions for users or groups so that they can see the application in the Shopping Web portal. To grant permissions to users or groups, click Add.
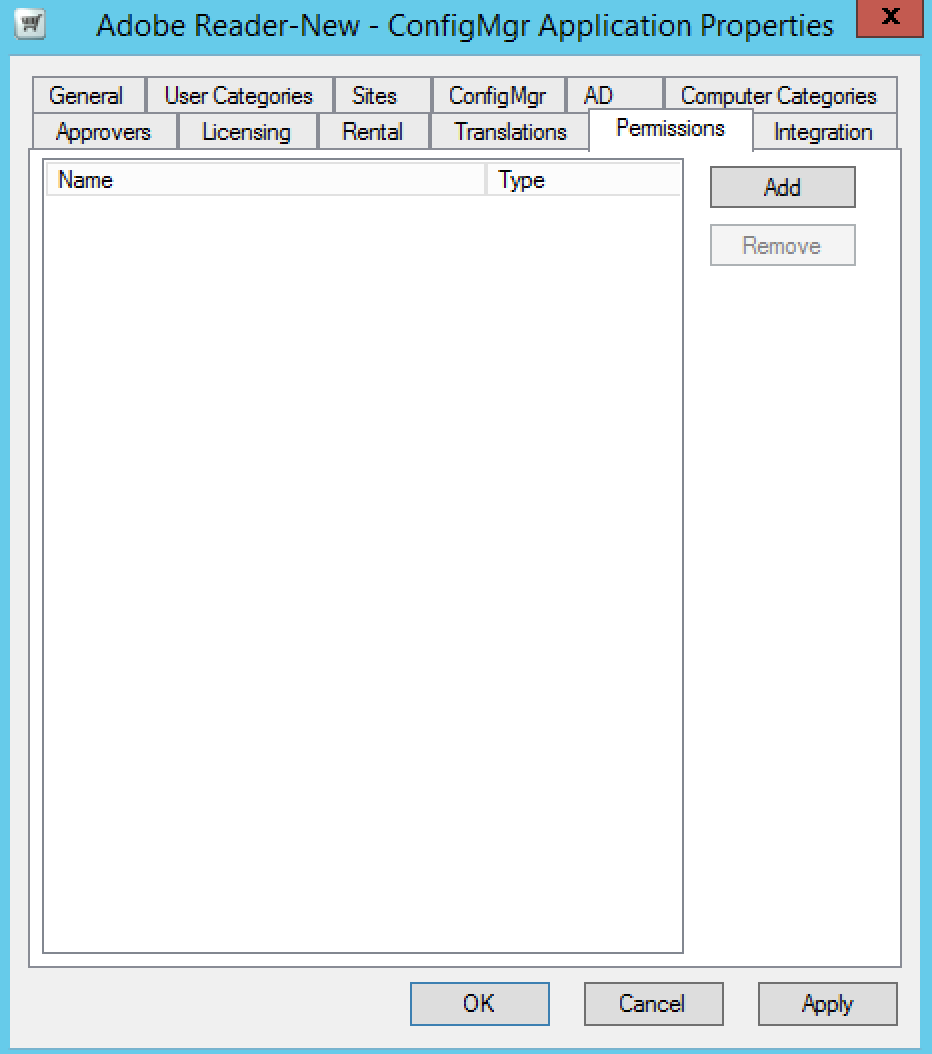 |
In the Select Users or Group dialog, enter the user or group you want to grant permission to.
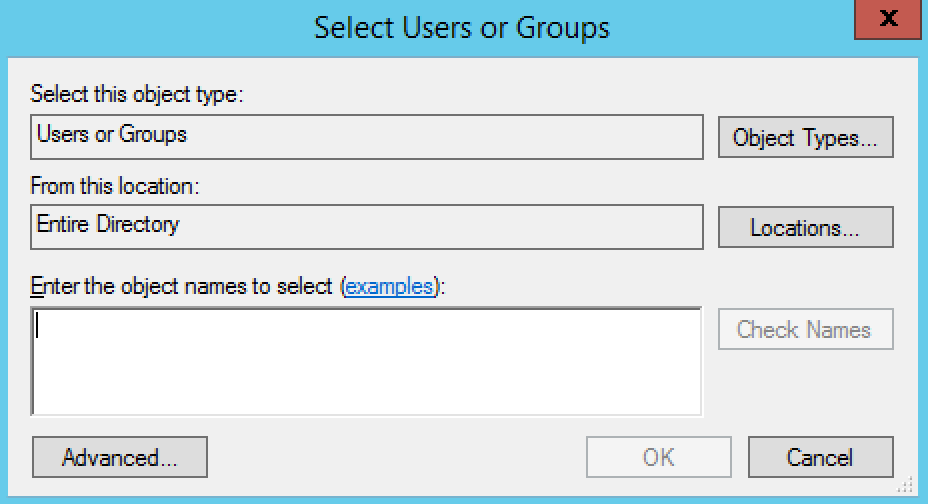
Click OK.
To revoke permissions to existing users or groups:
Select the user or group from list.
Click Remove.
Integration
The Integration tab is only visible if you integrate Shopping 5.3.100 with AppClarity 5.1 and migrate to the new catalog. The new catalog uses the vendor, title, version and edition to identify applications.
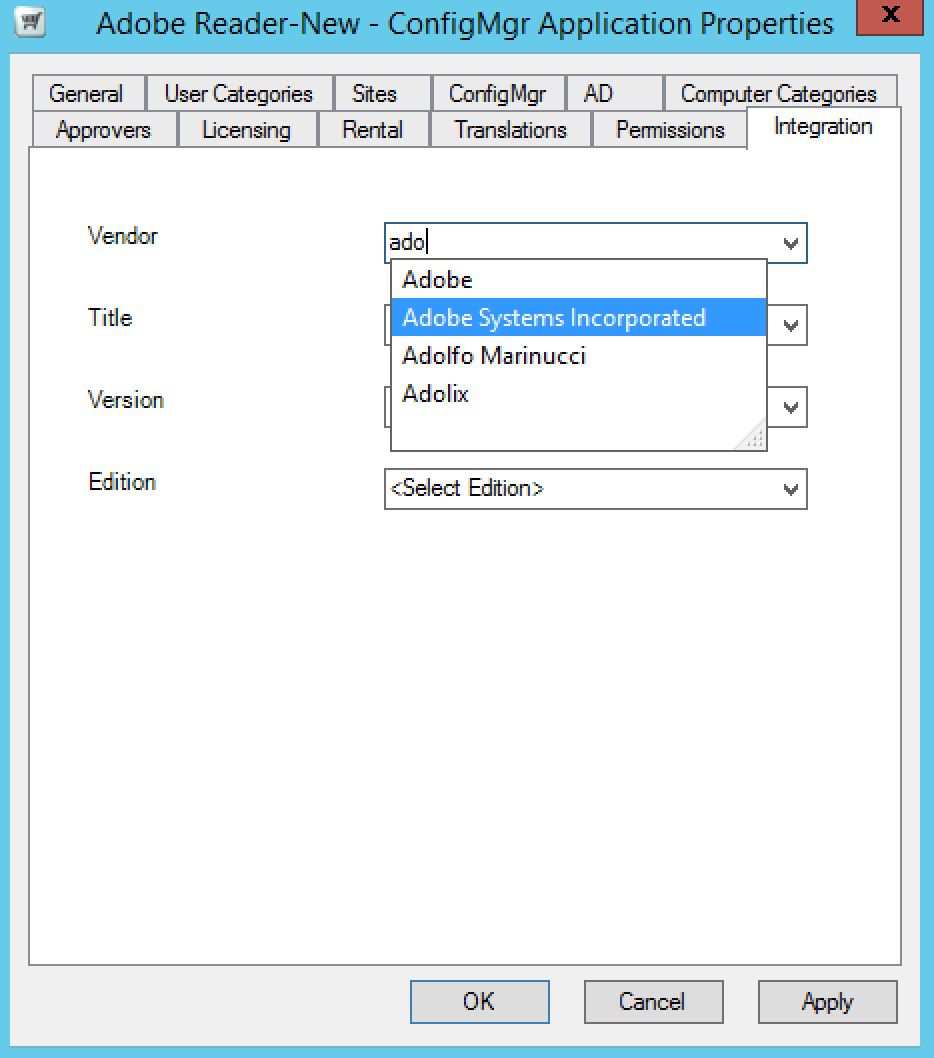 |
For example, to add the catalog mapping for Adobe Acrobat:
Click the Vendor list and associate it with Adobe Systems Incorporated.
Click the Title list and choose a title for it.
Click the Version list and choose a version for it.
Click the Edition list and choose one for it if it is available.
Click OK. If the mapping already exists, you will be prompted to correct it.
To grant permissions to users or groups, click Add.