Scheduled Data Imports
This page details about how to configure Scheduled Imports for SGC for 1E Tachyon.
Scheduled Data Imports
SGC for 1E Tachyon needs to schedule data imports to retrieve data periodically into defined tables.
The following Scheduled Data Imports has to be configured:
SG-1ETachyon Software
SG-1ETachyon Computer
SG-1ETachyon Computer Specifications
SG-1ETachyon NetworkAdapter
SG-1ETachyon Disk.
SG-1ETachyon Computer is already configured as part of the guided Setup.
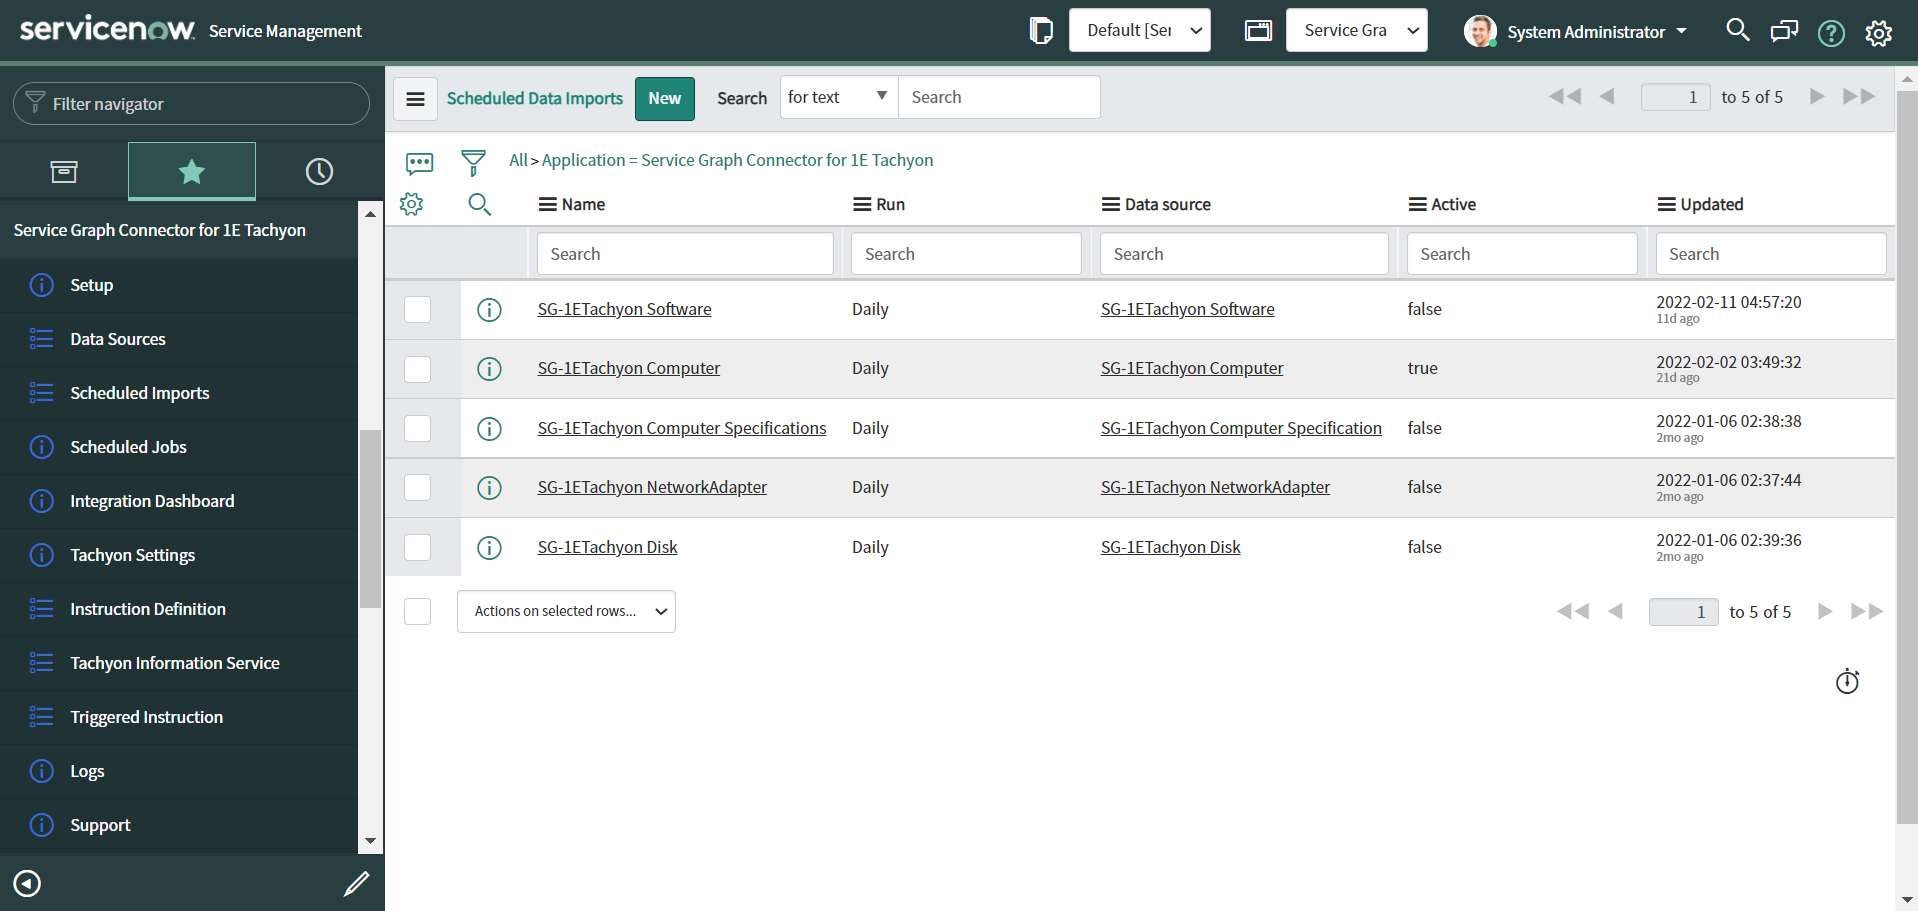
To configure the rest of the Scheduled Imports, click on Scheduled Imports tab given under Service Graph Connector for 1E Tachyon menu items on the left.
The Scheduled Data Imports page displays the lists of all the available Imports.
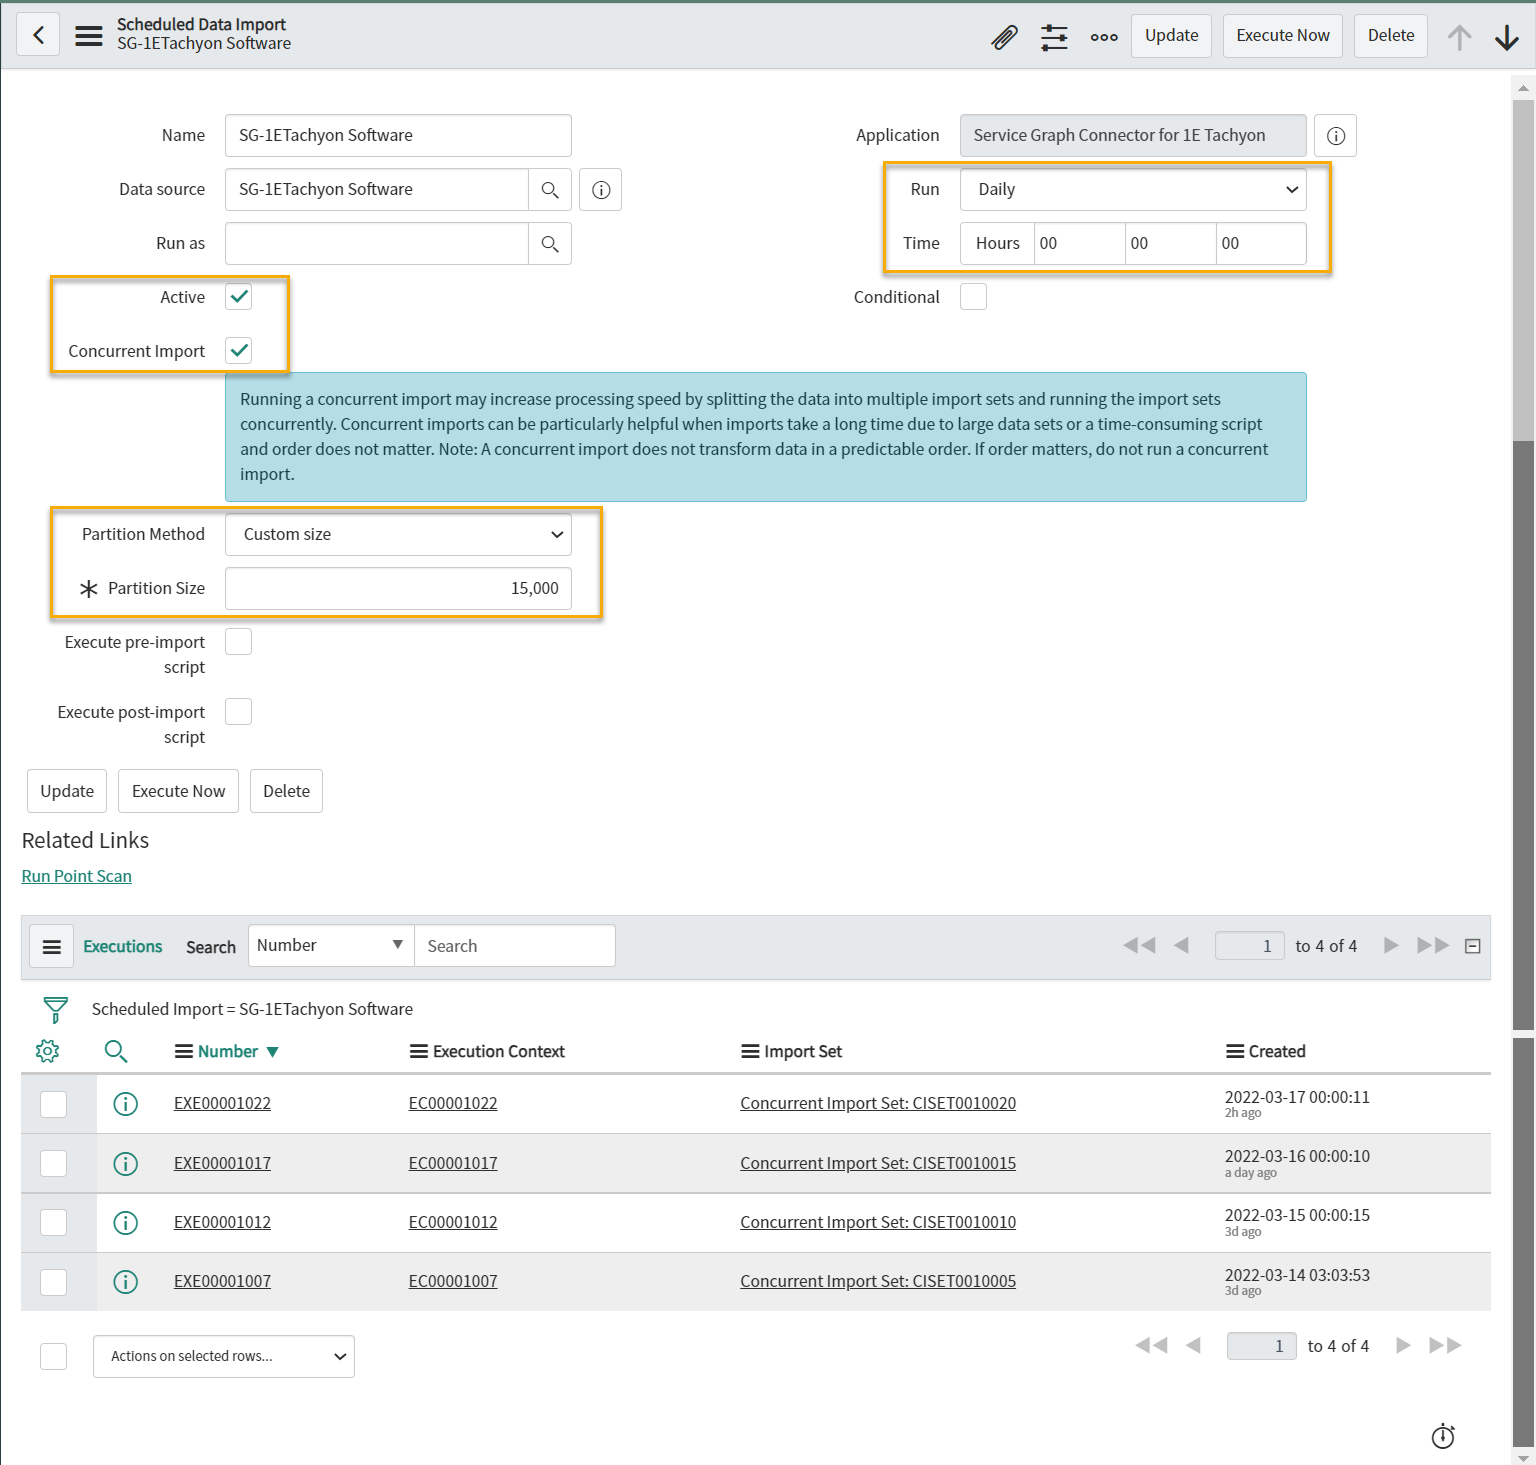
SG-1ETachyon Software
Now configure the remaining Scheduled Data Imports as listed in the above page. Click on the individual Data Import, it opens a respective Data Import page as shown in the picture. The imported installed Software details for the device are stored in cmdb_sam_sw_install table.
You need to perform the following actions on this page:
Set the frequency for Run to execute this Data Import from the available list.
Set the Time at which thisData Import should happen for the defined frequency.
To activate this Data Import, check the Active checkbox.
Now check the Concurrent Import checkbox,
Set the Partition Method from the available list.
Provide the value for Partition Size.
To save the above changes, click onUpdate button. Also, to run the above listed Data Imports On-Demand, click on Execute Now button.
The Delete button can be used to delete the scheduled job from the available list.
SG-1ETachyon Computer Specifications
To configure the Data Import, click on the link to open the SG-1ETachyon Computer Specifications into a new page as shown in the picture. The imported Computer Specifications for the device are stored in cmdb_ci_computer table.
You need to perform the following actions on this page:
Set the frequency for Run to execute this Data Import from the available list.
Set the Time at which thisData Import should happen for the defined frequency.
To activate this Data Import, check the Active checkbox.
Now check the Concurrent Import checkbox,
Set the Partition Method from the available list.
Provide the value for Partition Size.
To save the above changes, click onUpdate button. Also, to run the above listed Data Imports On-Demand, click on Execute Now button.
The Delete button can be used to delete the scheduled job from the available list.

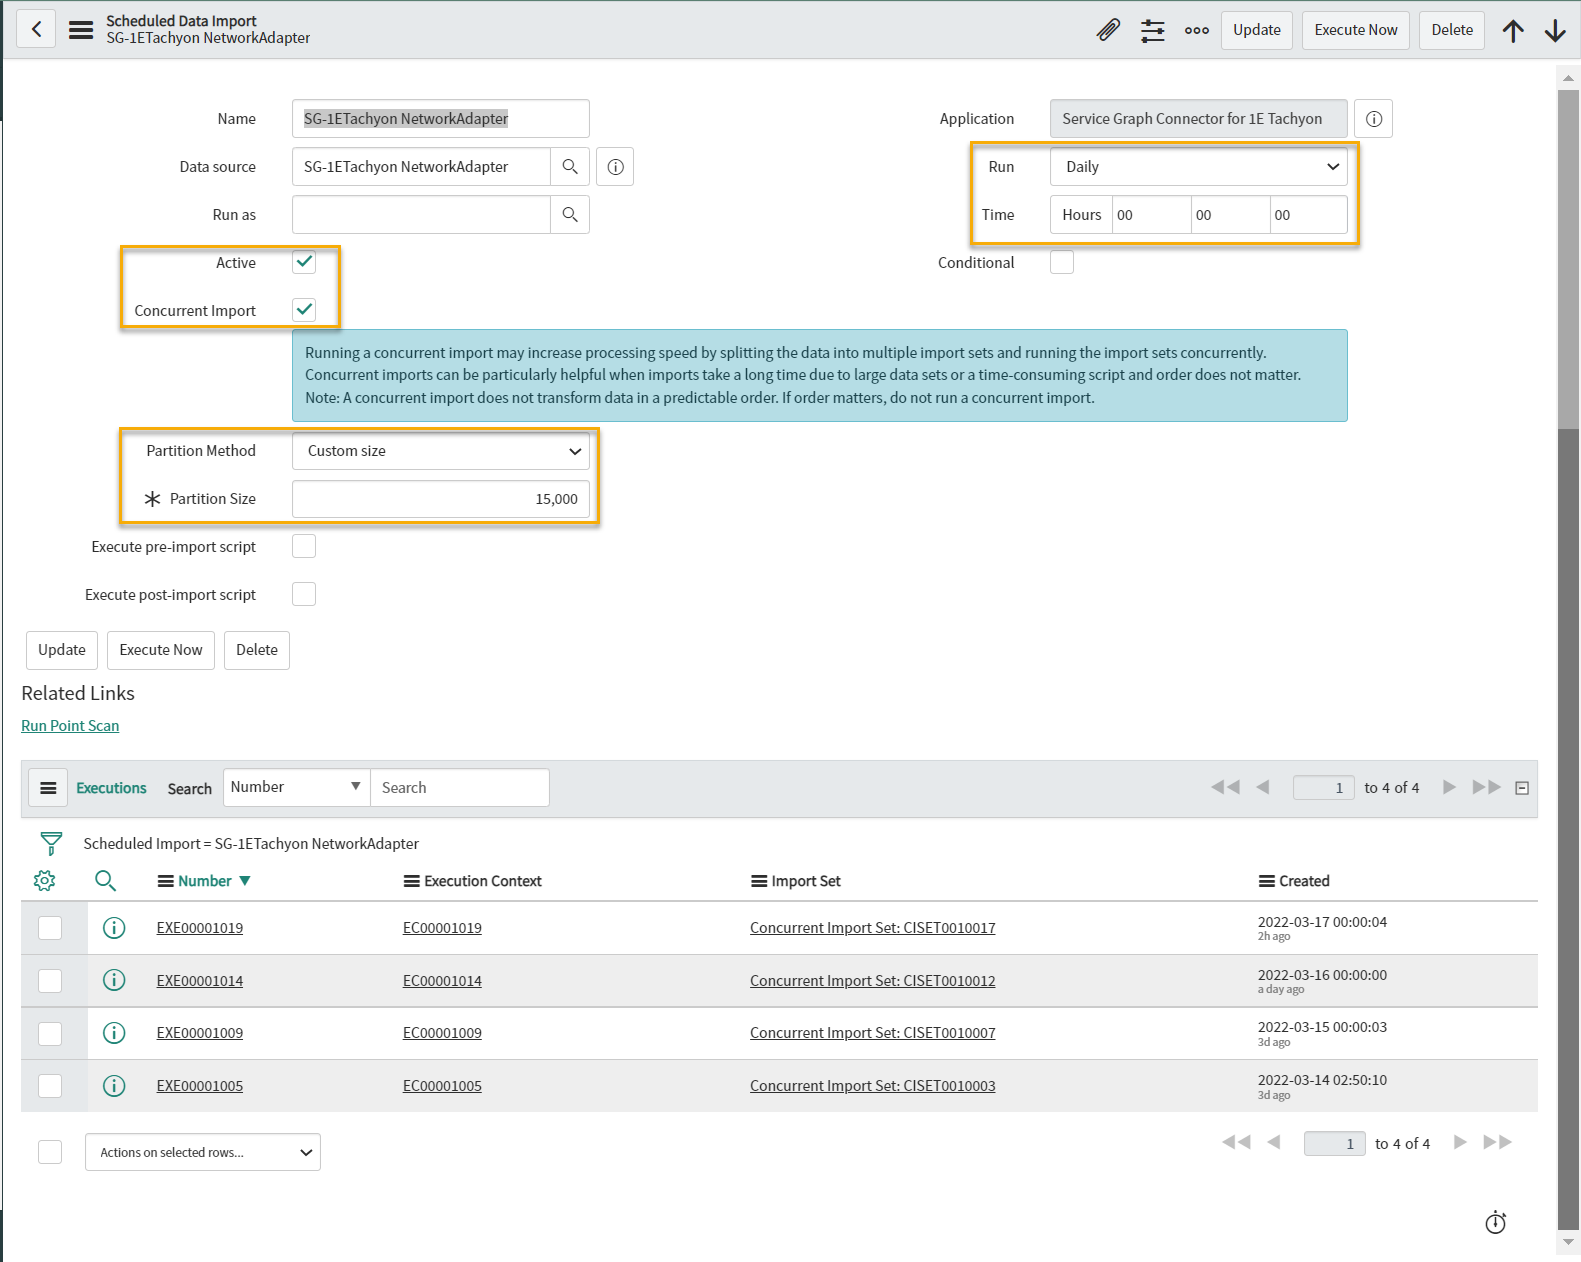
SG-1ETachyon NetworkAdapter
To configure the Data Import, click on the link to open the SG-1ETachyon NetworkAdapter into a new page as shown in the picture. The imported Network Adapter attributes for the device are stored in cmdb_ci_network_adapter table.
You need to perform the following actions on this page:
Set the frequency for Run to execute this Data Import from the available list.
Set the Time at which thisData Import should happen for the defined frequency.
To activate this Data Import, check the Active checkbox.
Now check the Concurrent Import checkbox,
Set the Partition Method from the available list.
Provide the value for Partition Size.
To save the above changes, click onUpdate button. Also, to run the above listed Data Imports On-Demand, click on Execute Now button.
The Delete button can be used to delete the scheduled job from the available list.
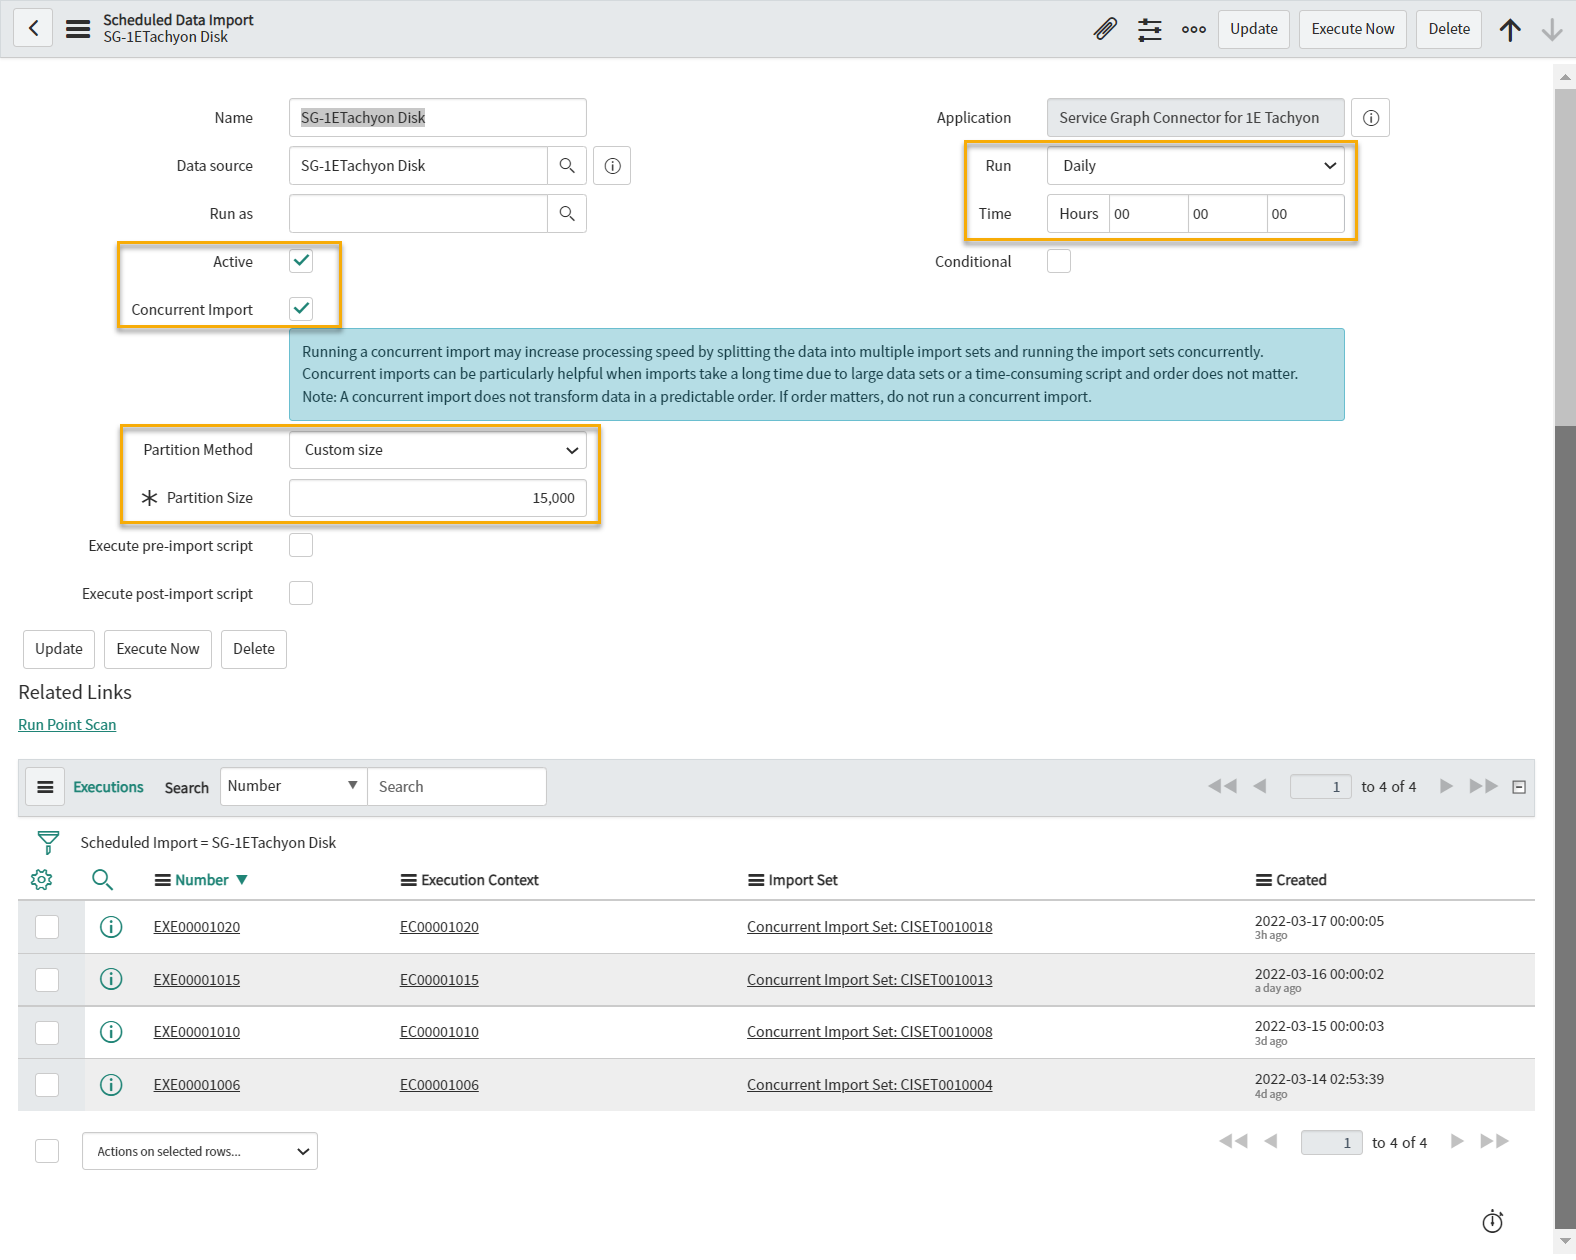
SG-1ETachyon Disk
To configure the Data Import, click on the link to open the SG-1ETachyon Disk into a new page as shown in the picture. The imported Disk usage details for the device are stored in cmdb_ci_disk table.
You need to perform the following actions on this page:
Set the frequency for Run to execute this Data Import from the available list.
Set the Time at which thisData Import should happen for the defined frequency.
To activate this Data Import, check the Active checkbox.
Now check the Concurrent Import checkbox,
Set the Partition Method from the available list.
Provide the value for Partition Size.
To save the above changes, click onUpdate button. Also, to run the above listed Data Imports On-Demand, click on Execute Now button.
The Delete button can be used to delete the scheduled job from the available list.