Step through adding a security role
Tip
In this tutorial, we are going to:
Create a new NightWatchman Console User security role that enables members to access all sections of the console except Security.
Grant permissions for this security role.
To add a new security role that grants access to all sections of the NightWatchman Console except Security:
In the Security section, select the Roles tab.
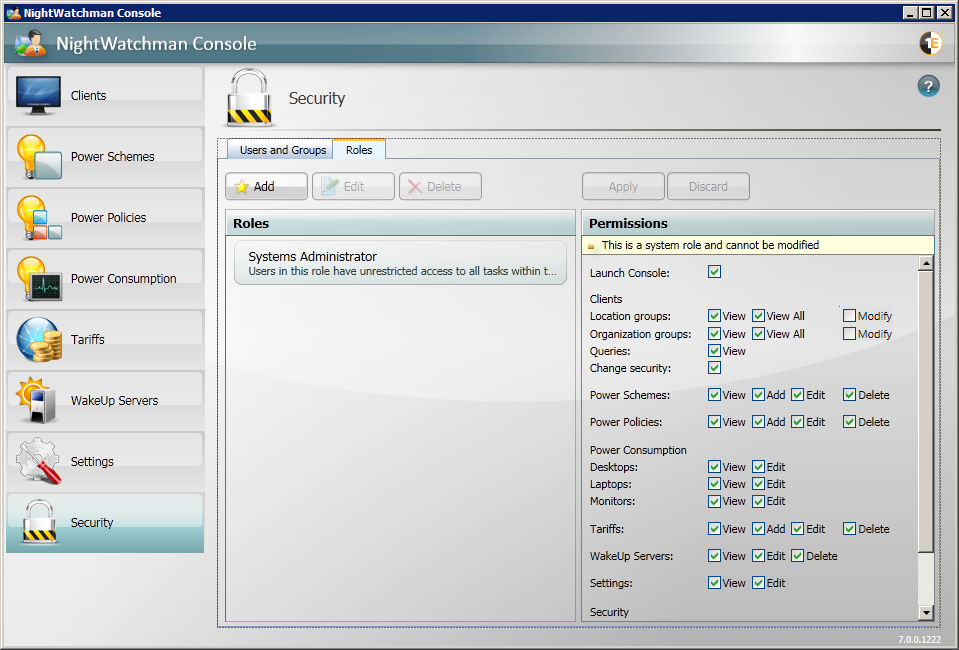
Click the Add button.
In the Add Security Role dialog, enter a name and a description for the role.
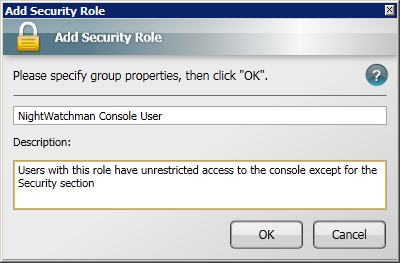
Click OK to save the new role.
Granting permissions to the role
To grant permissions to the newly created NightWatchman Console User security role:
In the Security section, select the Roles tab.
Select the NightWatchman Console Users role
In the Permissions panel, enable the Launch Console permission. The role must already have this permission before others can be granted.
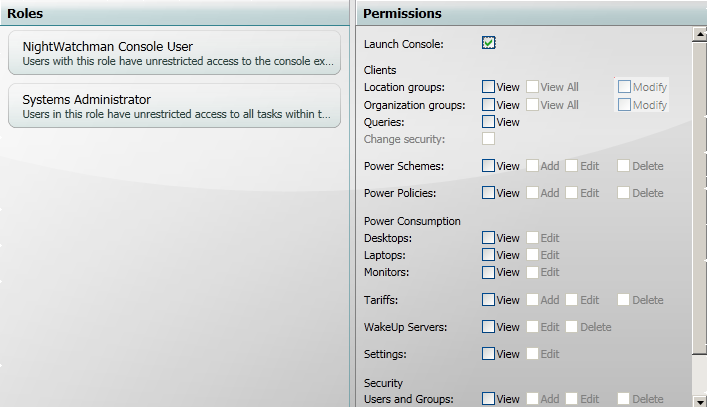
Enable all permissions except for Security. If the Modify permission for Location groups and Organisation groups is not enabled, the role:
Cannot Add, rename, delete groups
Cannot remove members from groups
Cannot move computers across groups
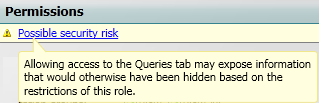
Notice when you select the Queries: View checkbox, a notification appears at the top warning of a potential security risk.

Click the notification to view the warning for the security risk.
When you have granted all the permissions for the role, click Apply.