Installing and upgrading
The recommended order for installing (or upgrading) NightWatchman Enterprise components is:
Install the NightWatchman console on remote consoles.
When configuring integration with WakeUp, add the WMI permissions to the Console service account described in Console service component requirements.
Install the Windows NightWatchman Agent and/or the Tachyon Agent with the WakeUp module enabled, or the Mac 1E Agent.
Note
Important points in relation to upgrading clients:
You are encouraged to upgrade clients quickly but prudently.
This may be days, depending on the complexity of your policies, or weeks for larger organizations.
Upgrading all clients (agents) at the same time is generally not practical.
It is best practice to phase your deployment to ensure there are no unforeseen compatibility issues.
In NightWatchman 7.2.500, the
If clients previously had both NightWatchman and WakeUp agents enabled and you upgrade to NightWatchman 7.3 first, the WakeUp agent will be uninstalled but the previous settings retained. When you installed the Tachyon Agent with the WakeUp module enabled, the previous settings will be used (unless you override them in the installation command line).
Version 7.3 of NightWatchman Management Center and WakeUp Server is compatible with earlier versions of NightWatchman and WakeUp clients, except that new features are not available on older clients.
New features that require client changes will not work on previous versions of clients but do not cause user-adverse issues. For example, with 7.2 there was a new "Logoff then Standby" scheduled action available. 7.1 clients will not recognize this action if they receive a NightWatchman policy that includes it. In that case, they will continue in the state they are currently in; they will not be forced by NightWatchman to either log off or go to standby
Installing NightWatchman Management Center
How to install NightWatchman Management Center using the interactive installer wizard or in unattended mode - also includes basic instructions on uninstalling NightWatchman Management Center.
Installing NightWatchman with the wizard
To install NightWatchman Management Center with the wizard, double-click on:
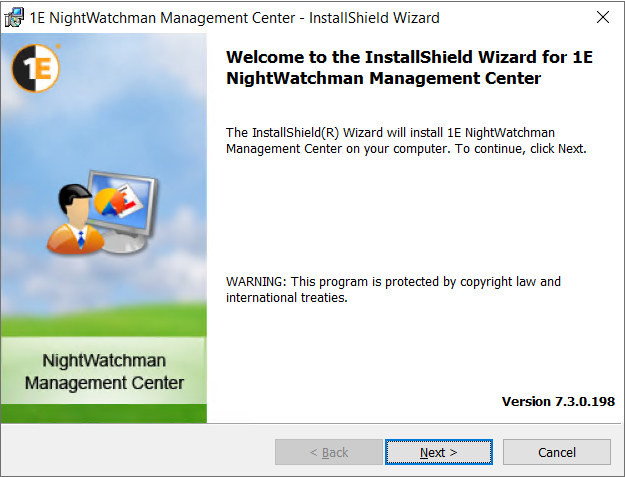
Welcome
This screen provides the version number for NightWatchman Management Center and outlines what the wizard will do.
Click Next to go to the next screen.
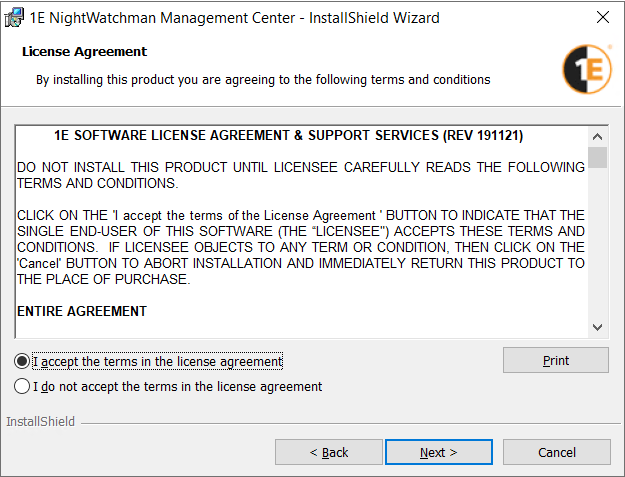
License Agreement
This screen provides the license agreement for NightWatchman Management Center.
To accept, click I accept the terms in the license agreement
Click Next to go to the next screen.
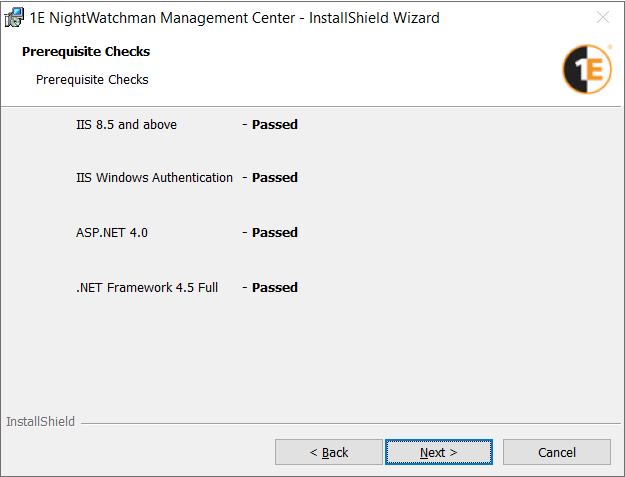
Prerequisite Checks
Background checks are run to ensure common prerequisites are met. If a prerequisite fails, the components dependent on those prerequisites are not installed. Later screens may require prerequisites for optional features.
Click Next to go to the next screen.
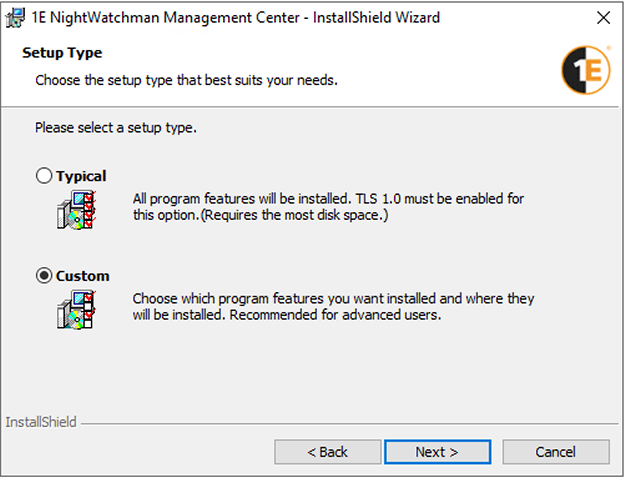
Setup Type
Select Custom.
Click Next to go to the next screen.
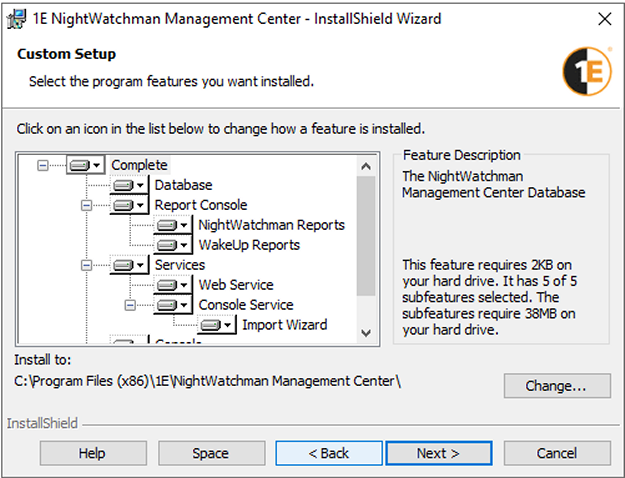
Custom Setup
This screen allows you to select the components you want to install on the local server. You do not need to change anything if you are installing all components on the same server.
Click Next to go to the next screen.
If you are installing separate components in a distributed system, you must ensure each server meets relevant Prerequisites. You will need to run the installer once for each group of components you want to install separately.
Component | Description |
|---|---|
Database | Installs database support components on the local application server, as well as the SQL Server database and SQL Agent jobs on the SQL Server database instance that you specify in next screen. You can only have one instance of the database components per implementation. The database holds all the information returned by NightWatchman clients and the WakeUp agents and forms the basis for the reports, as well as the configuration settings, and policies. The default name of the database is AgilityFrameworkReporting. |
Report Console | Installs the Reporting website, and the following reports:
You can only have 1 instance of the Reporting Website per implementation. Requires the Database component to be installed at the same time, or already on a remote server. For information about using these reports, please refer to Reporting. |
Services | Installs the following:
You can have up to 3 instances of the Web service feeding into a single database. Requires the Database component to be installed at the same time, or already on a remote server. Multiple-instances also cover hybrid environments using both HTTP and HTTPS communications (for example, HTTP for intranet-based and HTTPS for internet-based communications). Set the NightWatchman clients and WakeUp implementations in each region to communicate with the Web service using their respective protocols. |
Console | Installs the NightWatchman Management Console. You can have up to 10 instances of the console but they must be installed on computers with network access to the server where the Console service is running. Requires the Database and Services components to be installed at the same time, or already on remote server(s). |
Analysis Reports | Installs the Analysis Teports. For information about how to use these, please refer to: You can only have one instance of the Analysis reports component per implementation. Requires the Database and Services components to be installed at the same time, or already on remote server(s). |
By default, these components are installed toC:\Program Files (x86)\1E\NightWatchman Management Center\
You can select a new location by clicking Change... and navigating to a new folder.
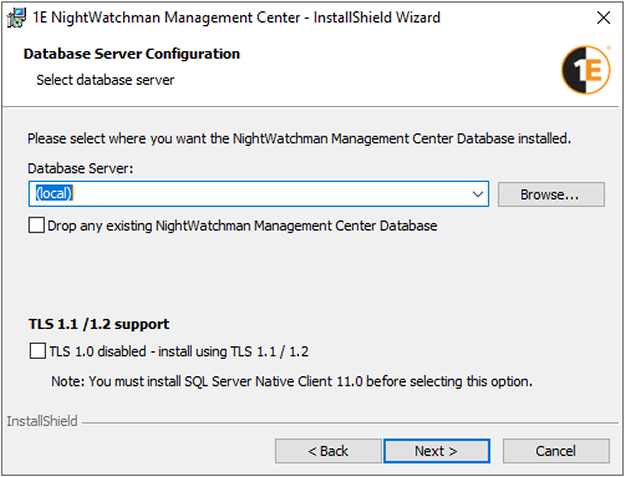
Database server configuration
The database can be specified using the following formats:
(Local) – uses the local default instance
ServerName – uses a remote server using the default instance
ServerName\Instance – uses a remote server and named instance on a dynamic port
ServerName,Port – uses a remote server and instance on a fixed port
The Browse button allows you to select any SQL Server database instance that has its Browsing service enabled and running.
Check theDrop any existing NightWatchman Management Center Databasebox, if you want to remove the existing database before installing the new one. Leave this box unchecked to use the existing database, in case of a re-install or upgrade.
Check theTLS 1.0 disabled - install using TLS1.1 / 1.2box, if TLS 1.0 is disabled in your environment and TLS 1.1 or TLS 1.2 is enabled. If you tick the checkbox then you must have installedSQL Server Native Client 11.0on the web server.
Click Next to go to the next screen.
Note
If you are installing with Typical Setup option, then this screen is not displayed if the installation wizard detects a SQL Server database instance on the local server. You must use Custom Setup if you need to do change the following defaults:
Database Server (local)
Keep the existing database
Use TLS 1.0
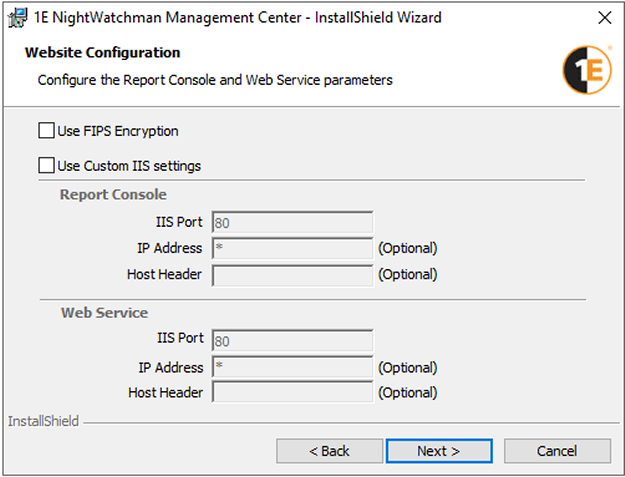
Website Configuration
Check Use FIPS Encryption
Click Next to go to the next screen.
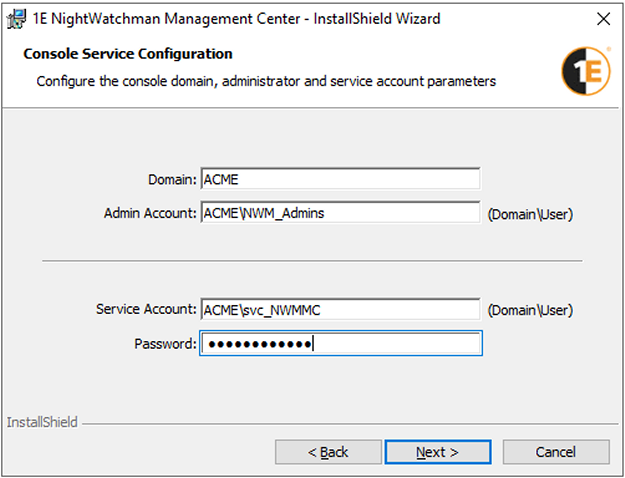
Console Service Configuration
Enter the user name and password of the NightWatchman Management Center Console service account.
Click Next to go to the next screen.
The user name must use the Domain\Account format.
For more detail about this account, please refer to Preparation: NightWatchman Management Center Console service account.
If the installation account has appropropraite permissions, the installer automatically grants the service account the permissions it needs. However, if you intend to use the NightWatchman Management Center console to implement remote wake-ups, you must manually set additional WMI permissions to the service account for the WakeUp namespaces, as described in Preparation - Accounts needed to install the WakeUp server.
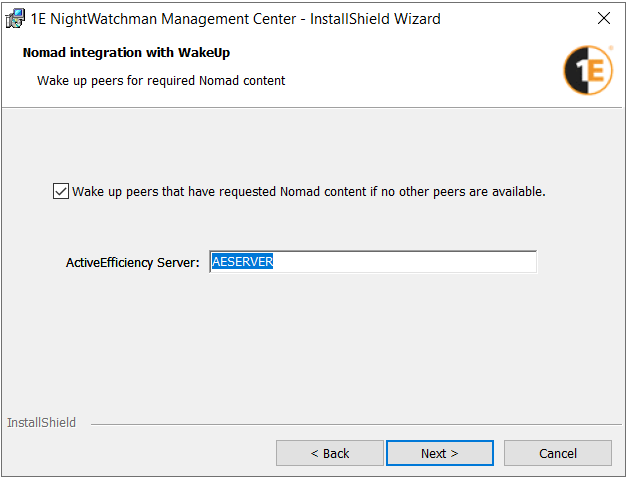
Content Distribution integration with WakeUp
Enable this option by checking Wake up peers that have requested Nomad content if no other peers are available.
Enter the name of the ActiveEfficiency Server
If you are using Nomad with ActiveEfficiency, enter the NetBIOS name of the ActiveEfficiency Server, for example AESERVER, or enter localhost if it is on the same server as the NightWatchman Management Center
If you are using Content Distribution with Tachyon Platform version 8.0 or later, enter the NetBIOS name of the Tachyon server that hosts Content Distribution - you will also need to
Click Next.
MSMQ
If the installer detects that the Windows feature MSMQ is not enabled, then you will have to abort the installation, resolve the issue and restart the installation.
If you are using ActiveEfficiency, then MSMQ must also be enabled on the ActiveEfficiency Server.
If you are using Tachyon Platform, then MSMQ is not required on the Tachyon server, and MSQM is only required on the NightWatchman server to enable installation to proceed.
Note
If the installer is unable to contact an ActiveEfficiency or Tachyon server, the installation will not proceed until the issue is resolved, and you click Next again.
Note
In previous versions of Nightwatchman, ActiveEfficiency was also used for the 1E Cloud synchronization feature, which is now obsolete. ActiveEfficiency is now only used for the Nomad integration with WakeUp feature, previously known as the WakeUp integration with ActiveEfficiency feature.
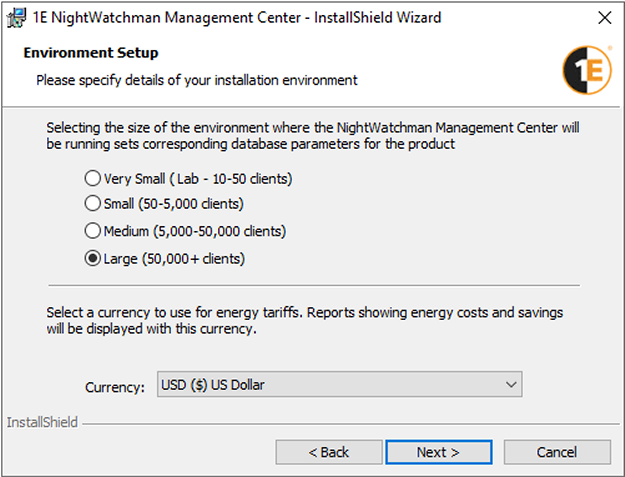
Environment setup
Select
the size of your organization - see below table
the currency that you want to use for energy tariffs.
Click Next to go to the next screen.
The NightWatchman database makes use of this information to provide the correct balance between responsiveness and database load.
Criteria | Very Small (lab) | Small | Medium | Large |
|---|---|---|---|---|
Number of clients | 10-50 | 50-5,000 | 5,000-50,000 | >50,000 |
How often client records are loaded into reporting tables | 5 minutes | 30 minutes | 1 hour | 1 hour |
How often summary data is updated | 10 minutes | 1 hour | 4 hours | 2am nightly |
How often clients will retry retrieval of Power Policy on failure | 5 minutes | 30 minutes | 30 minutes | 30 minutes |
How often clients poll for Power Policy | 15 minutes | 90 minutes | 500 minutes | 1500 minutes |
The maximum amount of time before a client sends up data | 900 seconds | 3600 seconds | 7200 seconds | 14400 seconds |
A client will send data as soon as it has this many messages to send | 5 | 5 | 15 | 25 |
How often new unassigned computers are assigned a power policy | 5 minutes | 5 minutes | 30 minutes | 60 minutes |
The currency is selected from a drop-down list of available currencies. For fresh installations, the currency set on the machine where the installation is taking place will be selected from the list by default. For upgrades, the default selected currency will be the one set in the earlier version of NightWatchman Management Center.
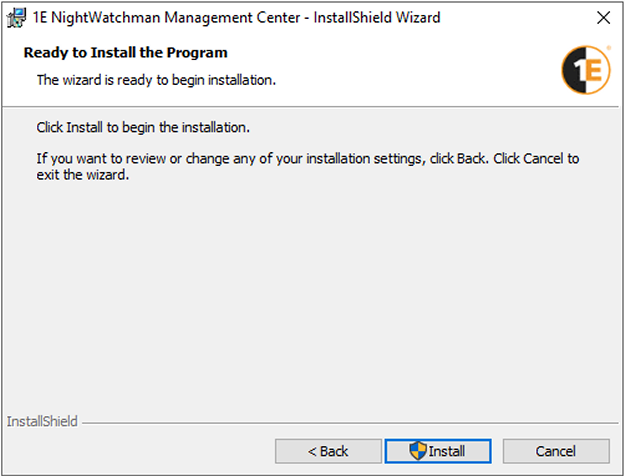
Ready to install
Click Next to begin installation.
Install
Click Finish when installation is complete.
Installing NightWatchman Management Center in unattended mode
You can install NightWatchman Management Center to a large number of machines by choosing to install it in unattended mode using the /qn switch in the installer command-line.
For example, to carry out a default installation where all the components are installed locally, run (the command-line is broken down into separate lines for clarity. Run it as a single command-line):
msiexec /i NightWatchmanManagementCenter.msi
ACTIVE_DIRECTORY_SERVER=ACME
AESERVERNAME=localhost
ADMINACCOUNT=ACME\NWM_Admins
SVCUSER=ACME\svc_NWMMC
SVCPASSWORD=Pa55w0rd
SQLSERVER=ACMESQL
CURRENCYCODE=GBP /qn
To install only the NightWatchman console where the NightWatchman Management Center console service is installed, run (the command-line is broken down into separate lines for clarity. Run it as a single command-line):
msiexec /i NightWatchmanManagementCenter.msi
ADDLOCAL=Console
SERVICELOCATION=ACME023 /qn
There are a number of installer properties which are detailed in Installing NightWatchman Management Center.
Note
Prerequisite checks are still carried out when you run in unattended mode. If they are not met, components will not install.
Uninstalling or repairing the NightWatchman Management Center
The NightWatchman Management Center can be removed using the Add or Remove Programs in Control Panel. To uninstall, select the NightWatchman Management Center item in the Currently Installed Programs list and click the Remove button. You can also access support information for the product in the Add or Remove Programs dialog.
When you carry our a repair or re-installation, certain information stored for the WakeUp server is not available to the installer. You may need to configure additional WMI permissions to the service account for the WakeUp namespaces, as described in Preparation - Accounts needed to install the WakeUp server.
To implement a repair the NightWatchman Management Center, run: Msiexec /fvom NightWatchmanManagementCenter.msi or if you are planning an upgrade, please refer to Upgrading NightWatchman Enterprise.
Detailed requirements
A definitive checklist of prerequisites and dependencies you need to meet in order to install NightWatchman Management Centre.
Component | Product | Notes |
|---|---|---|
OS |
| NightWatchman Management Center will install on systems running these server OSes.
|
Database servers |
| SQL server must be configured to use a case-insensitive, accent-sensitive collation as the server default (the preferred collation is
|
Runtime libraries |
| |
Installation and service accounts | To install NightWatchman Management Center, you need the following accounts and groups.
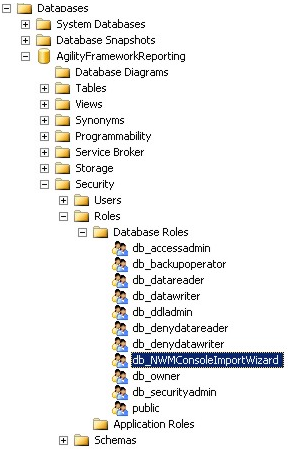
User account or AD Security Groups are required for use as administrators in the NightWatchman Management Center Console. NoteIf you are using the import Wizard to populate hierarchies, check that:
Any user or group that needs to use the Import Wizard must:
 If you are installing NightWatchman Management Center across multiple servers, install the database component first – it can be done remotely from a server where one or more of the other components are installed. If you are performing a clean NightWatchman Management Center installation or are upgrading NightWatchman Management Center and all the WakeUp Server components, permissions for the service account are set automatically as part of the installation process. The NightWatchman Console administrator account (used to define primary NightWatchman Console administrators) can be a domain user or group account. If you are upgrading NightWatchman Management Center, have legacy WakeUp Servers or intend to use the NightWatchman console to implement remote wake-ups (which is done after installing the WakeUp Server):
To set permissions:
For a default installation, the programs and files associated with NightWatchman Management Center are created in | |
Installing the WakeUp server
Note
In previous releases, the NightWatchman agent and WakeUp agent were part of the 1E Agent installer. From this release:
1E NightWatchman Agent installer replaces the old 1E Agent installer and includes only the NightWatchman agent
WakeUp Server installer no longer includes WakeUp Agent and includes only the WakeUp server
1E Client (previously Tachyon Agent) installer replaces the old 1E Agent installer and includes a WakeUp client module, for installation on clients and WakeUp servers.
Note
After installation of the WakeUp server you must install the 1E Client with its WakeUp module enabled. This is explained in the Installing the 1E WakeUp Agent page, which has links to documentation for the 1E Client.
Integration choice
When you install the WakeUp server, you must choose to integrate with either NightWatchman Management Center or Configuration Manager. The installed components are largely the same, however the functionality varies. In either case, you must have a NightWatchman Management Center in order to register and manage WakeUp servers, and for WakeUp reporting.
Installing the WakeUp server on Configuration Manager hierarchies
The WakeUp server must be installed on all Configuration Manager primary site servers as it will only wake machines for the Configuration Manager site on which it is installed. There is no reason to install WakeUp server on a CAS, given that no clients report directly to a CAS.
If you know the Site server has a remote SMS Provider role, perhaps because a WakeUp Server installation failed, then you will need to provide the installer with an alternative security account instead of allowing WakeUp Server to use the default LocalSystem. For details of how to provide account details, please refer to Integrating WakeUp server with a distributed Configuration Manager setup.
Installing the WakeUp server with the wizard
To install WakeUp server with the interactive wizard:
On the Welcome screen, click Next.
On the License Agreement screen, accept the license and click Next.
On the Customer Information screen, enter the name of your organization together with the license key and click Next. If you do not enter a license key, you are subject to a 30-day evaluation.
Note
Although the license only needs to be applied to the WakeUp server, you need to purchase licenses for all the Configuration Manager Client seats being serviced.
On the Destination Folder screen, accept the default location (
C:\Program Files\1E\WakeUp) for the installation or click choose a new location.On the Installation Type screen, choose from:
Install Server Components – installs the server components locally. This may be either the Configuration Manager or NightWatchman Management Center version of the WakeUp server depending on whether the Configuration Manager provider has been found locally installed or not.
Configuration Manager – installs the Configuration Manager version of WakeUp. If this option is selected, the installer detected the Configuration Manager provider installed locally.
NightWatchman Management Center – installs the NightWatchman Management Center version of WakeUp. If this option is selected, the installer did not detect the Configuration Manager provider installed locally.
Admin Components – installs the WakeUp Console. This must be installed when the Install Server Components checkbox is selected.
The Installation Options screen is displayed only if you chose the Install Server Components option. Choose the configuration for the WakeUp server:
Stand-alone Server – does not require extra steps after finishing the current installation wizard, other than installing the 1E Client with the WakeUp module enabled on the WakeUp server.
Dedicated Agent – you will need to install the 1E Client with the WakeUp module enabled on a dedicated client per subnet, in dedicated agent mode.
Multiple Agents – strongly recommended. You will need to install the 1E Client with the WakeUp module enabled on all clients, in multi-agent mode.
Note
Although three options exist, choosing multiple agents enables all the WakeUp functionality to be used. We recommend selecting this option unless you have been advised otherwise by a 1E representative.
You also set the level and type of encryption used when the WakeUp server communicates with its agents. Tick the Use FIPS Encryption checkbox or choose from:
Disabled – all packets are sent unencrypted and WakeUp behave exactly as in previous versions
Partial – encrypted or unencrypted communication are allowed
Full – all communications are encrypted and any unencrypted packages are discarded.
Note
If you are using FIPS, ensure that the same settings are made for all WakeUp server and 1E Agent.
Click Next to continue.
On the NightWatchman Management Center Configuration screen, set the parameters for integrating with NightWatchman Management Center. The NightWatchman Management Center must already be installed and you must have the host server name to hand.
Enable reporting – check this to enable reporting and the other controls on this screen. This option is user configurable only when the WakeUp server installation type is Configuration Manager, which happens when the installer detects a local installation of the Configuration Manager provider. When the WakeUp server installation type is NightWatchman Management Center, this is automatically checked and all the other controls are always be available.
Reporting server – enter the fully qualified domain name of the server where the NightWatchman Management Center Web service component is installed. This field validates the FQDN to ensure the Web service component is contactable.
Apply WMI Namespace – check this to set permissions on the N1E namespace for the account used in the Account or Group – Domain\User field. You must enable this if you want to allow non-administrators to send wake ups or make changes in the WakeUp console. The NightWatchman Management Center Console service connects to this WMI namespace when sending wake ups (alarm clocks, maintenance windows and on-demand wake ups). If you are running the NightWatchman Management Center Console Service as the user to whom you are granting the WMI permissions, and if the Console Service is currently running on the same machine that you are installing WakeUp on, you must restart the NightWatchman Management Center Console service for these permissions to take effect.
Account or Group – Domain\User – enter the domain and name of the account or group you want to give WMI and DCOM permissions to.
Click Next.
On the Ready to Install the Program screen, click Next.
On the Installation screen, click Finish.
Note
After installation of the WakeUp server you must install the 1E Client with its WakeUp module enabled. This is explained in the Installing the 1E WakeUp Agent page, which has links to documentation for the 1E Client.
Installing the WakeUp server in unattended mode
In the following:
ABCD-1234-5678-8765-4321is your license key<RepServ>is the server where the NightWatchman Management Center Web service is installed
The command-line is broken down into separate lines for clarity. Run it as a single command-line.
To install the WakeUp server for Configuration Manager server, on the server where the Configuration Manager WMI provider is installed, run:
msiexec.exe /i wakeupsvr.msi
PIDKEY="ABCD-1234-5678-8765-4321"
SERVERCOMPONENTS=1
SERVERTYPE=SMS
AFREPORTING=ON
REPORTINGSERVER=<RepServ>
/QN /l*v WakeUpServerInstall.log
To install WakeUp for NightWatchman Management Center, run:
msiexec.exe /i wakeupsvr.msi
PIDKEY="ABCD-1234-5678-8765-4321"
SERVERCOMPONENTS=1
SERVERTYPE=NMC
AFREPORTING=ON
REPORTINGSERVER=<RepServ>
/QN /l*v WakeUpServerInstall.log
To install WakeUp for Configuration Manager with the Intel® AMT component, run:
msiexec.exe /i wakeupsvr.msi
PIDKEY="ABCD-1234-5678-8765-4321"
SERVERCOMPONENTS=1
SERVERTYPE=SMS
AFREPORTING=ON
REPORTINGSERVER=<RepServ>
SVCUSER=<SVCUser>
SVCPASSWORD=<SVCPassword>
/QN /l*v WakeUpServerInstall.log
If you use the evaluation license key to install WakeUp server, then you will need to relicense within 30 days. You can get a license key from 1E Sales, and use the command-line Relicense the WakeUp server.
You can modify the WakeUp installation parameters using the command-line switches detailed in WakeUp Server installer properties.
Note
After installation of the WakeUp server you must install the 1E Client with its WakeUp module enabled. This is explained in the Installing the 1E WakeUp Agent page, which has links to documentation for the 1E Client.
Integrating WakeUp server with a distributed Configuration Manager setup
Ensure you meet the Prerequisites before you start. This section describes how to configure the WakeUp server to work with a distributed Configuration Manager installation, where the Configuration Manager WMI Provider is installed remotely from the Configuration Manager site server, usually on an SQL Server. WakeUp server must be installed on the Configuration Manager Site Server, and the installer queries WMI on the site server to detect the location of the remote Configuration Manager WMI Provider. By default, the WakeUp server service uses the Local System account, but a remote WMI Provider requires the service to use a domain account or network service account.
To do this:
Install the WakeUp server on the command-line with the
WAKEUPSVCUSERandWAKEUPSVCPASSWORDinstaller switches.If you are using a domain account, add
WAKEUPSVCUSERandWAKEUPSVCPASSWORDon the installer command-line. For exampleWAKEUPSVCUSER=<Domain>\<User> WAKEUPSVCPASSWORD=<Password>where <Domain> is the domain where the account is located, <User> is the account username and <Password> is the password for the domain account.If you are using the network service just add
WAKEUPSVCUSERon the installer command-line. For example,WAKEUPSVCUSER="NT AUTHORITY\NETWORK SERVICE"Grant additional security rights to the local WakeUp server (
C:\Program Files\1E\WakeUp\) and Agent installation (C:\ProgramData\1E\WakeUpSvr\) directories.Grant modify permissions to these directories for the domain account or network service, whichever is being used. All folders and files below these locations should be set to inherit these permissions.
For example (the command-line is broken down into separate lines for clarity. Run it as a single command-line):
To install the WakeUp server for Configuration Manager without AMT using the domain account ACME\ACMESVC with the password ACMEPSWD with reporting enabled on the CFGMGR02 reporting server, run:
msiexec.exe /i wakeupsvr.msi
SERVERCOMPONENTS=1
SERVERTYPE=SMS
WAKEUPSVCUSER=ACME\ACMESVC
WAKEUPSVCPASSWORD=ACMEPSWD
AFREPORTING=ON
REPORTINGSERVER=CFGMR02.ACME.COM
/QN /l*v WakeUpServerInstall.log
Relicense the WakeUp server
To relicense the WakeUp server, run:
wakeupsvr.exe -relicense=<LicenseKey>
Uninstalling the WakeUp server
To uninstall the WakeUp server, use Add/Remove Programs in Windows Control Panel.
You will need to uninstall the 1E Client separately. Alternatively if you are using the 1E Client for other purposes, then reconfigure the 1E Client to disable the WakeUp module.
Detailed requirements
A definitive checklist of prerequisites and dependencies you need to meet in order to install the WakeUp server.
Component | Product | Notes |
|---|---|---|
OS |
| WakeUp server will install on systems running these server OSes. |
System Center Configuration Manager |
| WakeUp server integrates with these Configuration Managers. |
Runtime libraries | n/a | |
Installation and service accounts | To install the WakeUp server, you will need:
If you are installing the WakeUp server in a distributed Configuration manager environment, WakeUp Server must be installed on each Configuration Manager site server. The installation account requires:
If you are installing the WakeUp server in a distributed Configuration manager environment, WakeUp Server must be installed on each Configuration Manager site server. The service account requires the following rights on each site server:
The service account requires the following Administration rights in Configuration Manager before installing WakeUp Server. We recommend creating a new security role and adding the permissions. Doing this causes the specified account/group to be added to the SMS Admins local group on the provider server.
The service account for the NightWatchman Management Center Console service connects to the WMI namespace on the WakeUp server when requesting wake-ups (alarm clocks, maintenance windows and on demand wake-ups from the NightWatchman Management Center Console including Web WakeUp if installed). Therefore, to have the necessary WMI permissions, this service account must be one or more of the following:
Administrators using remote WakeUp server Admin Consoles require remote access rights to the WMI namespace and DCOM Security, as a result administrators require one or more of the following:
The service account for the NWM Console service connects to the WMI namespace on the WakeUp server when requesting wake-ups. Therefore, the service account requires one or more of the following:
NWM Console service account will be added by the NightWatchman Management Center Installer to the N1E and WakeUp namespaces with the following permissions:
| |
Installing the 1E NightWatchman Agent for Windows
Note
In previous releases, the NightWatchman agent and WakeUp agent were part of the 1E Agent installer. From this release:
1E NightWatchman Agent installer replaces the old 1E Agent installer and includes only the NightWatchman agent
WakeUp Server installer no longer includes WakeUp Agent and includes only the WakeUp server
1E Client (previously Tachyon Agent) installer replaces the old 1E Agent installer and includes a WakeUp client module, for installation on clients and WakeUp servers.
This page concerns the installation of the 1E NightWatchman Agent.
There are installers for both x86 (1ENightWatchmanAgent.msi) and x64 (1ENightWatchmanAgent-x64.msi) so ensure you choose the correct one for your operating system.
The 1E NightWatchman Agent will install on these clientoperating systems:
Windows 10 CB 21H2
Windows 11 CB 21H2
Windows 10 CB 21H1
Windows 10 CB 20H2
Windows 10 CB 2004
Windows 10 CB 1909
Windows 10 CB 1903
Windows 10 CB 1809
Windows 10 CB 1803
Please refer to Preparation: Accounts needed to install the 1E agents because updates to the Windows registry are necessary during installation or configuration.
Please refer to Preparation: Networking for details of firewall port requirements and other network considerations.
Installing the 1E NightWatchman agent using CDA
The 1E Client Deployment Assistant (CDA) is designed to help install Windows versions of 1E Client and other 1E agents using Configuration Manager. It includes template transform files for each combination of client/agent for 32 and 64-bit platforms, and automatically creates collections and deployments in Configuration Manager, so that you only need to populate the collections.
Installing the 1E NightWatchman agent with the wizard
To install the agent with the wizard:
On the Welcome screen, click Next.
On the License Agreement screen, accept the terms of the agreement and click Next.
On the License Wizard screen, if you do not have a license key for NightWatchman, you are subject to a 30-day evaluation.
On the NightWatchman Management Center Configuration screen, choose the communication protocols.
Enable HTTP
Enable HTTPS – the NightWatchman Management Center website must already have been configured for HTTPS. You can opt to use client certificates from the local certificate store. You can search for these by certificate issuer or the certificate subject depending on which of the Match Certificate Issuer or Match Certificate Subject radio buttons is selected.
NMC Web Service – enter the fully qualified domain name of the server hosting the NightWatchman Management Center web service. For example,
MYNWMSERVER.DOMAIN.COM
Checking Use FIPS Encryption configures the NightWatchman Management Center to use FIPS encrypted communications. Ensure that the same setting is is made for all NightWatchman Management Center, WakeUp Server and 1E NightWatchman Agent components.
On the Destination Folder screen, click Next to accept the default location (
C:\Program Files\1E\NightWatchman\) or Browse to choose a new location.On the Ready to Install screen, click Next.
To verify the installation, go to Windows Programs and Features (Apps and features on Windows 10).
1E NightWatchman service
Post-installation you will see the following services running:
Display Name | Service Name | Description | Executable | Startup Type | Log On | Recovery | Dependencies |
|---|---|---|---|---|---|---|---|
1E NightWatchman | NightWatchman | Provides services which enable PC power management | NwmSvc.exe | Automatic | Local System | Defaults | None |
Default file locations
The default for installation folder for both 32 and 64-bit platforms is:
C:\Program Files\1E\NightWatchmanNightWatchman component files are copied to the respective sub-folders during installation:
C:\Program Files\1E\NightWatchman
To run the NightWatchman executable to set additional configuration options you will either need to add this directory to your Windows PATH environment variable, or change to that directory.
These logfiles are created when the services start, depending on the components installed:
%ALLUSERSPROFILE%\1E\Agent\NightWatchman.log
Note: if the 1E Endpoint Agent Installer is used, the logfiles location is %ALLUSERSPROFILE%\1E\Agent\NightWatchman.log
These folders are created during installation, depending on the components installed:
%ALLUSERSPROFILE%\1E\Reporting\NightWatchman
Windows registry
The 1E NightWatchman Agent stores its registry information in:
HKLM\SOFTWARE\1E\CommonHKLM\SOFTWARE\1E\NightWatchman
The HKCU\SOFTWARE\1E\NightWatchman registry key is created after first logon.
Default NightWatchman configuration
On a default installation, the NightWatchman component is configured as follows:
System tray applet is visible – notification icon is visible with the Keep Active option enabled
Logoff mode is active – you are prompted prior to a shutdown
Shutdown action is normal – if power management is enabled on the machine, NightWatchman shuts down or restarts as appropriate
No shutdowns initially scheduled – until a shutdown is scheduled, you can only initiate a shutdown from the system tray
Advanced sleepless detection is on – by default, processes keeping the machine out of sleep mode are automatically detected
Reporting is on – by default, reporting information is sent by the 1E NightWatchman Agent and as long as the NightWatchman Management Center configuration is in place
Installing the NightWatchman Agent in unattended mode
To deploy the 1E NightWatchman Agent to a large number of machines in unattended mode, use the /qn switch together with other installer properties on the command-line.
For example, to install NightWatchman with the log-off=ACTIVE, run C:\1E_DOWNLOAD>msiexec /i 1ENightWatchmanAgent.msi LOGOFFACTION=ACTIVE PIDKEY=ABCD-1234-5678-8765-4321 REPORTINGSERVER=<NWMCWSrv>/qn where ABCD-1234-5678-8765-4321 is your license key and <NWMCWSrv> is the FQDN or NetBIOS name of the server NightWatchman Management Centre Web service is installed. If the license key is not on the command-line, you are subject to a 30-day evaluation.
Licensing the 1E NightWatchman Agent
If you do not have a valid licence when you install the 1E NightWatchman Agent, you will be subject to a 30-day evaluation. If you need to run it beyond the evaluation period, contact Sales for a new key.
To relicense the 1E NightWatchman Agent:
On the command-line, run
nwmsvc.exe –relicense=ABCD-1234-5678-8765-4321
where
ABCD-1234-5678-8765-4321is your new license key.Start the service with:
nwmsvc.exe -start
When a license expires (evaluation or otherwise), the next time the system runs the NightWatchman component service a log entry records that the license is expired. At this point, no NightWatchman behavior is available, NightWatchman shutdown is not supported and information is not logged with NightWatchman Management Center Reporting. If you using a valid commercial license and see this notice, contact our Support team.
There are some configuration differences between an evaluation system and a production system. These differences exist because we expect the evaluation to be run on small test environments where the settings are optimal – they are not suitable for a production environment.
Settings | Purchased license | Evaluation license |
|---|---|---|
| 25 | 5 |
| 14400 | 300 |
| 1500 | 15 |
| 30 | 5 |
If you upgrade from an evaluation license to a commercial license, update these settings using the command-line on the NightWatchman component or from the NightWatchman Management Center console with a policy.
Using Microsoft System Center Configuration Manager to install the 1E NightWatchman Agent
If you use Configuration Manager to install the 1E NightWatchman Agent, the installer sets ALLUSERS=1 by default so that it is installed on a per-machine basis which also makes is easier to uninstall from Configuration Manager. For example, to install NightWatchman with log-off active, a license key, reporting enabled and WakeUp in multi-agent mode, run this on the command-line:
msiexec /i 1ENightWatchmanAgent-x64.msi LOGOFFACTION=ACTIVE PIDKEY=ABCD-1234-5678-8765-4321 REPORTING=ON REPORTINGSERVER=<NWMCSrv> ALLUSERS=1 /qn
In our example, we have included ALLUSERS=1 but it is not strictly necessary as the installer includes that by default.
The 1E NightWatchman Agent, Sysprep and disk imaging
If you want to install the 1E NightWatchman Agent on a computer you want to image for subsequent inclusion in base OS configurations, complete the installation described above first.
When deploying a disk image that includes a NightWatchman installation, it is very important to reset some of the registry information and delete some log files from disk before the image is taken. Do not use a disk image with NightWatchman installed without first making the changes outlined below. Once these registry keys and files have been deleted, it is safe to create the gold disk image.
There are three areas of the registry that need to be addressed. The licensing keys contain information specific to the computer name and therefore must be reset otherwise NightWatchman will fail to start as it will appear to have the wrong license information.
NightWatchman creates a
GUIDwhen it starts for the first time that uniquely identifies a computer. So if the computer is renamed for whatever reason, its power usage is preserved as its recorded in the NightWatchman database with the new name. ThisGUIDis held in the registry and must be purged otherwise each new computer that uses the disk image will cause the database record of the original machine to be renamed – and this will happen multiple times for each newly imaged computer.It is good practice to remove the hardware inventory records so that a new hardware inventory is taken. This eliminates the possibility of previous hardware inventory information being reported for the new computer as it forces a complete hardware inventory to be taken the first time NightWatchman runs on the newly imaged machine.
Install the NightWatchman agent with the necessary configuration and then stop its service. Set the service type to manual – this must be changed back to automatic on the newly imaged clients as part of the automated deployment but only after the machine has joined the domain and rebooted. This ensures that all of the information about the computer is correct before the 1E NightWatchman Agents start for the first time.
In order to prepare the registry for sys prep, take the following action for the respective registry keys:
Registry key | Value | Type | Action |
|---|---|---|---|
| | | Delete |
| | Delete | |
| | Delete | |
| | | Delete |
| | Delete | |
| | | Delete |
| | Delete | |
| | Set | |
| | | Blank |
| | | Blank |
| | | Blank |
| |||
| | Blank | |
| | | |
| | Blank | |
| | Blank |
So that you can be sure you are looking at the correct log files and not old logging from the gold image when you troubleshoot, delete these log files and clear out reporting data:
Agent | Location | Files | Include sub-directory |
|---|---|---|---|
NightWatchman | | | No No |
Uninstalling or repairing the 1E NightWatchman Agent
To uninstall the 1E NightWatchman Agent:
Go to Program and Features.
Select the 1E NightWatchman Agent.
Click Uninstall.
To repair the 1E NightWatchman Agent:
Run the installer.
Choose the 1E NightWatchman Agent.
Click Repair.
Installing the 1E WakeUp Agent
Note
In previous releases, the NightWatchman agent and WakeUp agent were part of the 1E Agent installer. From this release:
1E NightWatchman Agent installer replaces the old 1E Agent installer and includes only the NightWatchman agent
WakeUp Server installer no longer includes WakeUp Agent and includes only the WakeUp server
1E Client (previously Tachyon Agent) installer replaces the old 1E Agent installer and includes a WakeUp client module, for installation on clients and WakeUp servers.
The 1E Client
The 1E WakeUp Agent for NightWatchman Enterprise 7.3 is a client module that is installed as part of the 1E Client 5.0 (or later).
Note
The WakeUp client module of the 1E Client replaces the 1E Agent WakeUp components of the 1E Agent and 1E WakeUp Server.
If the WakeUp Server is configured in multi-agent mode (recommended) then the 1E Client must be installed with the WakeUp client module enabled on all in-scope devices.
When the 1E Client starts, and the WakeUp client module is enabled, it will only initialize the WakeUp client module if the OS version is Windows 7 or later. The 1E Client will automatically remove any previous installation of the WakeUp component from the 1E Agent, leaving behind the NightWatchman component, and keeping the WakeUp Agent registry settings. For NightWatchman v7.2.500 onwards the NightWatchman Agent has a separate installer, and its settings continue to be managed by the NightWatchman Management Center Web Service.
The WakeUp Server also requires a local WakeUp Agent, and therefore requires the 1E Client to be installed with the WakeUp client module enabled. The WakeUp Server is a 32-bit process and its registry entries are in the 32-bit WOW6432Node area. The 1E Client is a 64-bit process with its registry entries in the 64-bit area. When the 1E Client starts, if the WakeUp client module is enabled the 1E Client will automatically remove any previous installation of the WakeUp Agent component, leaving behind the WakeUp Server component, and moving the existing WakeUp Agent registry settings from the 32-bit to the 64-bit area of the registry.
WakeUp and the WakeUp client module of the 1E Client do not require a full Tachyon infrastructure; only the 1E Client is required, Tachyon Servers are not required. The full Tachyon infrastructure is required only if you are integrating NightWatchman with Tachyon.
The WakeUp client module of the 1E Client is not supported on:
Non-Windows devices
Legacy OS (that is OS which Microsoft no longer support including Windows XP, Vista, 7, Server 2008 etc.)
The following legacy WakeUp features from the 1E Agent do not exist in the WakeUp client module:
1E WakeUp Agent service - all WakeUp Agent features are now implemented as the WakeUp client module in the 1E Client service
Computer Health feature - is now obsolete
For more details on deploying the 1E Client please refer to 1E Client 24.3. You can install the 1E Client with only the WakeUp module enabled, without having a Tachyon platform infrastructure. The Tachyon platform infrastructure is only required if using the NightWatchman online status feature.
The 1E Client does not require a license key. The Tachyon platform, if used, does require a license.
Installing the 1E Client agent using CDA
In most cases the 1E Client will be installed silently using a software deployment tool such as Microsoft Configuration Manager.
The 1E Client Deployment Assistant (CDA) is designed to help install Windows versions of 1E Client and other 1E agents using Configuration Manager. It includes template transform files for each combination of client/agent for 32 and 64-bit platforms, and automatically creates collections and deployments in Configuration Manager, so that you only need to populate the collections.
The WakeUp module 1E Client installer properties
Additional WakeUp module installer properties are described on the 1E WakeUp Agent configuration properties page.
Installer property | Description |
|---|---|
Set this property to true to enable the WakeUp client module. The default value is false. Enabling this will also cause any installation of the 1E Agent's WakeUp component to be uninstalled the first time the 1E Client is started, leaving the NightWatchman component if that was installed. NoteWhen true then you must also specify either the name of the NightWatchman Management Center reporting server, or that reporting is turned off. For details of these and all other installer properties please refer to 1E Client - WakeUp client settings. | |
Set to 1 to force the WakeUp agent to use a FIPS-compliant algorithm for:
If enabled, then all components in the NightWatchman and WakeUp system must have FIPS enabled. EncryptionLevel and FIPS settings used by WakeUp do not affect other 1E Client communications. | |
Enables WakeUp reporting. Sets whether the Agent sends reporting messages to the NightWatchman Management Center Web Service. May be set to one of the following values:
TipWhen installing the 1E Client on a WakeUp Server, set MODULE.WAKEUP.REPORTING=OFF so that the server does not appear as a client in the NightWatchman Management Center Admin Console. This will only disable Agent reporting whilst the WakeUp Server will have reporting enabled for reporting statistics. | |
Set this parameter to the FQDN (recommended) or NetBIOS name of the server hosting the NightWatchman Management Center Web Service. WarningMandatory when WakeUp reporting is enabled (default) and using HTTP for communications. TipIf HTTP is not using standard port 80 then specify the port number as part of the server name: MODULE.WAKEUP.REPORTINGSERVER="ACMESERVER.ACME.COM:8080" | |
Set this parameter to the FQDN (required) or NetBIOS name of the server where the NightWatchman Management Center Web Service component secure site has been installed. WarningMandatory when WakeUp reporting is enabled (default) and using HTTPS for communications. TipIf HTTPS is not using standard port 443 then specify the port number as part of the server name: MODULE.WAKEUP.SECUREREPORTINGSERVER="ACMESERVER.ACME.COM:7433" | |
Specify the text used to search for a client certificate in the client certificate store. Either MODULE.WAKEUP.CERTISSUER or MODULE.WAKEUP.CERTSUBJECT is mandatory when all the following are true:
If this property is used, it will use the first certificate it finds where the specified text matches the certificate's Issuer CN. | |
Specify the text used to search for a client certificate in the client certificate store. Either MODULE.WAKEUP.CERTISSUER or MODULE.WAKEUP.CERTSUBJECT is mandatory when all the following are true:
If this property is used, it will use the first certificate it finds where the specified text matches the certificate's Subject CN. |
The WakeUp screen in the 1E Client installer
If the 1E Client is installed using the interactive installation wizard, the particular installer screen that is relevant to WakeUp is illustrated below.
WakeUp
If you are using version 7.2.500 or later of NightWatchman Management Center or WakeUp Server you must install the 1E Client with this option enabled on client devices and on WakeUp Sever. The 1E Client WakeUp module replaces the WakeUp Agent from previous versions of the 1E Agent.
Setting | Description |
|---|---|
Enable WakeUp | Check this box to enable WakeUp integration. WakeUp integration is required to enable 1E WakeUp capabilities on this device. NoteIf WakeUp Integration is enabled, when the 1E Client starts it will attempt to automatically remove any previous installation of the 1E WakeUp Agent. The 1E NightWatchman Agent is not affected. |
Use FIPS encryption | Checking Use FIPS Encryption configures the WakeUp module to use FIPS encrypted communications. You must ensure that the NightWatchman Management Center, WakeUp Server and 1E NightWatchman Agent components are all set to the same option. |
Enable HTTP reporting | Check this box if the NightWatchman Management Center Web Service is configured to use HTTP and you want communications from the WakeUp module to use HTTP. Do not use this option when installing on a WakeUp Server. When checked you must set the DNS Name FQDN for the server hosting the NightWatchman Management Center Web Service in the edit field provided. |
Enable HTTPS reporting | Check this box if the NightWatchman Management Center Web Service is configured to use HTTPS and you want communications from the WakeUp module to use HTTPS. Do not use this option when installing on a WakeUp Server. When checked you must set the DNS Name FQDN for the server hosting the NightWatchman Management Center Web Service in the edit field provided. |
Use client certificate (from local certificate store) for HTTPS reporting | This checkbox is only enabled when the Enable HTTPS reporting checkbox is checked. You will need to check this option if the NightWatchman Management Center Web Service has been configured to request a client certificate. The certificate is retrieved from the local certificate store and is found by providing a certificate issuer or certificate subject search text. The first certificate found that matches the text will be used to authenticate the client with the NightWatchman Management Center Web Service. |
Match Certificate Issuer | This option is only enabled when the Use client certificate for HTTPS reporting checkbox is checked. When selected this option sets the search in the local certificate store to match against the certificate issuer field of the certificate. |
Match Certificate Subject | This option is only enabled when the Use client certificate for HTTPS reporting checkbox is checked. When selected this option sets the search in the local certificate store to match against the certificate subject field of the certificate. |
Search Text | This option is only enabled when the Use client certificate for HTTPS reporting checkbox is checked. When enabled this edit field should be set to the search text used to locate and retrieve the client certificate from the local certificate store. This will be matched against either the certificate issuer or the certificate subject, depending on which option has been selected above. |

Note
When installing on client devices, enable HTTP or HTTPS reporting in order for NightWatchman Management Center to track which subnet the client device is on when it powers down. The WakeUp module reports back subnet changes more frequently than the NightWatchman Agent.
WakeUp Server must be installed before installation of the WakeUp client. If WakeUp client is installed first the WakeUp Server installer only provides the WakeUp Administration console installation option.
When installing on a WakeUp Server, do not enable HTTP or HTTPS reporting, because that prevents the server from appearing as a client in the NightWatchman Management Center Admin Console. This will only disable Agent reporting whilst the WakeUp Server itself should have reporting enabled for reporting statistics.
Warning
Enter the DNS Name FQDN for the server hosting the NightWatchman Management Center Web Service, do not enter the full URL.
Installing the Mac 1E Agent
The process to install the Mac 1E Agent is:
Prerequisites
You must have administrative privileges to the machine to run the installer. Throughout this process, you will be prompted to enter the administrative password at various stages of the installation.
If you are using FIPS communications, ensure that the same setting is made for all NightWatchman Management Center, WakeUp Server and 1E Agent components. See options for secure communications for further details.
Before you can run the installer, you must mount the 1E Agent.dmg disk image. Once you have mounted the disk image, you will see five files in it.
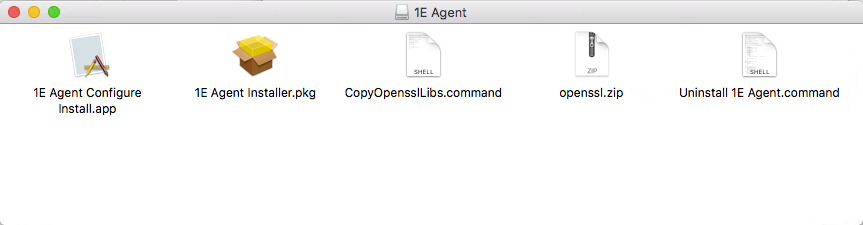 |
Installing the Open SSL libraries
To install the Open SSL libraries:
Double-click CopyOpensslLibs.command to install the Open SSL libraries.
Enter your administrator password. If the Open SSL libraries are already installed, you will not be prompted for your administrator password.
A window is displayed to notify you that the process has completed.
Close that window.
Installing the Mac 1E Agent
The main 1E Agent files are installed at the root of the system disk in: /Library/Application Support/1E/NightWatchman
To enable remote deployments in unattended mode:
The installer supports an optional pre-configuration file. This must be located on the computer where the installation is taking place with the following path and file name:
/Library/Preferences/com.1E.NightWatchman.PreConfiguration.plistIf the installer locates the file, it looks for the license number, the location (HTTP or HTTPS) of the server and applies them to the NightWatchman preference file. If the server is not found, it sets reporting to false.
At the end of installation, the installer creates an installer configuration file in /Library/Preferences. When the installer launches the 1E Agent daemon, the daemon looks for this installer configuration file and updates the installer settings. After applying those changes, it deletes the installer configuration file. APreConfiguration file takes precedence over the installer configuration file.
To install the Mac 1E Agent:
Double-click 1E Agent Configure Install.app.
Enter your production license key. If you do not provide one, you are subject to a 30-day evaluation period.
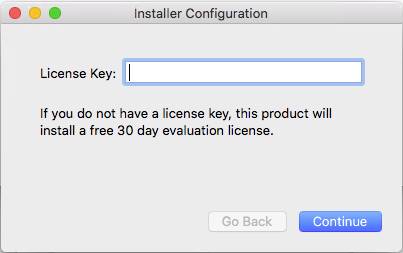
Click Continue.
Choose your communications protocol.
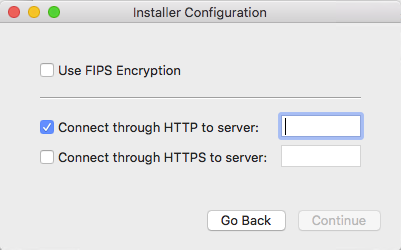
If the connection protocol you are using is HTTP, check the Connect through HTTP to server option and provide the NetBIOS name of the NightWatchman Management Center website server next to it.
If the connection protocol you are using is HTTPS, check the Connect through HTTPS to server option and provide it's FQDN to the NightWatchman Management Center website server next to it.
If you are using FIPS encryption, check the Use FIPS Encryption option. Ensure that the same setting is made for all NightWatchman Management Center, WakeUp Server and 1E Agent components. See options for secure communications for further details.
The installer will validate the location of the NightWatchman Management Center Web server. In the even that it fails to locate it, you will be prompted with a message.
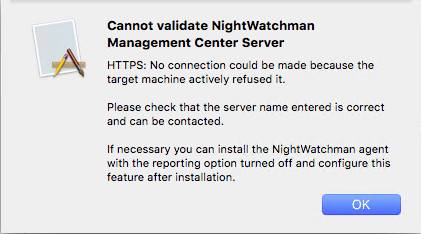
Click OK.
Check the server name is correct and that the NightWatchman Management Center website is up and running and contactable from the computer where the installation is taking place.
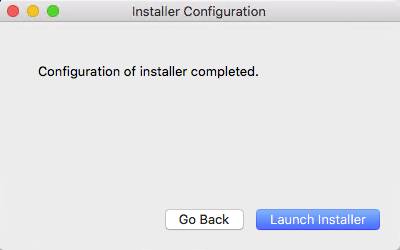
When the configuration for the installer is done, click Launch Installer.
On the Introduction screen, click Continue.
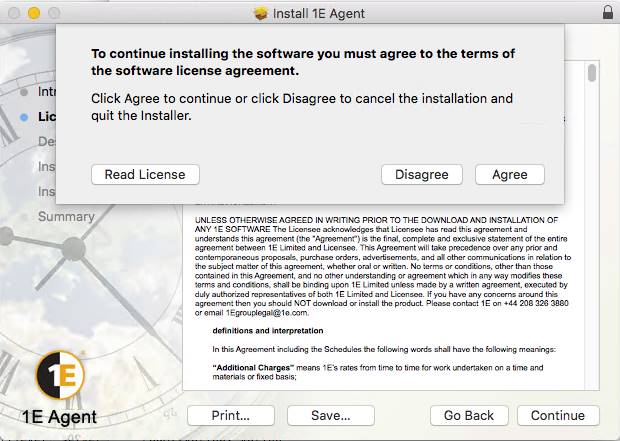
On the License agreement screen, accept the terms of the agreement and click Continue.
On the Installation Type screen, click Install to accept the default installation location which is /Library/Application Support/1E/NightWatchman
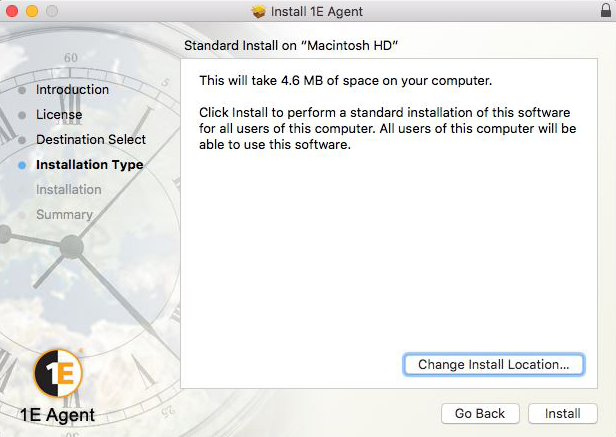
To install the files to a different location click Change Install Location and select a new destination for the installation files. Click Install when you are done.
You will be prompted that the machine requires a reboot after the installation takes place.

Click Continue Installation.
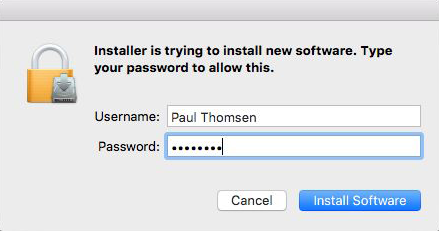
Enter your administrative password and click Install Software.
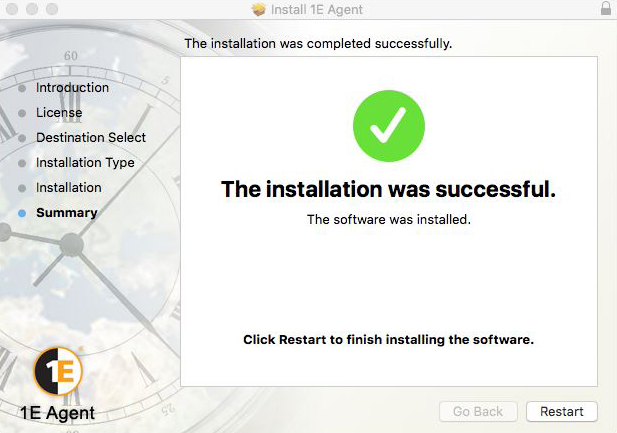
On the Summary screen, click Restart.
Licensing the 1E Agent
The most important key that must be included in the pre-configuration file is the 1E Agent license. This key is called LicenseNumber and is set using following command-line: defaults write /Library/Preferences/com.1E.NightWatchman.PreConfiguration LicenseNumber <1ELicKey> where <1ELicKey> is your commercial or evaluation license key.
You have two options before you run the installer:
Create the pre-configuration file and push it to the client machines. For example, using Copy Items in Apple Remote Desktop.
Create the pre-configuration file using the command-line on the client computer. For example:
defaults write /Library/Preferences/com.1E.NightWatchman.PreConfiguration HTTPServer <NWMC SERVER> defaults write /Library/Preferences/com.1E.NightWatchman.PreConfiguration LicenseNumber <1ELicKey>
where
<NWMC SERVER>is the server where the NightWatchman Management Center website is located and<1ELicKey>is your license key.
The installer will always use the pre-configuration file if it exists, so any manual updates to LicenseNumber, HTTPServer, HTTPSServer or Reporting will be reverted by the installer.
Post-installation, you must restart the computer in order to enable the version 6 1E Agent daemon to run. If you uninstall it, you will need to restart the computer to completely remove the agent daemon.
Uninstalling the Mac 1E Agent
To uninstall the Mac 1E Agent:
Click the installer disk image.
Run the Uninstall 1E Agent command script. You must run this with administrator rights.
Beyond the Mac installation
Using any Mac systems management software product, you can distribute changes to the NightWatchman policies using command-line switches to the NightWatchman executable.
Power downs are handled by the NightWatchman component of the 1E Agent. This is controlled via the NightWatchman command-line, which allows you to set specific attributes for the NightWatchman service. After installation, the nightwatchman executable is located in the following directory:
/Library/Application Support/1E/NightWatchman
For example, to change the shutdown policy for a particular machine to "force" and remove the user's ability to defer shutdown you could open a console on the machine with administrator privileges, change to the /Library/Application Support/1E/NightWatchman directory and enter the following command-line:
sudo ./nightwatchman -s logoffaction Force systemtray off
Another common usage is to change the shutdown time for different days of the week. The following example sets a shutdown time of 20:00 on weekdays and 13:30 at weekends:
sudo ./nightwatchman -scheduledactions WEEKDAYS=20:00,PowerOff,Active WEEKENDS=13:30,PowerOff,Force
To learn more about configuring NightWatchman from the command-line, please refer to 1E Agent Mac command-line switches.
To learn more about the Mac user interface, please refer to The 1E Agents - 1E Agent for Mac.
Agent log files
The 1E Agent Mac keeps a log file of settings, state changes and interactions in /tmp/Nightwatchman agent.log where /tmp is a symbolic link to /private/tmp. This is a temporary location, with files periodically deleted by daily, weekly or monthly cron scripts and/or reboots. You should backup this file to a safer location so that it does not get deleted automatically by system routines.
Installing Web WakeUp
The 1E Client 4.1 or later must be installed with the WakeUp module enabled on target computers if you want to wake them with Web WakeUp.
Installing Web WakeUp with the wizard
To install Web WakeUp using the wizard:
On the Welcome screen, click Next.
On the License Agreement screen, agree the terms and conditions and click Next.
On the Destination Directory screen, choose the installation directory. The default is
On 32-bit systems:
C:\Program Files\1E\WebWakeUpOn 64-bit systems:
C:\Program Files (x86)\1E\WebWakeUp
On the NightWatchman Console Service screen, choose the location for the service. The location is not validated by the installer. Optionally, check Enable ActiveX integration (enables Web WakeUp web pages to use ActiveX controls) or Enable Remote Desktop (enables a remote session on a woken up computer).
On the Ready to Install screen, click Next.
Click Finish.
Installing Web WakeUp in unattended mode
To install Web WakeUp in unattended mode, on the command-line, run:
msiexec command-line, run: /i WebWakeUp.msi SERVICELOCATION=<SERVICE> /qn
where <SERVICE> is the location for the NightWatchman Console service.
For more details on the installer properties, see Web WakeUp installer properties.
Post-installation configuration
If the Web WakeUp website is installed on a different computer to the NightWatchman Console Service and you get errors attempting to access the Web WakeUp website, perform the following post-installation configuration:
Firewall access – on the server where the NightWatchman Console service is installed, enable TCP port 8750 access from the computer where the Web WakeUp website is installed.
NightWatchman Console service – set the SPN for the server where the NightWatchman Console service is running with
setspn –a WEBWAKEUP/SERVICE <NWMCAccount>where<NWMCAccount>is the account the NightWatchman Console service is running under in the formatdomain\serviceacctWeb WakeUp website – set the SPN for Web WakeUp website by editing the
<client>element in itsweb.configfile.<client> <endpoint address="net.tcp://ACMENWMC:8750/MachineSearchService" binding="netTcpBinding" bindingConfiguration="NetTcpBinding_MachineSearchService" contract="MachineSearchService.MachineSearchService" name="NetTcpBinding_MachineSearchService"> <identity> <servicePrincipalName value="localhost" /> </identity> </endpoint> <endpoint address="net.tcp://ACMENWMC:8750/AuthorisedMachineService" binding="netTcpBinding" bindingConfiguration="NetTcpBinding_AuthorisedMachineService" contract="AuthorisedMachineService.AuthorisedMachineService" name="NetTcpBinding_AuthorisedMachineService"> <identity> <servicePrincipalName value="localhost" /> </identity> </endpoint> </client>Update both values for Service Principal Name from:
<servicePrincipalName value="localhost" />
to (where the SPN NWMCSPN had been previously created):
<servicePrincipalName value="NWMCSPN" />
By default,
web.configis located in:On 32-bit systems:
C:\Program Files\1E\WebWakeUp\WebsiteOn 64-bit systems:
C:\Program Files (x86)\1E\WebWakeUp\Website
Enabling Web WakeUp authorization
You can configure Web WakeUp to prompt users for authentication to wake computers up from the Web interface. When you do this, users can only register or search for computers that they are associated with in the Web WakeUp authorisation database. You can enable wake up authorisation:
When you install NightWatchman Management Center using the
STRICTAUTHORIZATIONinstaller property on the command-linePost-installation by setting the
AuthorisedMachineModuleparameter in theNWM.ServiceHost.exe.configfile. See Turning authorization on or off.
To enable users to wake up computers on the network, you must add their credentials to the tbWWU_Authorised_UserMachines table in the AgilityFrameworkReporting database. The columns in this table are:
UserTicket – the identifier for the user returned by the authentication mechanism. For Windows, it takes the format
Domain\User.NetbiosName – the NetBIOS name for the computer the user can wake up. Use * if you want the user to wake up any computer.
DomainName – the domain name for the computer
For example, if you want Joe to wake up ACMEDEV00017 and ACMEDEV00015 and Mary to wake up all the computers on the ACME network, update the table as follows:
UserTicket | NetbiosName | Domain |
|---|---|---|
ACME\Joe | ACMEDEV00017 | ACME |
ACME\Joe | ACMEDEV00015 | ACME |
ACME\Mary | * | This field must be set to SQL NULL. This is done by entering |
The Web WakeUp additions to the Agility Framework database also include a batch job that will populate the table from a .csv input file. See Web WakeUp authorization table for further details.
Restricting access to the Web WakeUp authorization service
You must lock down the Web WakeUp authorisation service in IIS as it provides the AddAuthorisedMachine , DeleteAuthorisedMachine , GetAuthorisedMachines and UpdateAuthorisedMachine methods that make it possible to update the tbWWU_Authorised_UserMachines table programatically. If access is not restricted, any user with web access and the right knowledge can use the Web WakeUp authorization service to grant themselves or other users permissions to wake any computer.
To lock down the service, update the NTFS file permissions for the AuthorisationServices.asmx file to restrict access so that only Web WakeUp administrators can browse to the service. On a default installation, this file is located in C:\Program Files\1E\WebWakeUp\Website\WebServices
Another way of restricting user access to waking arbitrary computers is to configure the Web WakeUp site to not display the wake up computer, search and register pages. If you do this, you will need to register the appropriate computers for all users of the Web WakeUp site with the AddRegisteredMachine and GetRegisteredMachines methods to update the tbWWU_Default_UserMachine_Mapping table. These methods are accessed from http://host/WebWakeUp/WebServices/LocalServices.asmxpage. See the Web WakeUp local services API for information.
Deploying the Web WakeUp ActiveX Control to clients
The Web WakeUp ActiveX control(WebWakeUpActiveX.msi) is supplied in a stand-alone installer. This means that the control can be rolled out across a network without requiring user intervention the first time they visit the Web WakeUp site.
There is a single installer property that controls whether the ActiveX control appears on the pre-approved list which allows it to be enabled in Internet Explorer without user intervention. To run this in unattended mode with pre approval, use: Msiexec /i WebWakeUpActiveX.msi PREAPPROVED=1 /qb
Property | Default value | Description |
|---|---|---|
PREAPPROVED | 1 | Enable or disable addition to the pre-approved list without user intervention when browsing the site
|
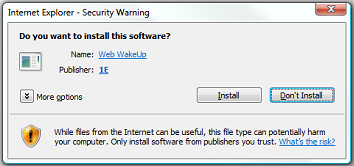
If the Web WakeUp ActiveX control has not been previously installed by the network administrator, the first time you browse to the web service, you will be prompted to install the Web WakeUp software. Installing the ActiveX control enables Web WakeUp to confirm the name of the local computer, specifically for the purpose of registering the computer as the default wake up.
If you choose not to install the ActiveX control, Web WakeUp attempts to use reverse DNS lookup in order to derive the local computer name. The accuracy of this operation is dependent on DNS being correctly configured and up-to-date and may affect Web WakeUp's ability to wake the computer at a later date.
You can use reverse DNS lookup instead of the Web WakeUp ActiveX control by changing a setting as described in Web WakeUp server configuration: ActiveX usage.
Either the Web WakeUp ActiveX control or reverse DNS lookup is required by the Register page (tab). If neither method is available to you then you can choose to remove this page from the website, as decribed in Web WakeUp server configuration: website control.
Detailed requirements
A definitive checklist of prerequisites and dependencies you need to meet in order to install Web WakeUp.
Component | Product | Notes |
|---|---|---|
OS |
| Web WakeUp server will installed on systems running these OS and can be viewed from computers running these client OS. It also supports mobile devices running BlackBerry OS 4.7 and 4.6, Apple iPhone 3G and 4, Apple iPad and Windows Mobile OS 7.0. |
Web servers |
| Web WakeUp server works with these Web servers. IIS Windows authentication must be enabled. |
Runtime libraries |
| These runtime libraries are required. |
Browsers |
| Web WakeUp works with these browsers.
You can use reverse DNS lookup instead of the Web WakeUp ActiveX control by changing a setting as described in Web WakeUp server configuration: ActiveX usage. Either the Web WakeUp ActiveX control or reverse DNS lookup is required by the Register page (tab). If neither method is available to you then you can choose to remove this page from the website, as decribed in Web WakeUp server configuration: website control. |
Mobile devices |
| Web WakeUp website is supported on these mobile device OS versions |
Installation and service accounts | To install Web WakeUp, you will need the follwing accounts. Note1E Client 5.1 or later (with WakeUp client enabled) must be installed on target computers if you want to wake them with Web WakeUp. For details on installing the 1E Client with the WakeUp client module enabled, please refer to 1E Client - Deploying 1E Client on Windows: WakeUp.
| |
Installing Enterprise View
Using the wizard
To install Enterprise View using the wizard, run EnterpriseView.msi.
On the Welcome screen, click Next.
On the License Agreement screen, accept the terms of the agreement and click Next.
On the Prerequisites Checks screen, you will not be able to install components that fail their respective prerequisite checks.
In the Custom Setup screen, choose the features you want installed. You must run the installer once for each of the components you want installed separately.
Enterprise View Web application – installs its Web components
Database – installs the database for Enterprise View
Click Change to install the components in a different location. They are installed in
C:\Program Files\1E\Enterprise View\On the Website Configuration screen, set the parameters for the Enterprise View website as follows:
Website Port – sets the port to be used for the Enterprise View website. This defaults to the standard IIS port 80. If changed from the default, users will need to add this to the URL for the Enterprise View Website, for example http://myserver:8080/EnterpriseView
IP Address – sets the IP address for the Enterprise View website.
Host Header – sets the host header for the Enterprise View website. This is the server name used to locate the website when users enter the site URL in their browser. In order to use it when it has been set, you will need to have defined the appropriate DNS settings.
In the Database Server screen, set the parameters for installing it Set the Database server that you are installing to: parameter to the server where the database resides. Click Browse... to display a list of server and instances visible from the local computer. The format of the database server identified may be one of the following:
(Local) – uses of the local default instance
ServerName – uses a remote server using the default instance
ServerName\Instance – uses a remote server and named instance using a dynamic port. For this option to work correctly the SQL browser service must be enabled.
ServerName, Port – uses of a remote server and instance defined by its fixed port
Set the Name of an existing or new database catalog: field to an existing database on the database server or a new name. If it is on a existing database server, the Enterprise View tables are created in the existing database. If it is on a new server, a new database is created with the new name and the tables are in that database. Clicking the Browse button will display the existing database catalogs on the selected database server.
On the Ready to Install screen, click Next.
Click Finish.
Post-installation
If you set up an additional host header for the Enterprise View website:
Configure the IIS client access policy to allow cross domain access to the Enterprise View website. This is done via the
ClientAccessPolicy.xmlfile which resides in the IIS root folder, typicallyc:\inetpub\wwwroot. If this file already exists, append the contents of theClientAccessPolicy.xmlfile from the Enterprise View%INSTALL_DIR%\Dashboard.webfolder to it. If it does not exist, copy it from theDashboard.webfolder to the IIS root folder.Edit the
web.configfile the Enterprise View%INSTALL_DIR%\Dasboard.webfolder and modify the service base URI used to access the Enterprise View website.Locate the line in the file:
<!-- add key="ServiceBaseUri" value="http://<<HostFQDN>>/EnterpriseView/"/-->
Remove the comments and update the
<<HostFQDN>>placeholder with the base URI for your Enterprise View website. For example,<add key="ServiceBaseUri" value="http://machineA.acme.com/EnterpriseView/"/
Save the file and test the new configuration by accessing the Enterprise View home page using the host FQDN.
Detailed requirements
A definitive checklist of prerequisites and dependencies you need to meet in order to install Enterprise View.
Component | Product | Notes |
|---|---|---|
OS |
| Enterprise View will install on systems running these OSes. |
Database servers |
| You must have one of these database servers installed. SQL server must be configured to use a case-insensitive, accent-sensitive collation as the server default (the preferred collation is Enterprise View will install on these database servers. If you are using your own database as a data source for the Enterprise View Website and it is local to the Website, you must add NT AUTHORITY/NETOWRK SERICE to the database users and grant appropriate permissions to that account for any specivic tables you want to use. If it is remote, you must add the machine account for the computer hosting the Enterprise View Website in the format: |
Runtime libraries |
| This runtime library is required. |
Installation and service accounts | To install Enterprise View, you will need the following accounts.
For a default installation, the programs and files associated with NightWatchman Management Center are created in | |
Upgrading NightWatchman Enterprise
Planning
To ensure a successful upgrade to NightWatchman Management Center 7.3, we recommend you undertake a planning exercise to understand issues that may arise and agree a suitable approach for the business.
Scope
The following 1E product versions are in scope for this upgrade process.
Product | Installer Type |
|---|---|
NightWatchman Management Center v7.2 (or later) | Server |
WakeUp Server v7.2 (or later) | Server |
We recommend that you upgrade your NightWatchman version to the latest version before it goes out of support. The installer supports direct upgrades from NightWatchman 7.2 and 7.2.500. You can find the latest 1E releases on the 1E Support Portal, .
There are two options that cover the cases where upgrades from earlier systems are required:
Direct upgrade – with a direct upgrade, you do not need to step through the intervening releases and instead do a direct upgrade to NightWatchman version 7.3
Phased upgrade:
Version
Phased upgrade process
7.2
The process for a phased upgrade from NightWatchman 7.2 is:
Upgrade to NightWatchman version 7.2.500
Upgrade NightWatchman version 7.2.500 to version 7.3
Best practices
In all cases, we advise the following:
Test your upgrade path and processes in a lab prior to upgrading your production environment, especially if you are upgrading to version 7.3 from and old version such as 7.0 or 7.1.
Upgrade all NightWatchman Management Center and WakeUp servers before starting the upgrade of any NightWatchman Agents and 1E Clients with the WakeUp module enabled.
If you are unsure about the upgrade, engage one of our consultants. Contact your 1E account team for more details
Check our documentation and knowledge base articles for relevant updates at https://1eportal.force.com/
If running earlier versions of the above software, we recommend that a new installation of NightWatchman Management Center 7.3 is implemented instead of performing an upgrade. Detailed information can be found in installing NightWatchman Management Center and installing the WakeUp Server.
Note
Ensure that you are using a supported version of SQL Server for NightWatchman 7.3
Custom reports
If custom reports have been developed for a specific version of the product to extend the standard reporting capabilities, consideration should be given to these as an on-going business requirement. While every effort is made to minimize the changes in the back-end reporting architecture, schema changes in later versions might cause custom reports to run with errors following the upgrade.
The upgrade process provides guidance to back-up and restore custom reports; however, we recommended that the upgrade process is tested prior to implementing on production environments in order to identify any issues. Contact your 1E account team if issues are encountered with custom reports following an upgrade and there is an on-going business requirement for these. As custom reports are not covered by the standard 1E support agreement, any remedial work to allow compatibility with 7.3 might be chargeable.
Approach
The overall approach is to upgrade server components first followed by clients:
Upgrade to NightWatchman Management Center 7.3
Upgrade to WakeUp Server 7.3
Upgrade to Web WakeUp 7.3
Upgrade to NightWatchman Agent 7.3
Upgrade to the latest 1E Client with the WakeUp module enabled
The approach assumes that the server components are upgraded in a like-for-like configuration. If you plan to relocate your server components to different hosts as part of your planned upgrade, we recommend you contact your 1E account team to arrange a discussion with a specialist for advice.
Licensing
License keys are required for the NightWatchman Enterprise 7.3 components. These are provided to all customers with active maintenance agreements. WakeUp requires a license key when installing server components and NightWatchman requires a license key as part of the 1E NightWatchman Agent install. If you have a version 7.x license, it will work with 7.3. Version 6 licenses will not work.
Rollback
The upgrade can be reverted as long as client agents have not been upgraded to 7.3. Rollback requires a valid backup of the AgilityFrameworkReporting database and its associated program files directories (including import scripts and custom reports).
To carry out a rollback:
Uninstall all 7.3 server components – NightWatchman Management Center/Agility Framework/WakeUp.
Delete the AgilityFrameworkReporting database using SQL Management Studio.
Restore your pre-upgrade version of the AgilityFrameworkReporting database from backup.
Install previous version of NightWatchman Management Center (or Agility Framework with NightWatchman and WakeUp product packs) and do not drop database.
Copy any import script and/or custom report files to the previous location.
Install previous versions of WakeUp servers where you upgraded them.
Validate functionality using suggested tests within this document.
Changes in functionality
Certain new features in NightWatchman Enterprise 7.0 and above rely on ActiveEfficiency Server integration. If you are intending to use the following features it is recommended that ActiveEfficiency v1.7 or later is installed prior to upgrading NightWatchman Enterprise:
WakeUp integration with Nomad
NightWatchman Enterprise 7.1 and later include the new Power Optimization and Reboot Optimization features, both of which are enabled by default when clients are installed or upgraded – they can be disabled with installation parameters or by toggling client registry values.
The Power Optimization and Reboot Optimization features can also be enabled or disabled by using NightWatchman console policies. New policies have power optimization automatically enabled by default. Existing policies will not exhibit this behavior and so are disabled by default. Enable Power Optimization ore Reboot Optimization when you change policies if you want this feature to continue to be enabled on clients.
NightWatchman Enterprise 7.2 and later includes Improved reporting console, Online / offline status ‘stoplights’ in the NightWatchman console and few Enhancements to NightWatchman policy management. Hardware Utilization is renamed to Computer Reclaim with addition to rarely used computers reports.
NightWatchman Enterprise 7.2.500 and later includes changes in 1E Agent. 1E Agent is renamed to 1E NightWatchman Agent and WakeUp Agent is moved as a module in the 1E Client.The WakeUp ConfigMgr console collection and computer menu extensions now have two more options whenever you run the WakeUp Server installer on a computer that has a ConfigMgr console.Options are - Send WakeUp with Software Update Deployment Evaluation& Send WakeUp with Application Deployment Evaluation. Also the log files for Wakeup Server and the NightWatchman and WakeUp Agents can now rollover multiple times.
Technical preparation
In order to create a recovery point, take a backup of the database which can be achieved by one of the following methods:
Method 1
If the server is dedicated to NightWatchman Management Center the IIS services can be stopped by running the following command from a command prompt.
iisreset /stop
Method 2
If the server shares IIS configuration with other applications which prevents the IIS services from being stopped, the NightWatchman Management Center application pools can be taken offline. To do this, start IIS Manager, expand the server, select Application Pools and stop:
NWMC_AFWebserviceNWMC_ReportConsole
Note
If the application pools are stopped (instead of stopping IIS), these will be restarted automatically by the installer following successful upgrade to NightWatchman Management Center 7.2. In this scenario, the application pools should be manually stopped again following the upgrade to prevent processing of client data until validation has completed.
Prior to running the SQL backup, the AFwebservice web service should be taken offline, to prevent clients from reporting data into the server during the upgrade. This is particularly important in a roll-back situation to prevent data loss from occurring.
Common Backup Tasks
Connect to the server hosting the NightWatchman Management Center database and using SQL Server Management Studio, take a full backup of the AgilityFrameworkReporting database.
Using a backup tool, backup the existing 1E software installation folder and all subfolders and files on all servers where NightWatchman Management Center and WakeUp Server have been installed.
If any custom reports have been developed for the existing version of the software (either by 1E or another party), copy the report files (with file extensions .rdlc and .rdlx to a temporary location. By default, these are located in C:\Program Files (x86)\1E\NightWatchman Management Center\ReportConsole\Source (or C:\Program Files (x86)\1E\AgilityFramework\AFConsole for previous versions).
If any stored procedures have been developed for the custom reports, these should be saved as .sql files and copied to the same temporary location. The stored procedures are referenced in the .rdlx files and can be saved as .sql files using SQL Server Management Studio. If a previous version of NightWatchman Management Center is installed, copy any modified or customized import scripts and input files to a temporary location.
Note
Import scripts are used to create the organization and location structures within the NightWatchman Console and automatically assign computers to the appropriate level in the structure based on subnets, Active Directory Sites or Active Directory Organizational Units
By default these are located on the NightWatchman server in C:\Program Files (x86)\1E\NightWatchman Management Center\ConsoleService\ImportScripts and have the file extensions .vbs and .csv
If any customization has taken place with the NightWatchman agent scripts, this configuration should be backed up in order that it can be re-applied after upgrade. Examples are:
Custom or modified NightWatchman shutdown scripts (default installation path on the agents is
C:\Program Files\1E\NightWatchman\Scripts).Custom scripts to control NightWatchman processing e.g.
prerun.vbs, runalways.vbs
Note
The default installation directory for the scripts in 7.3 is C:\Program Files (x86)\1E\NightWatchman\Scripts
Enabling Online Status using Tachyon integration
NightWatchman's online status feature requires a Tachyon Platform system. With a Tachyon Platform server and 1E Clients installed, you can integrate Tachyon with NightWatchman to show the online status of NightWatchman clients.
Note
In this version of NightWatchman, the only Tachyon integration feature is Online Status, which allows NightWatchman to contact Tachyon to obtain online status of clients.
Nomad - Integrating Nomad with WakeUp is a separate feature, that integrates Nomad Content Distribution with WakeUp. Nomad Content Distribution is a Tachyon Platform app, and WakeUp requires NightWatchman Enterprise. Content Distribution contacts NightWatchman, to request device wakeups.
Note
Macintosh clients will not display online status using this feature, even if the 1E Client is installed on them.
Understanding Tachyon...
Tachyon uses a very secure, highly scalable, and extensible client-server architecture supporting a wide variety of operating systems and device types. A web interface allows authorized users to query all clients in your organization and get responses almost immediately. Users can also make immediate changes. Tachyon is especially valuable for addressing immediate concerns, such as newly discovered security vulnerabilities or to correct accidental misconfigurations. Despite its power and responsiveness, it is engineered to not overwhelm your network, clients or servers.
Questions and actions are collectively known as instructions. Instructions are grouped together into product packs that can be imported individually to extend the Tachyon features as these are made available. Tachyon comes with a host of pre-framed questions and actions in the form of product packs, providing extensive out-of-the-box capabilities that can be extended as new and updated product packs are made available. You can also readily create your own instructions.
Instructions are also organized into tasks that you will find related to the kinds of activities you and your peers typically do. Where appropriate, instructions can be managed through an approval workflow so that changes are only made as authorized. Data collected in response to Tachyon instructions are not intended to be stored long term but they can be exported. Audit logging provides longer-term accountability.
Please refer to Tachyon Platform - Introducing Tachyon Platform for an overview of Tachyon; what it does and how it can benefit your organization.
Integrating Tachyon with NightWatchman Enterprise
In Tachyon
You need a Tachyon user with Full Administrator role permissions.
Your Tachyon license must have NightWatchman registered as a consumer. The steps below confirm the license details, and manually registers and enables NightWatchman as a consumer in Tachyon.
The process below assumes you have already created the service account for your NightWatchman Management Center Console service in your AD.
Login to the Tachyon Portal.
Navigate to Settings → License Information.
Scroll down to Products.
Confirm that NightWatchman is listed as a Consumer under one of the Feature items.
If it is not, then please contact your 1E Account Team to have it added to your Tachyon license, and then follow the steps on Tachyon Platform - License information page: Reactivating licenses.
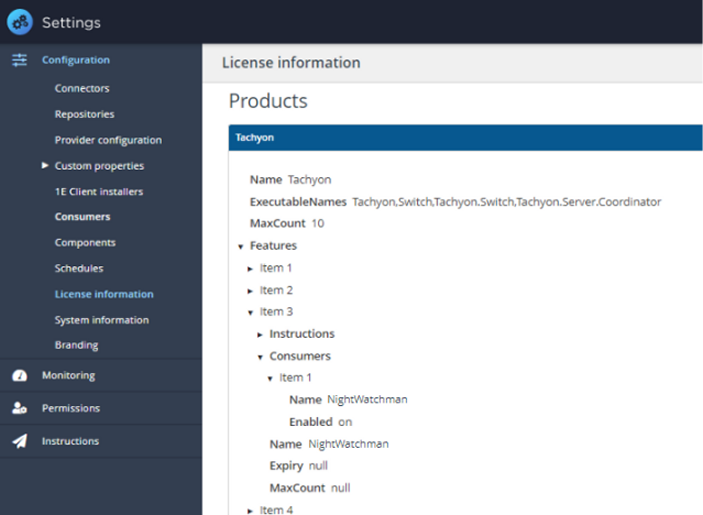
Navigate to Settings → Consumers.
Confirm that NightWatchman is listed as a Consumer, and it is Licensed and Enabled.
If it is not listed, then click Add to add a new consumer
If it is listed but not enabled, select and click Edit and check Enabled
If it is listed but not licensed, then review your License Information as described above.
In the Add / Edit consumer dialog, enter:
NightWatchman as the Name
100 as the Maximum simultaneous instructions
Check Use Windows Authentication
Check Enabled.
Click Add (or Save if editing).

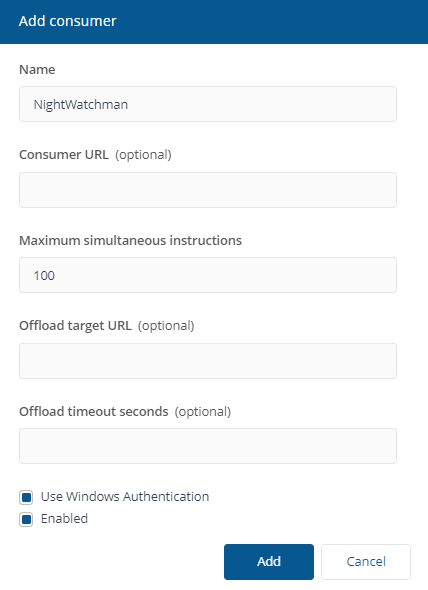
Navigate to Settings → Permissions → Users and Groups.
Click Add to add a new user.
Uncheck Security group.
Enter the name of the NightWatchman Management Center Console service account, and click the search icon.
Select the service account, and click Add.
In the list of users, ensure the service account is listed as Activated.
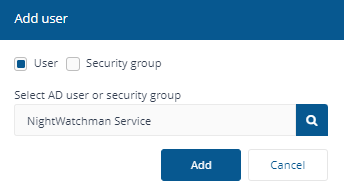
Navigate to Settings → Permissions → Assignments.
In the Assignments page, click on the All Instructions Viewer role.
Click the + button to add a new assignment.
In the Users and Groups column, search for the NightWatchman Management Center Console service account that you added earlier, and select it.
In the Management Groups column, select All Devices.
Click Save.
Note
The Online Status feature does not run any instructions or read responses, it simply requires a Tachyon user that has permissions on at least one Instruction Set, and must be assigned to the All Devices management group.
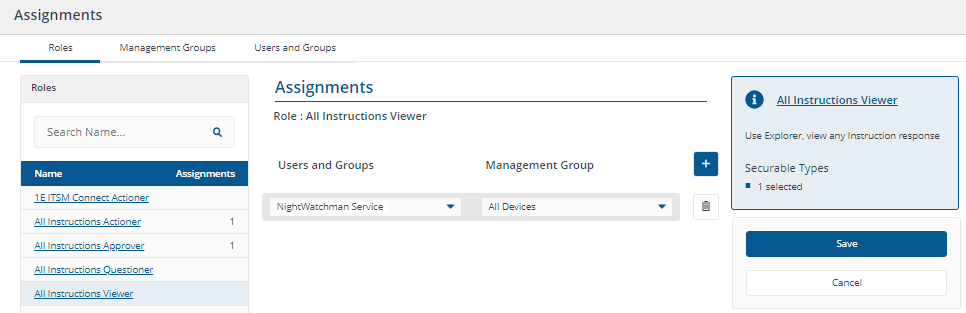
In NightWatchman
You need Administrator rights on the server that hosts the NightWatchman Management Center Console service.
Using Notepad or a similar text editor:
Browse to the
C:\Program Files (x86)\1E\NightWatchman Management Center\ConsoleServicefolder (This is the default path, yours may vary based on the install location of the Nightwatchman Management Center.)Open NWM.ServiceHost.exe.config
Search for
TachyonIntegrationEnabledand update its value to true:<add key="TachyonIntegrationEnabled"value="true"/>Change the
TachyonAPIvalue to the Tachyon server URL that you defined earlier:<add key="TachyonApiRoot"value="https://tachyon.acme.local/consumer"/>
Using Services control panel (
services.msc), restart the NightWatchman service.Open the NightWatchman console:
Select the Clients node.
Drill down to one of the lowest clients group.
The traffic light for each client should be red, yellow, gray, or green.
If you have any difficulties with the above, see the Tachyon integration troubleshooting page or the Tachyon documentation.
Verification
The NightWatchman console uses Tachyon to display traffic lights live status of its clients – indicating whether they are currently online or offline (or unknown). You can also check the status of groups within the NightWatchman client hierarchy.
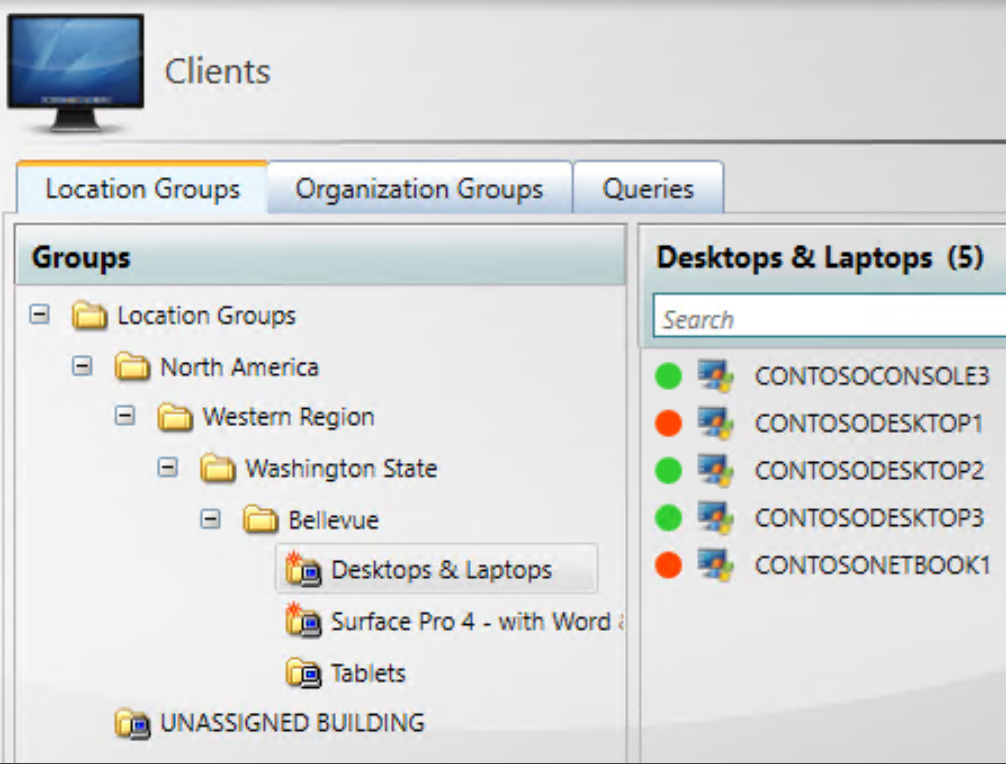
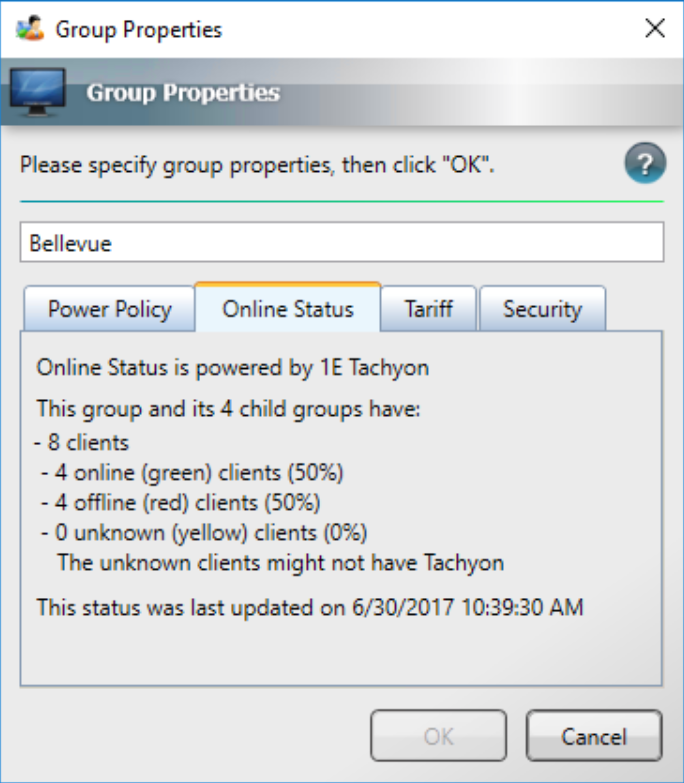
The statuses are:
Green – online
Red – offline
Yellow – computer is not a Tachyon client
Gray – Tachyon integration is not enabled.
Thanks to Tachyon's ability to deliver near real-time client data, it can be particularly valuable to you when you are using WakeUp to wake clients for urgent maintenance, such as deploying a solution to a zero-day vulnerability.
You can also use Tachyon to optimize NightWatchman by using Tachyon Explorer to return live status on clients to check for:
NightWatchman or WakeUp client logs which might indicate an issue
Clients with pending reboots that have become pending in just the last few hours
Clients that don't have appropriate wake-on-LAN settings.
Troubleshooting permissions
View the NWM.ServiceHost.exe.log on the NightWatchman server.
Customizing the integration
NightWatchman's Tachyon integration is designed to be highly reactive and scalable. However, depending on the size or your organization and the capabilities of your server, you might like to increase or decrease Tachyon's responsiveness. In particular:
GroupHierarchyMaxComputersInList– the number of clients (default 1,000) listed in the console when you click a lowest-level group in the client location or organizational hierarchiesGroupHierarchyMaxComputersInProperties– the number of clients (default 1,000) Tachyon online/offline status is returned for when you check the properties of a group in the client location or organizational hierarchies. A larger value is appropriate if the groups are large but more queries will be done on the Tachyon databaseMaxClientsForGetDevicesMatchingScopeTachyonCall– the number of clients (default 250) NightWatchman passes to Tachyon on each call to check online/offline status. Calls are made as quickly as Tachyon can respond.TachyonIntegrationClientStatusCacheExpirySeconds – how long NightWatchman will retain Tachyon client status before it returns to Tachyon for updated status (default 30). A larger value reduces the SQL queries to Tachyon but a smaller value ensures the NightWatchman console reflects the current status sooner. A small value is especially desirable for demonstrations
You can review and change those values using SQL Server Management Studio:
Connect Object Explorer to the server.
Open Databases → AgilityFrameworkReporting → Tables.
Right-click the
tbNWM_Dimension_GlobalSettingstable.Click Edit Top 200 Rows.
Modify the values as necessary.
Using the Services control panel icon (
services.msc), restart the NightWatchman Console service.
By default, the Tachyon client will wait up to 15 seconds after a computer resumes from standby. During that period, Tachyon will indicate the computer is offline although it's actually online. This delay ensures that Windows has time to reestablish network connectivity. If this is a concern and you find that your computers reestablish network connectivity faster, you can reduce this delay:
Edit the 1EClient.conf file on the client(s) in C:\Program Files\1E\Client
Add a line such as "FastReconnectTimeInSeconds=10" (supported values are 5 to 60 seconds)
Restart the 1E Client service