Using the core components
NightWatchman Enterprise provides centralized computer power management and reporting which enables you to understand and control computer energy usage throughout your entire organization. It is made up of several components that work together to provide network-wide control of power policies. These features and more are described in greater detail in the following sections.
Using WakeUp with ConfigMgr
NightWatchman's WakeUp feature can be integrated with Microsoft System Center Configuration Manager (ConfigMgr, or SCCM), please refer to How NightWatchman Enterprise works: Integrating WakeUp with Configuration Manager to find out more.
When WakeUp is integrated with ConfigMgr, you can use WakeUp to maximize the number of clients available for ConfigMgr deployments of:
Packages
Applications
Software updates
Operating systems and task sequences.
In addition, ConfigMgr console administrators can wake individual computers or collections of computers.
From NightWatchman 7.3, WakeUp can also be used with:
Phased deployments
ConfigMgr maintenance windows.
Using WakeUp with ConfigMgr Features
Packages
In ConfigMgr you can edit both existing and new Applications in the Application Management folder of the Software Library workspace.
Existing deployments:
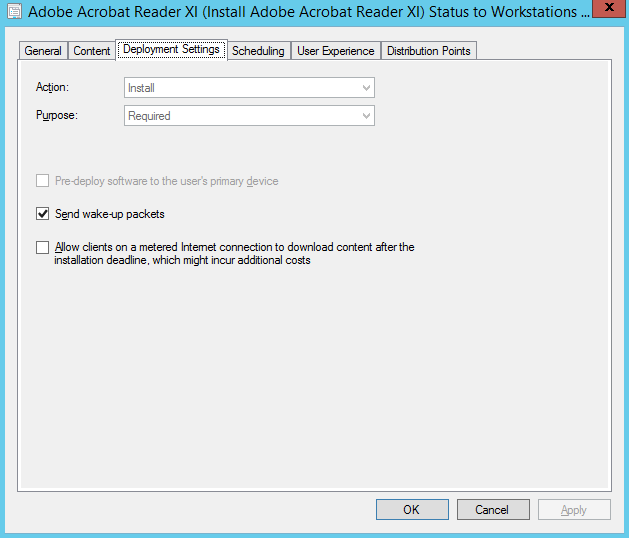
Right-click the package's Deployments properties
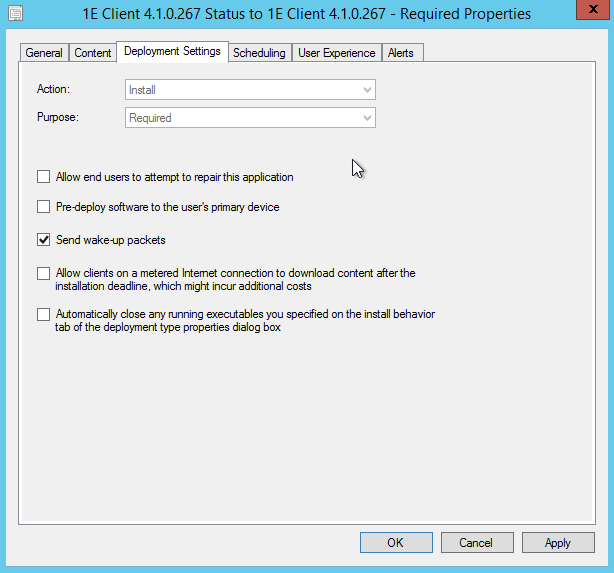
In the displayed dialog box, on the Deployment Settings tab, ensure you check Send wake-up packets.
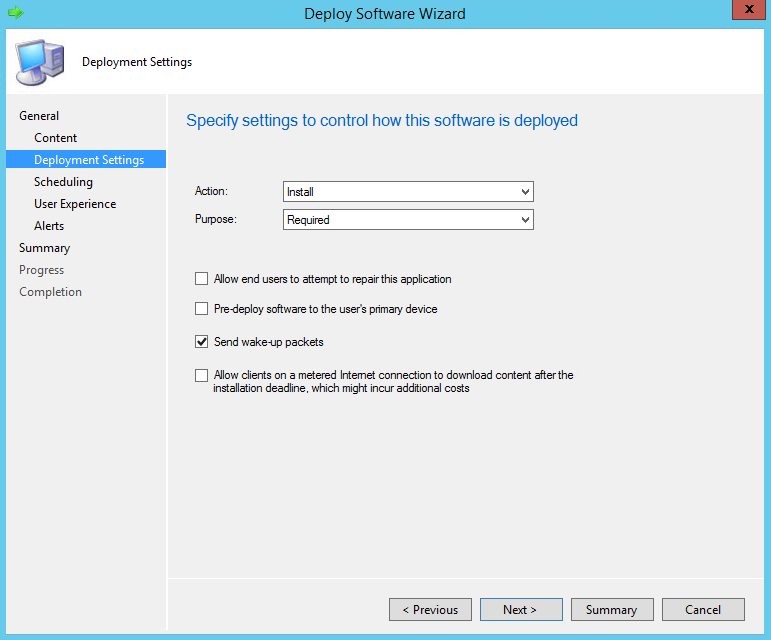
New deployments:
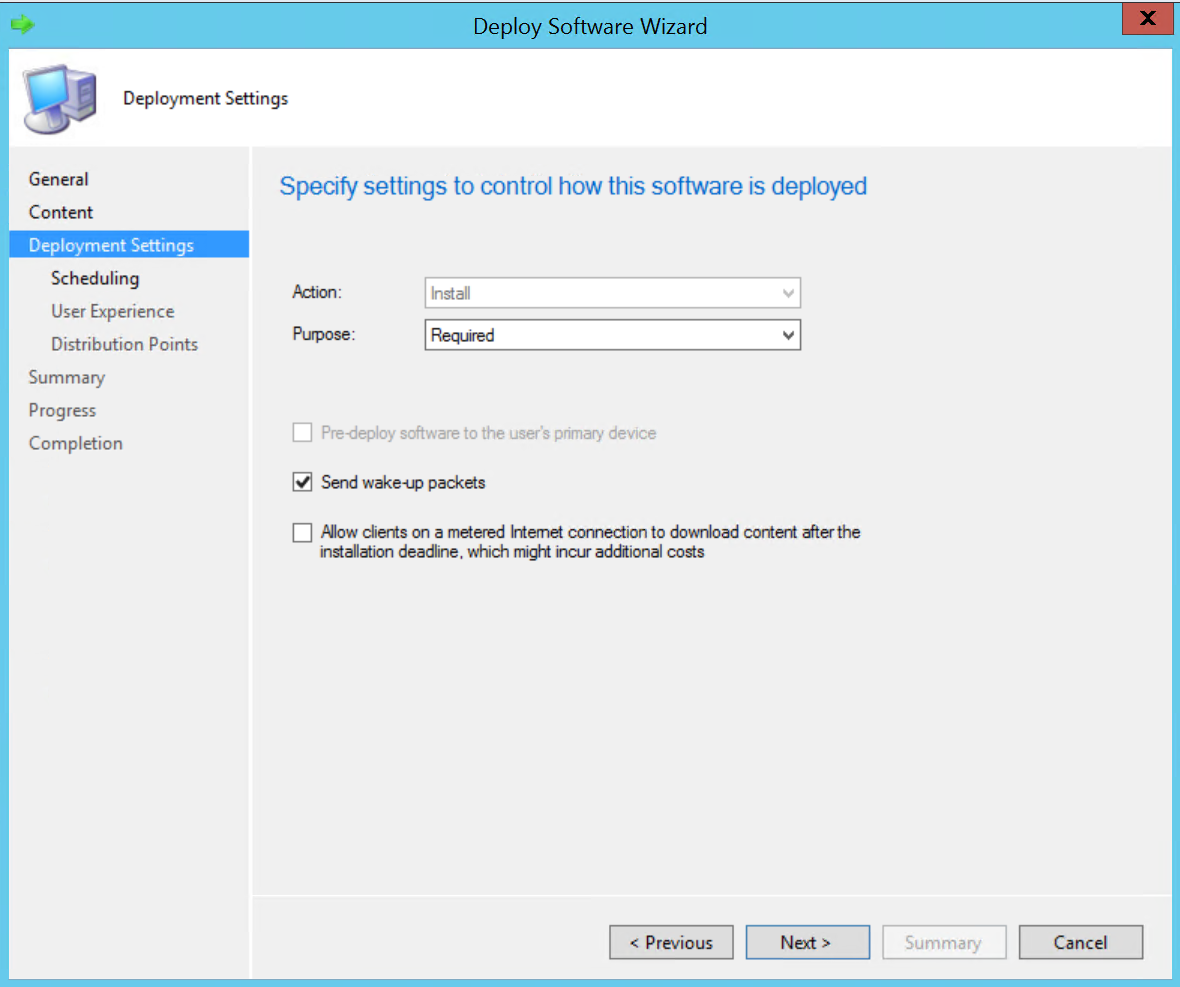
Using the Deploy Software Wizard, ensure you check Send wake-up packets on the Deployment Settings tab.
Applications
In ConfigMgr you can edit both existing and new Applications in the Application Management folder of the Software Library workspace.
Existing deployments:
Right-click the Application's Deployments properties
In the displayed dialog box, on the Deployment Settings tab, ensure you check Send wake-up packets.
New deployments
When using the Deploy Software Wizard, ensure Send wake-up packets is checked on the Deployment Settings tab.
Note
The WakeUp option is only displayed in the dialog boxes for Required applications. It is not displayed for Available applications.
Software Updates
In ConfigMgr you can edit software updates in the Software Updates folder of the Software Library workspace.
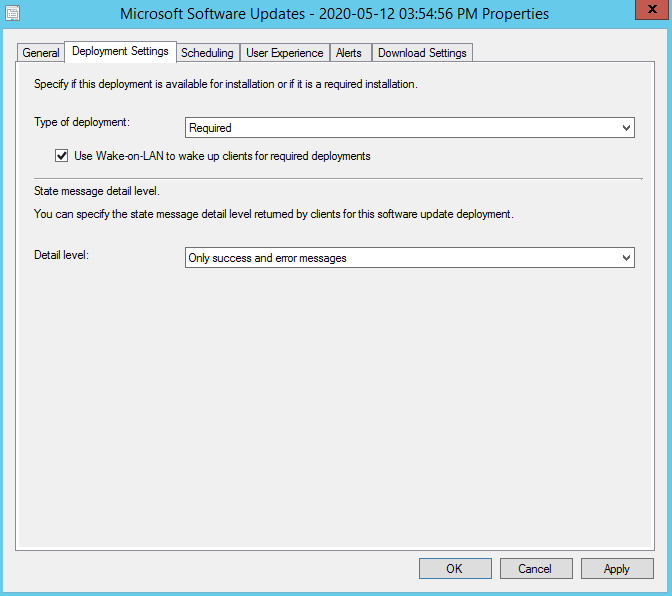
For an existing software update deployment:
Right-click the software update's Deployments properties
In the displayed dialog box, on the Deployment Settings tab, ensure you check Use Wake-on-LAN to wake up clients for required deployments.
Operating Systems and Task Sequences
In ConfigMgr you can edit task sequences in the Operating Systems folder of the Software Library workspace.
For an existing deployment:
Right-click the relevant collection's Deployments properties
In the displayed dialog box, on the Deployment Settings tab, ensure you check Send wake-up packets.

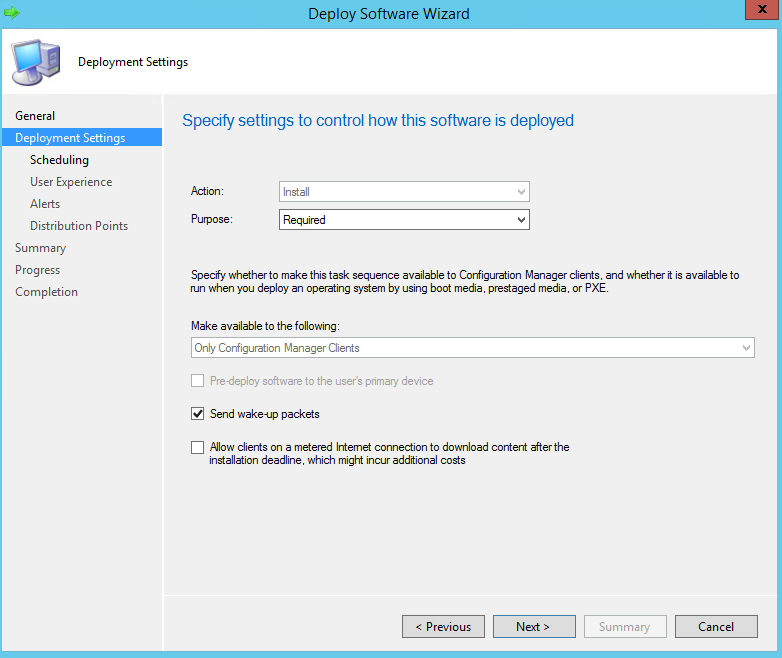
New deployments
When using the Deploy Software Wizard, ensure Send wake-up packets is checked on the Deployment Settings tab.
Note
The WakeUp option is only displayed in the dialog boxes for Required applications. It is not displayed for Available applications.
Phased Deployments
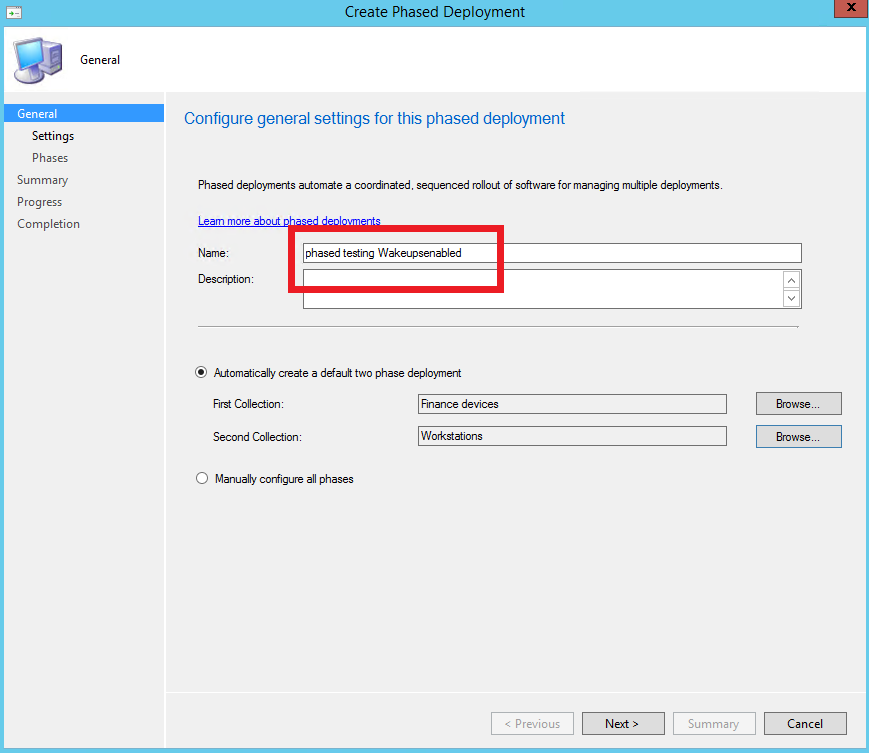
ConfigMgr Wake-on-LAN methods do not support phased deployments, so there is no Send wake-up packets option for them.
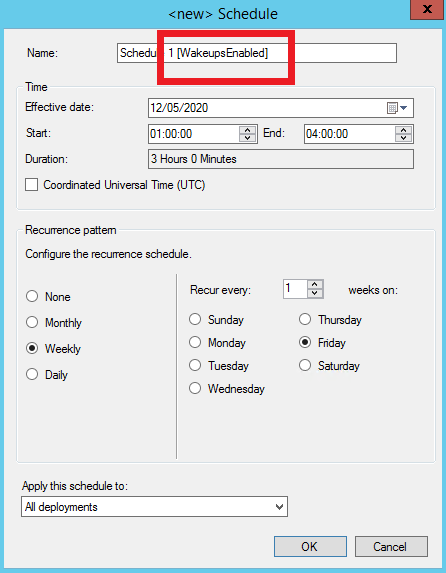
However, you can still use WakeUp with phased deployments by adding WakeupsEnabled to the name or description of the deployment. The spelling is important but not the case.
For multi-phase deployments (manually configured), you must include WakeupsEnabled in the name or description of each of the manually configured phases.
With wakeups enabled, WakeUp will send wake-on-LAN packets to client computers targeted by each phase when the phase becomes active.
Maintenance Windows
A ConfigMgr Maintenance Window can trigger WakeUp to send wakeups by including WakeupsEnabled in the Maintenance Window name.
The wakeups are sent for clients included in the collection the Maintenance Window applies to.
Note
In ConfigMgr you can create, edit and delete Maintenance Windows for Device Collections in the Assets and Compliance workspace.
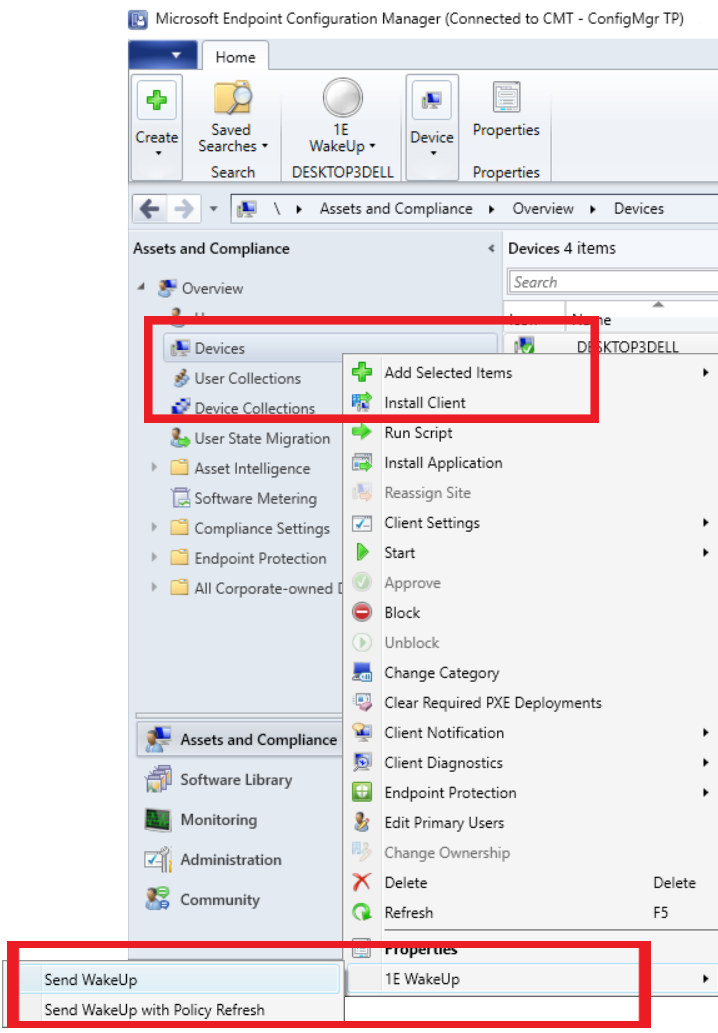
Devices
You can set an action to wake a computer with or without a policy refresh by right clicking the device and from the displayed menu choosing 1E WakeUp and either Send WakeUp or Send WakeUp with Policy Refresh.
The same functionality is available in the ribbon at the top of the console.
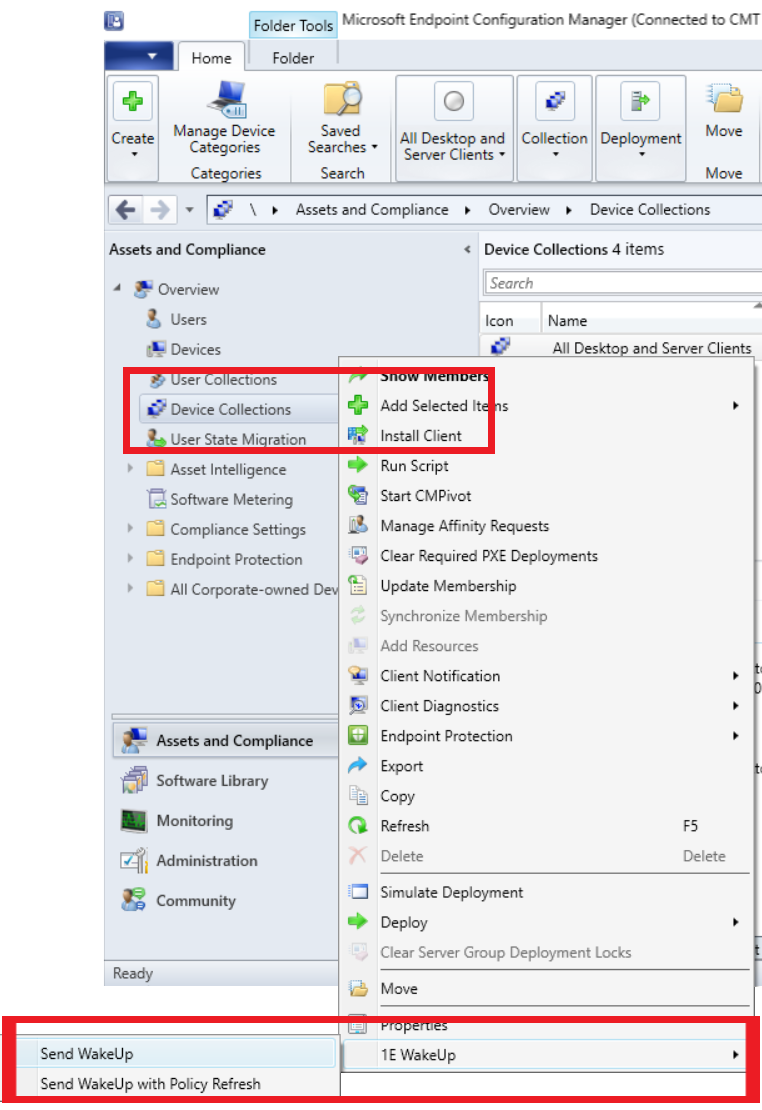
Collections
You can set an action to wake a computer with or without a policy refresh by right clicking a collection and from the displayed menu choosing 1E WakeUp and either Send WakeUp or Send WakeUp with Policy Refresh.
The same functionality is available in the ribbon at the top of the console.
Web WakeUp
Using a browser to connect to Web WakeUp for the first time
Web WakeUp enables specific computers to be woken up from a website. It is primarily aimed at the user who needs to access their work computer from a remote location. Web WakeUp integrates with NightWatchman Enterprise to provide computer search and status capabilities. This means that the computers can be turned off when not in use with NightWatchman, thereby saving power, and can be woken up whenever they are needed by the user wherever they are. Web WakeUp has an API that enables its wake up functionality to be used by 3rd party applications.
To access Web WakeUp, browse to the Web service at: http://<servername>/WebWakeUp/Default.aspx, where <servername> is the server where the Web WakeUp API is installed.
The Web WakeUp ActiveX control(WebWakeUpActiveX.msi) is supplied in a stand-alone installer. This means that the control can be rolled out across a network without requiring user intervention the first time they visit the Web WakeUp site.
There is a single installer property that controls whether the ActiveX control appears on the pre-approved list which allows it to be enabled in Internet Explorer without user intervention. To run this in unattended mode with pre approval, use: Msiexec /i WebWakeUpActiveX.msi PREAPPROVED=1 /qb
Property | Default value | Description |
|---|---|---|
PREAPPROVED | 1 | Enable or disable addition to the pre-approved list without user intervention when browsing the site
|
If the Web WakeUp ActiveX control has not been previously installed by the network administrator, the first time you browse to the web service, you will be prompted to install the Web WakeUp software. Installing the ActiveX control enables Web WakeUp to confirm the name of the local computer, specifically for the purpose of registering the computer as the default wake up.
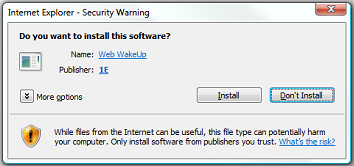
If you choose not to install the ActiveX control, Web WakeUp attempts to use reverse DNS lookup in order to derive the local computer name. The accuracy of this operation is dependent on DNS being correctly configured and up-to-date and may affect Web WakeUp's ability to wake the computer at a later date.
You can use reverse DNS lookup instead of the Web WakeUp ActiveX control by changing a setting as described in Web WakeUp server configuration: ActiveX usage.
Either the Web WakeUp ActiveX control or reverse DNS lookup is required by the Register page (tab). If neither method is available to you then you can choose to remove this page from the website, as decribed in Web WakeUp server configuration: website control.
The Web WakeUp home page
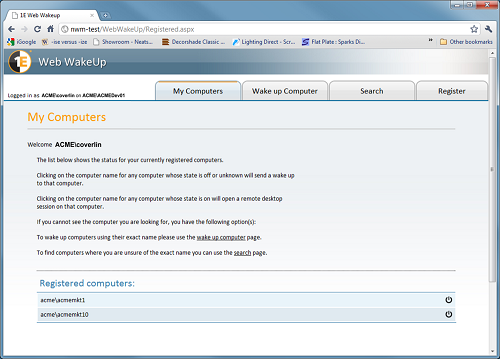
When you browse to the Web WakeUp home page for the first time, you can:
Register a computer for wake-up
Wake-up a registered computer
Search for the computer to wake-up
You can register up to 20 computers to wake-up. Registration adds the computer to the list of registered computers in the My Computers tab.
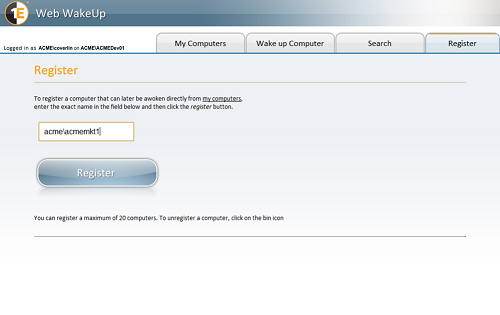
To register a computer for wake-up:
Click the Register tab.
Enter the name of the computer.
Click Register.
Once the computer is registered, it is displayed at the bottom of the page.
To de-register a computer, click the trash icon to the right of its entry in list – it is removed immediately.
Waking-up registered computers
Once a computer has been registered for wake-up, the next time you browse My Computers, its current status is displayed on the page – the name and current status is displayed on the right and its status is shown on the icon on the left.
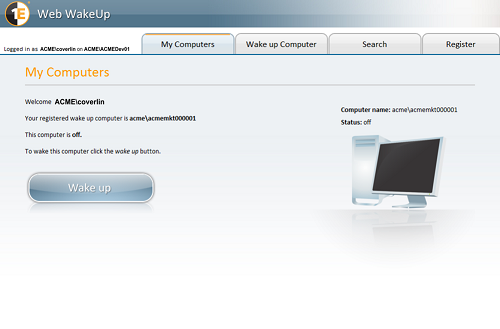
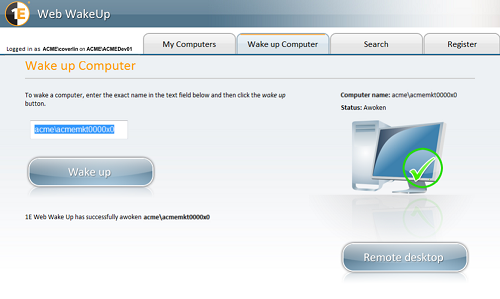
You can wake a registered computer from either the off or unknown states – clicking Wake up initiates a wake-up. The wake-up signal is sent to the computer and Web WakeUp periodically checks to see if it is awake. These checks are done over a fixed period; if the computer has not responded before the period finishes, its status is set to unknown. When a registered computer has been woken-up or is already awake, you can remote to it by clicking its name from the list of computers.
 |
Waking a computer by name
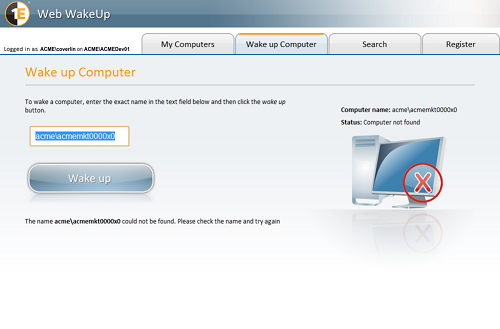
If you want to wake-up a computer that is not on your registered list, you can do this as long as you know the exact name of the computer or its domain name.
To wake-up an unregistered computer:
Enter the name for the computer in the text box. Alternatively, use the search feature to look for a computer to wake up.
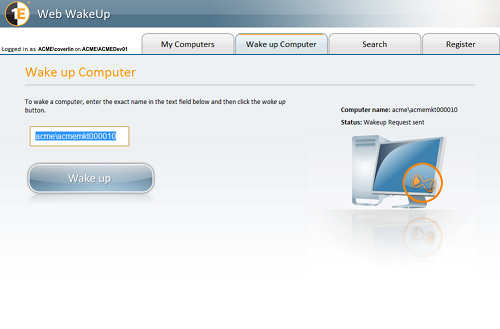
Click Wake up.
If you entered an incorrect computer name, you will be prompted to update the name and the status icon changes to reflect the error.
If the wake-up is successful, the status icon changes to reflect it.
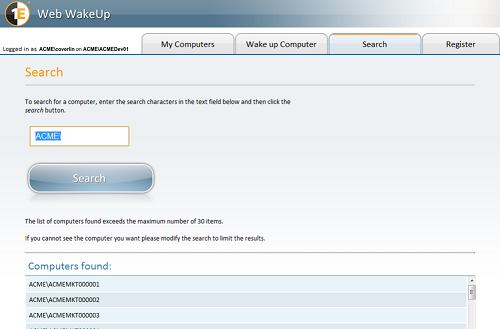
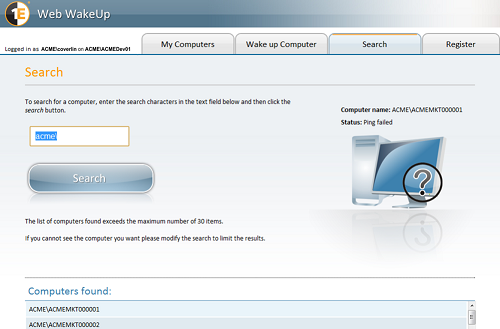
Searching for computers to wake-up
You can search for a computer to wake-up if you are unsure of its name. The search text does not allow the use of wildcards but it does allow a single search string to be used that will match against the domain and computer name fields separately. The rules that govern the search are:
Searches are not case sensitive
The backslash (\) separates the domain name search string from the computer name search string. If you omit the backslash, the search looks for the computer name only. The format of the search string is
DomainSearch\MachineSearch.Empty search strings return all entries
Note
The description is slightly different when Web WakeUp is running in authorised mode where the search only returns computers you are authorized to view.
The search matches the string against characters in the relevant field. If you were looking for XP, it will return computers whose netBIOS names contain the letters XP in that order – XP01034, Experiece1, vaxpac89, etc. Searching for domains is done by adding the domain at the start followed by a backslash. If you were looking for M\1, it will return all computers in domains that contain the letter M and the computers in those domain that contains the number 1.
If you want to return all computers in all the domains, leave the search string empty. However, the search is limited to displaying only 30 rows and the results are not paged. So if the computer is not listed, you need to refine your search. Your Web WakUp administrator can increase the number of rows returned by setting MaxMachines in the NWM,ServiceHost.exe file to the maximum 500 but this is likely to impact page loading time is a general search is run on a large network.
When you run a search, computers whose names match the search string are displayed in the Computers found: list.
To wake a computer from the search results, click the name of the computer. A timer starts to indicate that the wake-up is taking place.
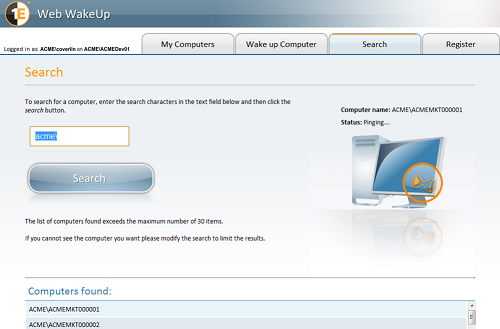
When it counts down to 0, the wake-up times out and the status icon changes – a timeout does not necessarily mean that there is an error as the computer may just have been slow in starting up. If a timeout occurs, try again after a reasonable time. If it still fails to wake-up after repeated tries, contact you network administrator to see if there is an issue with the computer or network.
Status icons
Icon are used to identity the status of registered computers and the action you can take.
Icon | Explanation | |
|---|---|---|
 | The computer is awake. | |
 | The computer is not wake. Click the icon to initiate a wake-up. | |
| A wake-up is taking place. | |
 | A timeout occurred when you tried to wake-up the computer and Web WakeUp is unable to determine its state. Try again after a reasonable time. | |
 | You entered an incorrect computer name. Try again. | |
 | There is an issue communicating with the computer due to a network issue or with the WakeUp server. Contact your network administrator to resolve the issue. |

These icons, displayed in the registered computers list under the My Computers tab, show their respective status:
Icon | Explanation |
|---|---|
 | The computer is awake. Click the name of the computer in the list to start a remote session with it. |
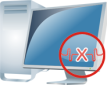
 | The computer is not awake. Click the icon to initiate a wake-up. |
 | A timeout occurred when you tried to wake-up the computer and Web WakeUp is unable to determine its state. Try again after a reasonable time. |
 | You entered an incorrect computer name. Try again. |
 | There is an issue communication with the computer due to a network issue or with the WakeUp server. Contact your network administrator to resolve the issue. |
Reporting
NightWatchman Management Center provides a number of reports on power consumption across your network. To view the reports, navigate to the NightWatchman Management Center Report Console at: http://<ReportWebsite>/ReportConsole where <ReportWebsite> is the name of the server where the it is installed.
 |
If the website is installed locally, use local host instead its server name.
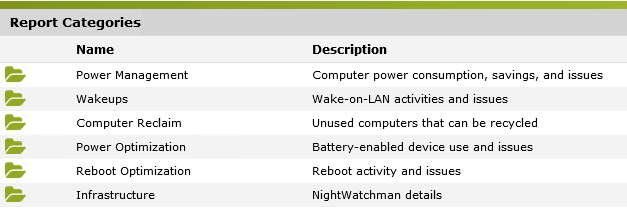
Nightwatchman reports are categorised as follows:
Power Management | |||
Type | Category | Reports | |
|---|---|---|---|
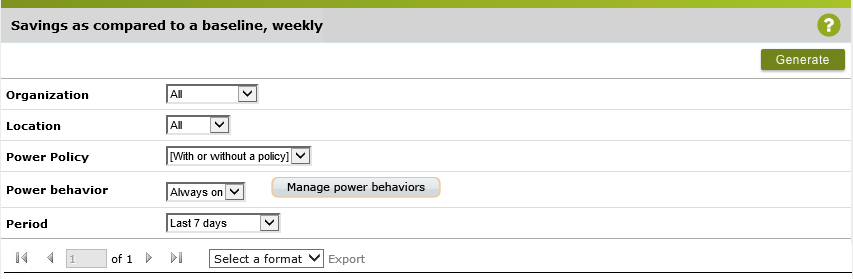
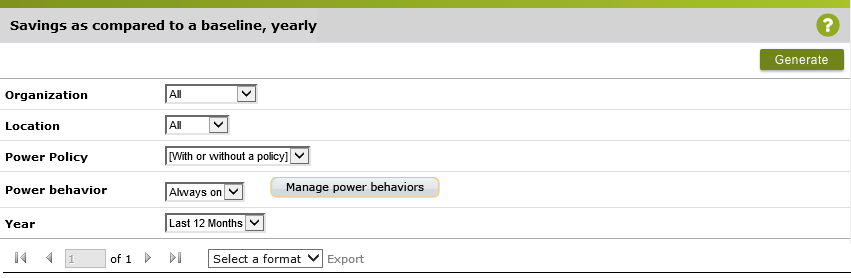
Savings | As compared to a baseline | Weekly – a before and after comparison of your savings in a weekly format
| |
Yearly – a before and after comparison of your savings in an annual format.
| |||
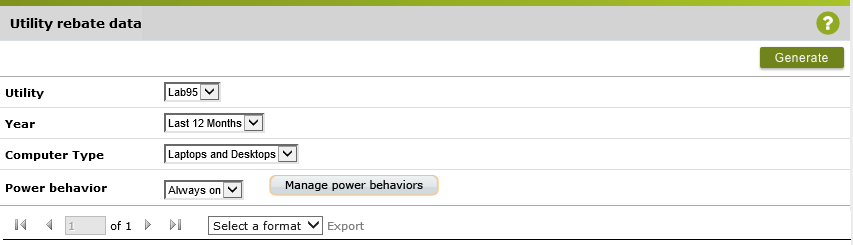
Utility rebate data – a before and after comparison of your savings to submit to your utility provider to claim rebates
| |||
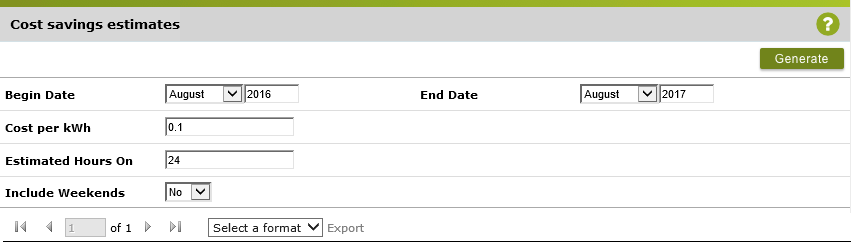
Estimates | Cost savings – an estimate of your cost savings without a baseline comparison.
| ||
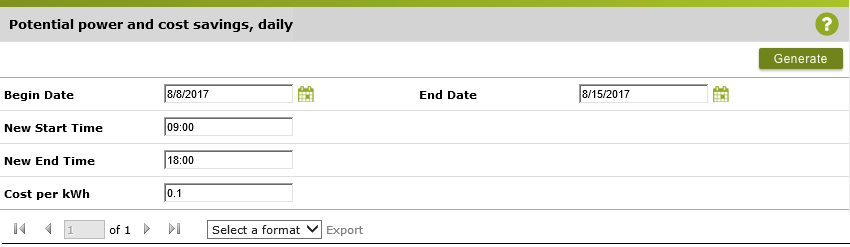
Potential power and cost savings, daily – a what-if analysis displaying your potential savings on a daily basis if you used a power management policy.
| |||
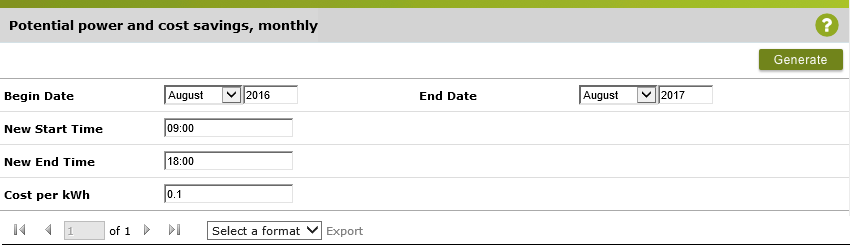
Potential power and cost savings, monthly – a what-if analysis displaying your potential savings on a monthly basis if you used a power management policy.
| |||
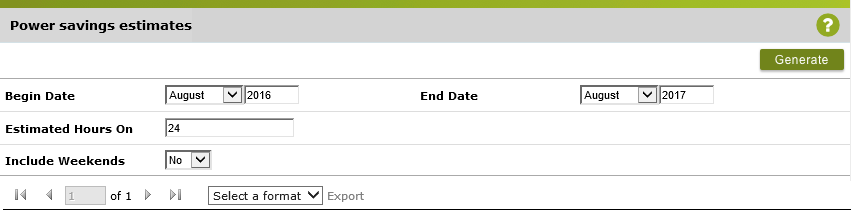
Power savings – your estimated power savings.
| |||
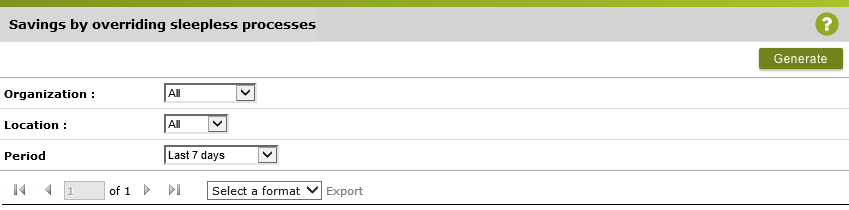
Others | Savings by overriding sleepless processes.
| ||
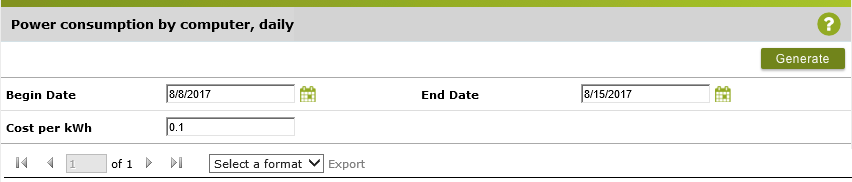
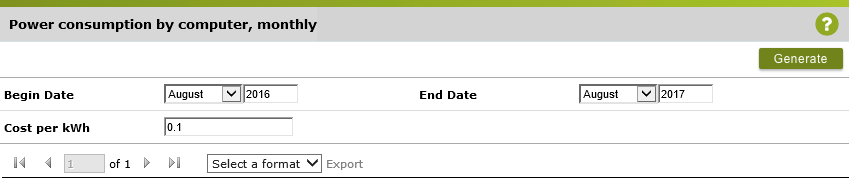
Consumption | By computer, grouped by organizational groups | Daily – daily power consumption for devices within an organization group.
| |
Monthly – monthly power consumption for devices within an organisation group.
| |||
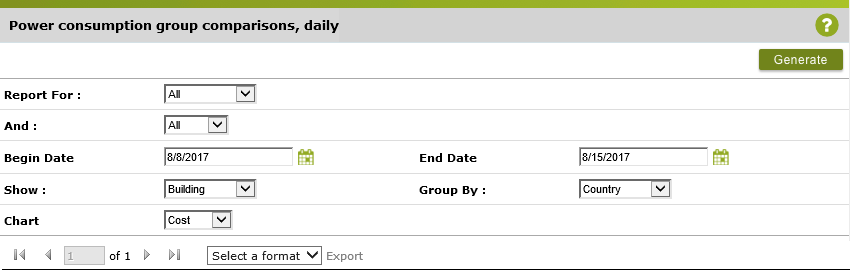
Group comparisons | Daily – group power consumption in a daily format.
| ||
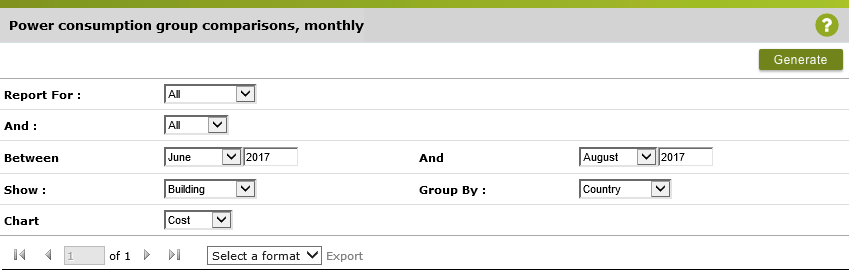
Monthly – group power consumption in a monthly format.
| |||
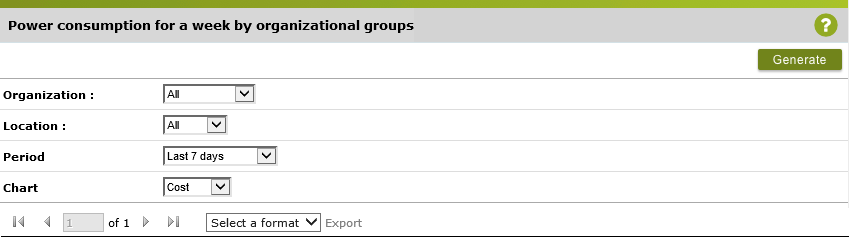
Over time | For locations, weekly – weekly power consumption in terms of kWh, costs and environmental impact by location.
| ||
For organizational groups, weekly – weekly power consumption in terms of kWh, costs and environmental impact by organization groups.
| |||
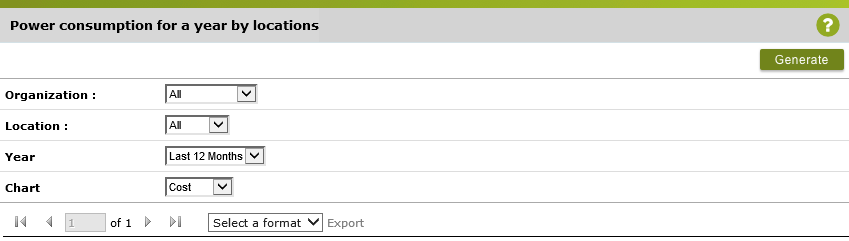
For locations, yearly (Report title: Power consumption for a year by location) – your annual power consumption in terms of kWh, costs and environmental impact by location.
| |||
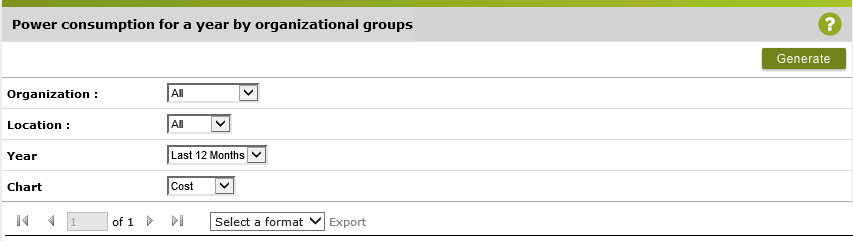
For organisational groups, yearly – your annual power consumption in terms of kWh, costs and environmental impact by organization groups.
| |||
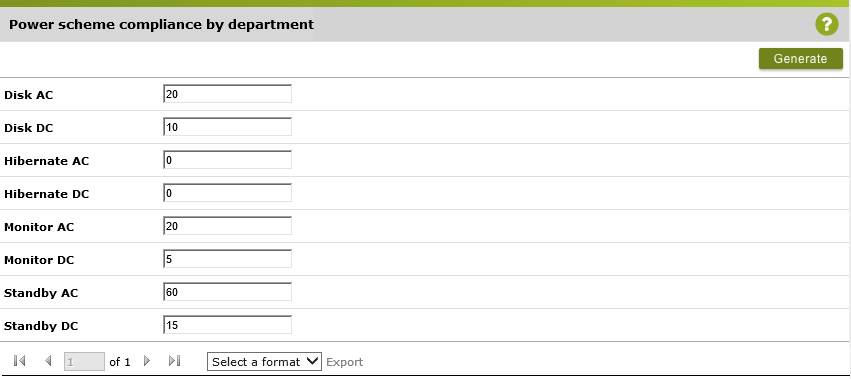
Power scheme compliance | Power scheme compliance by department – computers with power schemes by organization groups.
| ||
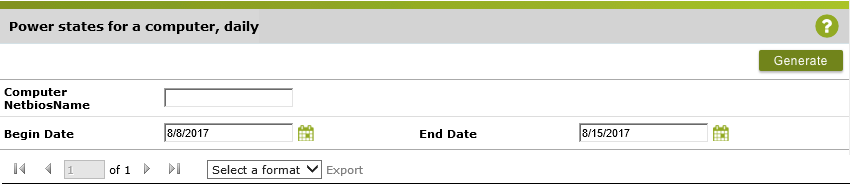
Power states | For an individual client, daily – power states for a particular device over a given period of time.
| ||
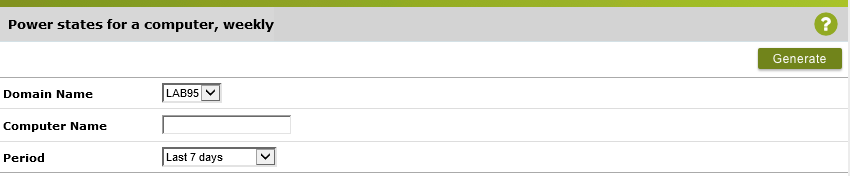
For an individual client, weekly – power states for a particular device over a particular week.
| |||
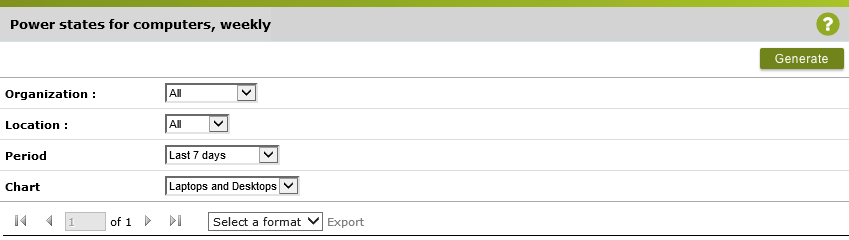
For selected computers, weekly – the proportion of power states (on, off, standby, etc) on a daily basis over the duration of a week.
| |||
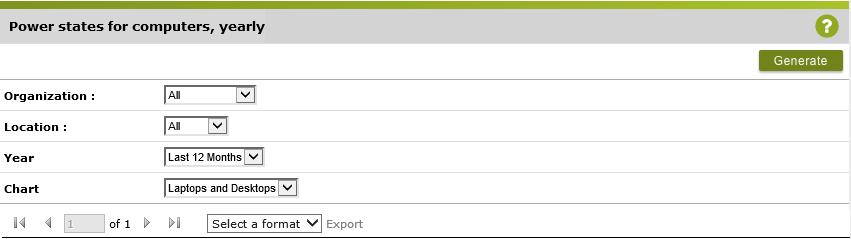
For selected computers, yearly – the proportion of power states (on, off, standby, etc) on a weekly basis over the duration of a year.
| |||
Sleepless clients | Problematic input devices – devices that are not able to enter sleep mode due to keyboard or mouse issues.
| ||
Busy and sleepless processes – devices that are not able to enter sleep mode due to process issues.
| |||
Shutdowns | Successful – devices that were successfully shutdown.
| ||
Uncompleted – devices that were unsuccessfully shutdown.
| |||
Wakeups | |||
Type | Category | Reports | |
Maintenance windows | Availability successes – wake-up activity successfully executed out for maintenance windows.
| ||
Diagnostics – wake-up activity that failed to execute for maintenance windows.
| |||
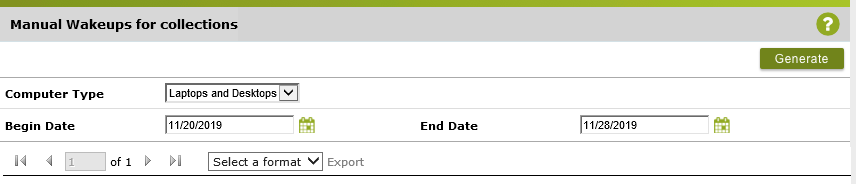
Manual wakeups | For clients – wake-up activites for individual computers aimed at Configuration Manager administrators.
| ||
For collections – wake-up activities for Configuration Manager collections aimed at Configuration Manager administrators.
| |||
WakeUp issues | Top 20 failing clients – the 20 WakeUp clients that are most commonly failing to wake.
| ||
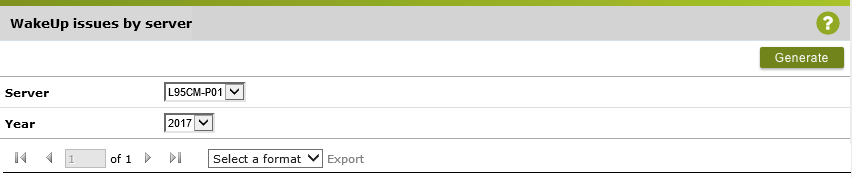
By servers – wake-up issues by WakeUp servers
| |||
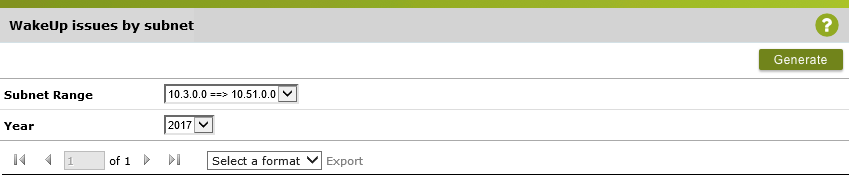
By subnet – wake-up issues by subnets.
| |||
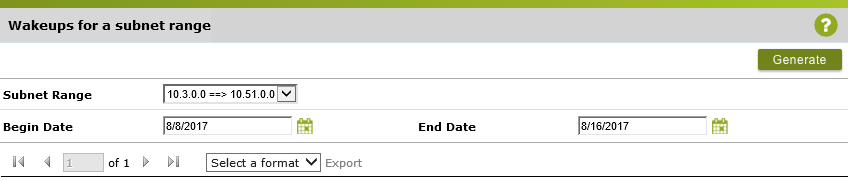
WakeUp summaries | For a subnet range – wake-up activities for a subnet range.
| ||
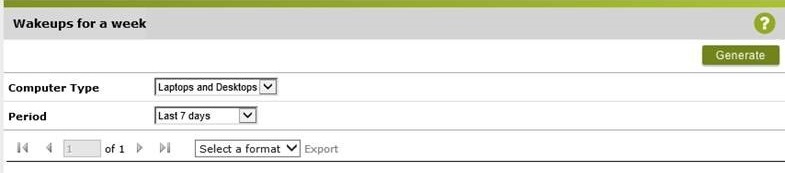
Weekly overview – wake-up activity for a week.
| |||
For Nomad deployments – wake-up activity for Nomad, a content distribution system.
| |||
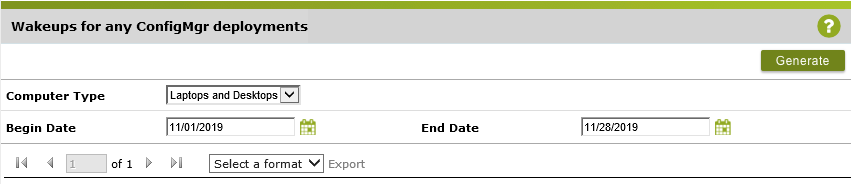
For ConfigMgr deployments – wake-up activity for ConfigMgr deployments.
| |||
For a server (Report title: Wakeups for a server) – activities on the WakeUp server.
| |||
Computer Reclaim | |||
Type | Category | Reports | |
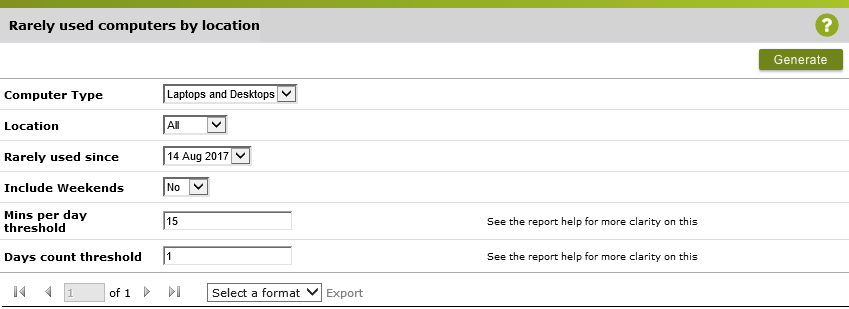
Rarely used computers by location
| |||
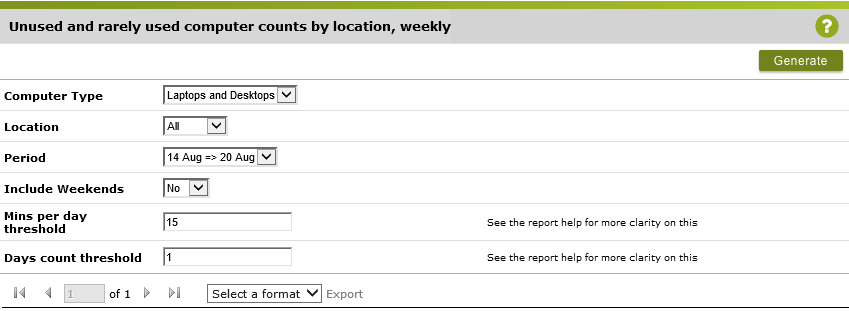
Unused and rarely used computer counts by location, weekly – number of unused computers by location and week that could be reclaimed for other uses
| |||
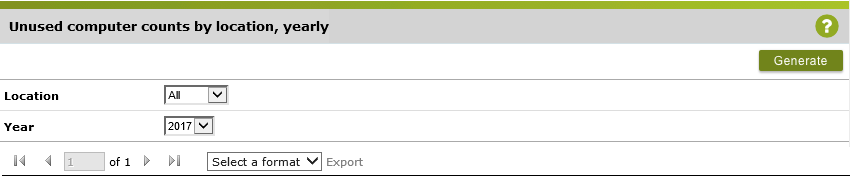
Unused computer counts by location, yearly – number of unused computers by location and month for a year
| |||
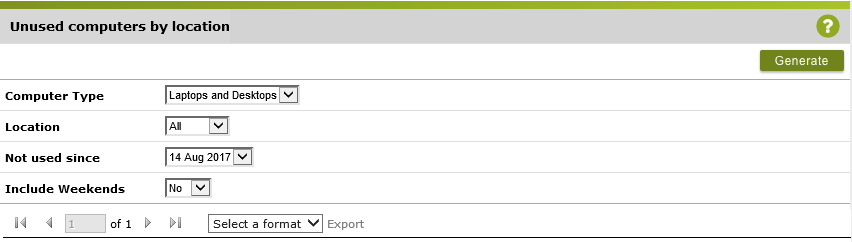
Unused computers by location – specific unused computers
| |||
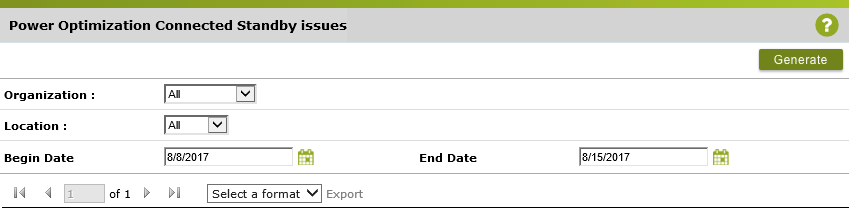
Power Optimization | |||
Type | Category | Reports | |
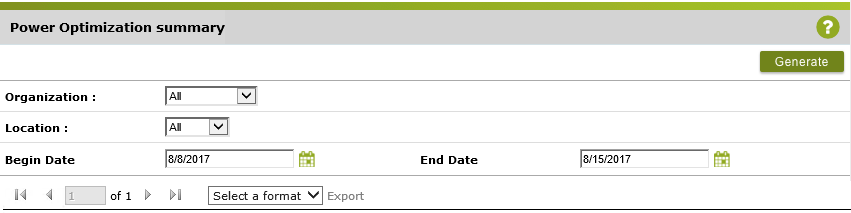
Summary – battery usage, modern devices that should be capable of smartphone-like behavior, and an overview of issues
| |||
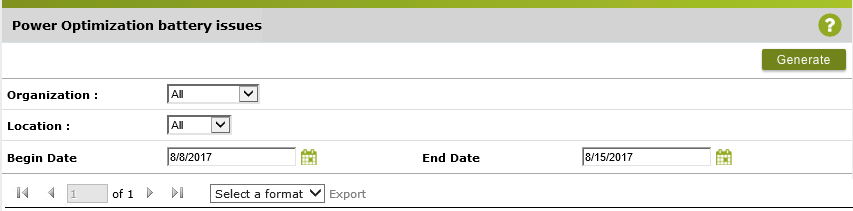
Issues | Batteries – details about computers that have batteries that are not performing well
| ||
Connected standby – details about computers that cannot receive instant messages, Skype calls, etc. while sleeping though they should be able to
| |||
Lowest power state – details about computers that do not go into a very low standby and thus have maximum battery life though they should
| |||
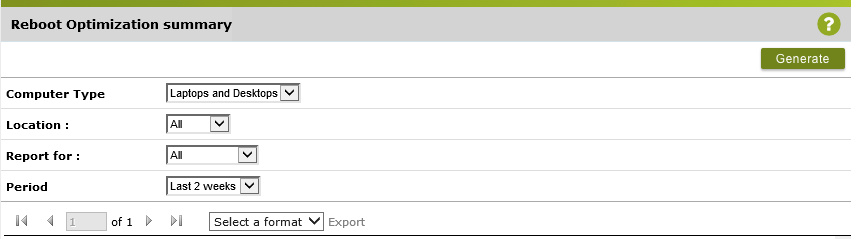
Reboot Optimisation | |||
Type | Category | Reports | |
Summary – summary for pending reboots that are preventing security patches from being effective, slow reboots, and unexpected reboots
| |||
Infrastructure | |||
Type | Category | Reports | |
Batch processing performance – list of NightWatchman batch processing details so that you can ensure there are no batch problems
| |||
Client versions – list of NightWatchman client versions so that you can ensure all clients are at the correct version
| |||


Enterprise View
Enterprise View is a web-based business intelligence dashboard that provides overviews of energy consumption and computer-related information from your network. You can customise the dashboard by choosing which tiles to display from a pre-defined list. It uses information already held in the reporting database to populate the tiles.
Accessing Enterprise View
To access Enterprise View, navigate to: http://<servername>/enterpriseview/ where <servername> is the name of the server where the Enterprise View software is installed.
Enterprise View requires Microsoft Silverlight – if it is not already installed, you will be prompted to do so.
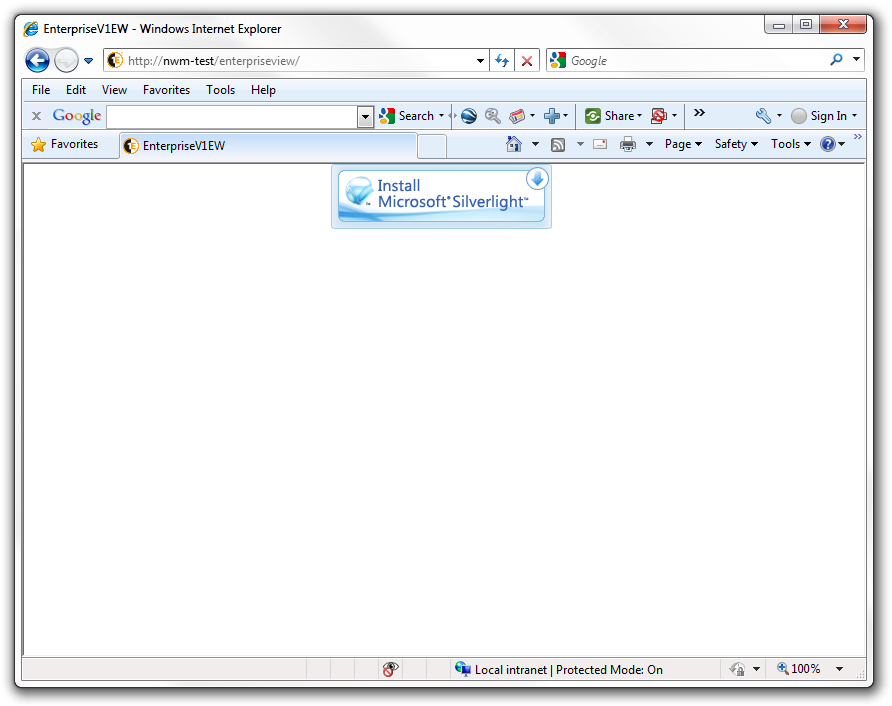
(If you see a placeholder instead of the Silverlight logo then you do not have access to the internet and you will need to download the Silverlight installer from another computer. All versions of Silverlight from version 3.0 are supported by Enterprise View).
To continue from this point:
Click Install Microsoft Silverlight.
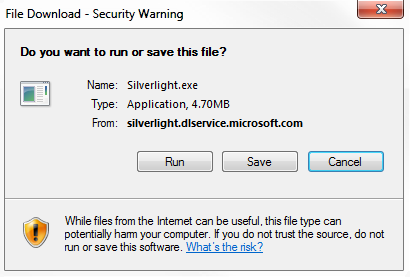
Click Run.
When all the files are extracted (a dialog displays its progress), the installer starts. When the installer starts running, a dialog displays its progress.
When all the files are extracted, the installer starts.

Click the Install now button.
When installation has completed successfully, the success success displays. You may need to refresh the browser before the Enterprise View home page is displayed.
Enterprise View home page
Once Silverlight is installed, navigating to the Enterprise View URL displays the home page. The first time the user navigates to the home page, getting started information is displayed.
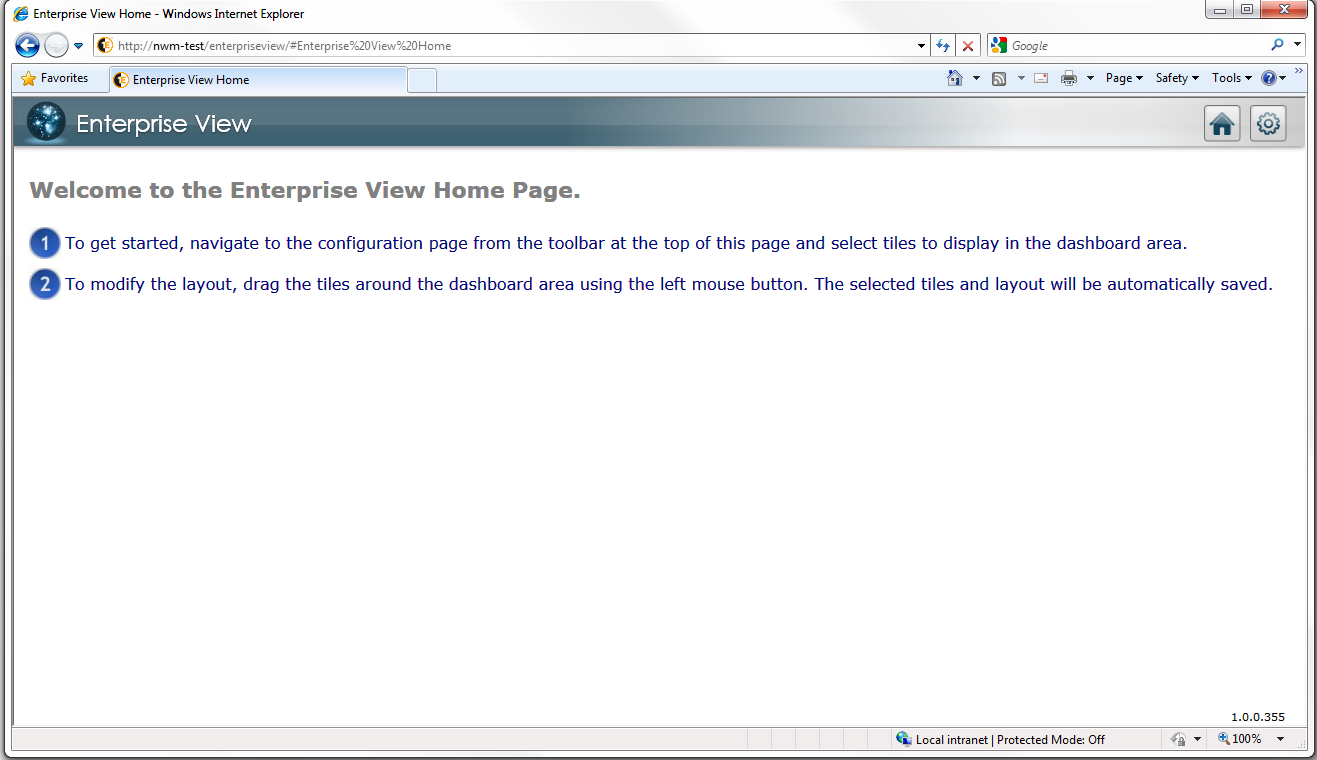
To add tiles to the dashboard:
Click the Tools button at the top-right of the page to display the tile configuration page. The list of tiles are the defaults provided with NightWatchman Management Center. You can select up to eight tiles to display on the dashboard.
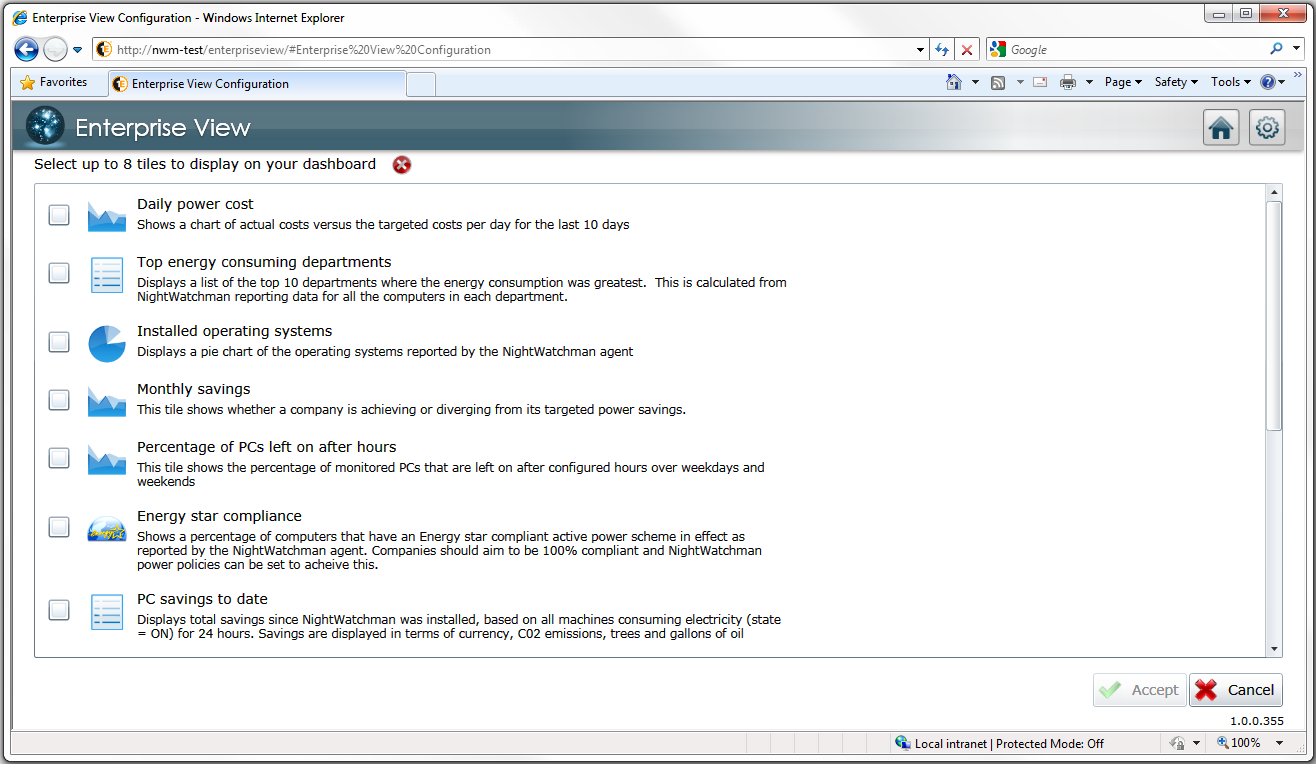
Click the checkbox to the left of the tile's icon.
When you have selected your tiles (8 maximum) click Accept to populate the dashboard.
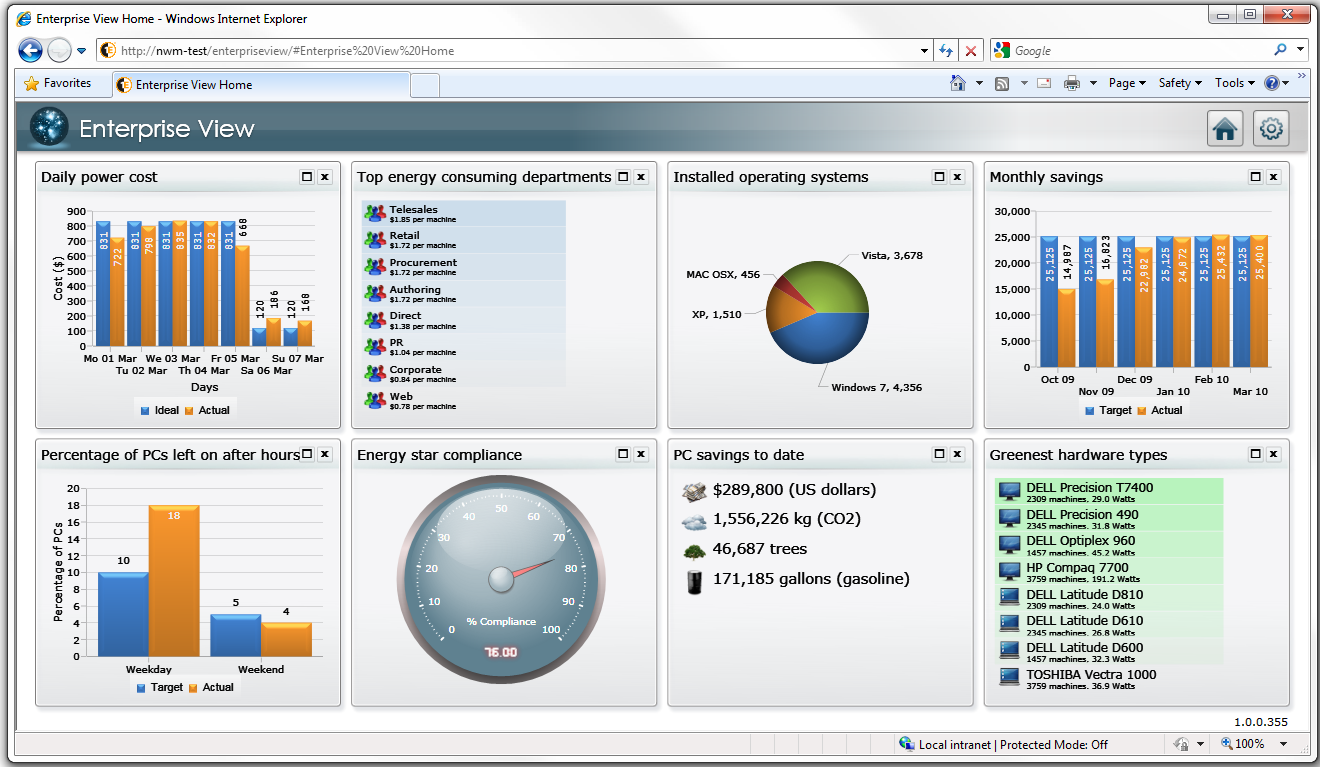
Once the tiles are on the home page, you can re-arrange them by dragging their title bars, expand them to view the details of a particular tile or close it.

Setting up the dashboard tiles
After you install the Enterprise View website, add the dashboard tiles and and configure their datasources. Tile definitions are provided when installing supported 1E applications and must be copied to the correct location in the Enterprise View website and manually configured before are available to users. When you install one of the supported applications, either NightWatchman Management Center or NightWatchman Server Edition, a folder is created in the product's installation directory which contains the XML definitions for the tiles associated with that product. The folder is relative to the product's installation directory: %installdir%\EnterpriseView
Copy the file definitions to the Enterprise View installation directory as follows:
On 32-bit platforms –
C:\Program Files\1E\Enterprise View\Dashboard.Web\SourceOn 64-bit platforms –
C:\Program Files (x86)\1E\Enterprise View\Dashboard.Web\Source
Each of the tiles requires a connection to a data source (which can be from an SQL database or a localized XML file) in order to display information. The data sources are defined in an XML file and is located at: %installdir%\1E\Enterprise View\Dashboard.Web\Source\DataSources.xml
To configure an SQL data source for NightWatchman, add a definition
DataSourceselement. For example:<DataSource Name="NightWatchman"> <ConnectionProperties DataProvider="SQL"> <Value> <![CDATA[ Server=<ServerName>;Database=AgilityFrameworkReporting;Trusted_Connection=True;pooling=false ]]> </Value> </ConnectionProperties> </DataSource>where
<ServerName>is the server where the NightWatchman Management Center database is installed.To configure an SQL data source for NightWatchman Server edition, add a definition to the
DataSourceselement. For example:<DataSource Name="NightWatchmanServer"> <ConnectionProperties DataProvider="SQL"> <Value> <![CDATA[ Server=<ServerName>;Database=NightWatchmanServerEdition;Trusted_Connection=True;pooling=false ]]> </Value> </ConnectionProperties> </DataSource>where
<ServerName>is the server where the NightWatchman Server Edition database is installed.To configure an XML data source, add the following XML snippet to the
DataSourceselement:<DataSource Name="LOCAL"> <ConnectionProperties DataProvider="XML"> <Value> <![CDATA["NONE"]]> </Value> </ConnectionProperties> </DataSource>
A tile may be duplicated provided its title is different. The default tiles are:
Title | Description | File | Notes |
|---|---|---|---|
Savings to date | Displays total savings since NightWatchman was installed and based on all machines consuming electricity (state = ON) for 24 hours. Savings are displayed in terms of currency, C02 emissions, trees and gallons of Oil | | Uses
|
Daily power cost | Displays a chart of the actual cost per day as reported by NightWatchman for the last 10 days. | | Uses
|
Monthly Savings | Shows savings for all of the PCs in all departments and all buildings for the last six months. | | This tile uses |
Top energy consuming departments | Displays the top 10 departments in descending order of energy cost per capita. Provides a way of monitoring which departments cost the most in terms of PC energy usage and are candidates for more stringent energy management. | | This tile uses |
Top 10 buildings by cost | Displays a list of the top 10 buildings where the cost of electricity usage is the highest. Reporting data from NightWatchman and current applied location-based tariffs are used to calculate power consumption and cost figures. | | This tile uses |
Installed operating systems | Displays a pie chart of the operating systems reported by the NightWatchman agent. | | This tile uses |
Percentage of PCs left on after hours | This tile shows the percentage of monitored PCs that are left on after configured hours over weekdays and weekends. The chart assumes that computers are on overnight if they are on at any time before 9AM or after 5PM on weekdays or at any time over the weekend. | | This tile uses |
Energy star compliance | Shows a percentage of machines that have a compliant active power scheme in effect as reported by NightWatchman client. You should aim to be 100% compliant and NightWatchman power policies should be set to achieve this. | | This tile uses |
Greenest hardware types | Displays a maximum of 3 desktop and 3 laptop hardware types that consume the least amount of energy in their relevant categories. This is only taken from hardware that has reported to NightWatchman in the last 90 days. | | This tile uses |
Most Consuming Hardware Types | Displays a maximum of 10 hardware types made up of any combination of desktops and laptops that consume the most amount of energy. This is only for hardware that have reported in the last 90 days. | | This tile uses |
NightWatchman Management Center stored procedure permissions
If the NightWatchman Management Center database is installed on a different server to the computer where the Enterprise View web application is running, modify the permissions of the respective stored procedures in the NightWatchman Management Center database.
To do this:
Modify the
SetSchemaObjectPermissions.sqlfile.On 32-bit platforms –
C:\Program Files\1E\NightWatchman Management Center\EnterpriseViewOn 64-bit platforms –
C:\Program Files (x86)\1E\NightWatchman Management Center\EnterpriseView
Set the string
%aspuser%to<DOMAIN> <DASHBOARDSERVER>$where<DOMAIN>is the name of the domain of the computer hosting the Enterprise View web application and<DASHBOARDSERVER>is the name of the server running the Enterprise View web application.Execute the file against the NightWatchman Management Center database.
The NightWatchman Agent and 1E Agent for Mac
The NightWatchman Agent and 1E Agent for Mac provide comparable functionality to each other for shutdown and restart of computers. The NightWatchman Agent is for Windows computers while the 1E Agent for Mac is for Macintosh computers.
NightWatchman Agent
On Windows, the NightWatchman icon in the system tray indicates its current status – if a shutdown has been scheduled or deferred and when backups have been made.
To interact with NightWatchman:
On the system tray, right-click the NightWatchman icon.
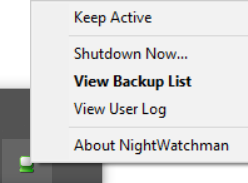
From its context menu, you can choose from the following:
Keep Active – keeps the system free from NightWatchman power down events for a period of time. You are prompted to choose how long to keep your computer active.
This option is useful when deadlines are imminent and the machine is liable to be used out of normal office hours or when a particular running task will take a long time to complete.
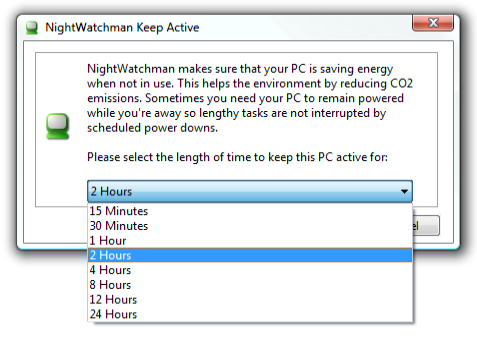
Keep Active only works as long as you remain logged on – as soon as you log-off, NightWatchman reverts to its default behavior It does not work for NightWatchman events where
logoffaction=FORCEor when you choose the Shutdown Now... option.The default time is 1 hour.
Shutdown Now... – initiates an immediate shutdown and closes all open applications. You will be prompted to save your work.
View Backup List – displays a list of documents automatically saved by NightWatchman. You can opt to view, keep or reject these files. There are two file types to take into account:
Previous saved files (those that were being edited at the time of the shutdown) – when viewing these types of files, open the last saved file and the NightWatchman backup file and review the changes. Close both these files before you choose to keep or reject them. If you keep the file, it replaces your last saved file with NightWatchman's backup. If you reject it, your last saved file is preserved. The backup history is purged in both cases.
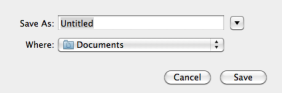
New files (new files that were created but not yet saved at the time of the shutdown) – if you open these types of file to review, ensure you close them before you choose to keep or reject them. If you keep the file, a Save As dialog opens for you to save the file. If you reject it, the file is not saved. The backup history is purged in both cases.
The Information: field provides details about the selected backup as follows:
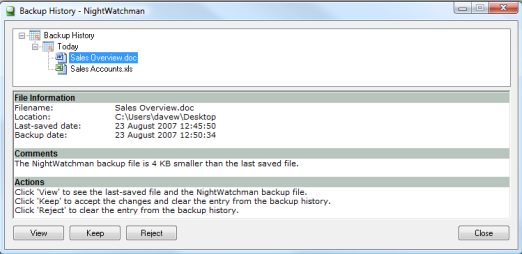
The root name for the file
The path of the last saved version of the file (not applicable to new files not previously saved)
The relative sizes of the last saved version and the NightWatchman backup
A comparison of the dates of the last saved version and the NightWatchman backup of the file. A warning occurs if the last saved version is more recent than the NightWatchman backup
A summary of the actions for the backup.
NightWatchman icon states are displayed in the system tray.
 – no scheduled shutdown (
 backup notification)
 – power down scheduled (
 backup notification)
 – power down deferred (
 backup notification)
The most recent backups are towards the top of the Backup History tree. This tree is sorted by dates which enables you to see when they occurred. A warning occurs when the NightWatchman backup file has an older date than the last saved file. This information is vital when assessing what to do with the changes as you should consider the fact that the changes were made to a document prior to the one currently saved.
View User Log – displays the User Log dialog. It provides a summarized account of the recent actions by NightWatchman, such as the time of a successful shutdown and a one-line summary of errors encountered.
About NightWatchman – information about the current of NightWatchman agent.
Shutting down NightWatchman
The modes to shutdown NightWatchman are:
Passive – if NightWatchman is set to work in passive mode, it will not shut down devices where a schedule shutdown begins if users are logged-on. They will see a balloon on the system tray notifying them that a power down is due. NightWatchman can be configured to retry later to see if the user has logged-off. If they have, it shuts down the computer at that point.
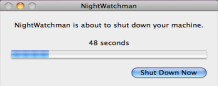
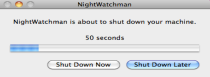
Active – If NightWatchman is set to work in active mode, users currently logged-on see the Countdown dialog when a scheduled shutdown begins. Users can close applications and save documents up to the point the timer expires.
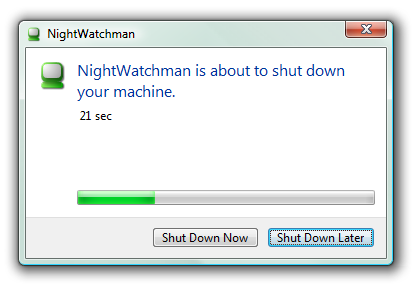
If they click Shut Down Now or allows the countdown to elapse, NightWatchman closes all open applications and saves any work-in-progress before shutting the computer down
If they click Shut Down Later, NightWatchman defers the shutdown and re-tries again later
Force – if NightWatchman is set to work in force mode, users currently logged-on see the Countdown dialog when a scheduled shutdown begins but they have no option to defer or cancel the event
1E Agent for Mac
On a Mac, the NightWatchman icon on the menu bar indicates its current status – if a shutdown has been scheduled or deferred and when backups have been made.
 |
To interact with NightWatchman:
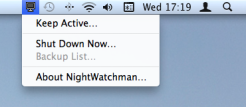
On the menu bar, right click the NightWatchman icon.
From its context menu, you can choose:
Keep Active – keeps the system free from NightWatchman power down events for a period of time. You are prompted to choose how long to keep your computer active.
This option is useful when deadlines are imminent and the machine is liable to be used out of normal office hours or when a particular running task will take a long time to complete. When multiple users are logged on and one user requests a Keep Active period, that period is enforced for all users even if the requestor logs off. Keep Active does not work for NightWatchman events where the
logoffactionis set to force or where the user actively chooses the Shutdown Now... menu option.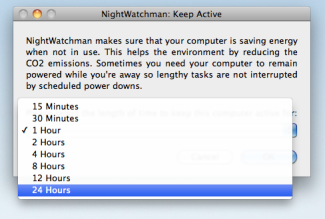
The default time is 1 hour. The icon changes to indicate the keep active event.
Shut Down Now... – initiates an immediate shutdown and closes all open applications. Click OK or Cancel to abort the operation. If a NightWatchman maintenance window is currently active the Shutdown Now option will not work.
Backup List – when NightWatchman makes a back up of your documents on a power-down event, the icon changes on the menu bar. Clicking the icon displays the Backup History dialog – file information and comments help you decide if you want keep the file.
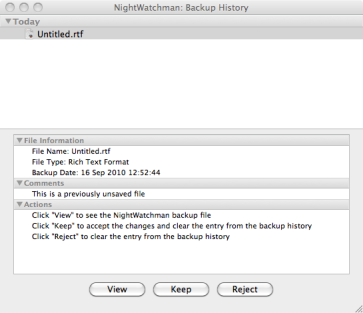
To view the contents of the file, click View.
To keep the backed-up file, click Keep and complete the Save As dialog
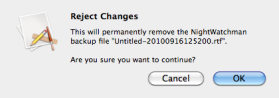
To remove the backed-up file, click Reject. You will be prompted with a warning
NightWatchman status icons are displayed in the menu bar.

- no scheduled shutdown

– scheduled shutdown on

– scheduled shutdown deferred
About NightWatchman – information about the current of NightWatchman agent.
Shutting down NightWatchman
The modes to shutdown NightWatchman are:
Passive – if NightWatchman is set to work in passive mode, it will not shut down devices where a schedule shutdown begins if users are logged-on and there are no interruption to users. NightWatchman can be configured to retry later to see if the user has logged-off. If they have, it shuts down the computer at that point.
Active – If NightWatchman is set to work in active mode, users currently logged-on see the Countdown dialog when a scheduled shutdown begins. Users can close applications and save documents up to the point the timer expires.
If they click Shut Down Now or allow the countdown to elapse, NightWatchman closes all open applications and saves any work-in-progress before shutting the computer down
If they click Shut Down Later, NightWatchman defers the shutdown and re-tries again later
Force – if NightWatchman is set to work in force mode, users currently logged-on see the Countdown dialog when a scheduled shutdown begins but they have no option to defer or cancel the event