Using the NightWatchman console
You run the NightWatchman console from the Start menu and use it to:
Configure the group hierarchies to model the physical and logical locations of the computers in your organization and use the Import wizard to populate the hierarchies automatically
Define power schemes and power policies and apply them
Configure tariffs for energy costs and power consumption values according to hardware types
Configure general settings for the NightWatchman Management Center.
Starting the NightWatchman console
The NightWatchman Console is run from the Start menu and consists of:
Clients
Power Schemes
Power Policies
Power Consumption
Tariffs
WakeUp Servers
Settings
Security.
Clients
When Clients is selected, the right-hand side shows the Location and Organization groups that are used for organizing computers with NightWatchman clients installed. When the NightWatchman Console is started, these groups are populated from the data held in the Agility Framework database. As you make changes to the Location and Organization groups, these are saved back to the Agility Framework database.
Initially, before either of the group hierarchies have been modified, the Location and Organization groups each contain a single node – the UNASSIGNED BUILDING and UNASSIGNED DEPARTMENT nodes, that always exist and contain computers with NightWatchman clients installed that have sent information back to the Agility Framework.
Note
Computers can only be associated with the lowest levels Building and Department.
To learn how to add, rename and delete groups or to add remove computers from specific departments or buildings, see modifying NightWatchman hierarchies.
Location and Organization hierarchies are each constructed of 5 tiers, always with buildings and departments at the lowest tier, with the exception of UNASSIGNED BUILDING and UNASSIGNED DEPARTMENT.
Location groups
Location groups enable you to model your company according to the physical location of the computers. You apply location specific power settings to computers according to their region. For example, if you are aware of a specific national holiday, you can apply a one-off policy that sets a power setting for that particular country. There are five levels to both the Location and Organization hierarchies.
The Location group hierarchy is constructed of 5 tiers which use the following names in NightWatchman reports: Region, Country, State, City and Building, with clients assigned to Buildings.
Organization groups
Organization groups, in contrast, enables you to model your company according to organizational units. This structure lets you apply specific power settings to computers according to where they sit in the organization. For example, if you are aware of a specific departmental off-site team building exercise, you can apply a one-off policy that sets power setting for that particular department only.
The Organization group hierarchy is constructed of 5 tiers which use the following names in NightWatchman reports: Company, Subsidiary, Division, Business Unit and Departments, with clients assigned to Departments.
Queries
Queries enables you to display a set of computers that match your selection criteria. This allows you to explore the computers in your estate. You can copy, sort and export the results of a query, and wake up one or more computers from the list. Administrators can define custom actions which can be run against the results.
Power Schemes
Power Schemes let you define named groups of settings that control NightWatchman clients to set the power management properties of the computer it is running on. Power schemes are not directly applied to computers but are part of the definition of the power policies. In the Power Schemes section, you can view summaries of the power schemes, add new ones or edit, copy and delete the existing ones.
Power Policies
Power Policies let you define a combination of NightWatchman and WakeUp settings to power off and wake up machines together with a specific Power Scheme. These can be applied at any level of the location or organization hierarchies. The behavior of a power policy is inherited by all the computers associated with that hierarchy. In the Power Policies section, you can view summaries of the power policies, add new ones or edit, copy and delete the existing ones.
Power Consumption
NightWatchman Console lets you define power consumption figures for the various types of hardware encountered and reported back by the NightWatchman clients. In the Power Consumption section you can view the power consumption table and edit the power consumption values for the different power states for each type of hardware found. To learn about editing these values, see modifying NightWatchman power consumption data.
Tariffs
The Tariffs section lets you define power costs that are applied to particular locations so that reports can more accurately show the actual costs for an organization. The Tariffs section lets you create a combined set of localized CO2 emissions per unit of power used and the cost per unit of power. To learn how to modify tariffs, see tariffs. Tariffs can only be applied to the Location group hierarchy, not to the Organization group hierarchy.
WakeUp Servers
NightWatchman Management Center can communicate with multiple WakeUp Servers to enable scalable wake up support across large and geographically diverse networks. These WakeUp Servers automatically register themselves with the NightWatchman Management Center. The WakeUp Servers section shows a list of registered servers where you can configure which subnets are managed by each server.
Settings
The Settings section lets you define default parameters for NightWatchman Client Policies along with units used by the NightWatchman reports. To learn more about these, see NightWatchman settings.
Security
NightWatchman Console lets you modify computer power states across your entire network, so you need to control who has access. In the Security section, you can view currently assigned users and groups, add new ones or edit, copy and delete the existing ones. Users and groups have security roles assigned to them.
Console language
The console can be either English, French or German – localisation is based on the operating system's display language. To change the default display language you may have to add a language to Windows, install it, and set it as the default. Also ensure the Windows Region control panel icon's format is set to match the Windows display language
Using the Import Wizard to populate hierarchies
If you have large number of computers, manually populating the building and department groups is an onerous task. NightWatchman comes with an Import Wizard that lets you leverage information from the Active Directory to automate this process.
You can run the import by using the Import Wizard (an interactive process) or from the command-line, allowing the whole process to be batched to enable easy synchronization with the source data. It comes with scripts that support importing Organization Unit or Sites and Subnet data and rely on input files to define how this information maps on to the NightWatchman Group hierarchies. To learn more about these scripts see import scripts and input files.
Recommendations
Before running the Import Wizard in a production environment, we recommend that you perform the following steps:
Define the script input files.
Stop the NightWatchman central service.
Create a backup of the Agility Framework Reporting database.
Start the NightWatchman central service.
Running the Wizard
You can run the Import Wizard interactively from the Start Menu\NightWatchman Management Center\ImportWizard.exe menu item or from a command prompt.
Backup your NightWatchman database before you continue.
The Welcome screen, click Next.
On the Data Import Script screen, provide the following:
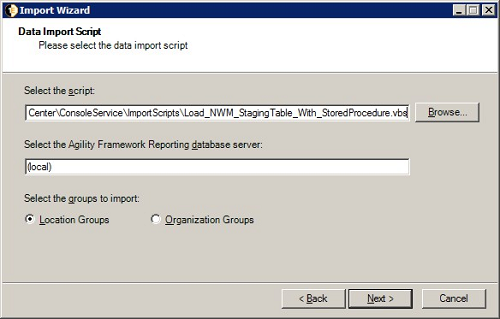
Location of the import script to be used to populate the temporary staging table
Location of the NightWatchman Management Center database
The destination group, location or organisation
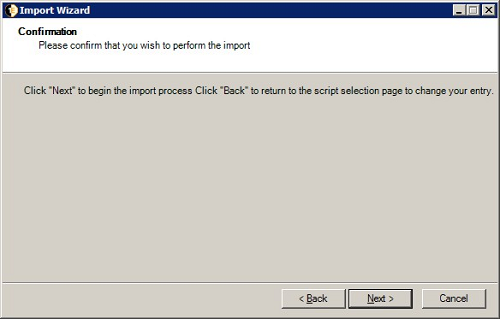
On the Confirmation screen, click Next.
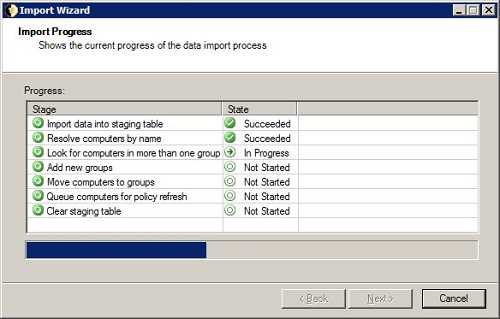
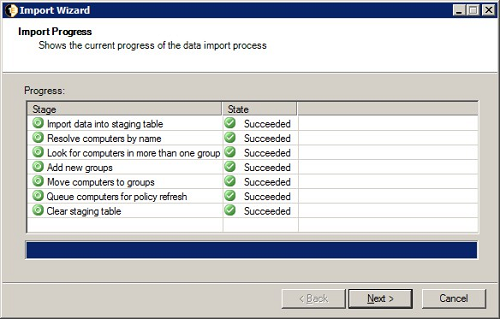
On the Import Progress screen, you can see the progress of the import.
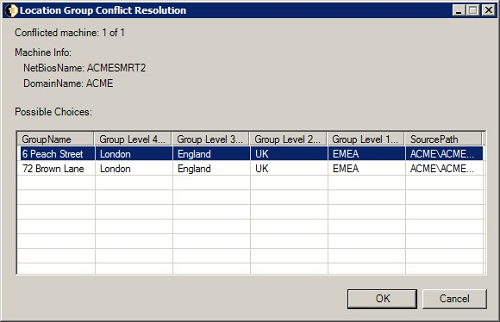
You may also be prompted for input in the conflict resolution stage.
On the Completion screen, you can see the results of the import.
Import scripts and input files
The import Wizard comes with a number of sample scripts that use information from a number of sources to modify NightWatchman Management Center data to associate computers with their respective departments and buildings. These scripts are found in <installdir>\ConsoleService\ImportScripts.
The scripts are all named
<scriptname>.vbs.template. Copy and rename them to<scriptname>.vbsbefore you use them with the import Wizard.The input files are all named
<inputfilename>.csv.template. Copy and rename to<inputfilename>.csvbefore you used them with the import Wizard.
For example, copy NWM_StagingTable_With_StoredProcedure.vbs .template and rename it to NWM_StagingTable_With_StoredProcedure.vbs.
The sample scripts do the following:
Imports Active Directory Organizational UnitsImports Active Directory Organizational Units
Imports Active Directory sites
Maps computers to groups
Maps Subnets to groups
Resolves import conflicts
Note
These scripts are provided as-is without any warranty, expressed or implied, of accuracy, completeness, fitness for a particular purpose, title or non-infringement and are not supported or guaranteed by us.1E shall not be liable for any damages you may sustain by using these scripts, whether direct, indirect, special, incidental or consequential, even if it has been advised of the possibility of such damages.
Purpose | Script |
|---|---|
Import OUs |
Retrieves Organizational Unit (OU) computer details from the Active Directory (AD) and writes them to a staging table ready for conversion into NightWatchman group hierarchies. This template recurses down through the OU hierarchies to retrieve the computer details from all the lower levels. Dependency: Each line in the input file tells the import Wizard what it should do with the computers in each OU. It is a comma-separated file and the format for each line is: Level1,Level2,Level3,Level4,Level5,OU=OUName,DC=D1,DC=D2... DC=Dn,DCFQDN
|
Import AD sites |
Retrieves computer details from AD sites and writes them to a staging table ready for conversion into NightWatchman group hierarchies. This script returns computer details from all subnets in the site. Dependency: Each line in the input file tells the Import Wizard what it should do with the computers in each Site. It is a comma-separated file and the format of each line is: Level1,Level2,Level3,Level4,Level5,Site
|
Map computers to groups |
Retrieves a list of computer details from the Dependency: Each line in the input file tells the Import Wizard what it should do with the computers in each Site. It is a comma-separated file and the format of each line is: Level1,Level2,Level3,Level4,Level5,NetBIOSName,ComputerDomain
|
Map subnets to groups |
Retrieves a list of subnet details from the Dependency: Each line in the input file tells the Import Wizard what it should do with the computers in each Site. It is a comma-separated file and the format of each line is: Level1, Level2, Level3, Level4, Level5, SubnetIP
|
Resolve import conflicts |
The Import Wizard comes with a sample script that resolves to groups items that are in the conflicted table. This sample script shows how to use a stored procedure to load the staging table. It does not require an input file as it works on the conflicted imports table in the NightWatchman Management Console database. |
Importing data
Once the import script, target database and target hierarchy have been selected in the Import Wizard,the import process performs the following steps to import the information from Active Directory.
Import data into the staging table – the
tbNWM_Dimension_Group_Stagingtable is used to hold the information gathered from the source prior to converting it to the NightWatchman Console format.Resolve computers by name – the script selected in the Import Wizard Data Import Script page is run and populates the
NetBiosName, DomainName, GroupPathandSourceDataPathcolumns in the staging table.Look for computers in more than one group – this step identifies any conflicts in the information being imported where a computer is being allocated to more than one group in either the Organization or Location group hierarchies. When running the wizard interactively, the administrator is prompted to resolve conflicts as they arise.
Add new groups – creates new groups necessary, arising from processing the import data.
Move computers to groups – the identified computers are moved to their allocated groups.
Queue computers for policy refresh – an existing group may have its own power policy assigned, any computer moved into a group is prompted to refresh its policy.
Clear staging table – once the import is completed, the staging table is purged of content.
Command-line parameters
By default the Import Wizard is located in the following directory:
32Bit Machines:C:\Program Files\1E\NightWatchman Management Center\ConsoleService
64Bit Machines:C:\Program Files(x86)\1E\NightWatchman Management Center\ConsoleService
It can be run from a command-line with:
ImportWizard.exe <command-line parameters>
For example, to run the Import wizard in unattended mode on a particular SQL Server instance and using the built-in machine mapping script to assign machines to organization groups:
ImportWizard.exe
-IsSilent
-AfrServer SQLSERVER\INSTANCE,14333
-Provider_VBScriptFile="ImportScripts\Map_Machines_To_NWM_StagingTable.vbs"
-TierLevelType="organization"
The command-line parameters for the Import Wizard are:
Parameters | Default value | Notes |
|---|---|---|
AfrServer | The SQL details provided when the Import Wizard component was installed | Location for the NightWatchman Management Center Web Service. NoteWhen using this parameter, leave a space between AfrServer and the SQL Server instance name, do not use the = sign. |
iSilent | Not silent | Controls whether dialogs are displayed during the import process. When isSilent is not used, the Import Wizard is displayed to perform the steps interactively, pre-populated with other settings from the command-line. When isSilent is used, the process is invisible. NoteWhen run with You can run the Import Wizard again interactively to determine what to do with the conflicts using the |
Provider_VBScriptFile | Sets the name of the VBScript file used to import data into the staging table. | |
RemoveStagingTableOnExit | True | Clears the data from the staging table after the import process is completed. |
TierLevelType | Location | Group structure for the imported machines. This may be set to either of the following values:
|
The default values for these parameters are stored in the ImportWizard.exe.config file which also contains the name of the database, however the isSilent value is ignored, which means isSilent parameter must be used to run the process silently.
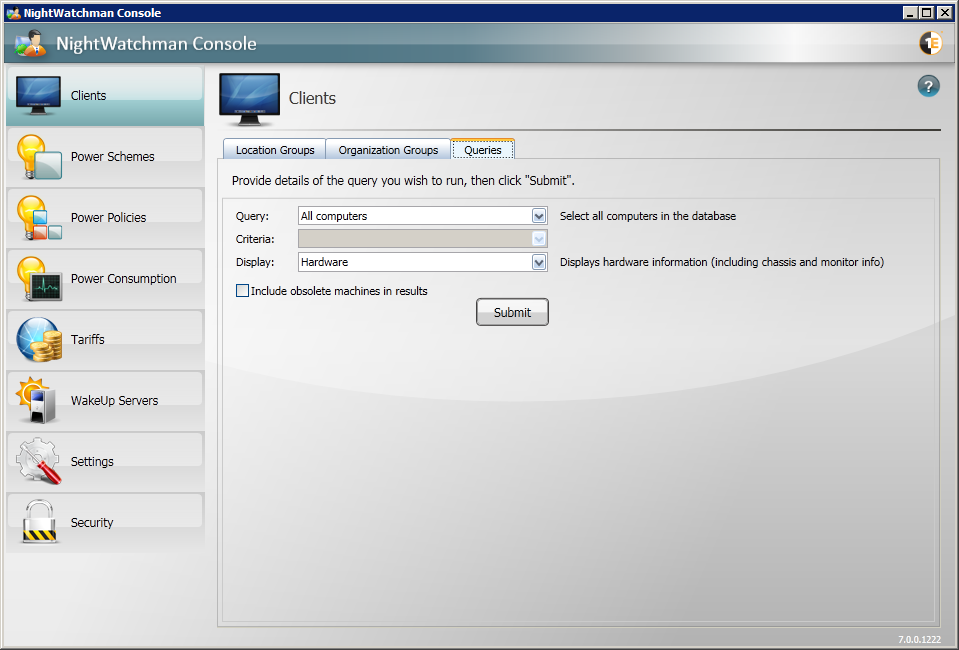
Exploring Computers
NightWatchman lets you retrieve a set of computers that match a specific selection criteria. This is done from the Clients section of the Nightwatchman Console via the Queries tab.
 |
Retrieving computers
To retrieve a particular set of computers you can follow these general steps:
Select a query from the Query: field and any associated criteria from the Criteria: field.
Select the information you want to display for those computers from the Display: field.
Select whether to include obsolete computers in the results.
Click the Submit button to run the query to retrieve the computers.
After the results have been displayed you can then sort the columns  Click here for a tutorial or export the data Click here for a tutorial.
Out of the box, NightWatchman Enterprise provides a set of built-in queries, criteria and display options - though these may be extended by an administrator, see Extending the Console Query interface for more details. The following headings describe the available built-in queries, criteria and display options.
Built-in queries and criteria
The following table describes the built-in queries and associated criteria available from the Query: and Criteria: fields:
Query | Notes |
|---|---|
All computers | >Retrieves all computers from the Nightwatchman Enterprise database. There are no criteria associated with this query. |
By hardware | Retrieves computers whose chassis or monitor fields include the text entered in the Criteria: field. |
By IP address | Retrieves computers whose network adapter IP address includes the text entered in the Criteria: field. |
By location tier | Retrieves computers that belong to the location tier selected in the Criteria: field. It contains a list of available bottom-level location tiers, including the catchall UNASSIGNED location tier. |
By NetBIOS name | Retrieves computers whose NetBIOS name includes the text entered in the Criteria: field. |
By organization tier | Retrieves computers that belong to the organization tier selected in the Criteria: field. It contains a list of available bottom-level organization tiers, including the catchall UNASSIGNED organization tier. |
By power policy | Retrieves computers that have been assigned the power policy selected in the Criteria: field. It contains a list of available power policies. There is a special entry called |
By subnet | >Retrieves computers that belong to the subnet selected in the Criteria: field. It contains a list of subnets known to NightWatchman Enterprise i.e. it is the list of all subnets that the computers that have reported back to NightWatchman Enterprise belong to. |
Built-in display options
The display options control what columns of information are displayed for the results of the query. There are three columns that are shown for all display options:
Column | Notes |
|---|---|
NetBIOS name | The computer's NetBIOS name. |
Domain Name | The domain name the computer belongs to. |
Obsolete | Indicates whether the computer's record is obsolete or not. Only displayed if the Include obsolete machines in the results checkbox is ticked. |
The following table describes the built-in display options available from the Display: field.
Display | Notes |
|---|---|
Hardware | Displays hardware related information for the computers. |
Hierarchy | Displays information about location and organization hierarchies that each computer belongs to. |
Network Adapters | Displays information about the network adapters for the computers. If a computer has more than one network adapter, it is displayed on a separate row in the results. |
Power | Displays information about NightWatchman power policies and power schemes applied to computers. |
Software | Displays information about the OS installed on NightWatchman clients. |
Summary | Displays each computer's hardware type and times when it last interacted with NightWatchman. |
Obsolete computers
NightWatchman will set a computer to obsolete if it has not been in touch with NightWatchman Enterprise for a configurable number of days. You can control the number of days (between a minimum of 7 and a maximum of 90) using the Hide obsolete clients after days setting in the The NightWatchman Settings section.
By default obsolete computers are not displayed in the returned results of a query. You can turn the display of these on by checking the Include obsolete machines in results. When the checkbox is checked an additional Obsolete column is displayed in the results that indicates whether a computer row comes from an obsolete computer or not.
Interacting with the results
When the results are displayed you can select rows of computers in the results table and interact with them using a right-click context menu. There are three options that are provided, as described in the following table:
Option | Notes |
|---|---|
On-demand Wakeup | Sends a wakeup request to the selected computers. |
Actions | This sub-menu contains a list of actions that may be performed on the selected computers. By default, this is not visible in the console. You can enable and extended it. |
Properties | Only enabled when a single computer is selected in the results table. The Properties dialog for the selected computer is displayed when you selection this option. |
Power schemes
Power schemes provide a convenient structure for defining and re-using commonly required power management settings. A NightWatchman power scheme is a collection of power management settings that can be selected and applied through a power policy.
Managing power schemes in the NightWatchman console
Using NightWatchman Console you can:
Note
Before a power scheme is applied to a computer, it must be associated with a power policy. To learn more about power policies, see Power policies.
Creating a new power scheme
To add a new power scheme in the NightWatchman console:
In the Power Schemes section, click Add.
Set the required values in the Add Power Scheme dialog.
Click OK to save the new power scheme.
The Add Power Scheme dialog
The Add Power Scheme dialog lets you define properties for the new power scheme:
Name field – the name for the new power scheme. This field cannot be left blank.
Turn off display after: – sets when the power scheme turns the monitor off after a period of inactivity. You can set different values for this parameter for use when the computer is plugged in or running on batteries.
Turn off hard disks after: – sets when the power scheme turns the computer's hard disks off after a period of inactivity. You can set different values for this parameter for use when the computer is plugged in or running on batteries.
Standby: – sets when the power scheme puts the computer into standby mode after a period of inactivity. You can set different values for this parameter for when the computer is plugged in or running on batteries. This parameter must be set to a shorter time than the Hibernate parameter.
Hibernate: – sets when the power scheme puts the computer into hibernate mode after a period of inactivity. You can set different values for this parameter for when the computer is plugged in or running on batteries. This parameter must be set to a longer time than the Standby parameter
Prompt for password when computer wakes up – check this checkbox if you want the computer to prompt the user when it awakes from a standby or hibernate mode.
Editing power schemes
To edit an existing power schemes in the NightWatchman Console:
In the Power Schemes section, select the Power Scheme you want to edit.
Click the Edit button.
Change the required values in the Edit Power Scheme dialog, which has the same parameters as the Add Power Scheme dialog.
Click OK to save the changes to the Power Scheme.
Copying power schemes
To copy an existing power schemes in the NightWatchman Console:
In the Power Schemes section, select the Power Scheme you want to copy.
Click the Copy button. This takes a copy of the settings of the selected Power Scheme and opens the Edit Power Scheme dialog.
Change the values in the Edit Power Scheme dialog if necessary. It the same parameters as the Add Power Scheme dialog.
Click OK to save the Power Scheme.
Deleting power schemes
To delete an existing power schemes from the NightWatchman Console:
In the Power Schemes section, select the Power Scheme you want to delete.
Click the Delete button.
If the warning option is turned on the Confirm delete dialog is displayed. Click Yes to continue with the deletion or No to cancel.
Clicking Yes attempts to continue with the deletion. If the Power Scheme has previously been associated with a Power Policy an Unable to delete scheme warning dialog is displayed indicating that the Power Scheme is in use and you are able to delete the selected scheme.
If the Power Scheme is not currently associated with a Power Policy, clicking Yes permanently removes Power Scheme from the NightWatchman Console.
Disabling the deletion warning dialog
To prevent NightWatchman from displaying the deletion warning dialog every time you delete a power scheme, power policy, tariff, security role or security account, check the Don't ask me again checkbox, located on the warning dialog itself.
Note
Before checking this box, make sure that you definitely do not want the deletion warning dialog to appear as deleting a NightWatchman Console Power Scheme cannot be undone.
Power policies
A NightWatchman power policy is a collection of NightWatchman settings that can be applied to a computer to determine how it behaves in terms of its power consumption. Using the NightWatchman power policies, you can apply consistent behaviors for power schemes, shutdowns and wakeups across the network for specific groups of computers. Like power schemes, these power policies are maintained in a library.
Daily scheduled actions
NightWatchman Enterprise supports setting different times, actions and logoffs for each day of the week, letting you tailor NightWatchman behavior to suit your weekly business working practices. Daily scheduled actions are controlled from on the Scheduled Actions tab.
Alarm clocks
An alarm clock definition consists of a weekday and time when it takes place. For example, you may want all the machines in a development department to be available at 08:00am Monday to Friday, except Thursday when there is a team meeting, so the machines should be available at 10:00am.
Alarm clocks wake up the NightWatchman client computer for 60 minutes. If you want the computer to wake up for a different duration, use a maintenance window instead. You can set an alarm clocks from the NightWatchman command-line or from its console.
You can define an alarm clock by creating and applying a power policy. An advantage of using a power policy over the command-line for alarm clocks is that if WakeUp integration is enabled, you can bring a computer out of a power-off state. Using the command-line, you can only bring a computer out of a sleep state. Details on how to configure an alarm clock as part of a power policy can be found here.
Maintenance windows
A maintenance window definition consists of a weekday and time when it takes place, the duration and the action it takes at the end of the event. For example, you may want all the machines in a network to be available for 1 hour at 02:00h every Wednesday to receive Windows updates and shut down afterwards. You can set maintenance windows from the command-line or from its console.
You define maintenance windows by creating and applying a power policy. An advantage of using power policies over the command-line for maintenance windows is that if WakeUp integration is enabled, you can bring a computer out of a power-off state. Using the command-line, you can only bring a computer out of a sleep state. Details on how to configure a maintenance window as part of a power policy in the NightWatchman Console can be found using the The Power Policy dialog.
Computer reclaim
Computer reclaim (formerly hardware utilization) aims to identify the number of computers which are actually being used in an organization – the aim is to identify hardware waste where you have 50,000 computers in your organization but it turns out that no more than 30,000 are actively used at any given time. See the Using Computer Reclaim section for best practices on this.
You can gather computer reclaim data by creating a power policy where the Monitor Computer Reclaim option is enabled and then applying it to the machines you want to monitor. Alternatively, you can enable this feature by setting the 1E Agent HARDWAREUTILIZATION installer property to ON during its installation on the machine you want to monitor.
The sample and aggregation intervals for is set in the NightWatchman Console (more details under the Computer Reclaim section in NightWatchman Settings). Reports are available in the Reports console.
Sleepless client detection
Sleepless client detection helps optimize your NightWatchman client computers ability to go into a sleep state, and as a result increasing power savings and energy efficiency in your organization. There are two levels of sleepless detection – the basic level is enabled by default.
The advanced level requires explicit enabling. It is possible that some applied operating system updates may prevent the advanced sleepless detection feature from functioning correctly. For this reason it is not enabled by default. To benefit from the additional process name information provided by advanced sleepless detection you must enable it. This is done from the Sleepless Client Detection tab in the NightWatchman console.
In basic mode, it reports on faulty input devices and flags potential causes why an unattended computer is failing to enter into a sleep state.
In advanced mode, where possible, it additionally identifies specific processes that prevent the unattended computer from entering into a sleep state. These processes can be added to the sleepless exclusion list to enable the computer to enter into a sleep state where appropriate, regardless of whether the named processes are running at that time.
The process for the basic sleepless detection is :
NightWatchman monitors the keyboard and mouse and if it does not find a period of inactivity that is greater than 30 seconds over a 24 hour period it will report back to Agility Framework Reporting with the input device as potentially being unreliable.
If the input devices are verified as allowing the computer to enter a sleep state, NightWatchman then examines the running processes:
If a process causes overall CPU usage to exceed 20%, it will prevent the computer from going to sleep when it should have and is reported as a busy process.
If a process sets a system required flag, it is noted in the basic sleepless detection mode but the information about the process requesting it will not be available. The <unknown process> is reported as a sleepless process.
The busy and sleepless process information is batched together with other NightWatchman client data and recorded in the Agility Framework Reporting at the next transmission time.
Advanced sleepless detection adds the following information to the basic sleepless detection:
If a process sets a system required flag, the system is analyzed and the actual process name derived and reported as a sleepless process in place of the <unknown process> reported by the basic sleepless detection.
The sleepless detection information from the client is sent back to Agility Framework Reporting and appears in two NightWatchman reports under the heading Sleepless Client Detection:
Busy and Sleepless Processes – indicates the processes running on the client computer that are the likely cause for it not entering into a sleep state.
Untrusted input device – indicates potentially faulty input devices that are the likely cause for a client computer not entering into a sleep state.
Once you have reviewed the NightWatchman reports that identify potential reasons why a particular client computer is being kept from entering into a sleep state, you can add any processes named in the report to the sleepless exclusion list for that particular NightWatchman client. This is where the extra process name resolution of the advanced sleepless detection really comes into its own. We recommend that the Power Policy with the excluded processes only gets applied to the computers reported against in the NightWatchman Busy and Sleepless Processes report.
When a NightWatchman client computer is at the point where it should enter a sleep state, NightWatchman checks any named processes on the sleepless exclusion list. If the only processes preventing sleep are in the sleepless exclusion list NightWatchman will force the computer to enter into a sleep state regardless.
Managing power policies in the NightWatchman console
NightWatchman power policies define configuration settings for both NightWatchman and WakeUp. Together, they control the availability of computers and maximize power savings while minimizing any impact on productivity. Power policies are not assigned directly to computers but they are assigned to the groups that contain the computers. This is done from the Location or Organization group hierarchies.
Creating a new power policy
To add a new power policy:
In the Power Policies section, click the Add button.
Set the required values in the Add Power Policy dialog.
Click OK to save the new power policy.
Editing power policies
To edit existing power policies:
In the Power Policies section, select the power policy you want to edit.
Click the Edit button.
Change the required values in the Edit Power Policy dialog, which has the same parameters as the Add Power Policy dialog.
Click OK to save the changes to the power policy.
Copying power policies
To copy existing power policies:
In the Power Policies section, select the power policy you want to copy.
Click the Copy button. This takes a copy of the settings of the selected Power Policy and opens the Edit Power Policy dialog.
Change any required values in the Edit Power Policy dialog, which has the same parameters as the Add Power Policy dialog.
Click OK to save the copied power policy.
Deleting NightWatchman power policies
To delete an existing power policies:
In the Power Policies section, select the power policy you want to delete.
Click the Delete button.
If the warning option is turned on the Confirm delete dialog will be displayed. Click Yes to continue with the deletion or No to cancel.
Clicking Yes attempts to continue with the deletion. If the power policy has previously been associated with a group in either the Organization or Location hierarchies, a warning dialog is displayed indicating that the power policy is in use and that you are able to delete it.
If the power policy is not currently associated with a group, clicking Yes permanently removes the selected security role from the NightWatchman Console.
Disabling the deletion warning dialog
To prevent NightWatchman from displaying the deletion warning dialog every time you delete a power scheme, power policy, tariff, security role or security account, check the Don't ask me again checkbox, located on the warning dialog itself.
Note
Before checking this box, make sure that you definitely do not want the deletion warning dialog to appear as deleting a NightWatchman Console Power Scheme cannot be undone.
Tariffs
Managing tariffs in the NightWatchman console
You can define power costs in the NightWatchman console which can be applied to particular locations so that reports can more accurately show the actual costs for an organization.
The Tariffs section lets you create a combined set of localized CO2 emissions per unit of power used and the cost per unit of power.
Tariffs can only be applied to the Location group hierarchy, not to the Organization group hierarchy.
The Tariff dialog
The Tariff dialog is displayed whenever you Add, Copy or Edit Tariffs. The fields in the Tariff dialog are:
Name – the name of the tariff; used when applying tariffs to location groups. The tariff name must be unique and is validated when you click OK.
Description – holds supplementary information about the cost and CO2 emissions settings for the tariff.
Cost per kWh – the cost per kWh of energy used for this particular tariff. Cost is displayed in the currency that was set during installation but this can be changed in the NightWatchman Settings.
CO2 per kWh – localized values for the amount of CO2 created per kWh of power generated.
Utility Provider – the name of the utility provider for the location where the tariff is applied. This is the name that will appear in Reports.
Currency and CO2 per kWh units are global and dependent on the values defined in the NightWatchman Settings.
Creating a new Tariff
To add a new tariff in the NightWatchman Console:
In the Tariffs section, click the Add button.
Set the value for the tariff.
Click OK to save the new tariff.
Editing Tariffs
To edit an existing tariff in the NightWatchman Console:
In the Tariffs section, select the tariff to edit.
Click the Edit button.
Update the value for the tariff.
Click OK to save the changes for the tariff.
Copying Tariffs
To copy an existing tariff in the NightWatchman Console:
In the Tariffs section, select the tariff to copy.
Click the Copy button. The Copy Tariff dialog opens with a copy of the settings from the selected tariff.
Update the values for the tariff as necessary in the Copy Tariff dialog.
Click OK to save the tariff.
Deleting Tariffs
To delete an existing tariff from the NightWatchman Console:
In the Tariffs section, select the tariff to delete.
Click the Delete button
If the warning option is turned on the Confirm delete dialog is displayed. Click Yes to continue with the deletion or No to cancel.
Clicking Yes continues with the deletion. If the tariff has previously been associated with a group in either the Organization or Location hierarchies, a warning dialog is displayed indicating that the tariff is in use and that you cannot delete it.
If the tariff is not currently associated with a group, clicking Yes removes it from the NightWatchman Console.
Disabling the deletion warning dialog
To prevent NightWatchman from displaying the deletion warning dialog every time you delete a power scheme, power policy, tariff, security role or security account, check the Don't ask me again checkbox, located on the warning dialog itself.
Note
Before checking this box, make sure that you definitely do not want the deletion warning dialog to appear as deleting a NightWatchman Console Power Scheme cannot be undone.
Using NightWatchman group hierarchies
Managing power policies in the NightWatchman console
The NightWatchman console lets you use the Location and Organization group hierarchies to apply power policies across your network. You can also interact with the hierarchies to perform immediate tasks and control how the power policies are applied.
The power policy used by a computer is set according to its position in the NightWatchman group hierarchies. You fine tune the way this works with, Inheritance, overriding and precedence. The Location and Organization group hierarchies help to model real world scenarios. In Organization versus Location, you can learn how these are mapped to known situations.
Using NightWatchman console you can:
Inheritance, overriding and precedence
Group hierarchies provide for the inheritance and overriding of power policies. A group, at any level in the hierarchy, can have a power policy applied to it which is inherited by all the groups it contains. A locally applied group power policy overrides any inherited power policy for it and all the groups it contains.
A given computer resides in both a building and a department bringing it under the influence of both the Location and Organization group hierarchies. Power policies can be applied to both hierarchies. In this case, the power policy coming from the Organization group hierarchy takes precedence but you can override this default for a specific Location group.
Tier Names
The Location group hierarchy is constructed of 5 tiers which use the following names in NightWatchman reports:
Region
Country
State
City
Building (clients reside here)
The Organization group hierarchy is constructed of 5 tiers which use the following names in NightWatchman reports:
Company
Subsidiary
Division
Business Unit
Department (clients reside here)
Note
The tier names, as they appear in reports, can be changed by editing values in the SQL table tbAFR_Lookup_TierLevel. Do not modify any other part of this table except for the tier names.
Organisation versus Location
It is worthwhile taking a moment to consider how the Organization and Location group hierarchies are used and why you would want to specify a preference for one over the other.
The Organization group hierarchy is used to define policy according to business use. In this way, you set up behaviors for users in specific departments. For example, you can typify the behavior of the sales department as being different from the marketing department and define different policies for each that then get applied to the appropriate department.
The Location group hierarchy is used to define policy according to where a machine physically resides. In the previous example, the power policy is specifically designed for an office renovation. Perhaps the power policy specifies that the machines in the building are all shut down at 10PM on a Friday and not awoken until 9AM on a Monday. In this case you would want to allow the extraordinary circumstance of a particular building being renovated over a weekend to take precedence over any behaviors defined for the departments contained in that building.
NightWatchman reports report time in state, power consumption, CO2 emissions, costs and savings. Typically the location group structure is used for reporting and the organization group structure used for applying power policies, however both structures can be used for reporting and for policies.
Applying power policies
To apply an existing power policy to a group in either the Organization or Location hierarchies:
In the NightWatchman Clients section, select the group from the Organization or Location hierarchies you want to apply the power policy to.
Right-click the group to display the context menu.
Select the power policy from the Apply Power Policy sub-menu.
Once the power policy is applied, the icon for the group changes to include a red star. This helps to locate the nodes in the hierarchy where power policies are applied.
A power policy applied to a particular group cascades down to all the groups it contains in the hierarchy, unless another power policy is applied lower down the hierarchy. See inheritance, overriding and precedence for further details.
Computers retrieve their assigned power policies on their next policy refresh cycle. By default, this is 25 hours but can be re-configured on the NightWatchman client. Click here for a more detailed step-through.
Note
The NightWatchman Console also shows computers that have versions earlier than 5.5 of the NightWatchman Client installed. It also shows computers that have the WakeUp Agent installed but no NightWatchman Client.In both these cases, power policies are not applied to those computers.
You must have NightWatchman Client version 5.5 or later installed on the computer for it to receive policy updates. If you are unsure about the NightWatchman Client version for a particular computer, right-click and check its properties.
Overriding organization groups
To override the power policies in the Organization group hierarchy with those from the Location group hierarchy:
In the Clients section, select the group in the Location Group hierarchy that you want to take precedence over the Organization group hierarchy.
Right-click the group to display the context menu and select the Properties menu item.
In the Properties dialog on the Power Policy tab, check the Override organization group priority for this group only checkbox.
Applying tariffs
To apply an existing NightWatchman tariff to a group in the location hierarchy:
In the Clients section, select the group from the Location hierarchy you want to apply the tariff to.
Right-click on the group to display the context menu.
Select the tariff from the Apply Tariff sub-menu.
Once the tariff is applied, the icon for the group will change to include a green T. This helps to locate the nodes in the hierarchy where the tariffs are applied.
A Tariff applied to a particular group will cascade down to all the groups inside in the hierarchy, unless another tariff is applied lower down. See inheritance, overriding and precedence for further details.
Tariffs are used by reports to calculate energy costs and CO2 emissions from energy used.
On-demand wake ups
To perform an on-demand wake up for a group in or a particular computer:
In the Clients section, select the group or computer you want to wake up from either the Organization or Location hierarchies.
Right-click the group or computer.
Select On-demand wakeup from the context menu.
Viewing properties
To view properties for a group or computer in the NightWatchman Group hierarchies:
In the Clients section, select the group or computer from the Organization or Location group hierarchies you want to view the properties for.
Right-click the group or computer to display the context menu.
Select Properties.
WakeUp servers
NightWatchman Management Center can communicate with multiple WakeUp servers to enable scalable wake up support across large and geographically diverse networks. These WakeUp servers automatically register themselves with the NightWatchman Management Center.
Site Boundaries
Normally NightWatchman uses subnets or Configuration Manager site boundaries to determine which WakeUp server is used to wake up a client computer with a particular IP address.
In non-Configuration Manager environments, the site boundaries for the WakeUp servers are set in the NightWatchman console. In this configuration, the first WakeUp server to register is initially given a global site boundary so that it may cover all wake up requests until the boundaries for all the registered WakeUp servers have been configured.
In a Configuration Manager environment, the site boundary for each WakeUp server corresponds to the site boundary of the Configuration Manager server where the WakeUp server is installed. In the NightWatchman console, the site boundaries are imported automatically from Configuration Manager and are read-only, though additional inclusion and exclusion lists can be added.
For both Configuration Manager and non-Configuration Manager environments, additional exclusion and inclusion lists can be defined to tailor the coverage of the WakeUp servers.
WakeUp servers have an implied order that governs which server is used when the site boundaries overlap. This Server order can be modified in the NightWatchman console. You can delete WakeUp servers from the NightWatchman console, doing this prevents the deleted server from processing any future wake up requests. If a deleted WakeUp server subsequently re-registers with NightWatchman Enterprise, it will re-appear in the NightWatchman console.
Site Codes
As an alternative to boundaries, NightWatchman can use Configuration Manager site codes in Configuration Manager environments. By default, NightWatchman will use check the site code first and only use the boundaries if a match is not found. This feature was introduced with 7.0.0 and was announced in the release notes as "WakeUp server mapping process able to map based on assigned Configuration Manager site". However, there is a known issue with this feature in 7.0.0, so you must also use the latest NightWatchman Accumulated hotfix for 7.0.0.
The NightWatchman console enables the network address for a particular WakeUp server to be modified. The new address is used when building the WMI namespace for connecting to the server to issue wake up requests. The validity of the namespace can be verified in the NightWatchman console.
The legacy WakeUp server
When an upgrade is made from a version prior to 6.0.500, a legacy server will appear in the NightWatchman console with a global boundary so that it handles all wake up requests. In earlier versions, only one WakeUp server could be registered with the NightWatchman Management Center.
Following the upgrade, this previously used WakeUp server appears in the NightWatchman console as #Upgrade# and has a global boundary of 0.0.0.0 - 255.255.255.255. As you upgrade your WakeUp servers, these will automatically register with NightWatchman Management Center and you can adjust the server boundaries as necessary to provide scalable coverage.
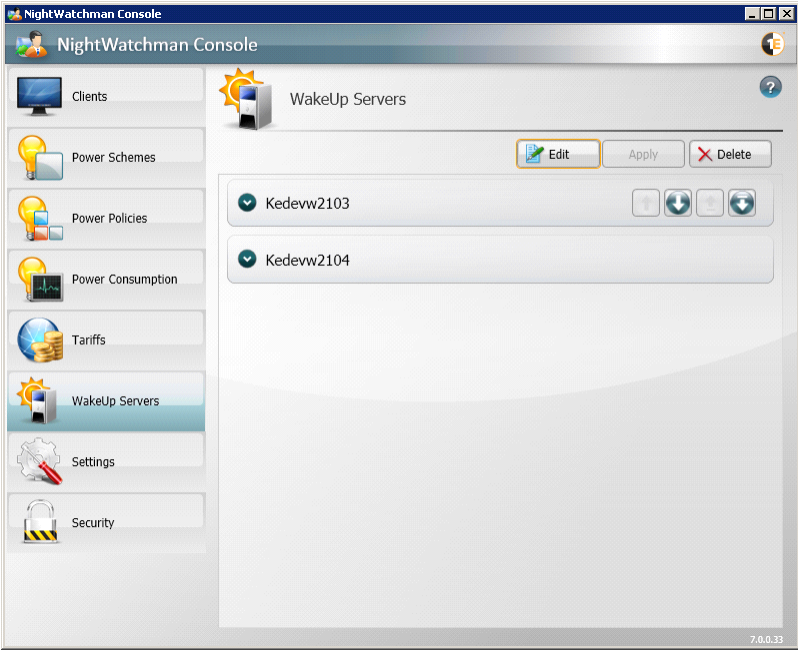
Managing WakeUp servers in the NightWatchman console
In the NightWatchman console, the WakeUp servers section displays a list of registered servers where you can:
Edit each server's subnet site boundaries
Edit IP address
Edit the server order which dictates which WakeUp server gets takes precedence in the event of subnet and IP addresses overlapping,
Delete server registrations to prevent a particular WakeUp server from being used.
Note
When you modify any of these values, the changes may take several minutes to resolve, depending on the number of servers involved and the speed of the network.
Editing server site boundaries
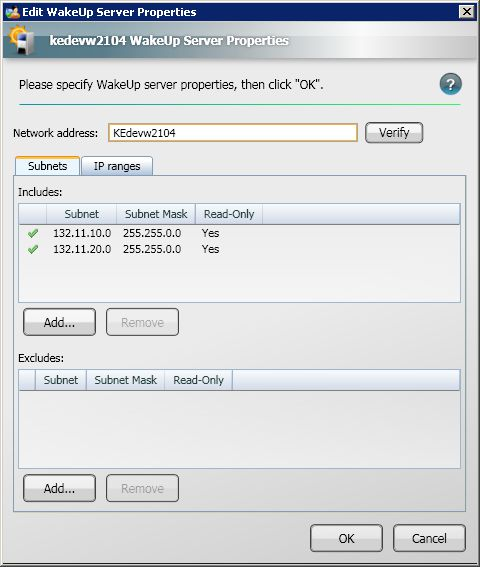
WakeUp servers use site boundaries that determine which server is used to wake up a client computer with a particular IP address. Site boundaries are defined using IPv4 and are represented using either subnets or IP ranges or a combination of the two. These are configured with inclusions and exclusions to allow maximum control over which IP addresses are covered by the WakeUp server.
In ConfigMgr environments, there are entries for subnets that come from the ConfigMgr server where the WakeUp server is installed. These entries cannot be removed but they can be adjusted by adding further inclusions or exclusions.
To edit a particular server's site boundaries, select the server from the WakeUp server list and click the Edit button to open the Edit WakeUp server Properties dialog. For example, WakeUp server kedevw2104 has 2 inclusions and no exclusions.
Adding a subnet inclusion or exclusion
To add new subnet:
Click the Subnets tab in the Edit WakeUp Server Properties dialog.
Click the Add... button for Includes: or Excludes: to open the Enter IPv4 subnet dialog.
Enter the subnet address and subnet mask. Each subnet is defined using its base subnet address and a subnet mask.
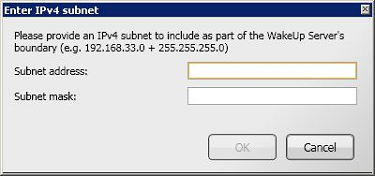
Click OK to save the new subnet inclusion or exclusion.
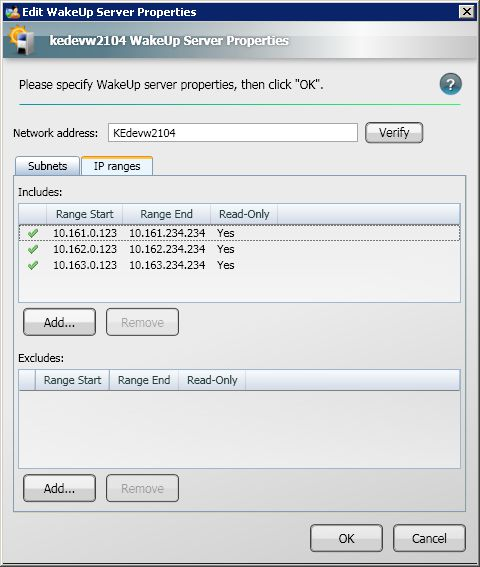
Adding an IP range inclusion or exclusion
To add an IP range, select the IP ranges tab in the Edit WakeUp Server Properties dialog, as shown in the following picture, then click on the Add... button below either the Includes or Excludes lists.
Click the IP ranges tab in the Edit WakeUp Server Properties dialog
Click the Add... button for Includes: or Excludes: to open the Enter IPv4 range dialog.
Enter the IP addresses for the range you want created.
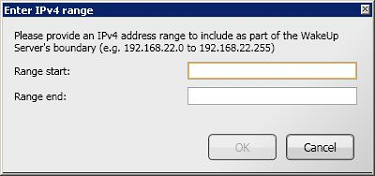
Click OK to save the IP range.
Server order
WakeUp servers have an implied order that governs which server is used when site boundaries overlap. This order is maintained in the NightWatchman Console. The servers at the top of the list takes precedence over those below it.
To change the order of the WakeUp servers:
Select the server to promote or demote from the list.
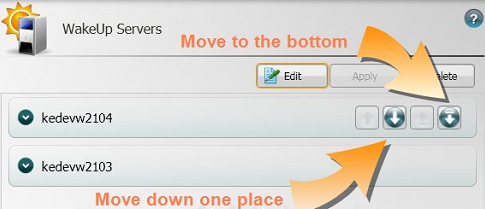
If the server is already at the top of the list, click the Move down one place or Move to bottom arrow to reposition the selected server in the list.
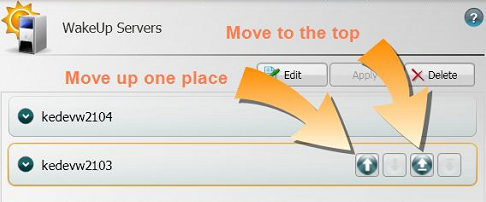
If the server is not the top most in the list, click the Move up one place or Move to the top arrow to reposition the selected server in the list. Click the Apply button to accept the new order for the server.
Deleting servers
You can delete WakeUp servers from the NightWatchman Console to stop it from processing wake up requests. If a deleted WakeUp server subsequently re-registers with NightWatchman Enterprise, it will re-appear in the NightWatchman Console.
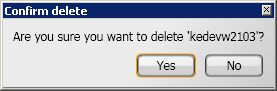
To delete an existing WakeUp server:
Select the server from the WakeUp servers list.
Click the Delete button.
In the Confirm delete dialog, click Yes to delete the server or No to cancel.
WakeUp servers which do not report for 30 days are deregistered and no longer displayed in console.
Managing network address for WakeUp servers
The NightWatchman Console enables the network address for a particular WakeUp server to be modified. The new address is used when building the WMI namespace for connecting to the server to issue wakeup requests. The validity of the namespace can be verified in the console. As WakeUp only returns the NetBIOS name for the WakeUp server, you will need to change it if:
The DNS in your environment is not fully configured, set this to the FQDN for the WakeUp server
Your network is configured to only use FQDN, set this to the FQDN for the WakeUp server
You have load balanced the WakeUp server for high-availability, set this to the cluster node name for the WakeUp server.
To change the network address for a particular WakeUp server:
Select the server from the WakeUp server list.
Click the Edit button.
In the Edit WakeUp Server Properties dialog, enter the new network address.
Click the Verify button to check its validity.
Setting power consumption data
Managing power consumption data in the NightWatchman console
You can view and modify the power consumption figures of the hardware found on your network in the NightWatchman console. Editing these values affects the information in NightWatchman reports. They are based on information available from your computer vendors. This information is usually available on the support pages of your vendors' web sites, where you download manuals and other documentation. The regulatory documents are most likely to contain the needed data.
The NightWatchman power consumption information is divided into three tabs: Desktops, Laptops and Monitors with information for each category shown in its own tab. Default values are used when hardware information cannot be found; these are <default chassis> for the desktop type, <default laptop> for the laptop type and <default monitor>.
The Desktops tab
In the Desktops tab, you can set power consumption values for specific types of computers in four operation states; namely, on, standby, hibernate and off.
Manufacturer – the hardware manufacturer
Type – the type of computer
Model – the model of the computer
On – the power consumption when the computer is on
Standby – the power consumption when the computer is in standby mode
Hibernate – the power consumption when the computer is in hibernate mode
Off – the power consumption when the computer is connected but turned off
Source – the source of the information
The Laptops tab
In the Laptops tab, you can set power consumption values for specific types of laptops in five operation states; namely, on, on with screen in standby, standby, hibernate and off.
Manufacturer – the hardware manufacturer
Type – the type of computer
Model – the model of the computer
On – the power consumption when the computer is on
On with screen in standby – the power consumption when the computer is on but the display is in standby mode
Standby – the power consumption when the computer is in standby mode
Hibernate – the power consumption when the computer is in hibernate mode
Off – the power consumption when the computer is connected but turned off
Source – the source of the information
The Monitors tab
In the Monitors tab, you can set power consumption values for specific types of monitors in two operation states; namely, on and off.
Model – the model of the computer
On – the power consumption when the computer is on
Standby – the power consumption when the computer is in standby mode
Source – the source of the information
Automated power consumption catalog updates
As of August 2018, NightWatchman Enterprise can no longer integrate with ActiveEfficiency to enable the power consumption tables to be automatically updated via the cloud. 1E is still pleased to provide the same data to you using a slightly more manual process. Contact 1E Support for details.
Support will ask you to:
Open SQL Server Management Studio on your NightWatchman database server or a console that can access it
Click on New Query to create an empty query window
Ensure the AgilityFrameworkReporting database is selected in the Available Databases dropdown list
Paste these queries into the query window:
select [Type], SubType, Manufacturer, Model, HardwareID, count(*) 'Count' from tbAFR_Lookup_HardwareComponent hw
join tbAFR_Dimension_ComputerSystem systems on hw.HardwareId=systems.HardwareComponentId
where IsDefault=0 group by [Type], SubType, Manufacturer, Model, HardwareId order by Count(*) desc
select [Type], SubType, Manufacturer, Model, HardwareID, count(*) 'Count' from tbAFR_Lookup_HardwareComponent hw
join tbAFR_Dimension_DisplayMonitor systems on hw.HardwareId=systems.HardwareComponentId
where IsDefault=0 group by [Type], SubType, Manufacturer, Model, HardwareId order by Count(*) desc
Click the Execute button
Two results tables will appear. Right click each and select Save Results As. Save the first as "computers.csv" and the second as "monitors.csv" in a location that is convenient for you.
E-mail the two CSV files to 1E support
Support will e-mail you a file with SQL statements that you will execute in the same manner to populate the power consumption table.
Modifying Power Consumption values
To modify the power consumption values:
Tick the Custom column checkbox for the row you want to update.
Click the value in the field to display the edit field.
Edit the value. This supports accuracy up to the first decimal place.
Press Enter on the keyboard or click another row in the table to save the value.
Note
Entering decimal fractions beyond the first decimal place will initially display but is rounded up to the nearest first decimal when navigating away from the power consumption values page.
NightWatchman console security
Managing security in the NightWatchman console
NightWatchman security lets you control who has access to specific NightWatchman features (it relies on the account information provided by the Active Directory). With NightWatchman, you can:
Add new users or groups
Delete users or groups
Add new security roles
Change permissions for security roles
Assign security roles to users or groups
Delete security roles
Set viewing and access options for the group hierarchies
Adding new user or group security accounts
To add a new user security accounts:
In the Security section, select Users and Groups tab.
Click the Add button.
In the Select Users or Groups dialog, type the name of the user or group.
Click the Check Names button to search the AD for the user or group.
Click the OK button to create the security account.
Details for the account are sourced from the AD.
Deleting users or groups
To delete an existing user or group security account:
In the Security section, select the Users and Groups tab.
Select the account you want to delete.
Click the Delete button.
If the warning option is turned on the Confirm Delete dialog is displayed. Click Yes to delete or No to cancel.
Turning off the deletion warning dialog
To prevent NightWatchman from displaying the deletion warning dialog every time you delete a power scheme, power policy, tariff, security role or security account, check the Don't ask me again checkbox, located on the warning dialog itself.
Note
Before checking this box, make sure that you definitely do not want the deletion warning dialog to appear as deleting a NightWatchman Console Power Scheme cannot be undone.
Adding new security roles
To add a new security role:
In the Security section, select the Roles tab.
Click the Add button
In the Add Security Role dialog, enter a name and description.
Click OK to save the new security role.
After creating the new security role you will need to define the permissions for it.
Changing permissions for security roles
To change permissions for security roles:
In the Security section, select the Roles tab.
Select the role you want to amend.
Check or uncheck the checkboxes for the permissions you want this role to have.
Click Apply to enable the new permissions or Discard to revert the permissions to their original settings.
Permissions
Notes
Launch Console
With this permission, users can launch the NightWatchman Console.
Note
Users must already have this permission before they can be granted any other permission.
Clients
With these permissions, users can access group hierarchies. The following permissions can be applied to the Location or Organization hierarchies individually:
View – users with this permission can view the group hierarchy subject to specific permissions assigned to the group hierarchy.
Note
Users must already have this permission before they can be granted the View All or Modify permissions.
View All – users with this permission can view the group hierarchy regardless of any specific permissions assigned to the group hierarchy.
Modify – users with this permission can modify the group hierarchy i.e. adding/deleting/renaming groups and moving/removing computers of group.
Queries – this enables the user to access the Queries tab.
Change Security – this enables users to define access for others by setting permissions on location and organization groups. This permission becomes available only when one or more of the View checkboxes are checked.
Note
If not all view permissions are selected a security warning will appear. This indicates that allowing access to the Query tab may expose information that would otherwise have been hidden based on the restrictions of the role. For example, if a role does not allow a user to see information about power policies, enabling access to the Query tab potentially will allow that user to display information related to power policies.
This not only applies to different areas of the console that the user may have permissions to but also to the areas of the hierarchy that the user may have permissions for. A user may not be able to view the New York section of the hierarchy but will be able to run a query that may return information about the New York computers.
Power Schemes
With these permissions, users can access power scheme properties as follows:
View – users with this permission can view power schemes.
Note
Users must have this permission before they can be granted the Add, Edit or Delete permissions for Power Schemes.
Add – users with this permission can add new power schemes.
Edit – users with this permission can edit existing power schemes.
Delete – users with this permission can delete existing power schemes.
Power Policies
With these permissions, users can access power policy properties as follows:
View – users with this permission can view power policies.
Note
Users must have this permission before they can be granted the Add, Edit or Delete permissions for Power Policies.
Add – users with this permission can add new power policies.
Edit – users with this permission can edit existing power policies.
Delete – users with this permission can delete existing power policies.
Power Consumption
With these permissions, users can access power consumption properties for desktops, laptops and monitors as follows:
View – users with this permission can view the items in the power consumption tab.
Note
Users must have this permission before they can be granted the Edit permission for Power Consumption.
Edit – users with this permission can edit power consumption data in the chassis and monitor tables.
Tariffs
With these permissions, users can access tariffs properties as follows:
View – users with this permission can view tariffs.
Note
Users must have this permission before they can be granted the Add, Edit or Delete permissions for Tariffs.
Add – users with this permission can add new tariffs.
Edit – users with this permission can edit existing tariffs.
Delete – users with this permission can delete existing tariffs.
WakeUp Servers
With these permissions, users can access WakeUp Servers properties as follows:
View – users with this permission can view WakeUp Server properties.
Note
Users must have this permission before they can be granted the Edit or Delete permissions for WakeUp Server.
Edit – users with this permission can edit existing WakeUp Server properties.
Delete – users with this permission can delete existing WakeUp Server properties.
Settings
With these permissions, users can access settings properties as follows:
View – users with this permission can view settings properties.
Note
Users must have this permission before they can be granted the Edit permission for Settings.
Edit – users with this permission can edit existing settngs properties.
Security
With these permissions, users can access security properties. You can set specific permissions for the Users and Groups or Roles tabs.
View – users with this permission can view security properties for users and groups as well as roles.
Note
Users must have this permission before they can be granted the Add, Edit or Delete permissions for Security.
Add – users with this permission can add new users and groups as well as roles.
Edit – users with this permission can edit existing users and groups as well as roles.
Delete – users with this permission can delete existing users and groups as well as roles.
Launch Import Wizard
With this permission, users will be able to run the data Import Wizard.
Assigning security roles to users or groups
To assign security roles to users or groups:
In the Security section, select the Users and Groups tab.
Select the user or group from the list to assign the role to. Unassigned roles are identified by the

icon.
Click the
next to the role to assign it to the user or group.
Deleting security roles
To delete an existing security role:
In the Security section, select the Roles tab,
Select the role you want to delete.
Click the Delete button.
If the warning option is turned on, the Confirm delete dialog is displayed. Click Yes to delete or No to cancel.
If the role is associated with a user or group, another Confirm delete dialog is displayed indicating that the security role is use. Click Yes to delete or No to cancel.
To prevent NightWatchman from displaying the deletion warning dialog every time you delete a power scheme, power policy, tariff, security role or security account, check the Don't ask me again checkbox, located on the warning dialog itself.
Note
Before checking this box, make sure that you definitely do not want the deletion warning dialog to appear as deleting a NightWatchman Console Power Scheme cannot be undone.
Setting viewing and access options for group hierarchies
To set viewing and access options for group hierarchies:
In the Security section, select the Roles tab.
Define a security role with the View (but not the View All) permissions.
Select the Users and Groups tab.
Assign the security role to the user or group.
An administrator with Change Security permissions must set the security properties for the node in either the Location or Organization hierarchies in order of the user or group to view that it. To do this:
In the Clients section, right-click your mouse on the node.
Select Properties from the menu.
Click the Security tab in the Properties dialog.
Select the user or group from the list.
The NightWatchman Settings section
The default values for the policies applied to the Clients section are controlled in Settings section where you define:
For Location based tariff settings | |
CO2 emissions per kWh unit | Sets the unit used for displaying the CO2 emissions in reports. |
Currency symbol | Sets the currency symbol used in reports. |
For computer reclaim | |
Sample interval (secs) | Sets how frequently, in seconds, NightWatchman will sample the PC usage. A low value means a user will have to interact with the PC more frequently for NighWatchman to report that it is in use. |
Aggregation interval (mins) | NightWatchman will add up all the usage samples after the aggregation interval (defined in minutes) and decide whether the PC was used during that time. A low value will show usage at a more granular level in the daily report. |
For NightWatchman reporting | |
NightWatchman reporting enabled | Determines whether the reporting on the NightWatchman Clients is turned on or not |
Maximum batch send interval seconds | Maximum interval (in seconds) to wait before batch dispatching messages in the spooler to the NightWatchman Management Center Web Service. By default, this is set to 14400. This parameter (maxbatchsendintervalsecs), set by the installer, modifies the settings for communicating with NightWatchman Management Center Reporting and should not need to be modified under normal circumstances. The default for an evaluation license is 300 seconds. NoteThis parameter must be set to a value greater than the one set for Poll interval seconds. |
Maximum file age days | Maximum age (in days) for the Nightwatchman Client to store reporting information locally when the NightWatchman Management Center Web Service cannot be contacted. By default, this is set to 14 days. Beyond that, the file will not be submitted to the NightWatchman Management Center Reporting and will be deleted instead. This parameter ( maximumfileagesecs ), set by the NightWatchman client installer, need not be modified under normal circumstances. |
Minimum messages per batch | Minimum number of messages in the spooler before a batch is dispatched to the NightWatchman Management Center Web Service. By default, this is set to 25 messages. This parameter (minmessagesperbatch), set by the installer, modifies the settings for communicating with NightWatchman Management Center Reporting and should not need to be modified under normal circumstances. The default for an evaluation license is 5 messages. |
Poll interval seconds | Interval (in seconds) for reporting messages being sent to the NightWatchman Management Center Web Service Component. By default, this is set to 600 seconds. This parameter (pollintervalsecs), set by the installer, modifies the settings for communicating with NightWatchman Management Center Reporting and should not need to be modified under normal circumstances. AttentionThis parameter must be set to a value that is less than the Maximum batch send interval seconds. |
Wait minutes for unavailable server | Duration (in minutes) to wait before the spooler retries connecting to the NightWatchman Management Center Web Service. By default, this is set to 1440 minutes. This parameter (waitminutesforunavailableserver), set by the installer, modifies the settings for communicating with NightWatchman Management Center Reporting and should not need to be modified under normal circumstances. |
To hide obsolete clients | |
Hide obsolete clients after days | When a client computer has not reported back for this many days, set it to obsolete and remove it from the NightWatchman Console display. |
For NightWatchman client power policies | |
Poll interval mins | Polling interval (in minutes) to check for new power policy settings. This poll checks to see which power policy is used for the client computer and retrieves the settings. The default value is dependent on the environment size selected in the NightWatchman Management Center installer. These defaults are:
The default for an evaluation license is 15 minutes. The range of values are 1 - 43200 inclusive. This parameter (pollintervalmins) is set by the installer. |
Retry interval mins | Retry interval (in minutes) to check for new power policy settings if the initial check fails. By default, this is set to 30. The default for an evaluation license is 5 minutes. The range of values are 1 - 1440 inclusive. This parameter (pollintervalmins) is set by the installer. |
For power policies | |
Wake up before alarm clock mins | Duration (in minutes) before an alarm clock start to send a wake up to a computer, using the registered master wake up provider. By default, this is set to 5. The minimum value for this setting is 0. |
Wake up before maintenance window mins | Duration (in minutes) before a maintenance window start to send a wake up to a computer, using the registered master wake up provider. By default, this is set to 5. The minimum value for this setting is 0. |
For WakeUp integration | |
WakeUp integration enabled | Enables the NightWatchman Management Center Console Service to send wake ups to selected clients This allows on-demand wake ups from the NightWatchman Console and wake ups before alarm clocks and maintenance windows. |
Changing parameter values
To change the value for a parameter, click the value in the field – it changes to an edit field.
Parameter value constraints
Specific values have constraint tests associated with them. Each time you change a value, they are evaluated and if the value does not pass the tests, the field is highlighted in red and when you hover the mouse over the value, a notification is displayed.
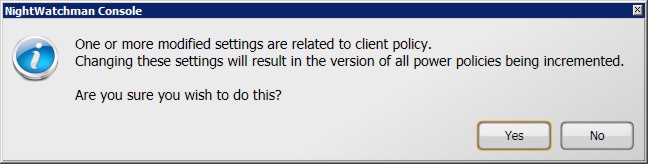
Changing client policy values
When changing any of the values under NightWatchman reporting, NightWatchman client power policy and Power policy headings you will see the following dialog displayed when attempting to Apply the changes.