1E SaaS post-installation steps
Installing 1E DataSync Agent
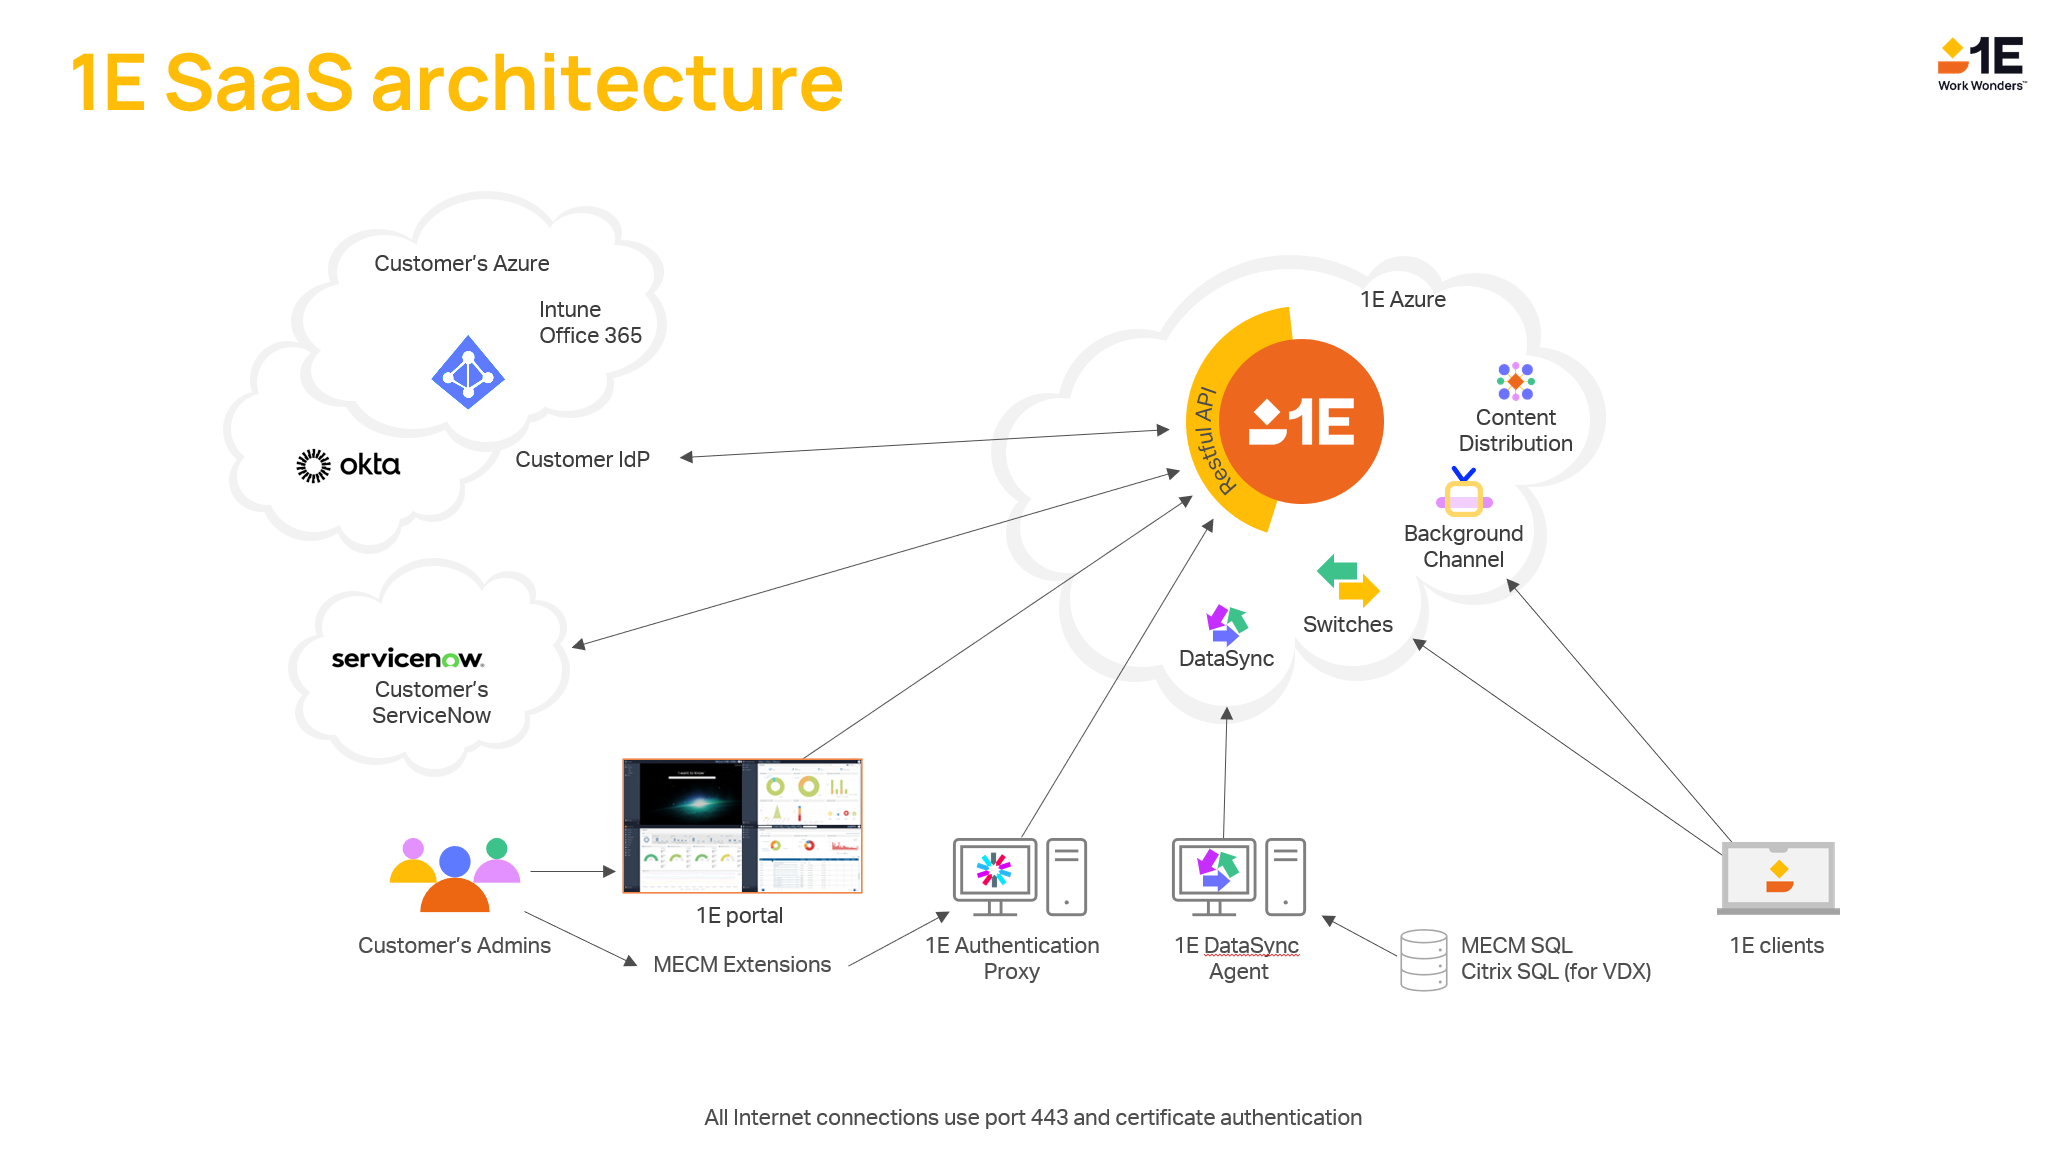
Here we describe the procedure for setting up a 1E DataSync Agent for 1E 23.7.
The DataSync Agent is how your 1E SaaS instance gets data from your on-premises data sources.
Requirements
You will need the following items before you can start the installation.
Note
1E will be provide you with install for each agent which must be installed on different servers.
Requirement | Details |
|---|---|
SaaS instance | 1E must have already provisioned your 1E SaaS instance, and readied the relevant Syncs. 1E will provide you with the following in one or more TXT files so you can install the Agent(s):
|
Host computer(s) | You will need one host computer for each sync use-cases:
NoteThis version of DataSync supports only one Agent per computer. If you need to use a single host computer to support multiple Sync use-cases, then please contact your 1E Account Team, who can work with you to determine the correct number of DataSync computers needed, the hardware specification, and custom installation steps. Hardware A physical computer or a VM with 4 CPU and 8GB RAM should be sufficient for most cases. Operating System The Agent can be installed on any Windows version, server or client, as long as it has .NET 6.0 Runtime installed, although in most production scenarios one would prefer a Window Server OS. Domain membership The computer on which the Agent is installed must be domain joined. .NET 6.0 Runtime Must be present on the machine on which the Agent is to be installed. You can download and install it from here: Download .NET 6.0 Runtime (v6.0.11) - Windows x64 Installer. .NET Framework 4.7.2 or later The installer has a dependency on this version of the .NET Framework (although the Agent itself does not depend on it). Coexistence with other on-premises components:
|
Installation account permissions | The installation account running the installer must be a:
For every source database from which data will be synced, the installation account must have the following permissions:
After installation, the installation or other user account requires certain permissions in the 1E Portal to allow verification. If you do not have Full Administrator rights, minimal permissions are described below in Post installation. NoteThe Agent service runs using the Network Service account. If the installation account has sufficient permissions, the Agent installer creates a SQL Login on the instance, and grants the required permissions on the database:
|
SQL Server source(s) | The SQL Server instance which hosts the source database must be configured to use SSL certificates. If this is not possible, then please contact your 1E Account Team for help.
The Agent communicates with source database(s) on whatever ports they are running on. Ensure the host computer firewall allows access to each SQL Server source(s). The Agent can sync from any version of SQL Server. |
Network access to 1E Azure | The Agent communicates with the following hosts in 1E Azure on port 443. Ensure the host computer firewall allows access to each of these Azure hosts.
|
Preparation
To run the installation you will need the DataSync Agent MSI installer along with the following pieces of information from 1E. You can download the installer from support.1e.com/.
The parameters are provided to you as part of the SaaS provisioning process, in one or more TXT files. Normally, 1E provides one TXT file for each Sync use case. All parameters are mandatory.
Installation parameters | Installer property name | Description |
|---|---|---|
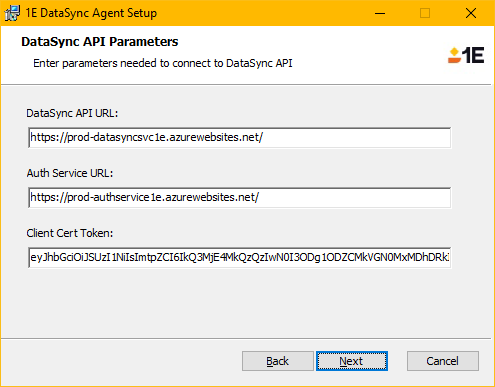
DataSync Service URL | DATA_SYNC_API_URL | The URL of DataSync Service URL running in Azure. This should normally be: https://prod-datasyncsvc1e.azurewebsites.net/ |
Auth Service URL | AUTH_SERVICE_URL | The URL of Auth Service running in Azure used by the Agent to obtain authentication tokens. This should normally be: https://prod-authservice1e.azurewebsites.net/ |
Client Cert Token | CLIENT_CERT_TOKEN | A token used by the Agent installer to perform the initial setup of authentication for the Agent. This is a unique time-based token that includes encoded details of the Azure authentication certificate, and the specific Sync use-case(s). The token is only valid for six days. |
Data Source Connection details | SQL_SERVER_DATA_SOURCES | <SyncName>|<DbServerName>|<DbName> Use the table below to construct the connection details for a specific Sync use-case. WarningAlthough the Data Source Connection details field supports multiple sync use-cases, for this version, you should only enter details for one Sync. Use the pipe character | as a delimiter. |
Data Source Connection details | Description |
|---|---|
SyncName | The SyncName is provided to you by 1E, specific to a single Sync use-case. You should not change this. |
DbServerName | The SQL Server instance name, using a format as specified by Microsoft. For example:
DbServerFQDN must match the subject name in the SQL Server instance’s SSL certificate. The installation account must have permission to this SQL Server instance and database, as described in Requirements. |
DbName | The SQL Server database name. The installation account must have permission to this SQL Server instance and database, as described in Requirements. |
Interactive installation
To run the installation interactively, logon to the host computer using the installation account, then start the installer.
Run the DatasyncAgent.msi
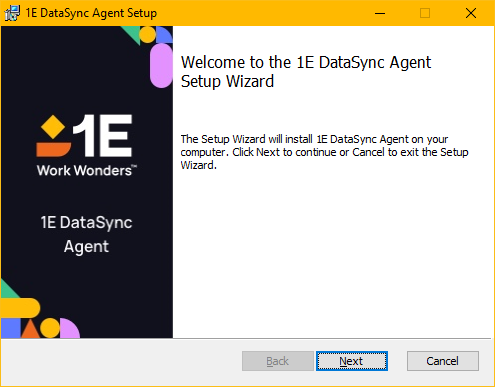
On the Welcome screen, click Next
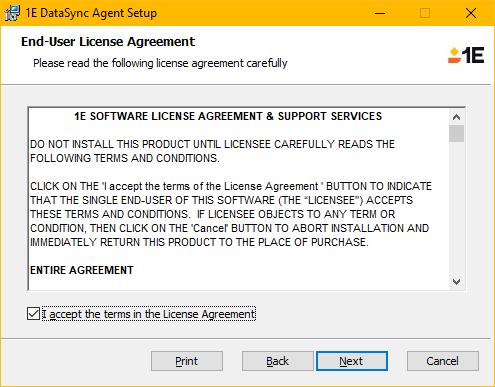
On the End-User License Agreement screen, check I accept the terms in the License Agreement, and click Next
On the DataSync Service URL Parameters screen, enter the parameter values you have been provided, and click Next
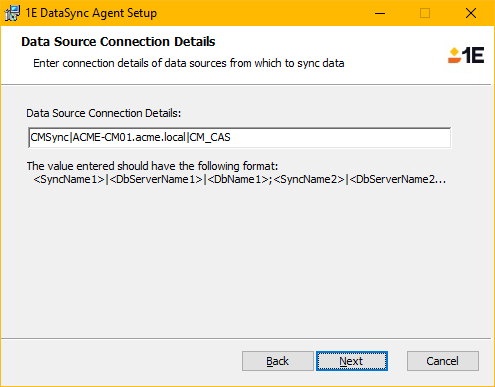
On the Data Source Connection Details screen, enter the parameter value that you constructed earlier, and click Next
On the Ready to install 1E DataSync Agent screen, click Install to begin the installation

On completion, click Finish to close the installer.
Silent installation
To run the installation silently, logon to the host computer using the installation account, then start the installer using a command line similar to below. You should have been given a TXT file with the command line you need for installing a single DataSync Agent supporting a single Sync. However, you must first reconstruct the SQL_SERVER_DATA_SOURCES parameter by replacing the placeholder text using the guidance in Preparation.
For example:
msiexec.exe /i DataSyncAgent.msi /l*v %TEMP%\DataSyncAgent.install.log /qn DATA_SYNC_API_URL=https://prod-datasyncsvc1e.azurewebsites.net/ AUTH_SERVICE_URL=https://prod-authservice1e.azurewebsites.net/ CLIENT_CERT_TOKEN=eyJhbGciOiJSUzI1NiIsImtpZCI6IkQ3MjE4MkQzQzIwN0I3ODg1ODZCMkVGN0MxMDhDRkI3IiwidHlwIjoiSldUIn0.eyJ2ZXIiOiIxIiwianRpIjoiMDMxNzY4NDYtNTk4Yi00YjkxLTljMDItMDNlZTkxNjhiOTgzIiwiaWF0IjoxNjYzNzI5MjU5LCJleHAiOjE2OTUyNjUyNTksImFwcF9pZCI6ImNkYzY3MTNhLWUxYjQtNGFkYy05NTUwLTgyYzc1MWYwZDBlNCIsImNlcnRfaWQiOiJDZXJ0MSIsInRlbmFudF9pZCI6IjU1YWNjOTY4LTRmZjItNDQ1NC05OGY0LTliZmE5NzgxMGQwYyJ9.bU20wok0mR1_vi9W4wQ4RAjrXykTpbXETWWBHdNhizR9-zhk1uZY8necFzpS6JJoKma_Aurd9lM3br9k21TUwMigzFSxQMJlcac2Dpn0Wp1Z4adhYnoH-pdTiwBYwHh_9jUssDb8RHohkMtUWHjwlmi8qFJ1tnWUEUo9l2Agw1rX2VDuYXFdHrtl8Vv7nYasiF4ohxEgppjk1HSt7OjAfd-0evejjcvCGie_a9CsFf8RlENlsMkLpK-3uOZ7wmnWpMZXBtu5g65AkK4K8RlNGHD9EtUiR4v6DmeH-d50Y6Uqw3y8af_egtrAguMGMiTlLfOMOnW16S7zjXUIHyF0fA SQL_SERVER_DATA_SOURCES="CMSync|ACME-CM01.acme.local|CM_CAS"
Post installation
Once the installer finishes it will have created a Windows service for the Agent called 1E DataSync Agent. The service will start immediately and start sending data from all the sources you specified.
The first sync is full, the following syncs are only the differences.
The Agent maintains a snapshot for each dataset in:
%ALLUSERSPROFILE%\1E\DataSyncAgent\Snapshots\{syncname}\{dataset}
Review Agent logs
You should review installation and service logs for any errors. Unless otherwise specified on the command-line, the Agent installer creates an installation log in the %temp% folder of the logged on user. The DataSync Agent service log file is created by default at:
%ProgramData%\1E\DataSyncAgent\Logs\DataSyncAgent.log
The log shows details of each Sync cycle:
The frequency of each cycle depends on the Sync use-case. The cycle starts when the Agent is started.
Within each cycle, there are pairs of entries for each data set, saying "Syncing data set" and "Done syncing data set in HH:MM:SS.SSSSSSSS".
"Syncing data set" does a SQL query then uploads events. If there is an issue with the SQL query, an entry is displayed showing the query and the error, and the process moves onto the next data set.
"Done syncing" indicates events for the data set have been uploaded, and either says "No events sent" if no new data, or lists the types of new events (Truncates, Inserts, Updates, Deletes, SnapshotCompletes).
Content Distribution CMSync
Open a browser, connect to the 1E portal, as a 1E user that is a member of the Nomad Administrator role (or Full Administrator)
Open the Content Distribution app
The Overview page will be populated after 30 minutes, or longer depending how many clients you have in ConfigMgr.
Note
Content Distribution tiles will only show data once you have deployed 1E Client to your ConfigMgr clients, and the DataSync synchronization process has completed at least once.
The DataSync Agent gets details from ConfigMgr about ConfigMgr clients and jobs, and passes this data up to your 1E SaaS instance, where it is matched with 1E Clients and aggregated into Content Distribution.
Synchronization takes longer the first time it runs, and subsequently less time processing deltas.
Data sets: ApplicationPackages, Collections, CollectionMembers, Contents, Deployments, Duplicates, StateMigrations, TaskSequencePackages, TaskSequenceReferences.
MECM connector
The following steps are required to complete the configuration process.
Open a browser, connect to the 1E Portal, as a 1E user that is a member of the Inventory Administrator role (or Full Administrator).
Open the Settings app and navigate to Configuration → Connectors.
In the Connectors page, click Add and in the Add Connector popup select System Center Configuration Manager from the list of connector types.
Enter a name for your new MECM connector. You can choose any name, it can be the same as the Sync name used when installing the Agent.
Check the Run Consolidation Reports checkbox.
Click Add to save the new connector.
In the Connectors page, select the new MECM connector and click the Test button.
If the test succeeds, Test status will display a green check icon, and you are good to go.
If the test fails, the Test status will display a red failed icon, and you will need to investigate the issue.
After a test success, you can execute a sync action, and review the contents of the Inventory repository.
manually execute a sync action - Execute a connector sync action.
schedule a sync action - Schedules page.
review the contents of the Inventory repository - Introducing Inventory Insights.
Note
The DataSync Agent gets details from ConfigMgr about ConfigMgr clients, and passes this data up to your 1E SaaS instance, where it is consolidated into the Inventory with data from other inventory connector sources.
Synchronization takes longer the first time it runs, and subsequently less time processing deltas.
Data sets: CUSTOM_SQL_Property_DATA, DeploymentPackage, DeploymentProgram, GroupMap, Patchs, Settings, Sites, SMSPackages, v_Add_Remove_Programs, v_CategoryInfo, v_CICategories, v_GS_CCM_RECENTLY_USED_APPS, v_GS_COMPUTER_SYSTEM, v_GS_INSTALLED_SOFTWARE, v_GS_OPERATING_SYSTEM, v_GS_PC_BIOS, v_GS_PROCESSOR, v_GS_SERVICE, v_GS_SYSTEM_CONSOLE_USER, v_GS_VIRTUAL_MACHINE, v_GS_WORKSTATION_STATUS, v_R_System, v_R_User, v_RA_System_SystemOUName, v_Site, v_UpdateCIs, vSMS_Program.
VDX connection to a Citrix SQL Server
VDX is currently a 1E Labs application.
More detail about VDX will be provided soon.
Note
Data sets: Application, ApplicationInstance, Connection, DesktopGroup, Machine, Session, SessionMetrics, SessionAutoReconnect, User.