Installing and upgrading
How to set up 1E Virtual Assistant, including a guide to upgrading.
1E Virtual Assistant is a ServiceNow application that can be installed from the ServiceNow App portal. This section provides details on how to install 1E Virtual Assistant and how to configure it post-installation for use.
App installation
The 1E Virtual Assistant app is available on the ServiceNow app store and can be installed onto your ServiceNow instance using the following steps:
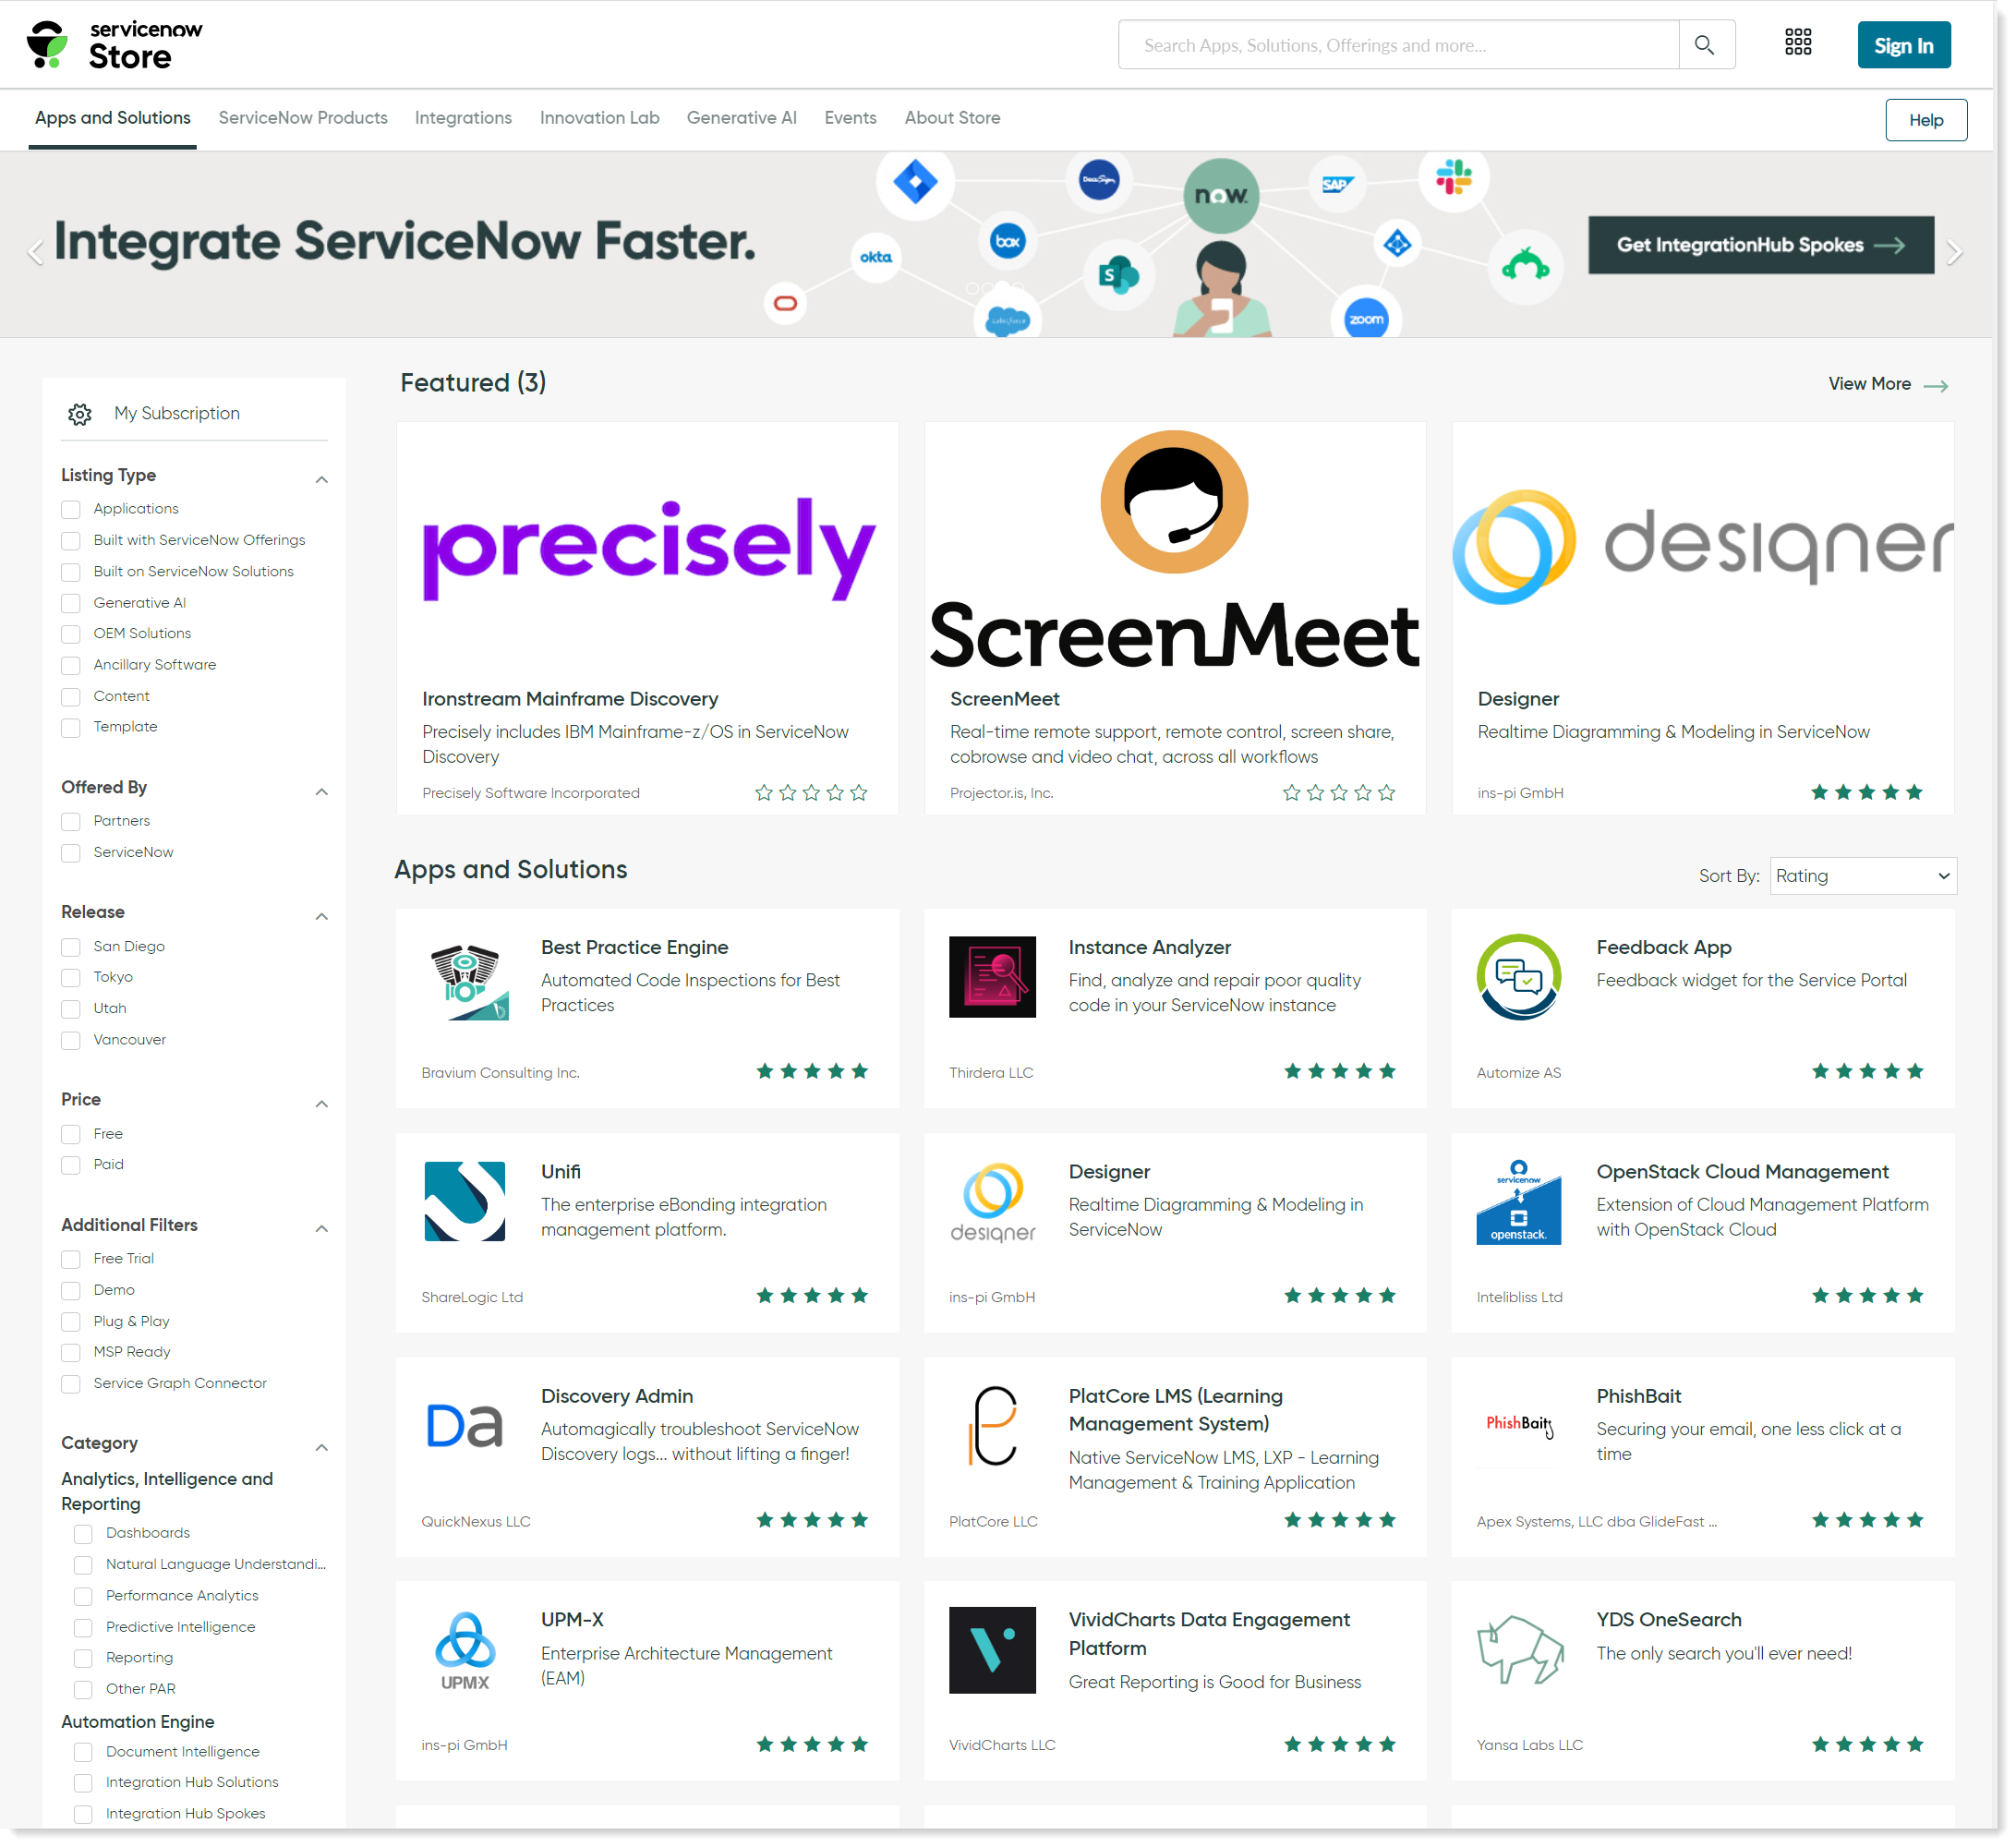
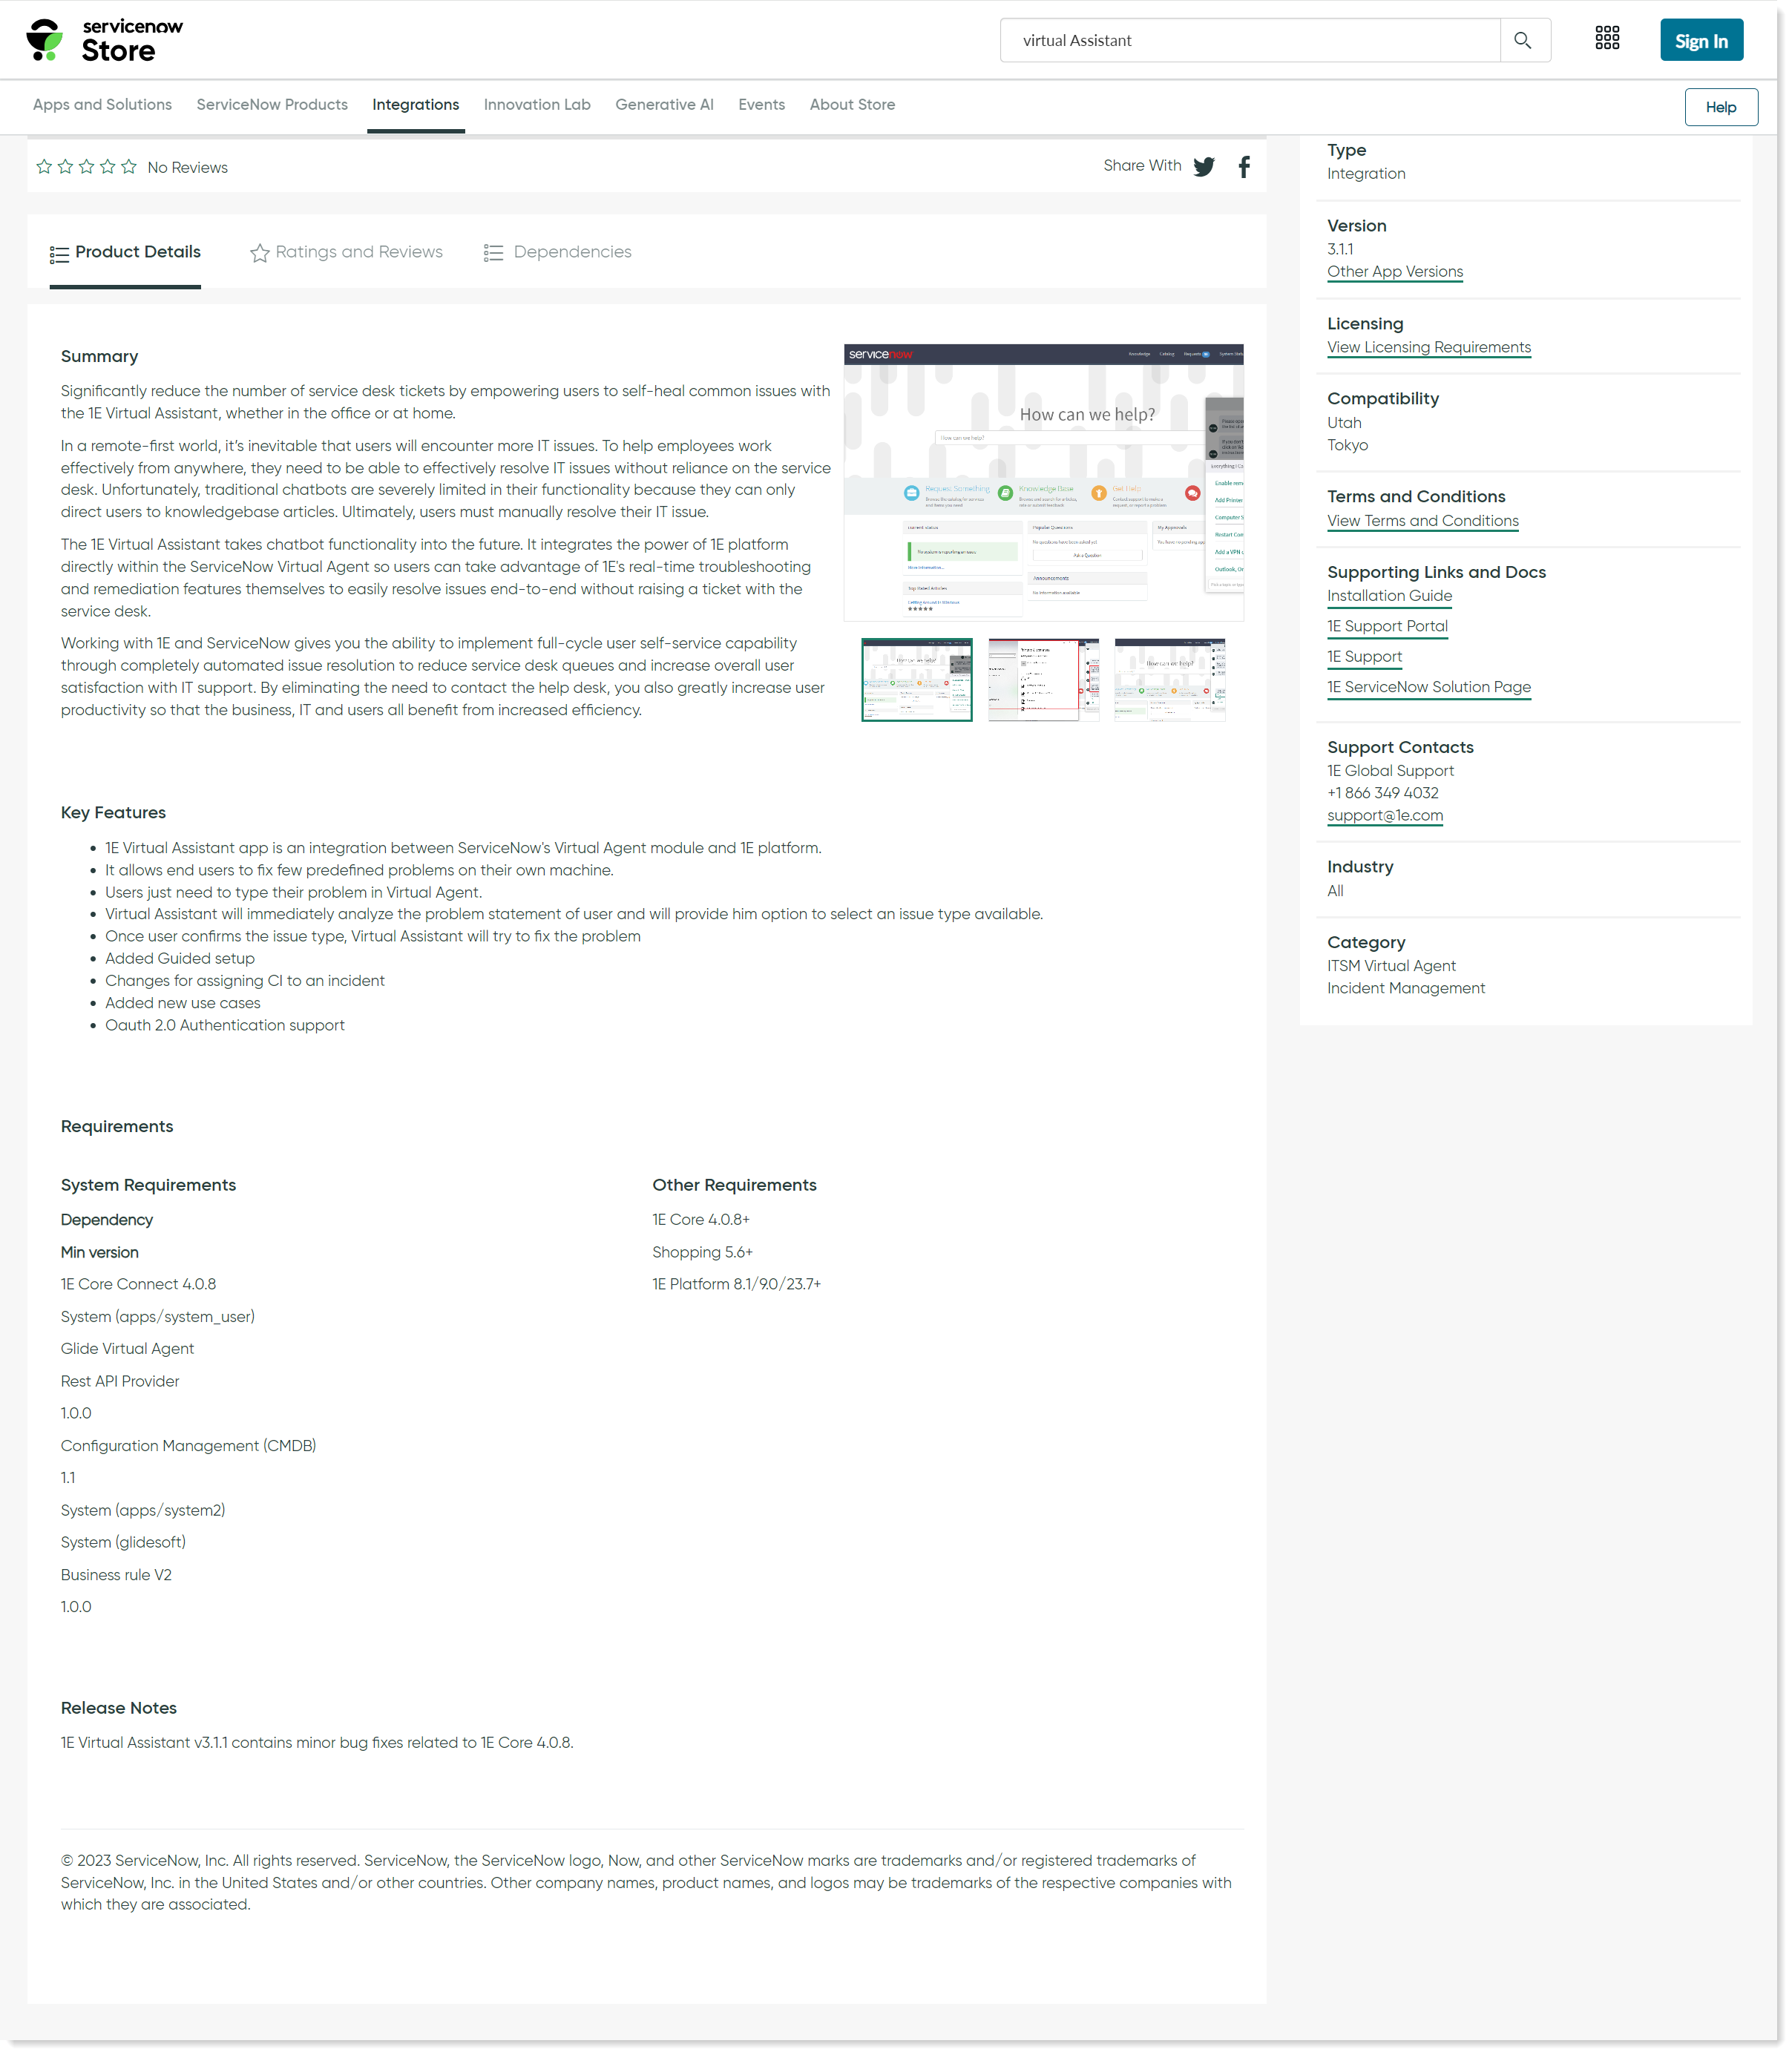
Browse to the ServiceNow App Store using the following URL: https://store.servicenow.com/sn_appstore_store.do#!/store/home, as shown in the picture.
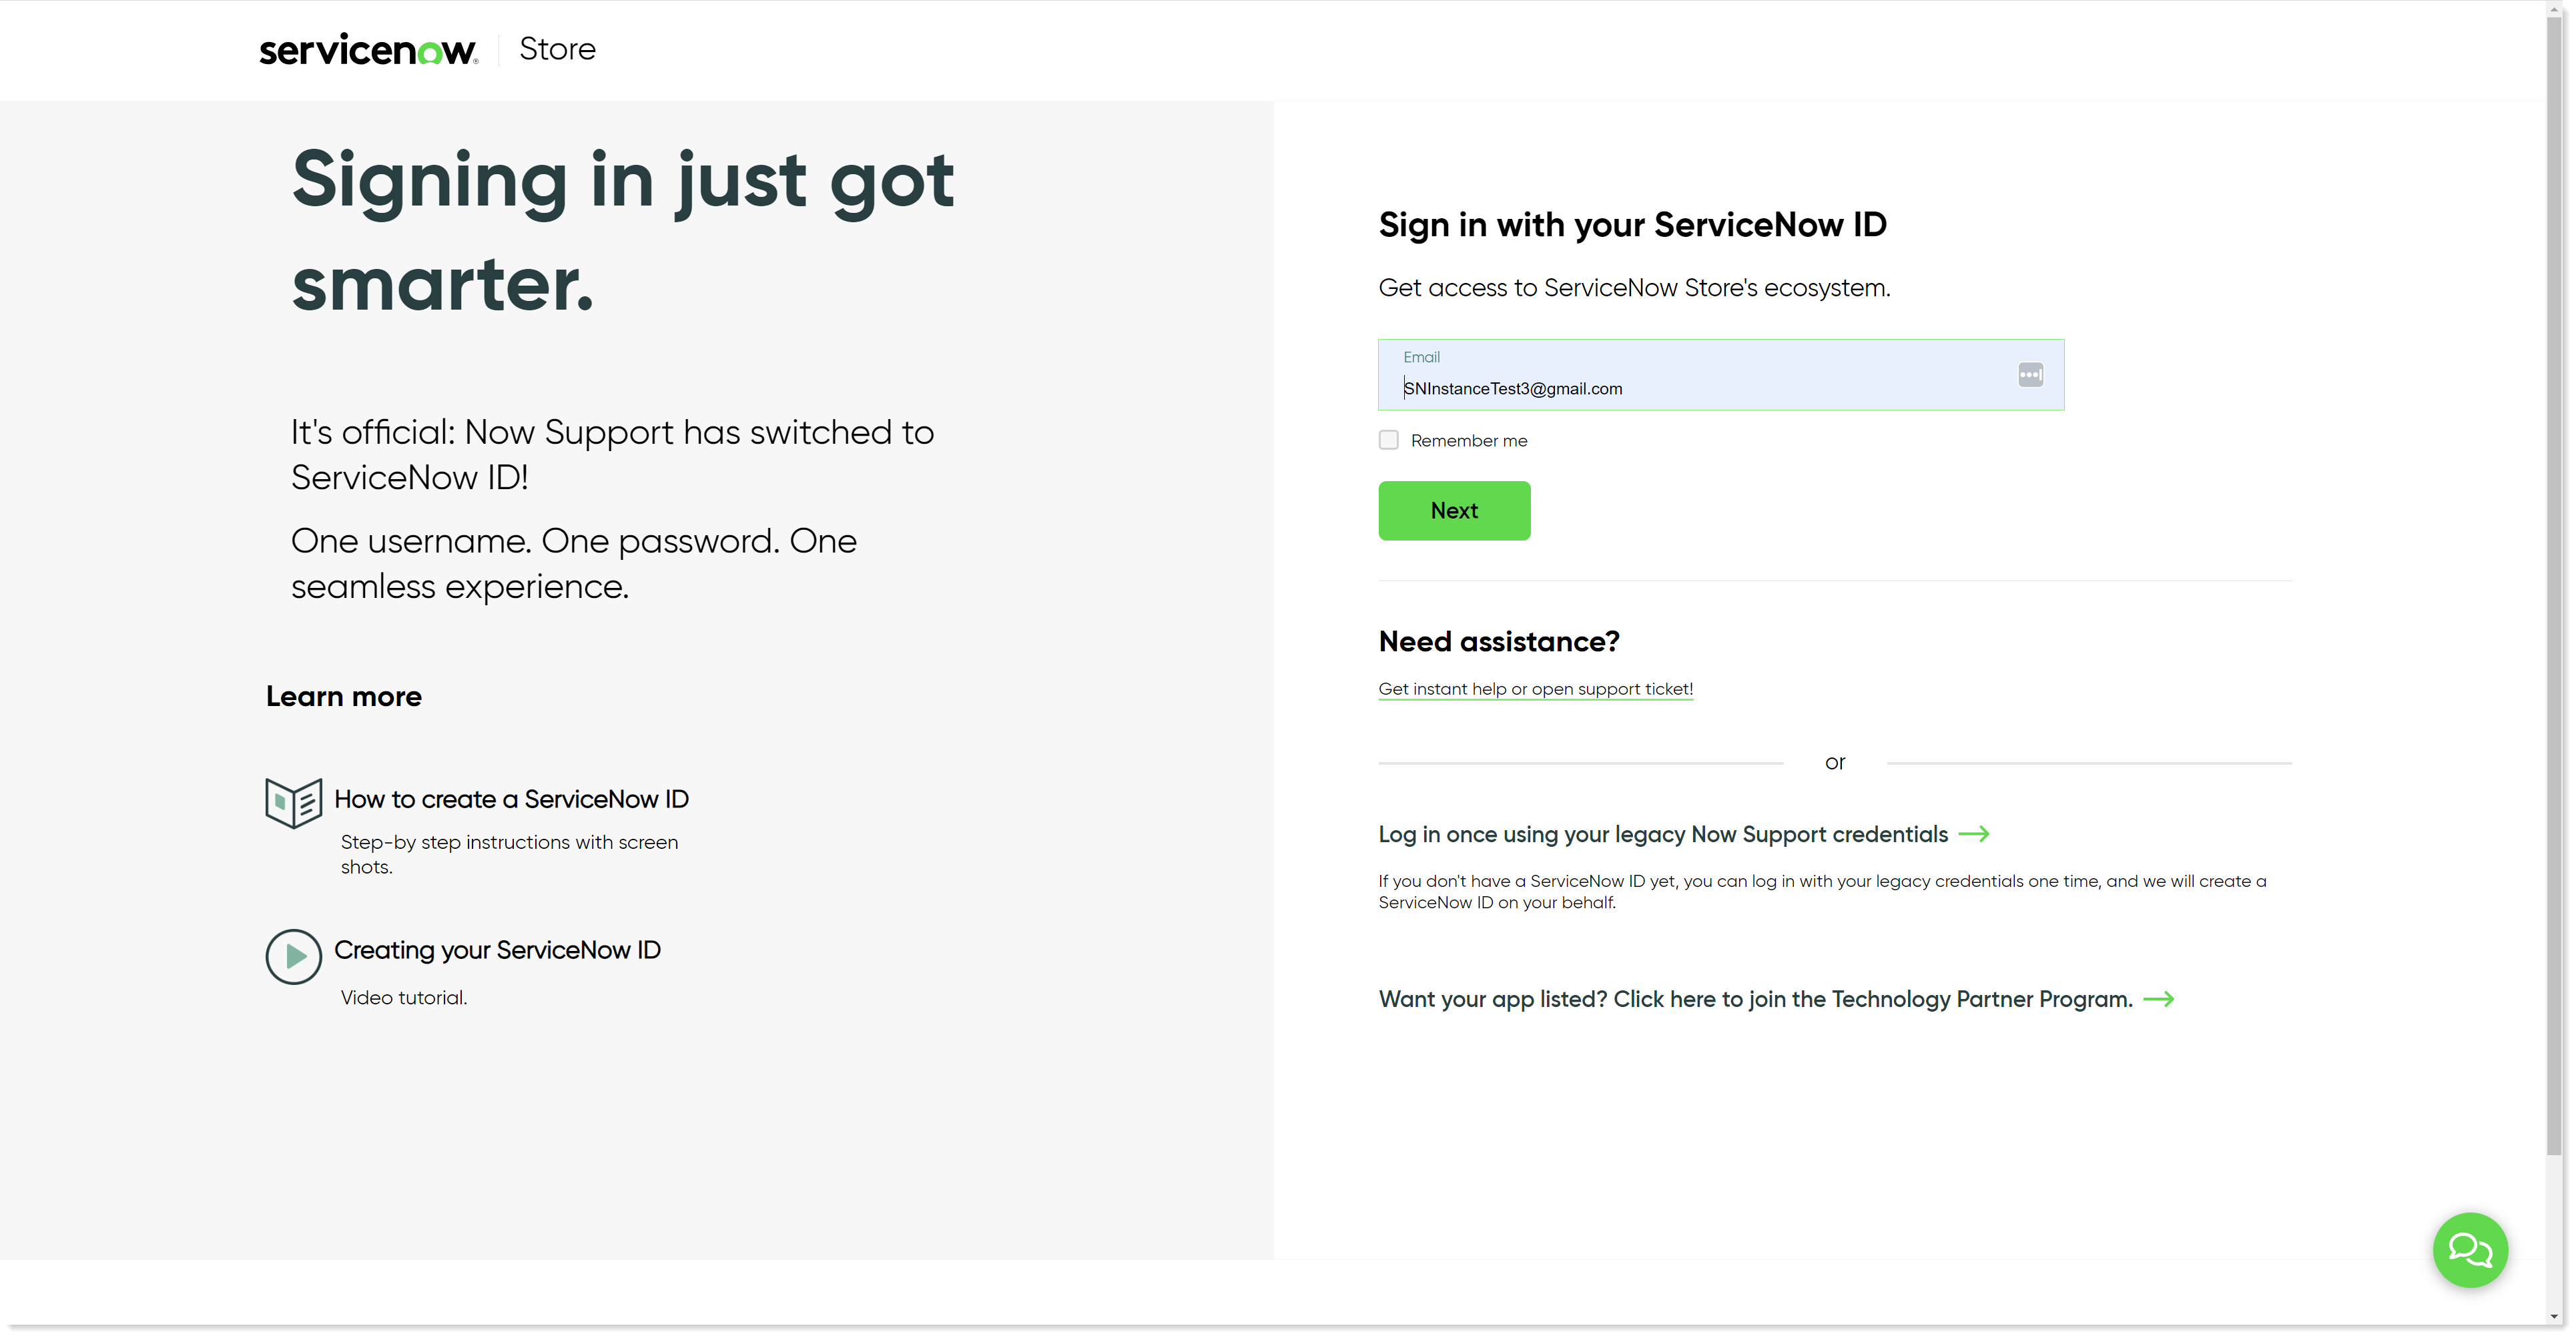
Click the Sign In button at the top-right of the ServiceNow Store to log in.
In the Login popup, you will be prompted to enter your credentials. The username and the password should be the ones provided when you created your ServiceNow support account.
You can also reset your account password and raise a support ticket from here.
After you've logged in, find the 1E Virtual Assistant app from the list of available apps.
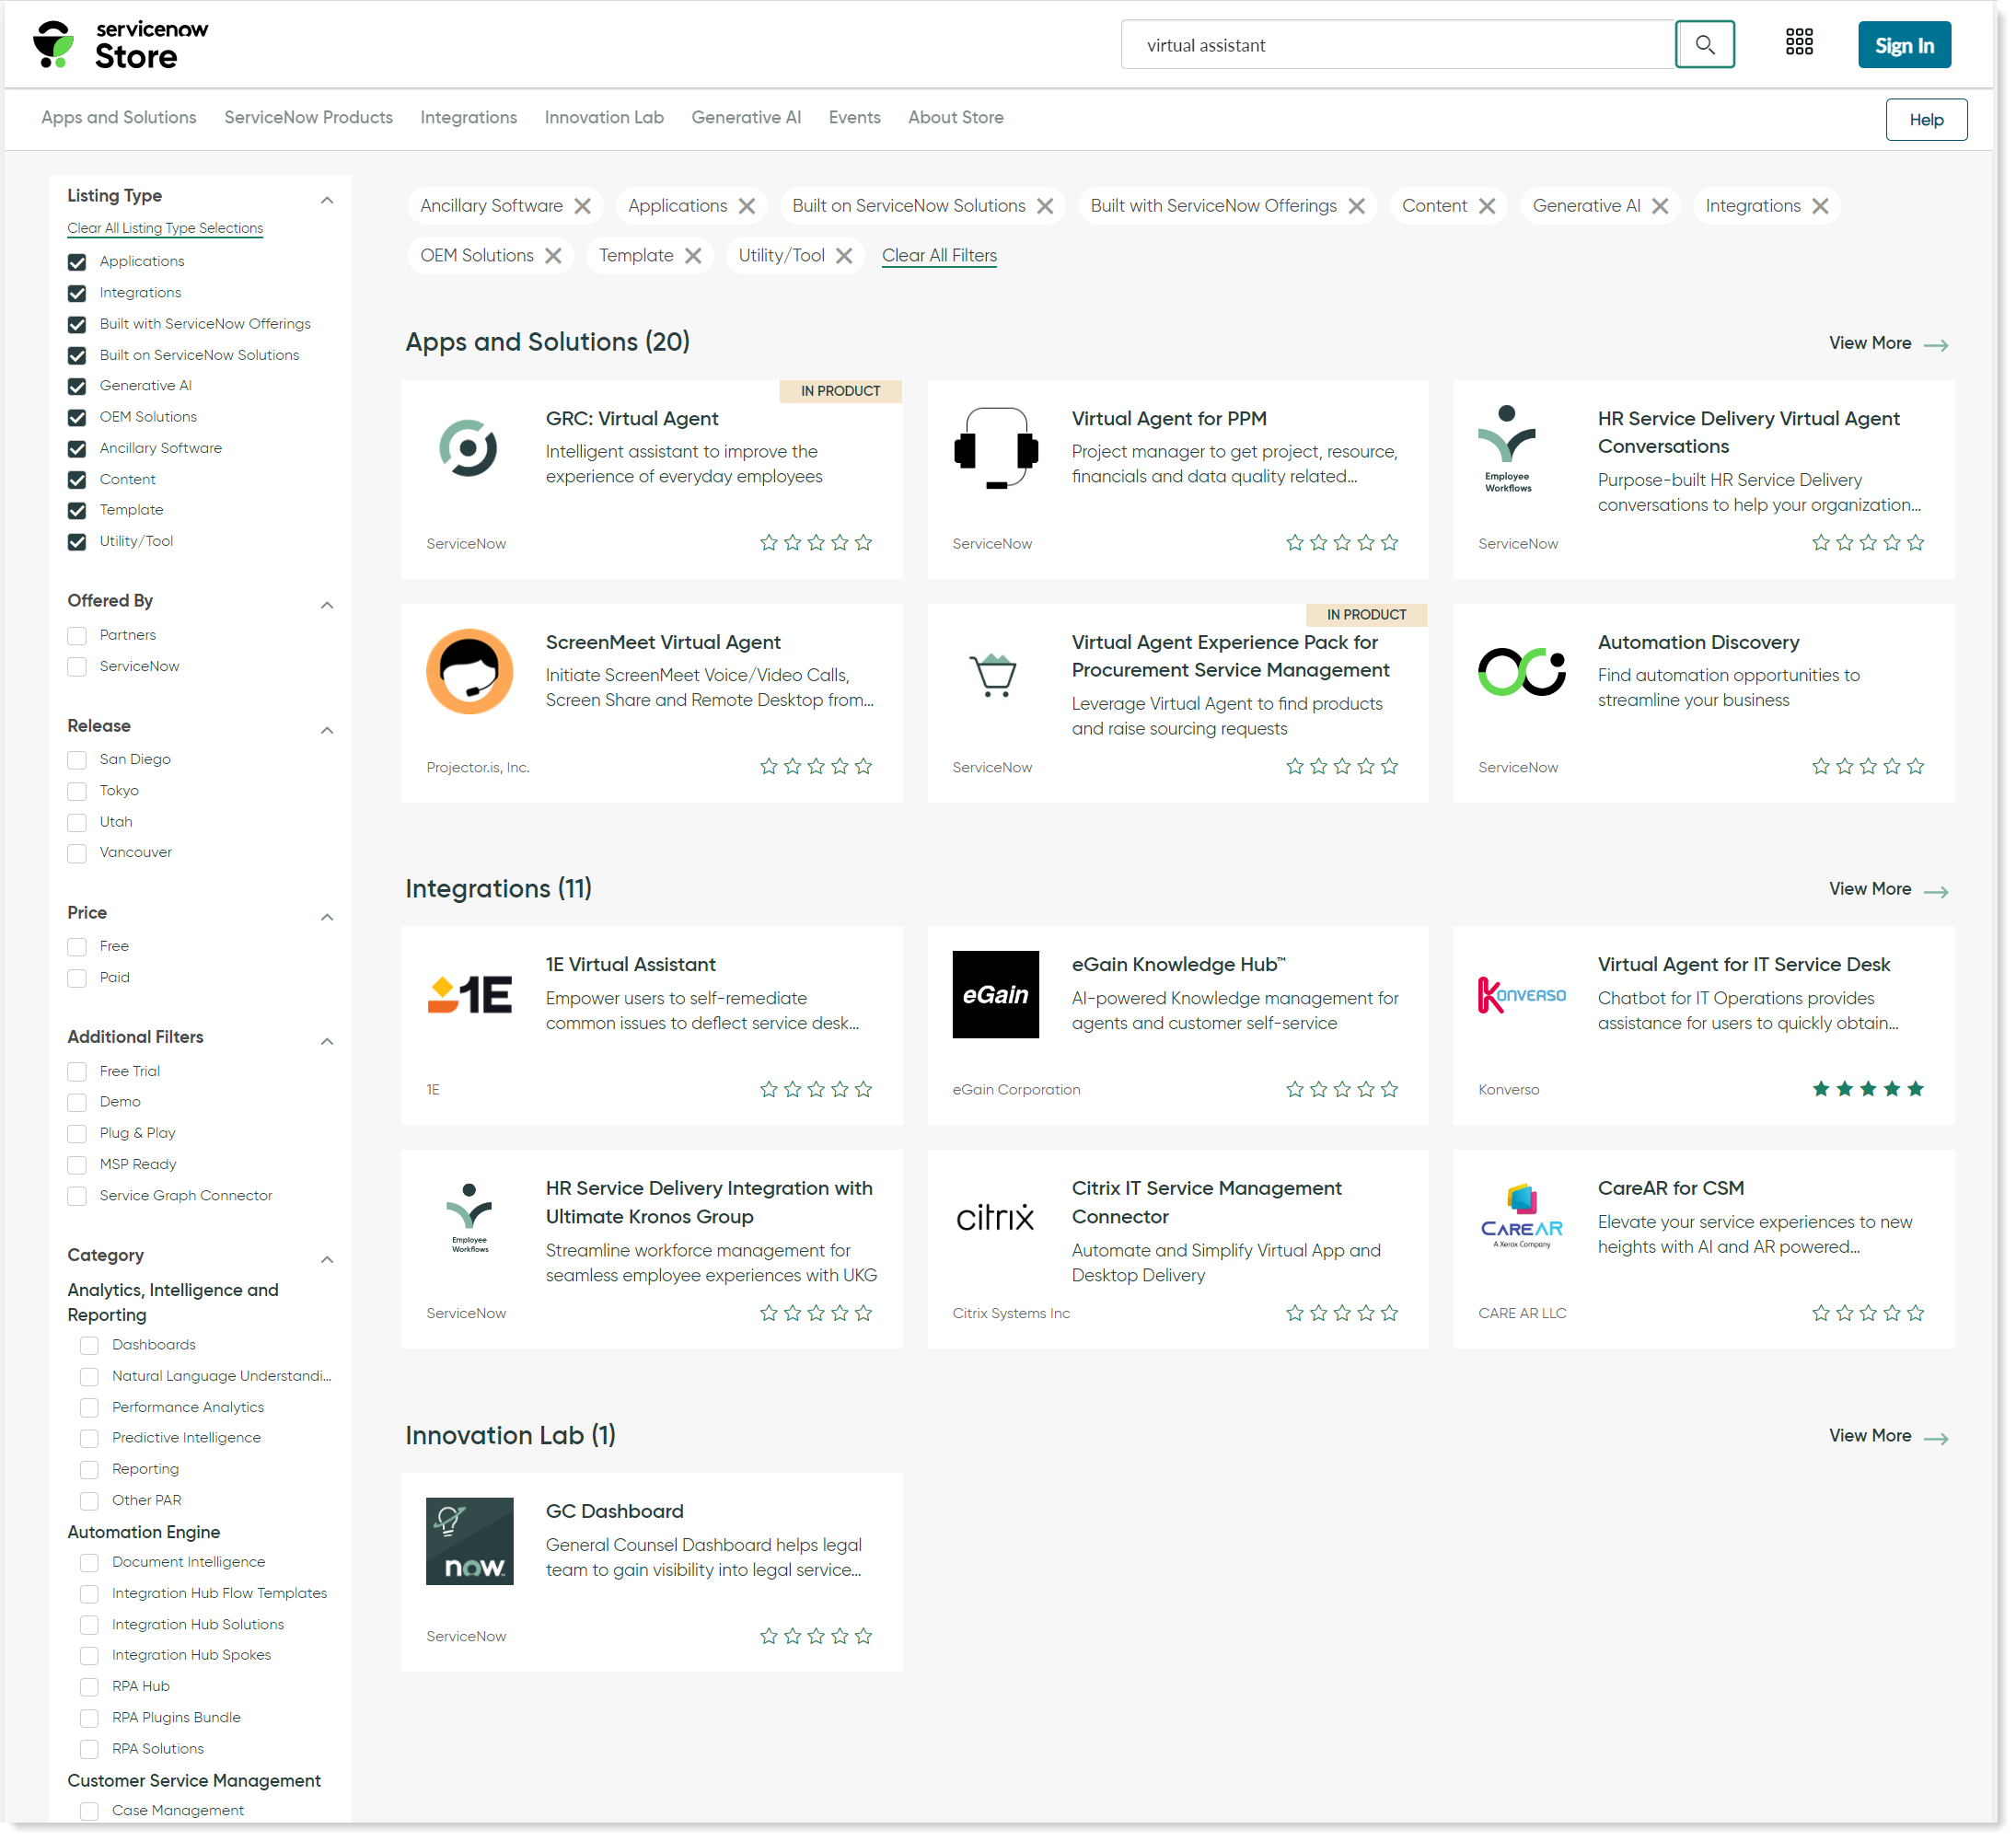
Click on the application and click on Get to install the application.
The 1E Virtual Assistant app will install automatically on your ServiceNow instance. The ServiceNow Instance details are already available in ServiceNow because they are part of your TPP credentials.
Upgrading
In case, you already have 1E Virtual Assistant application installed on your ServiceNow instance, but an older version of it. Then you should upgrade your 1E Virtual Assistant application to the latest version.
Before upgrading, ensure that the following tables have been backed up:
Triggered Instructions
Instruction definitions
Now perform the following steps to upgrade the application:
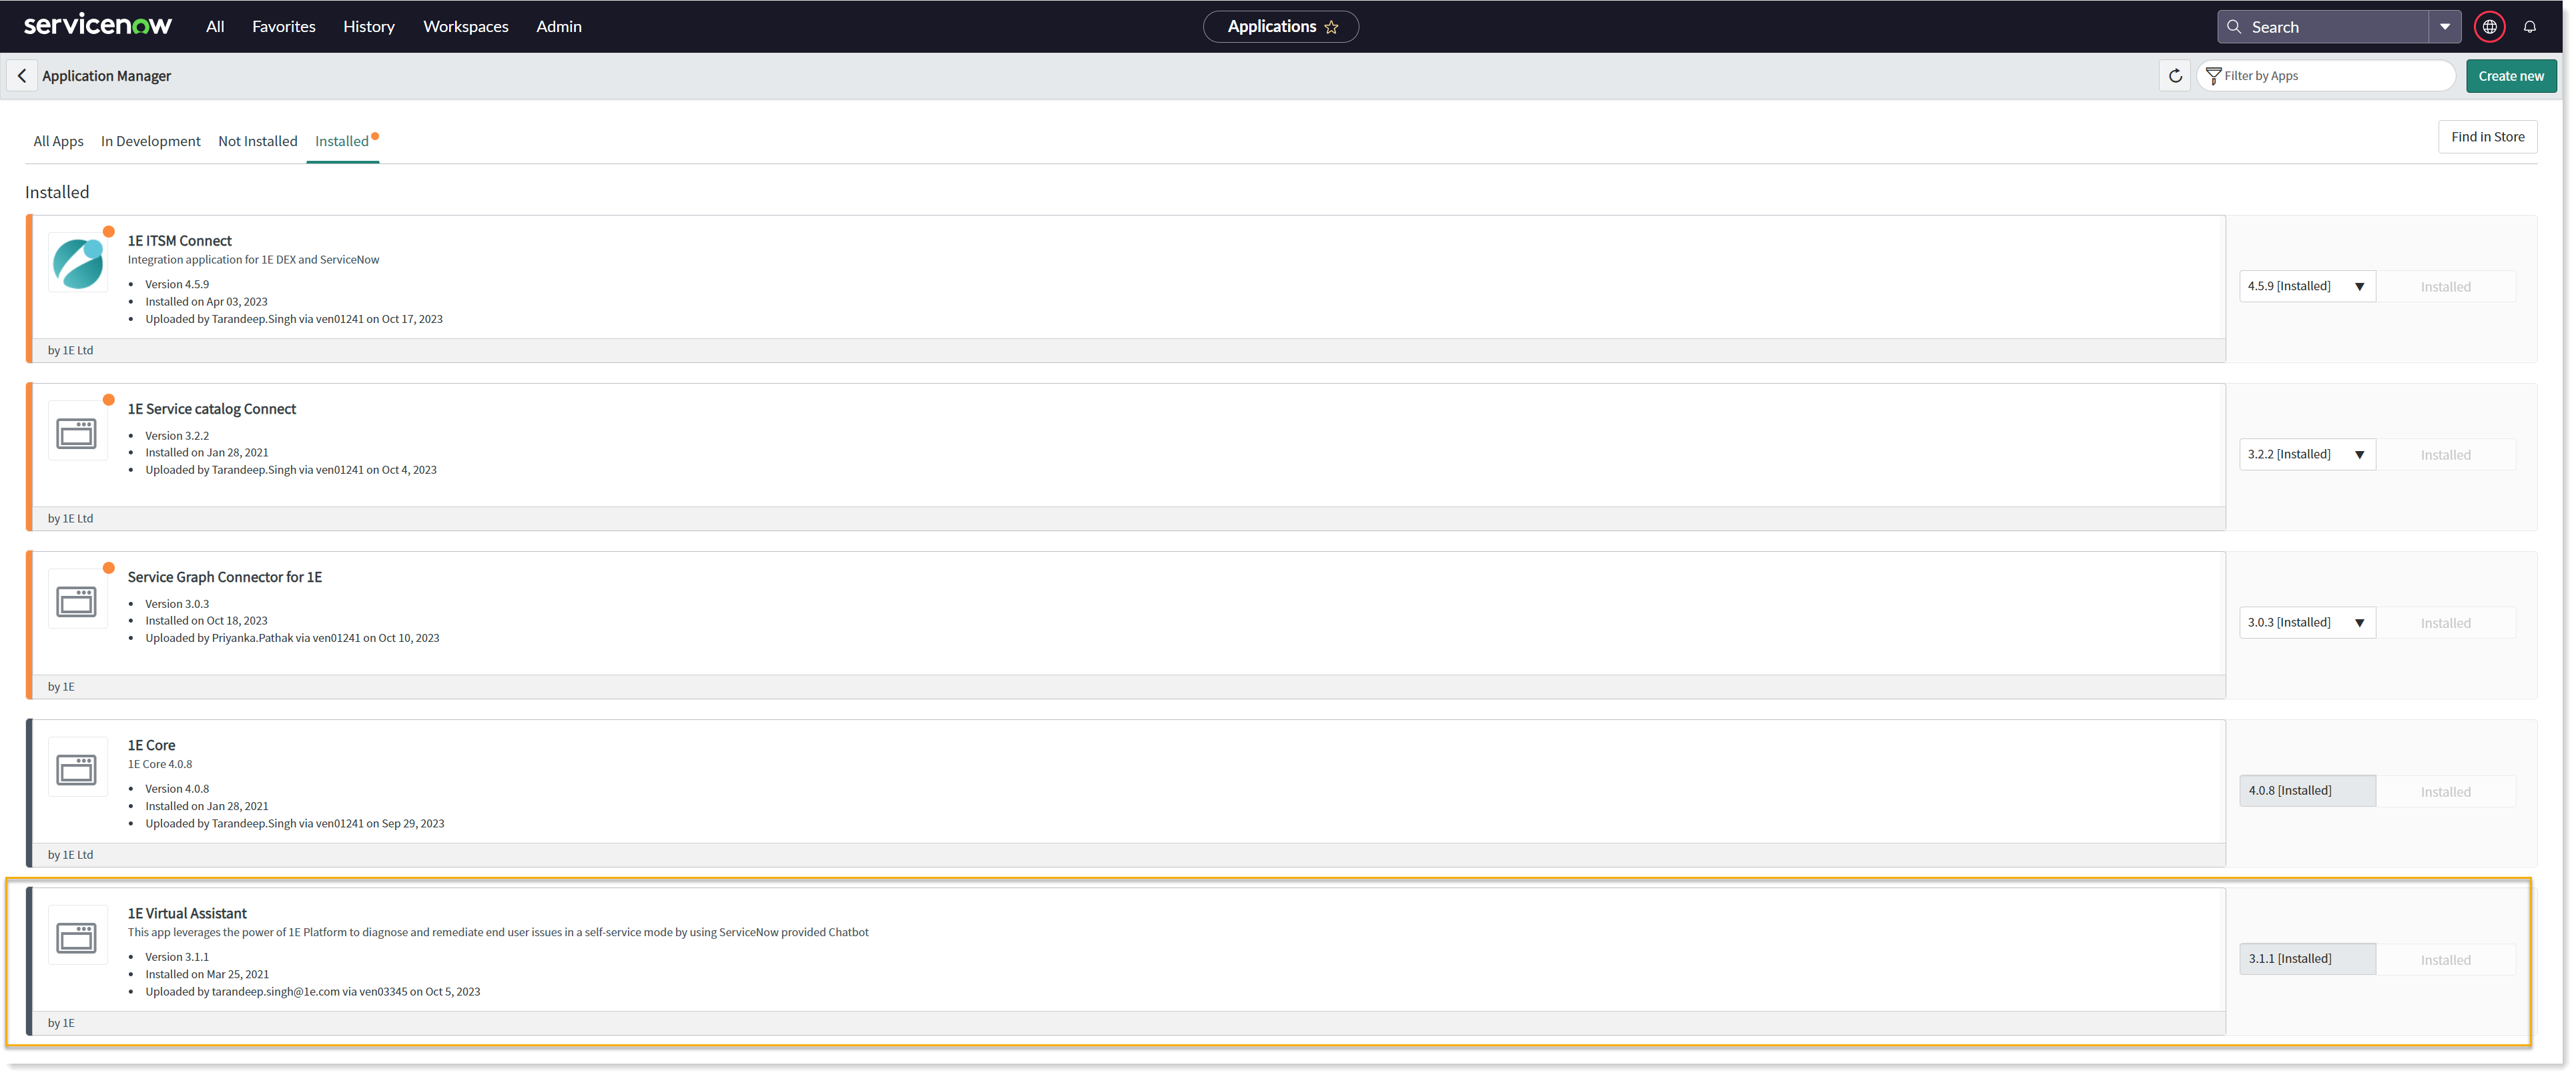
In ServiceNow, navigate to My Company Applications. This opens up an Application Manager page as shown in the picture below.
Note
In case the application is not listed under My Company Applications, then navigate to Plugins and look for the application there.
Click on the Installed tab on Application Manager page to see the list of installed applications.
Look for 1E Virtual Assistant from the list, select the latest version from the dropdown menu as shown in the picture below, and click Update.
You now have the latest version of 1E Virtual Assistant available.
Guided Setup
Setup is a step-by-step guided procedure to configure 1E Virtual Assistant.
The guided Setup is available under the 1E Virtual Assistant menu items in the application navigator. Only users with an Administrator role will see this option in the menu. This Setup contains the basic configuration steps you will need to complete to get the application working.
Getting Started
Click on Setup to open the Getting started page on the right-pane of the ServiceNow window, as shown in the picture below.

Click on the Get Started button to start the guided setup and configure the connector.

The configuration process has two steps, as shown in the picture above, these are:
1E Platform Configuration
1E Virtual Assistant Configuration
Click on Get Started button to view each step's associated tasks.
1E Platform Configuration
The step 1E Platform Configuration has four tasks to complete, as shown in the picture below.
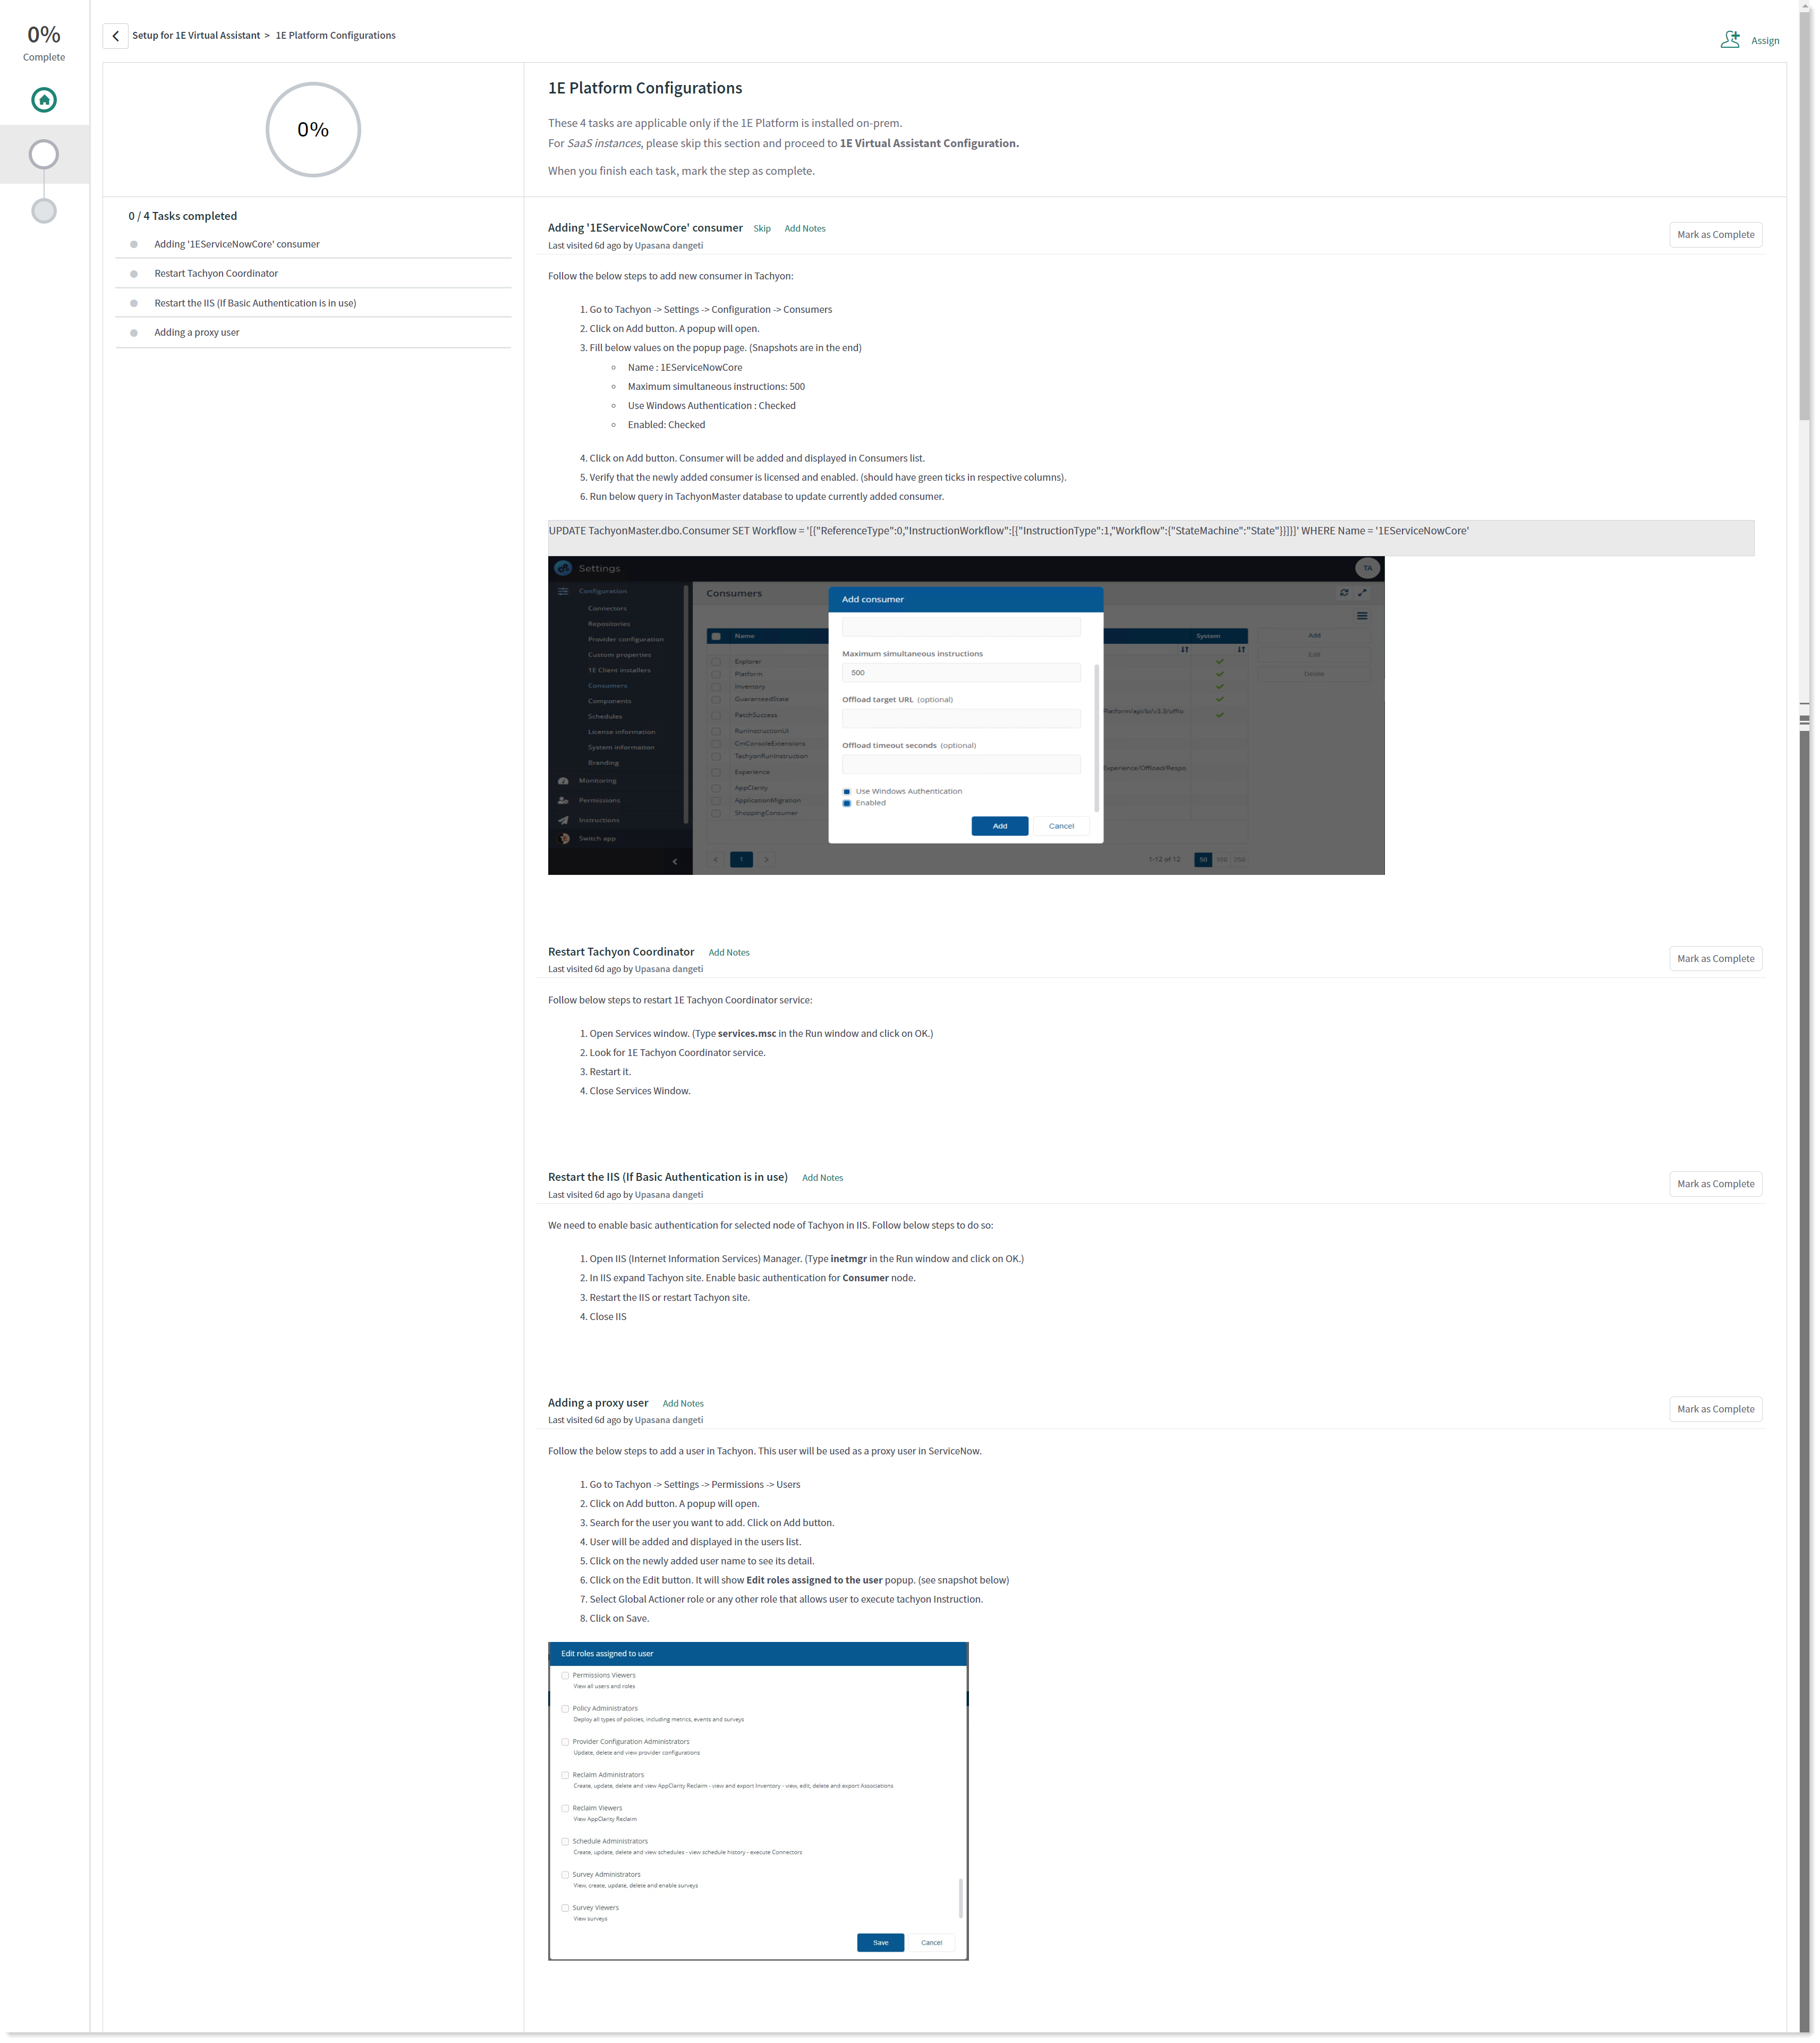
Adding 1EServiceNowCore Consumer
Restart Tachyon Coordinator
Restart the IIS (if Basic Authentication is in use)
Adding a proxy user
Every task involves a series of configuration steps. You need to complete each step before moving onto the next one. As you finish configuring each task, click on Mark as Complete button and move on to the next one.
Note
As you complete the configuration of each task, your progress shows as a percentage at the top of the page.
Once you have performed all the actions associated to 1E Platform Configuration for your connector, your progress should now show 50% complete.
1E Virtual Assistant Configuration
The step 1E Virtual Assistant Configuration has four tasks to complete, as shown in the picture below.
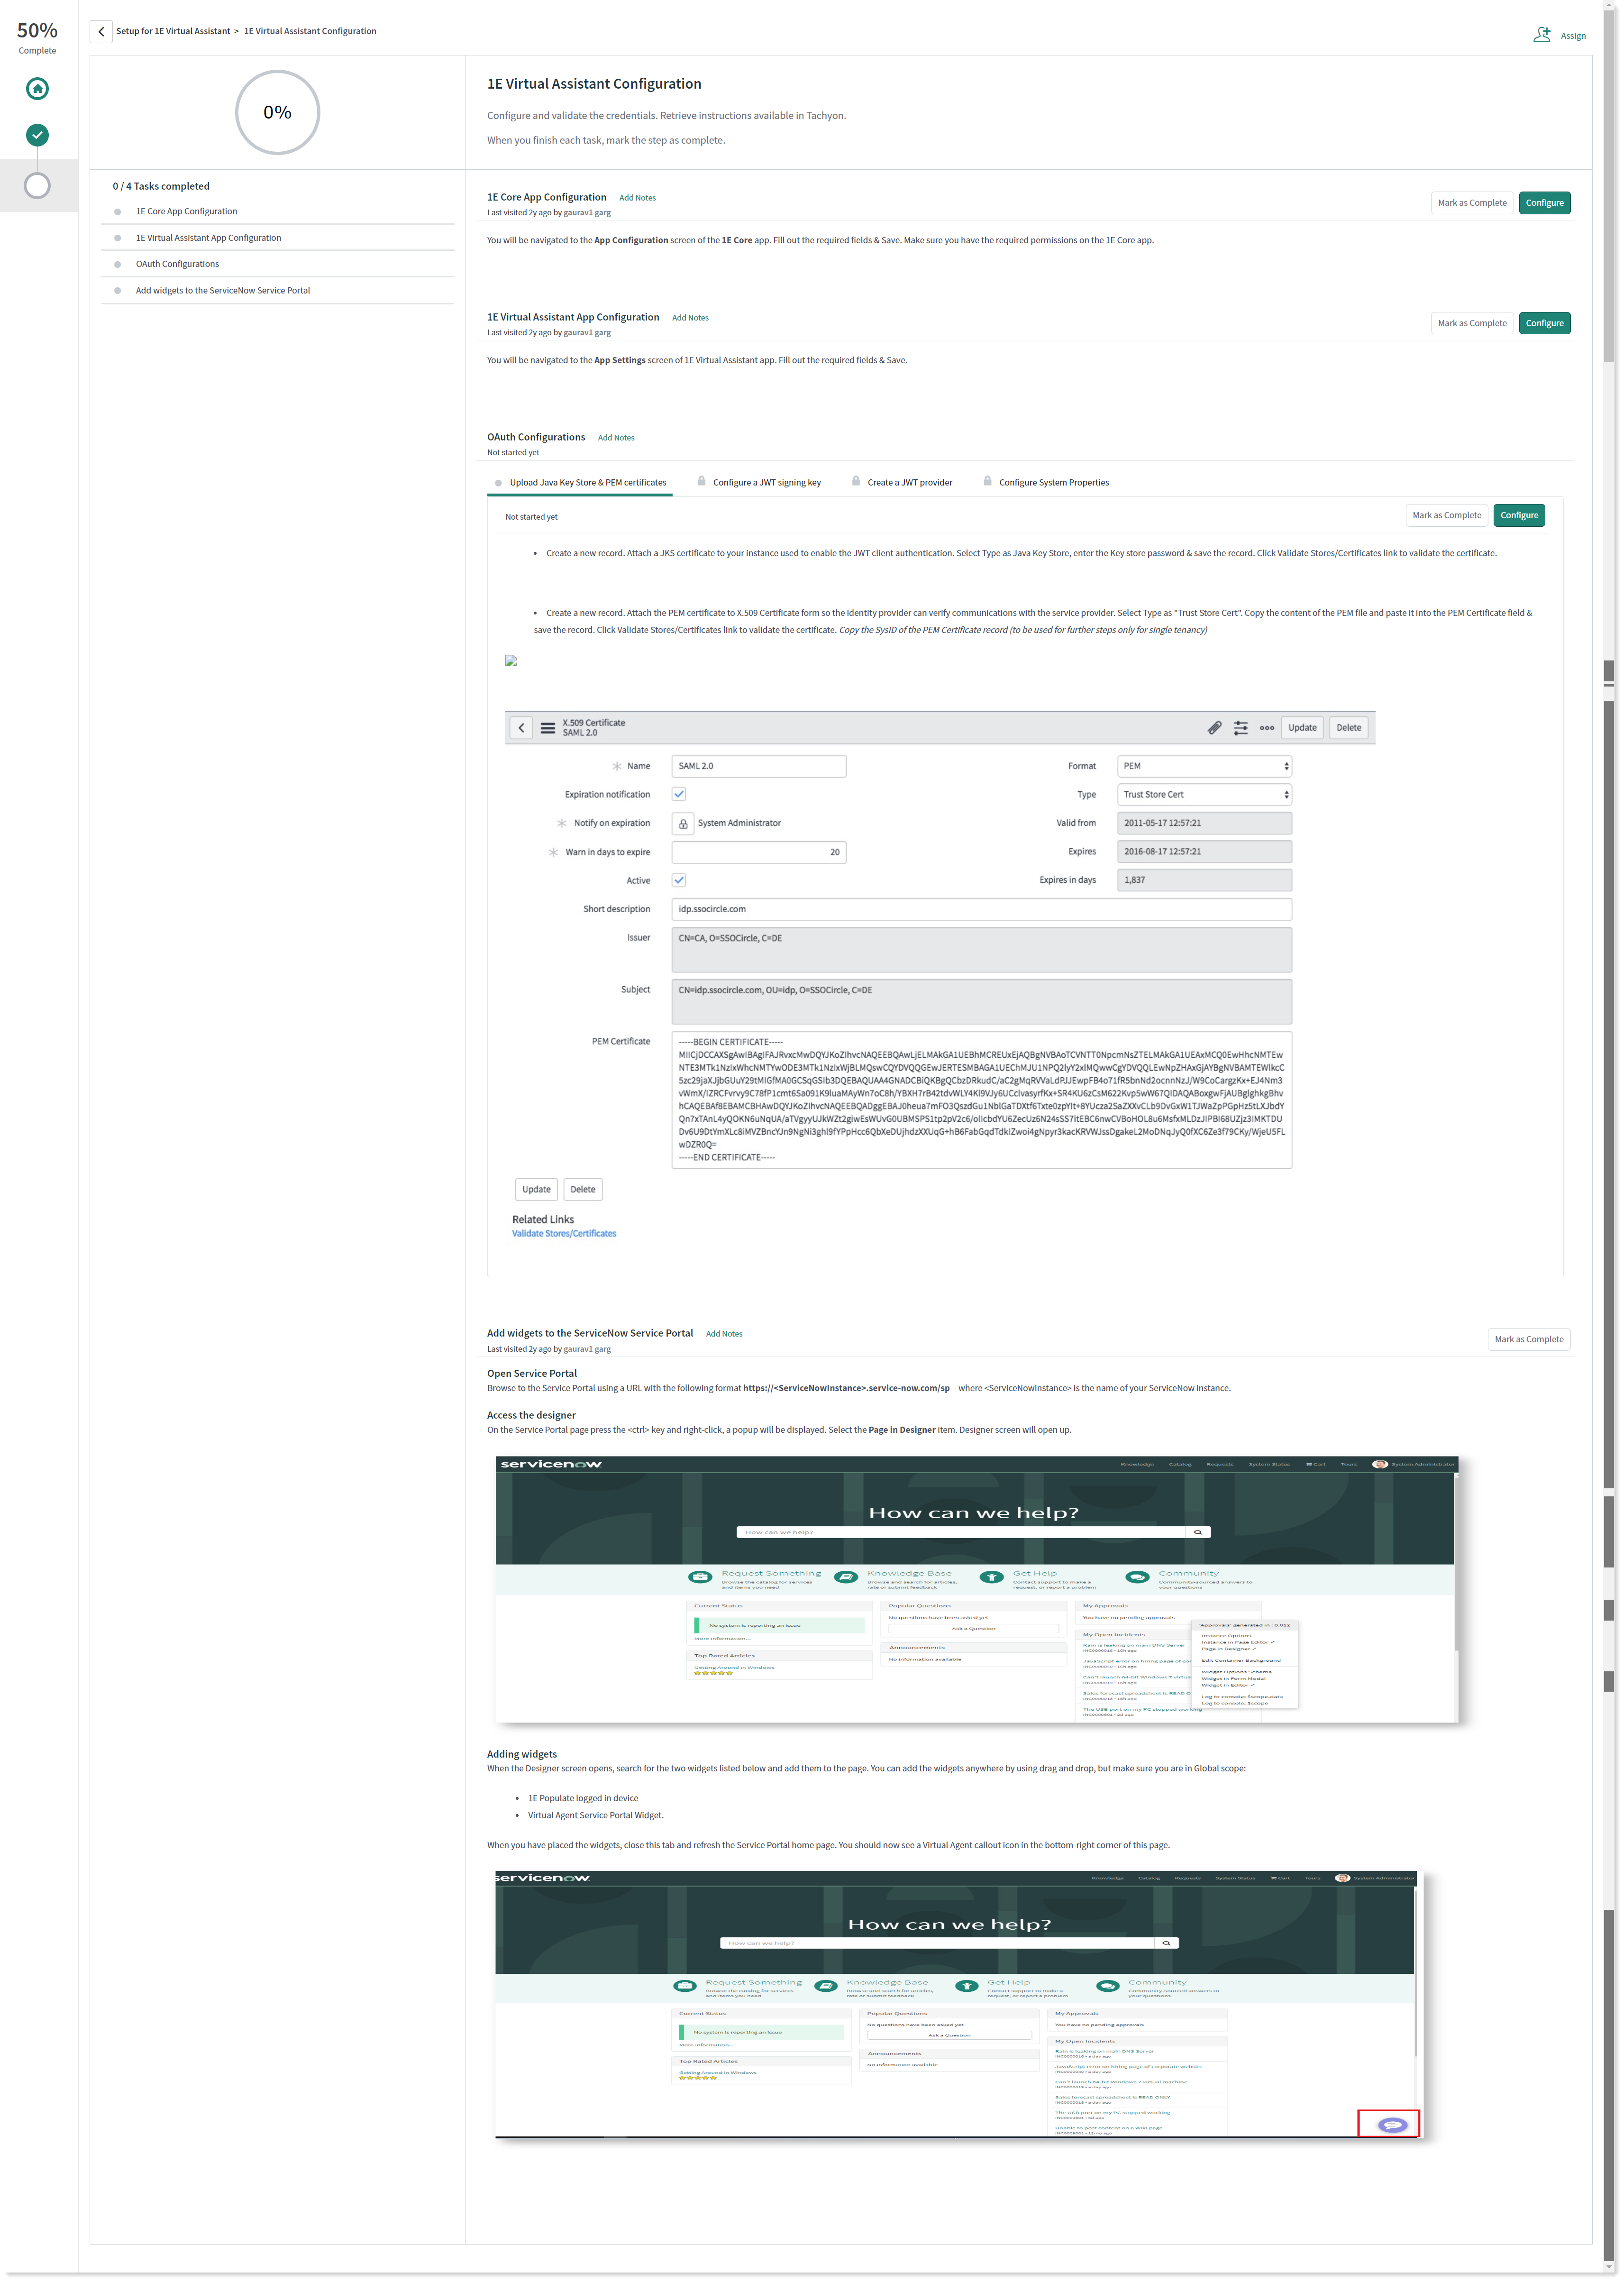
1E Core App Configuration
1E Virtual Assistant App Configuration
OAuth Configuration
Add widgets to the ServiceNow Service portal
Click the Configure button to work on each task.
Every task involves a series of configuration steps, as mentioned in the above picture. You need to complete each step before moving onto the next one. As you finish configuring each task, click on Mark as Complete button and move on to the next one.
Note
As you complete the configuration of each task, your progress shows as a percentage at the top of the page.
1E Core App Configuration
This step guides you in configuring 1E Core application settings for your connector, click the Configure button to continue. The admin user must complete the form as shown in the picture below.
To save your changes, click Save.
Once you complete the above actions, click on Mark as Complete to complete this task of configuration and move on to the next part.
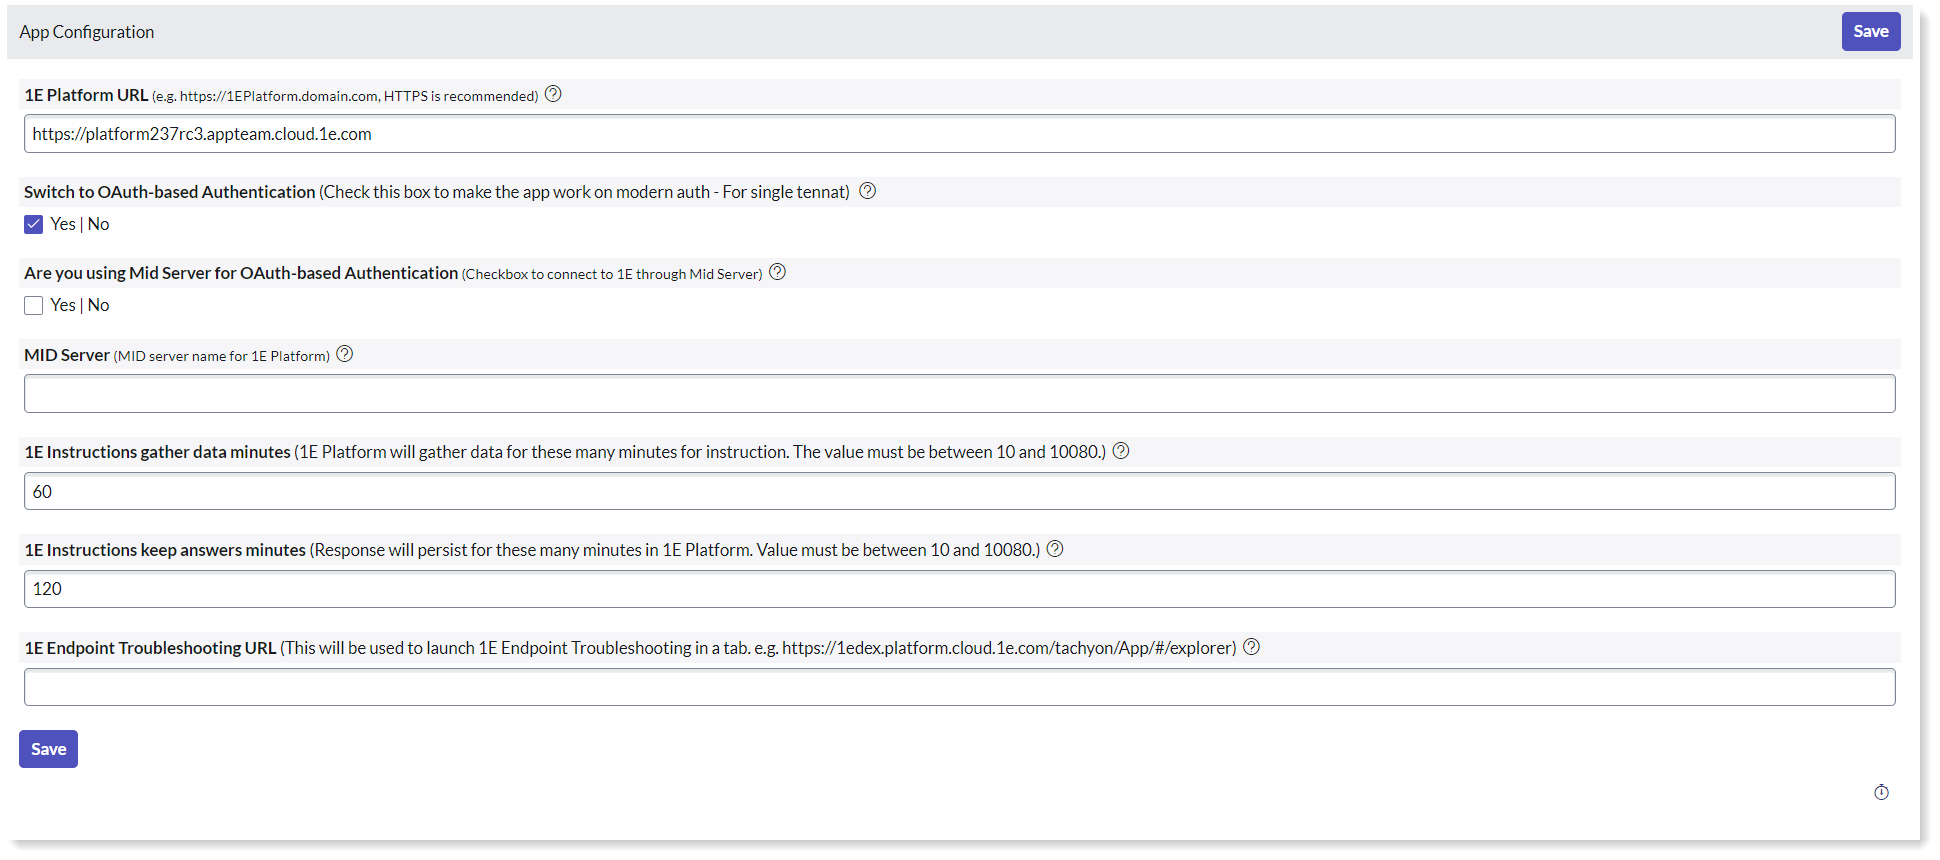
1E Virtual Assistant App Configuration
The next step is to configure 1E Virtual Assistant App Settings. If you click on Configure button, it redirects you to App Configuration page. The admin user must complete the form and Save the App Settings form as shown in the picture below.
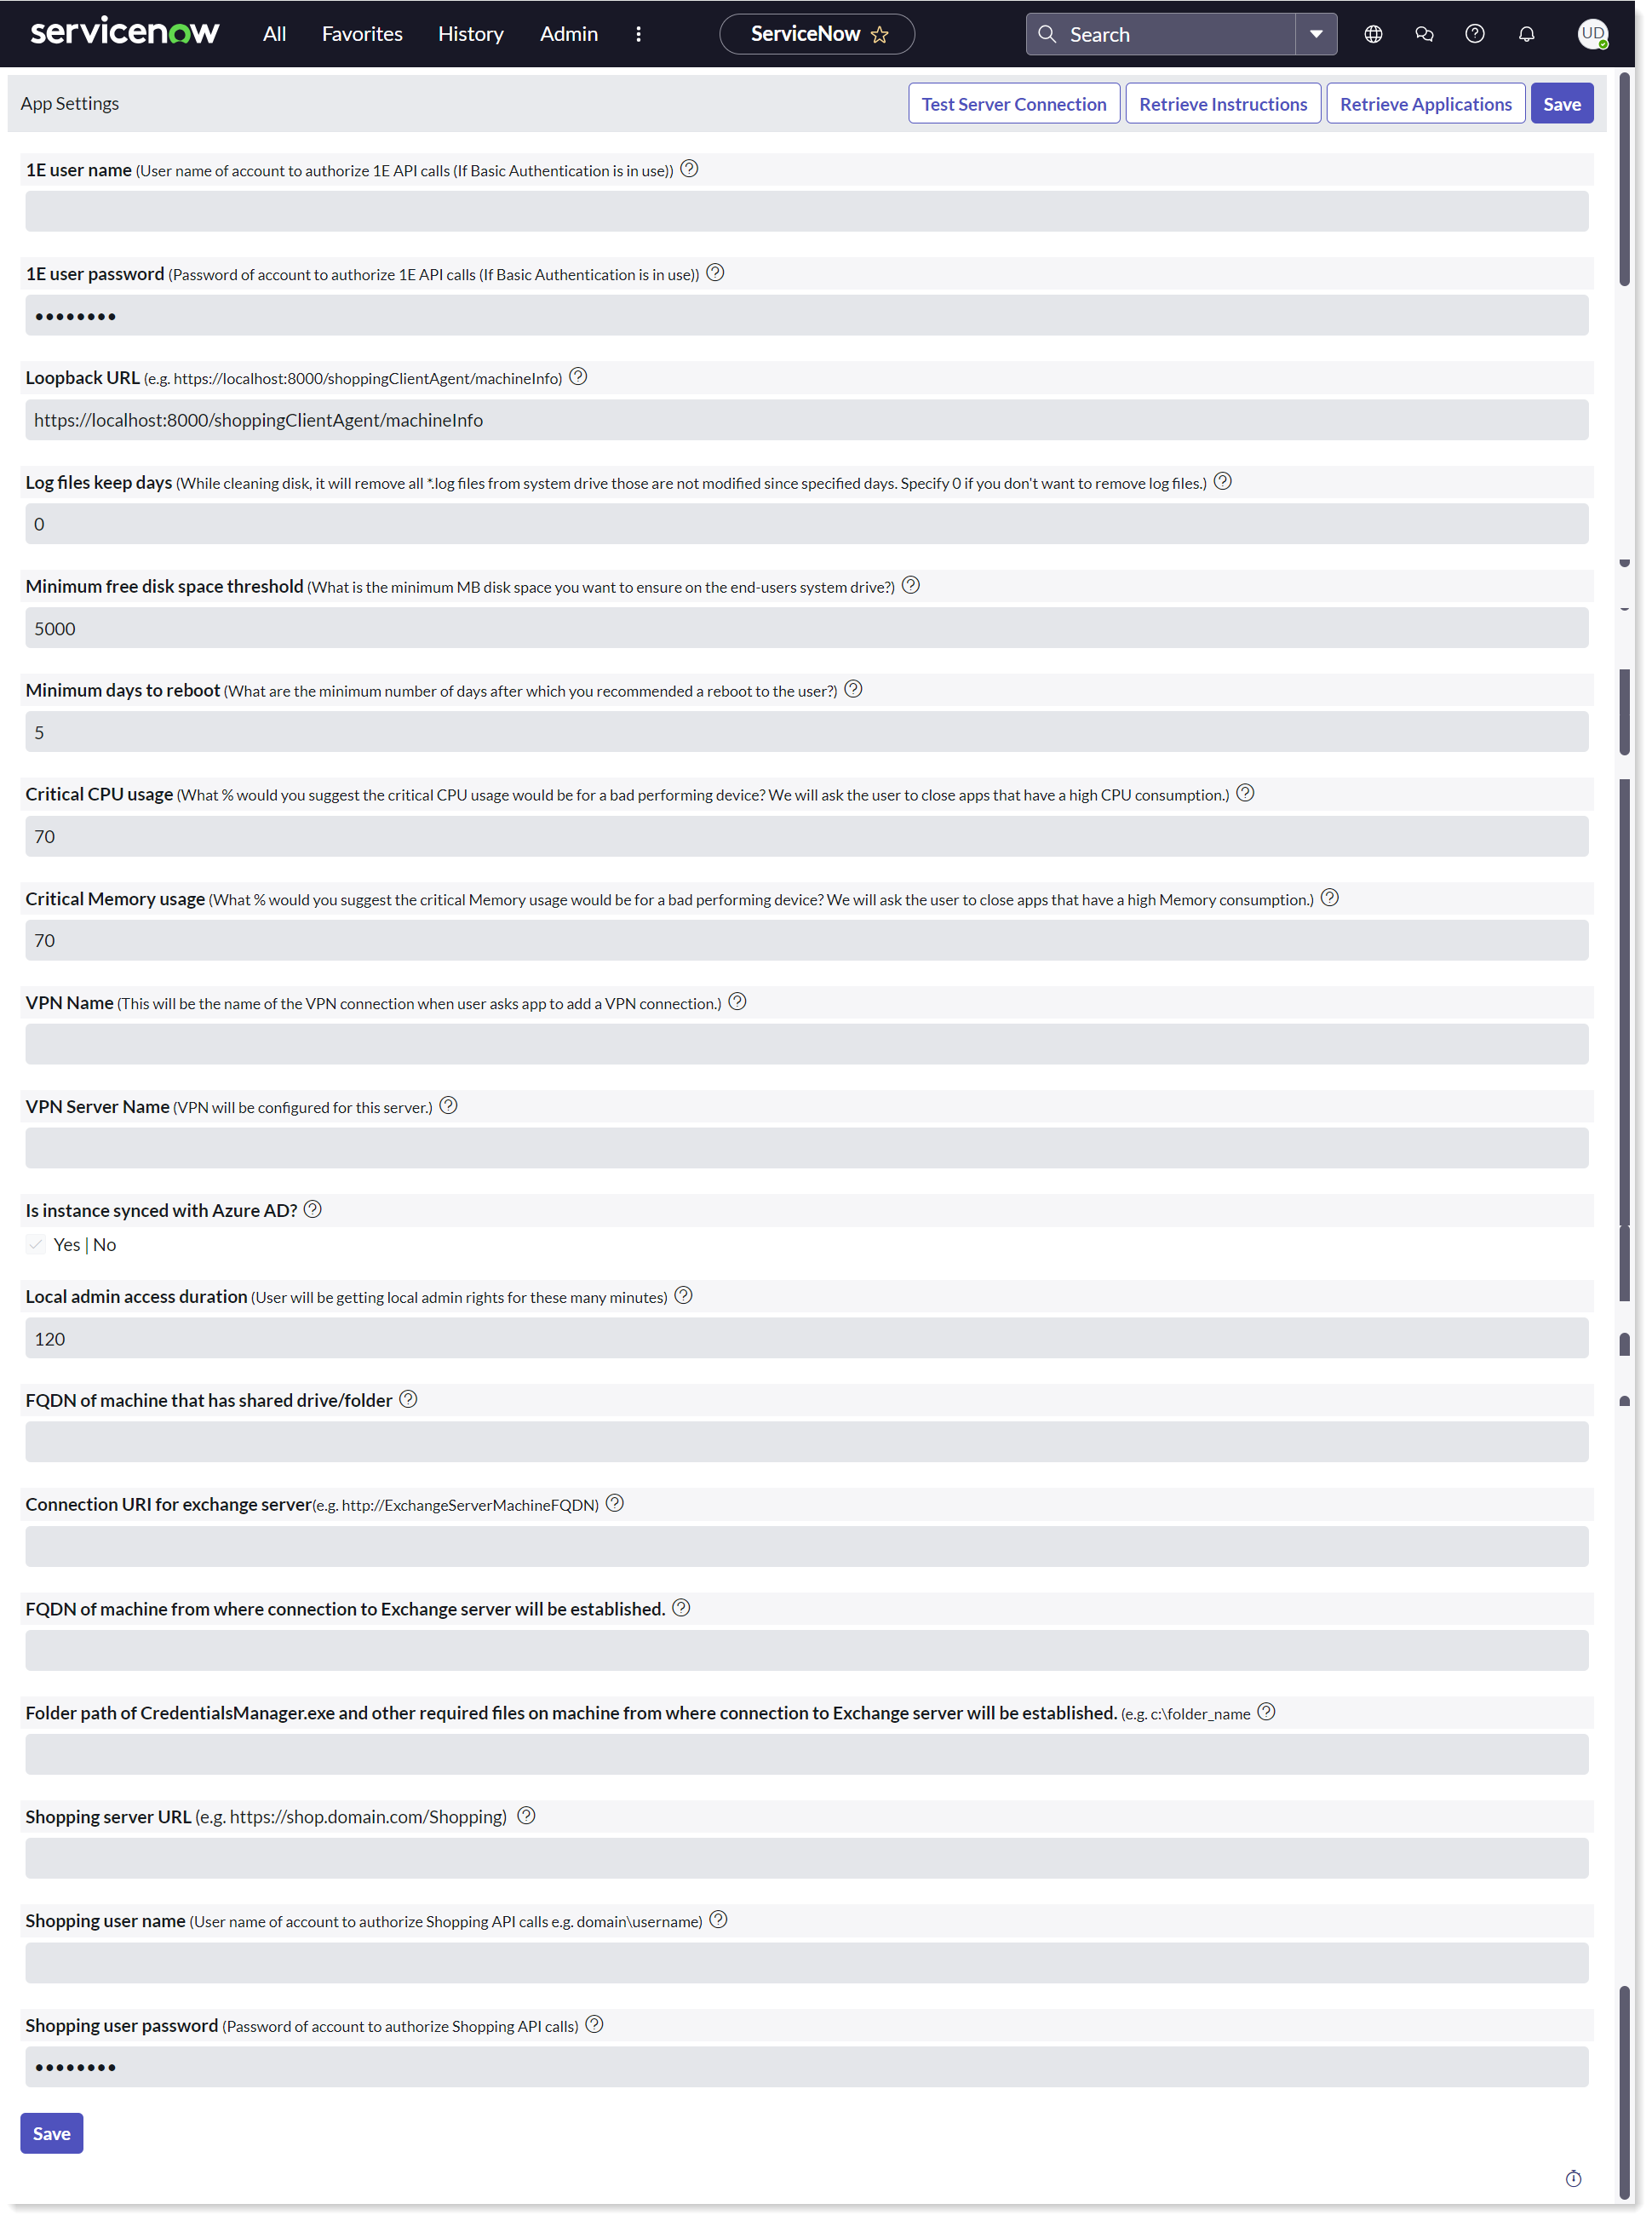
Completing this configuration allows the 1E Virtual Assistant to communicate with 1E. To test whether the application is successfully synced with 1E server, click on Test Server Connections in the top right corner. Once the connection is established, click on Retrieve Instructions to import the instructions from 1E into ServiceNow. Now click on Retrieve Applications to retrieve the list of installable applications from Shopping.
Once you complete the above actions, click on Mark as Complete to complete this task of configuration and move on to the next part.
Note
The OAuth Configuration is only applicable if you have chosen for Modern Authentication.
OAuth Configuration (for Modern Authentication)
Once you have completed the above settings, you now have to configure OAuth settings. This section further contains four steps to be completed. If you click on Configure button, it redirects you to the respective settings page.
Every task involves a series of configuration steps. You need to complete each step before moving onto the next one. As you finish configuring each task, click on Mark as Complete button and move on to the next one.
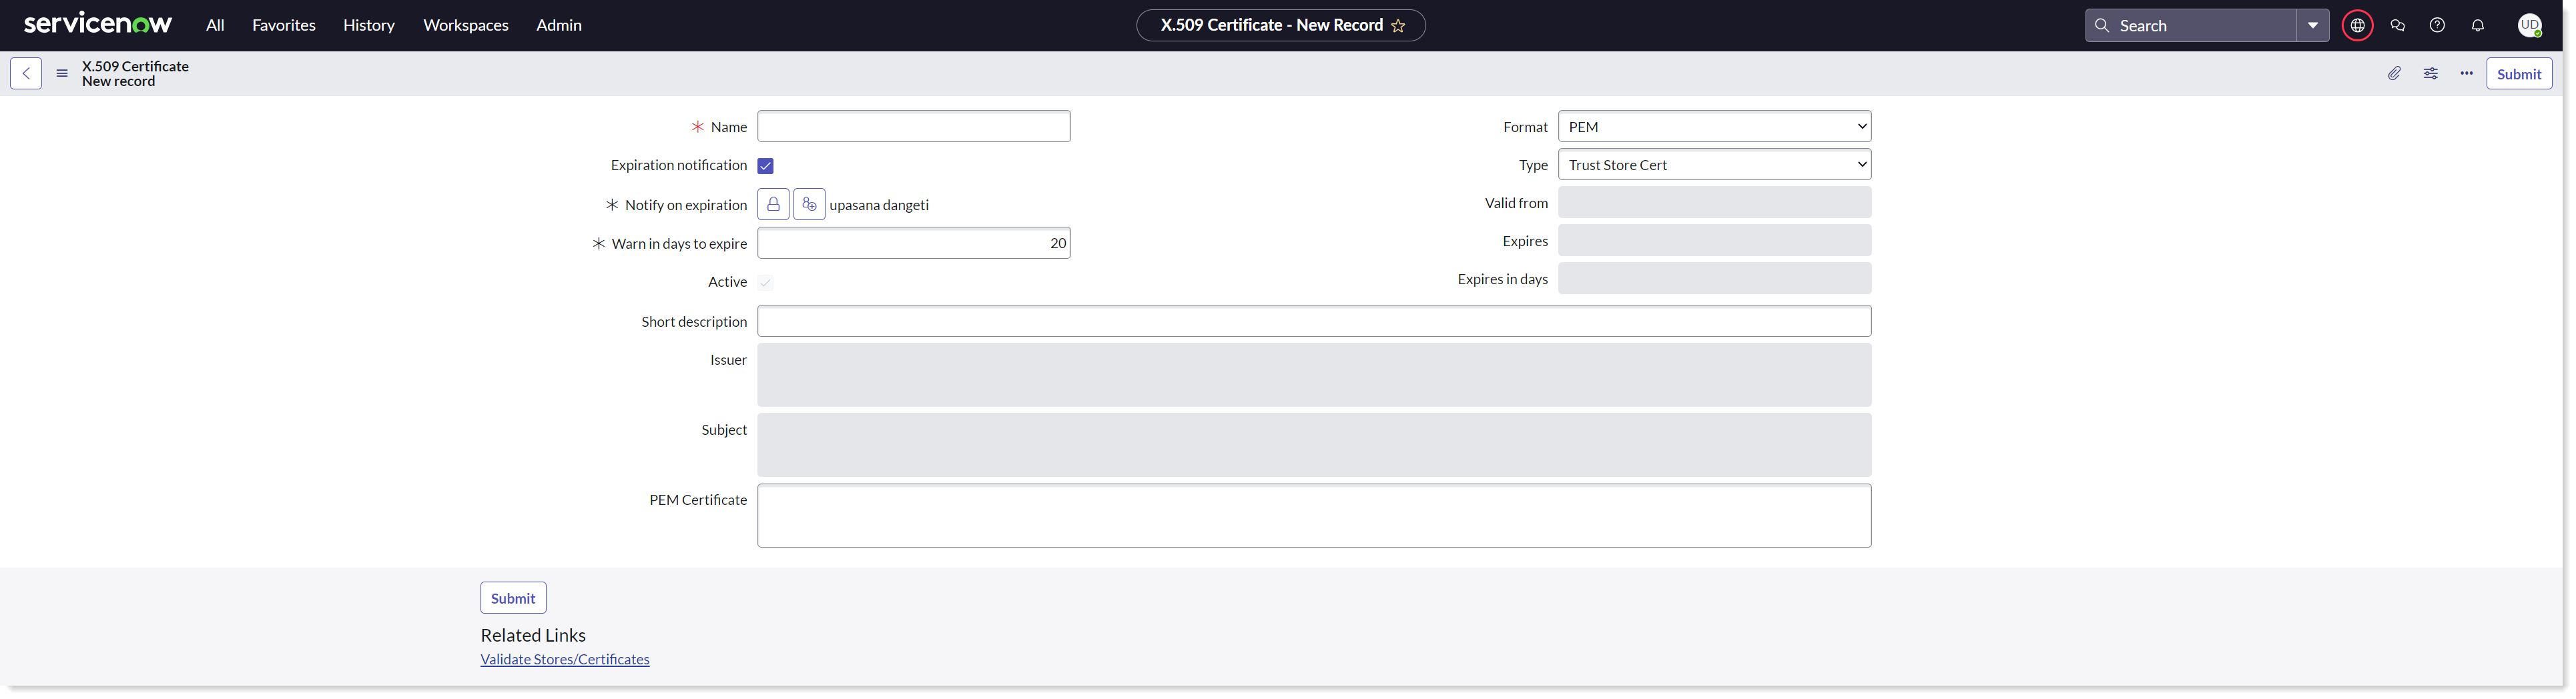
Upload JKS and PEM certificates
To upload the certificates, create a New record and attach the JKS and PEM certificates. Select Type as Java Key Store for JKS and Trust Store Cert for PEM certificates. Attach the JKS certificate and copy the content of the PEM certificate to the respective records. For JKS certificate, provide the Key store password. Submit the records and Validate the certificates.
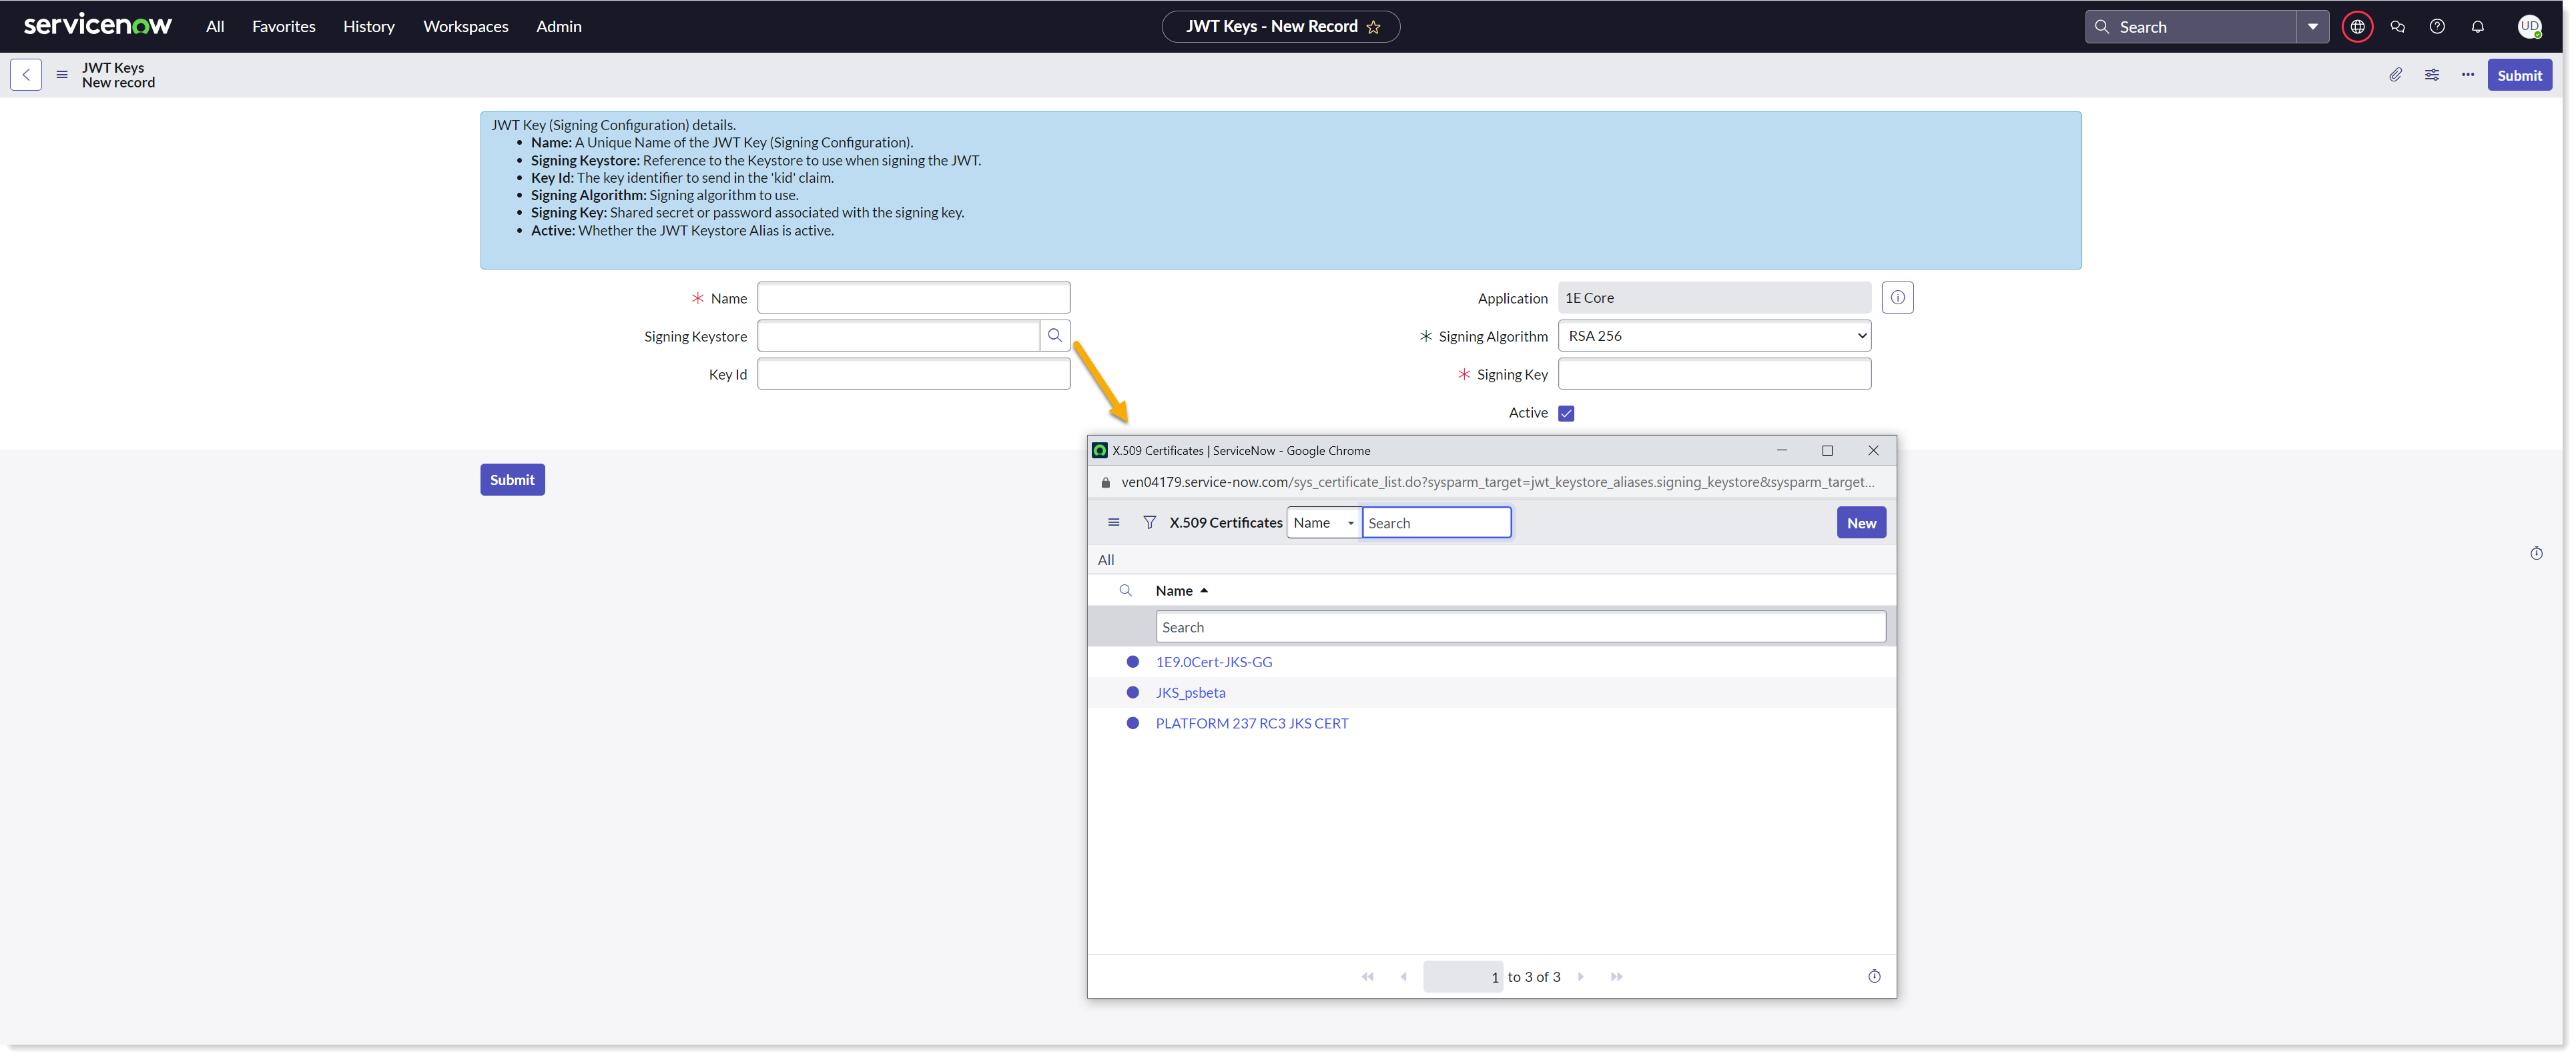
Configure a JWT signing key
Create a new record and provide a descriptive Name. Obtain the JKS certificate uploaded earlier using the lookup list in the Signing Keystore field and provide the Signing Key password. Submit the record.
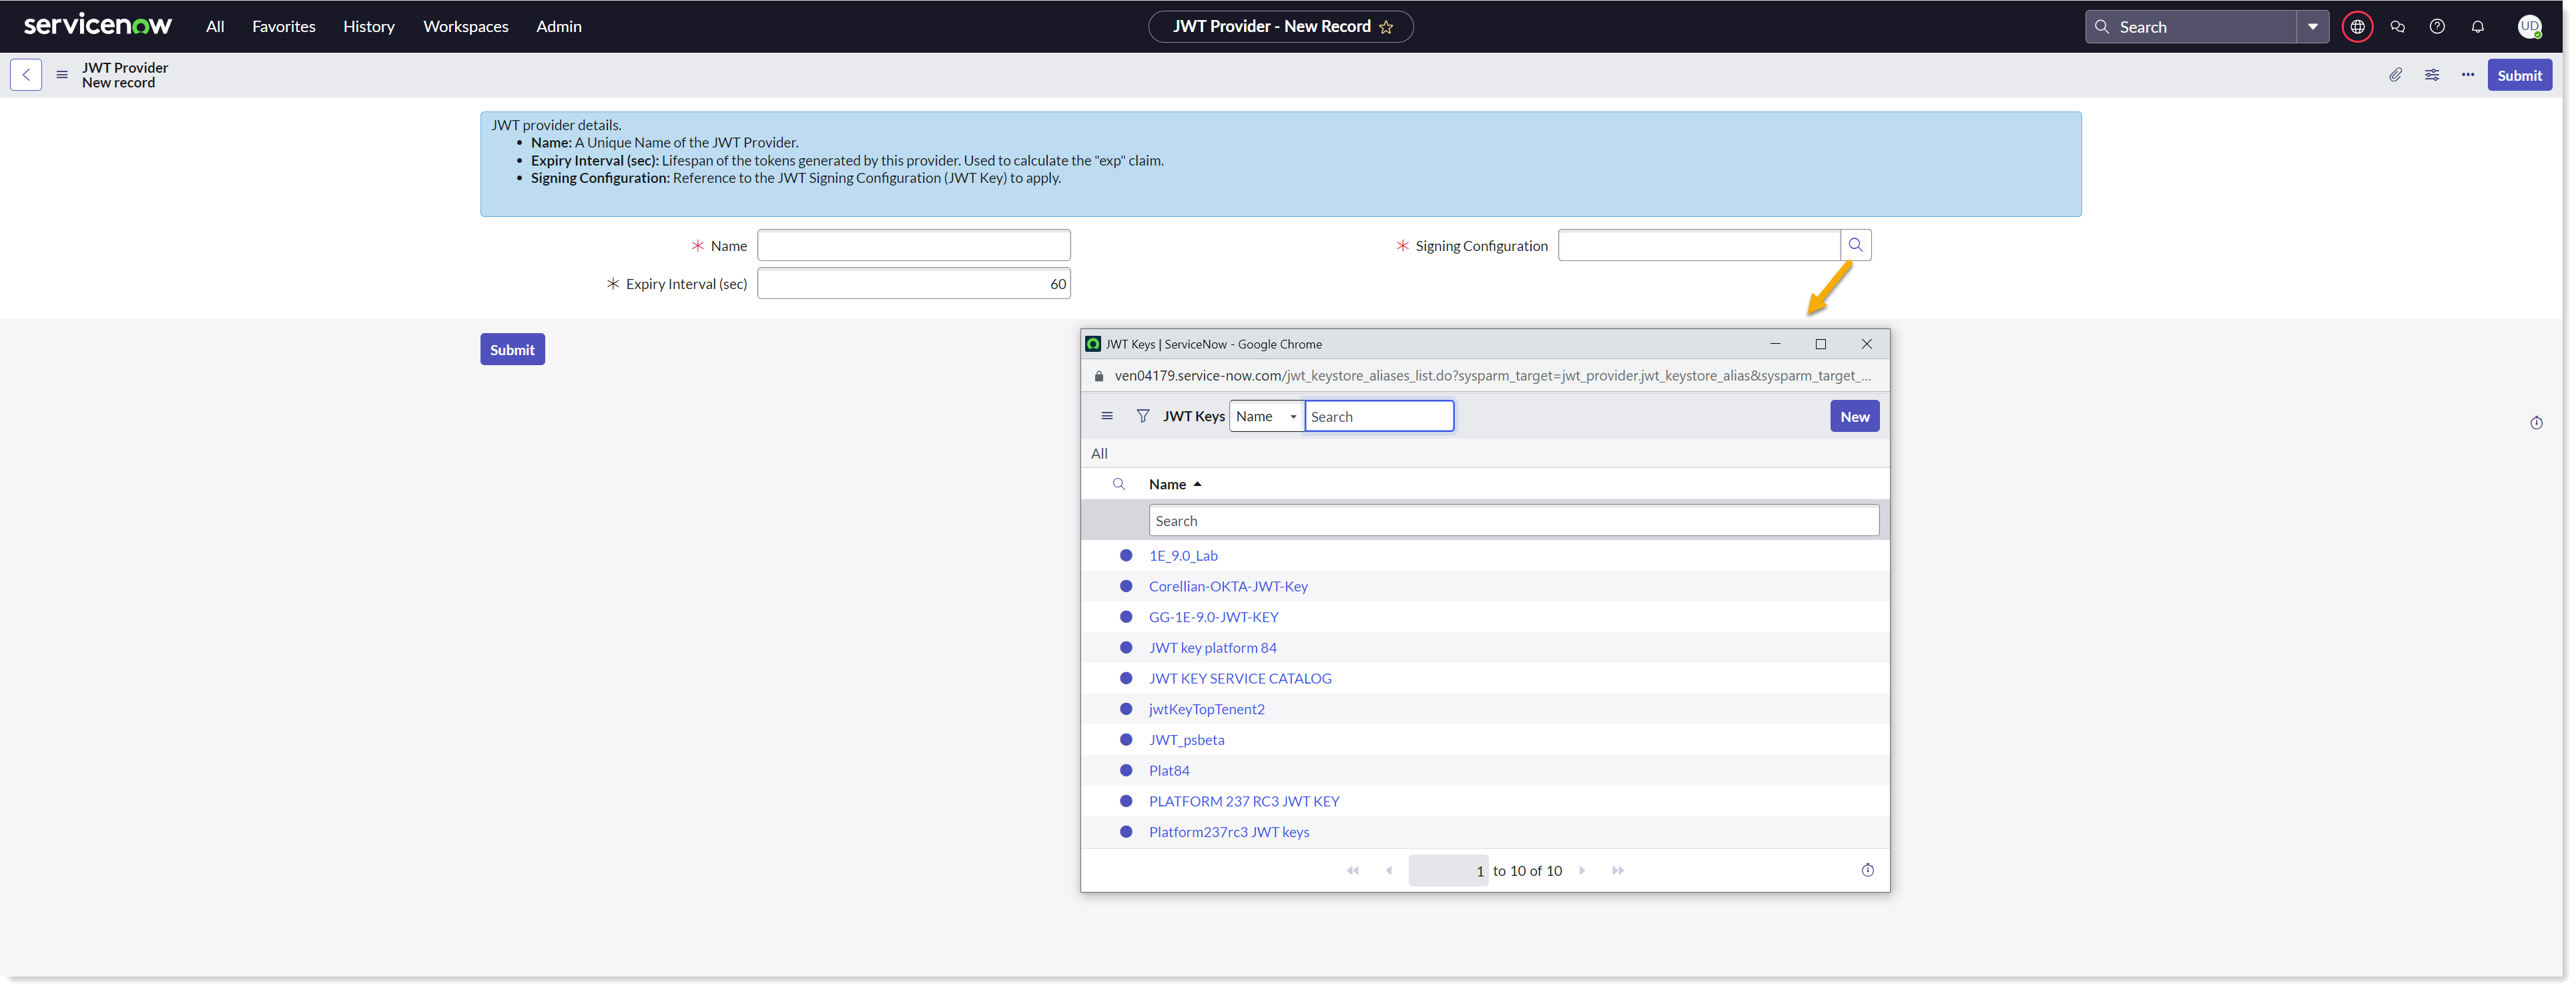
Create a JWT Provider
Create a new record and provide a descriptive Name. Ensure you have the required permissions. Obtain the JWT Key created earlier using the lookup list in the Signing Configuration field and Submit the record. Copy the sys_id of the JWT Provider for future reference.
Configure System Properties
Configure the following system properties by adding the below values.
System Properties
Value
x_1e_virtual_agent.pem_certificate
Requires the SysID of the PEM Certificate record in sys_certificate table
x_1e_virtual_agent.jwt_provider
Requires the SysID of the JWT Provider record in jwt_provider table
x_1e_virtual_agent.key_id
The key identifier is generated by the resource server (also known as App ID) and sent as a kid claim
Add widgets to the ServiceNow Service portal
Open Service Portal
Browse to the Service Portal using a URL with the following format https://<ServiceNowInstance>.service-now.com/sp - where <ServiceNowInstance> is the name of your ServiceNow instance. For example: https://dev19162.service-now.com/sp.
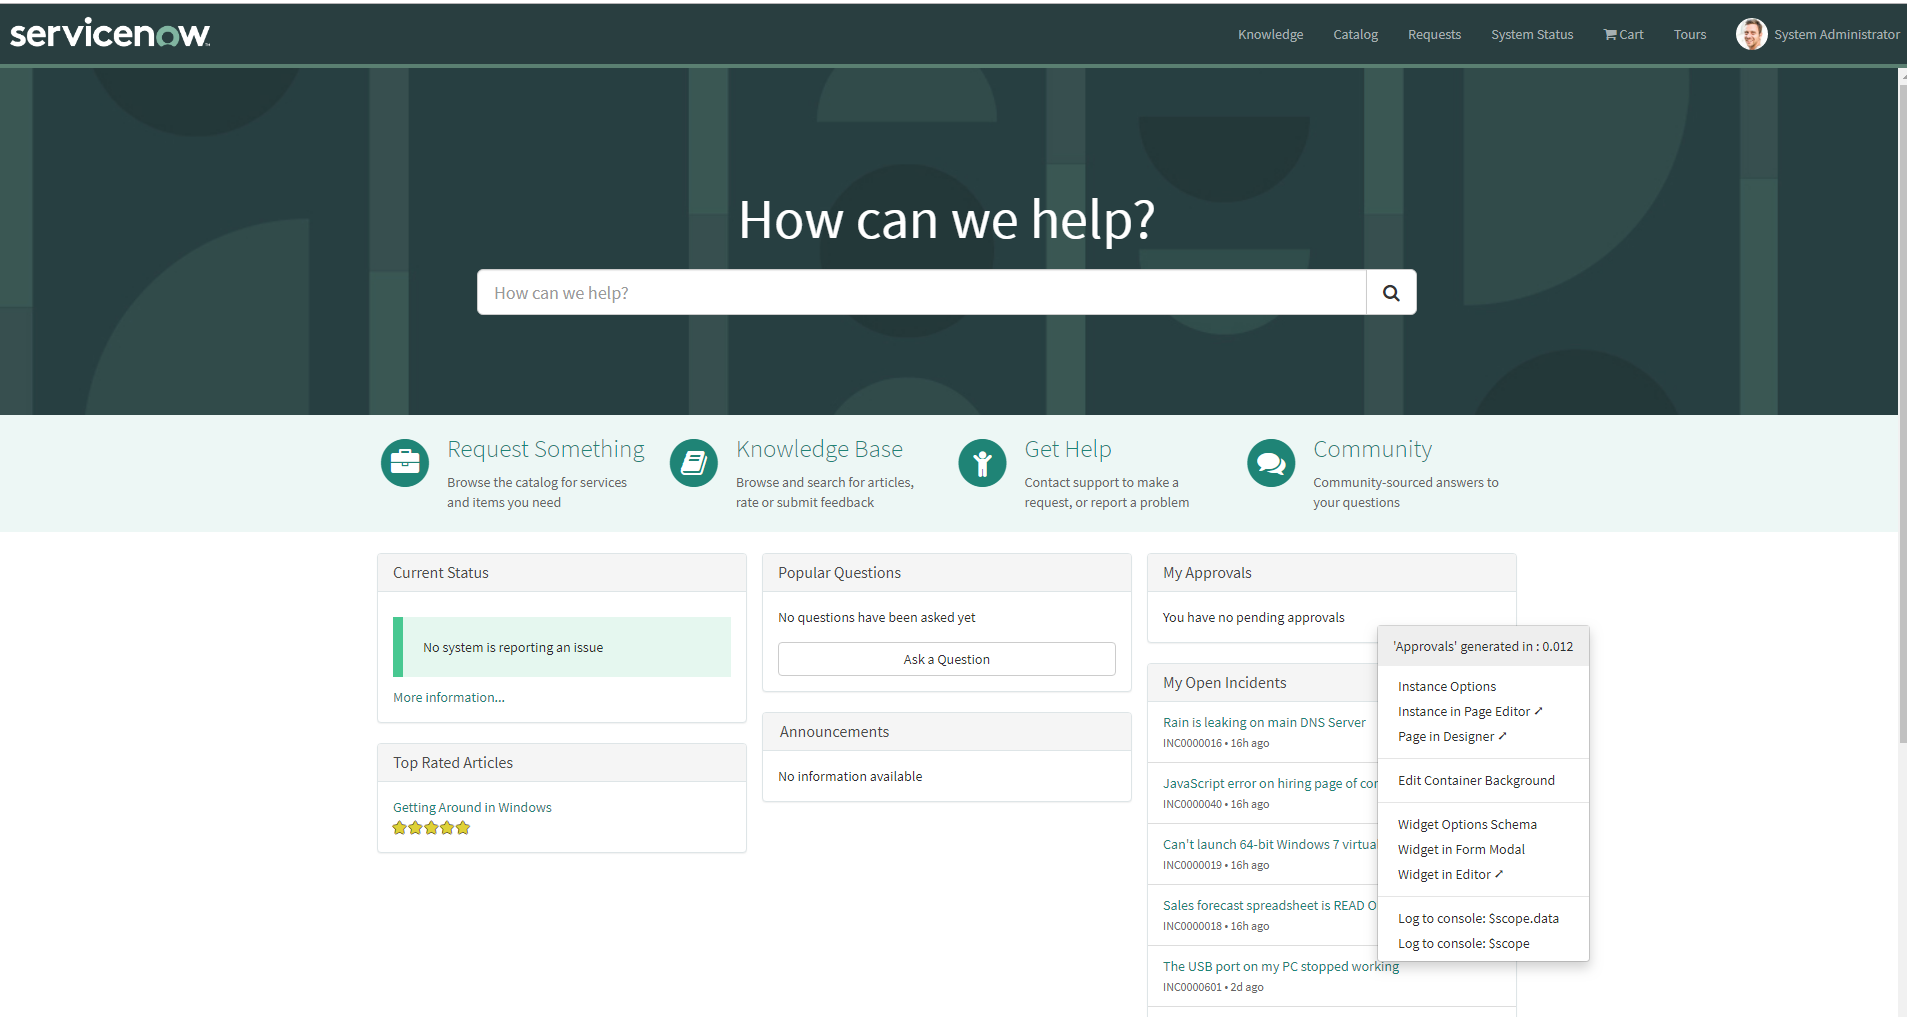
Access the designer
On the Service Portal page, press the <ctrl key> and right-click, a popup will be displayed. Select the Page in Designer item. The Designer screen will open up as shown below.
Adding widgets
When the Designer screen opens up, search for the two widgets listed below and add them to the page. You can add the widgets anywhere by using drag and drop, but ensure you are in Global scope:
1E Populate logged in device
Virtual Agent Service Portal Widget
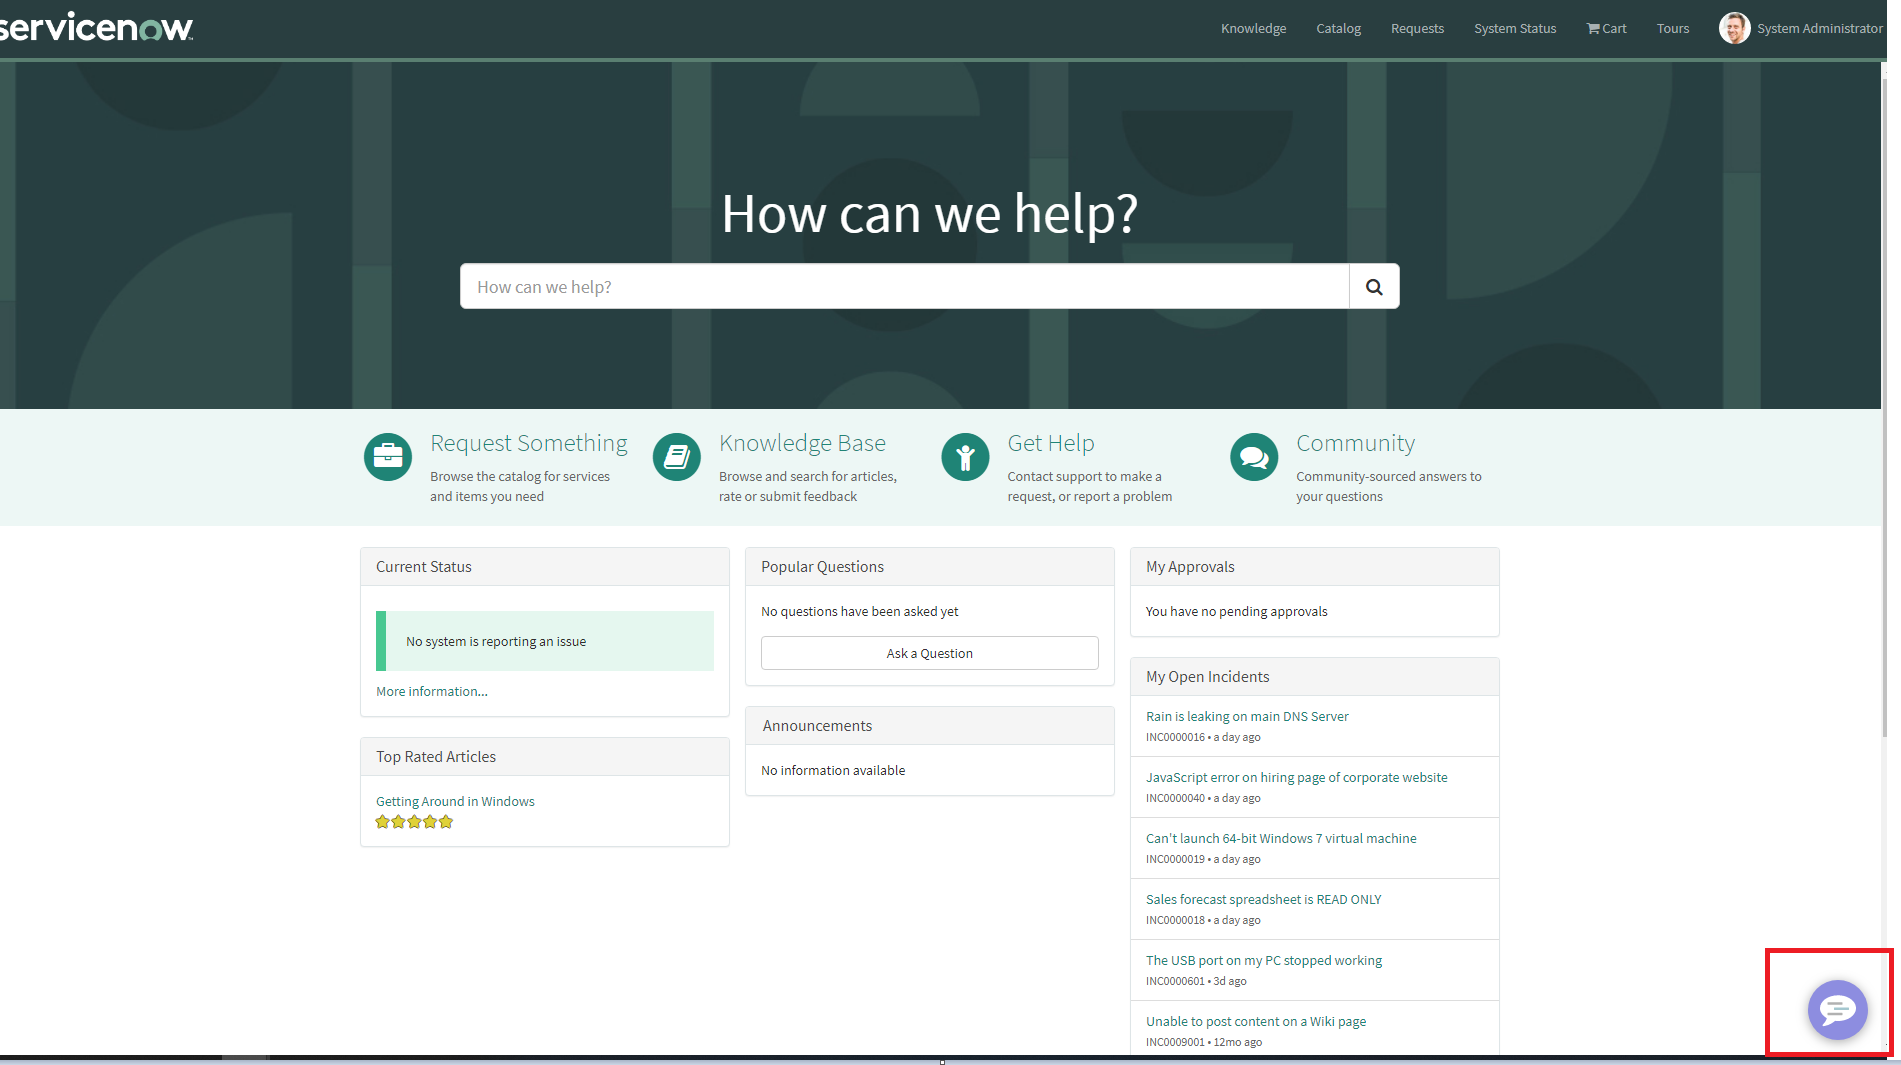
When you have placed the widgets, close this tab and refresh the Service Portal home page. You should now see a Virtual Agent callout icon in the bottom-right corner of this page, as shown below.