Preparation for Modern Authentication
Below, given are the steps to be followed to configure your ServiceNow instance for Modern Authentication:
Get the 1E Virtual Assistant application
Prerequisite
Configure Microsoft Entra ID/Okta and 1E
Preparing the certificates for ServiceNow
Upload PEM and JKS certificates
ServiceNow OAuth steps
Upload PEM and JKS certificates
Configure a JWT signing key
Create a JWT provider
Settings for Modern Authentication
Microsoft Entra ID IdP
For more information on how to configure, please refer to Provisioning and Upgrading Guide for 1E 24.1.
Get the 1E Virtual Assistant application
To get the latest version of the 1E Virtual Assistant application installed, you can consider either of the below choices:
If you are a new customer, you can get the 1E Virtual Assistant application from ServiceNow app store. To install the application, refer App installation.
However, if you already have and older version of 1E Virtual Assistant application on your ServiceNow instance, then refer to Upgrading to upgrade your application.
Prerequisite
The following information is required for the preparation of certificates:
.pfx certificate (containing a private key, client authentication and 2048 key)
This .pfx certificate is given either by your internal PKI team, sometimes by a third party, or you can generate a self-signed certificate by yourself.
To create your own self-signed certificate, use the New-SelfSignedCertificate PowerShell cmdlet. This would create a certificate in the local machine personal certificate store on the device you have run the cmdlet. You can then export this certificate as a .pfx file, which includes the private key, using the CERTLM.MSC utility.
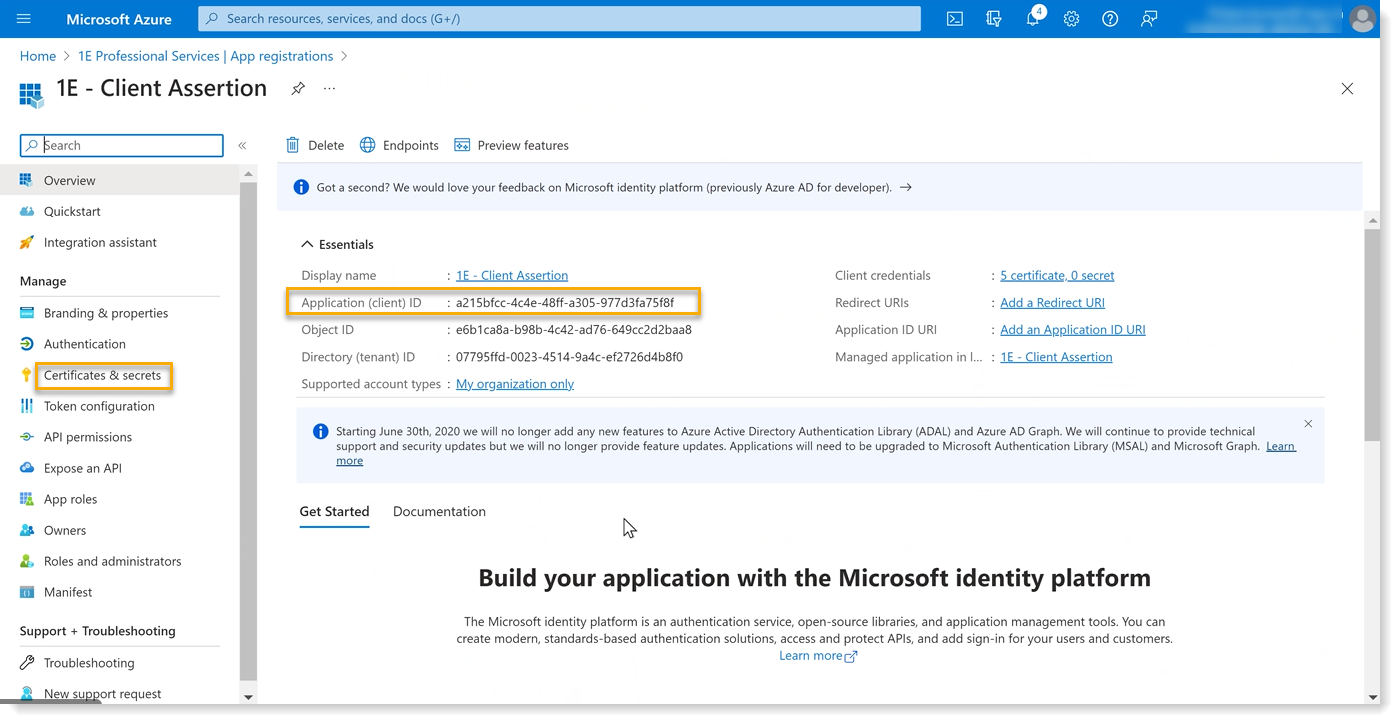
The client assertion Application ID from Microsoft Entra ID, as shown in the picture below.
You need the following tools:
1E PowerShell toolkit (available on 1E Support Portal)
Configure Microsoft Entra ID and 1E
Install the certificate with private key locally to the local machine personal certificate store. Ensure that you have the required permissions to access the private key.
Login to your 1E instance using Set-1E Server as shown below.

Get the AppID of the certificate using:
Get-1ECertificateThumbprint -StoreName localmachine\my | fl *
The AppID value of a certificate is a base 64 encoding of the certificate thumbprint.
Now make a note of the AppID and then create a mapping using:
Add-1EJwtPrincipalMapping -Identifier <Certificate AppID> -Principal 1EUser@domain.com
Note that 1EUser@domain.com should be a principal with appropriate permissions in 1E.
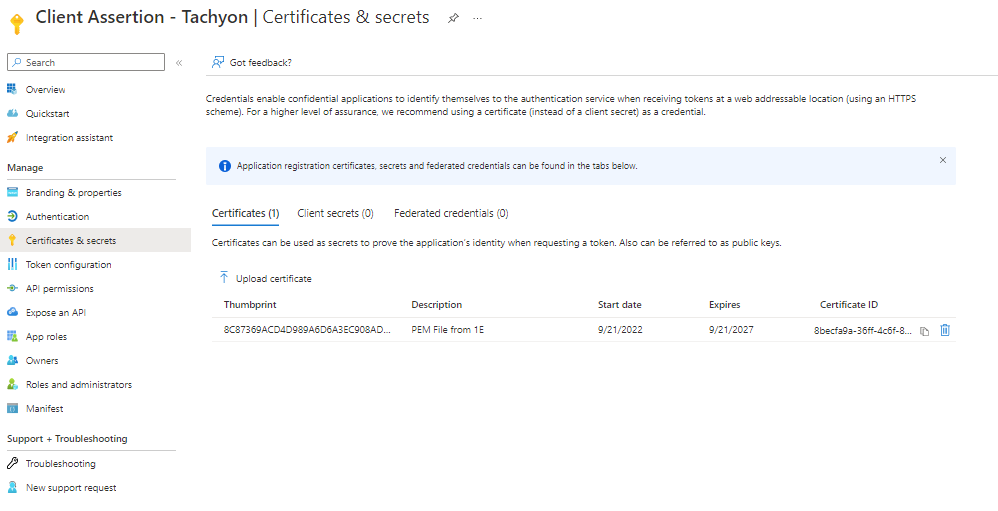
Export the certificate that you have imported in the above steps in .CER format.
Login with the administrator principal role.
Navigate to Azure Active Directory → App Registrations → 1E Client Assertion → Certificates and upload the certificate.
Preparing the certificates for ServiceNow
Follow the below given steps to prepare the certificates:
The .pfx certificate has to be converted into .PEM and .JKS file types.
To convert the .pfx certificate, you need to first install OpenSSL and keytool applications on your machine.
After installing the applications, copy the .pfx certificate in the same directory where these applications reside.
Copy the entire content of the bin folder of OpenSSL into the bin folder of Java.
Now open the PowerShell/CMD where the .pfx certificate resides and run the following commands:
To generate the .PEM file:
openssl pkcs12 -in <filename>.pfx -out <filename>.pem
To generate the .JKS file:
openssl pkcs12 -export -in <filename>.pem -out <filename>.p12 -name MyCert
keytool -importkeystore -srckeystore <filename>.p12 -destkeystore <filename>.jks -srcstoretype pkcs12 -deststoretype JKS
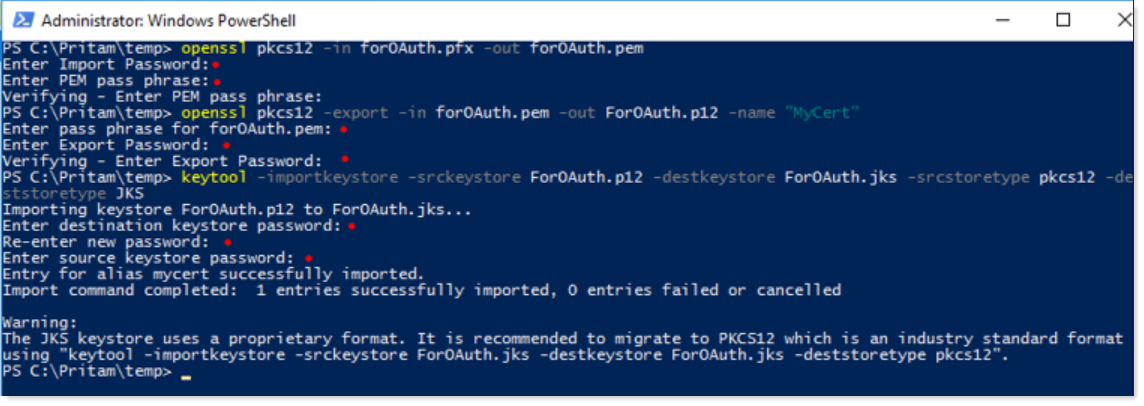
Take a note of the JKS keystore password for future use.
Upload both PEM and JKS certificates into certificates table (sys_certificate) in ServiceNow.
ServiceNow OAuth steps
Now on your ServiceNow instance, configure the following OAuth steps:
Upload PEM and JKS certificates
Configure a JWT signing key
Configure a JWT provider
Upload PEM and JKS certificates
To upload the certificates, navigate to System Definition → Certificates and create a new record as shown in the picture below.
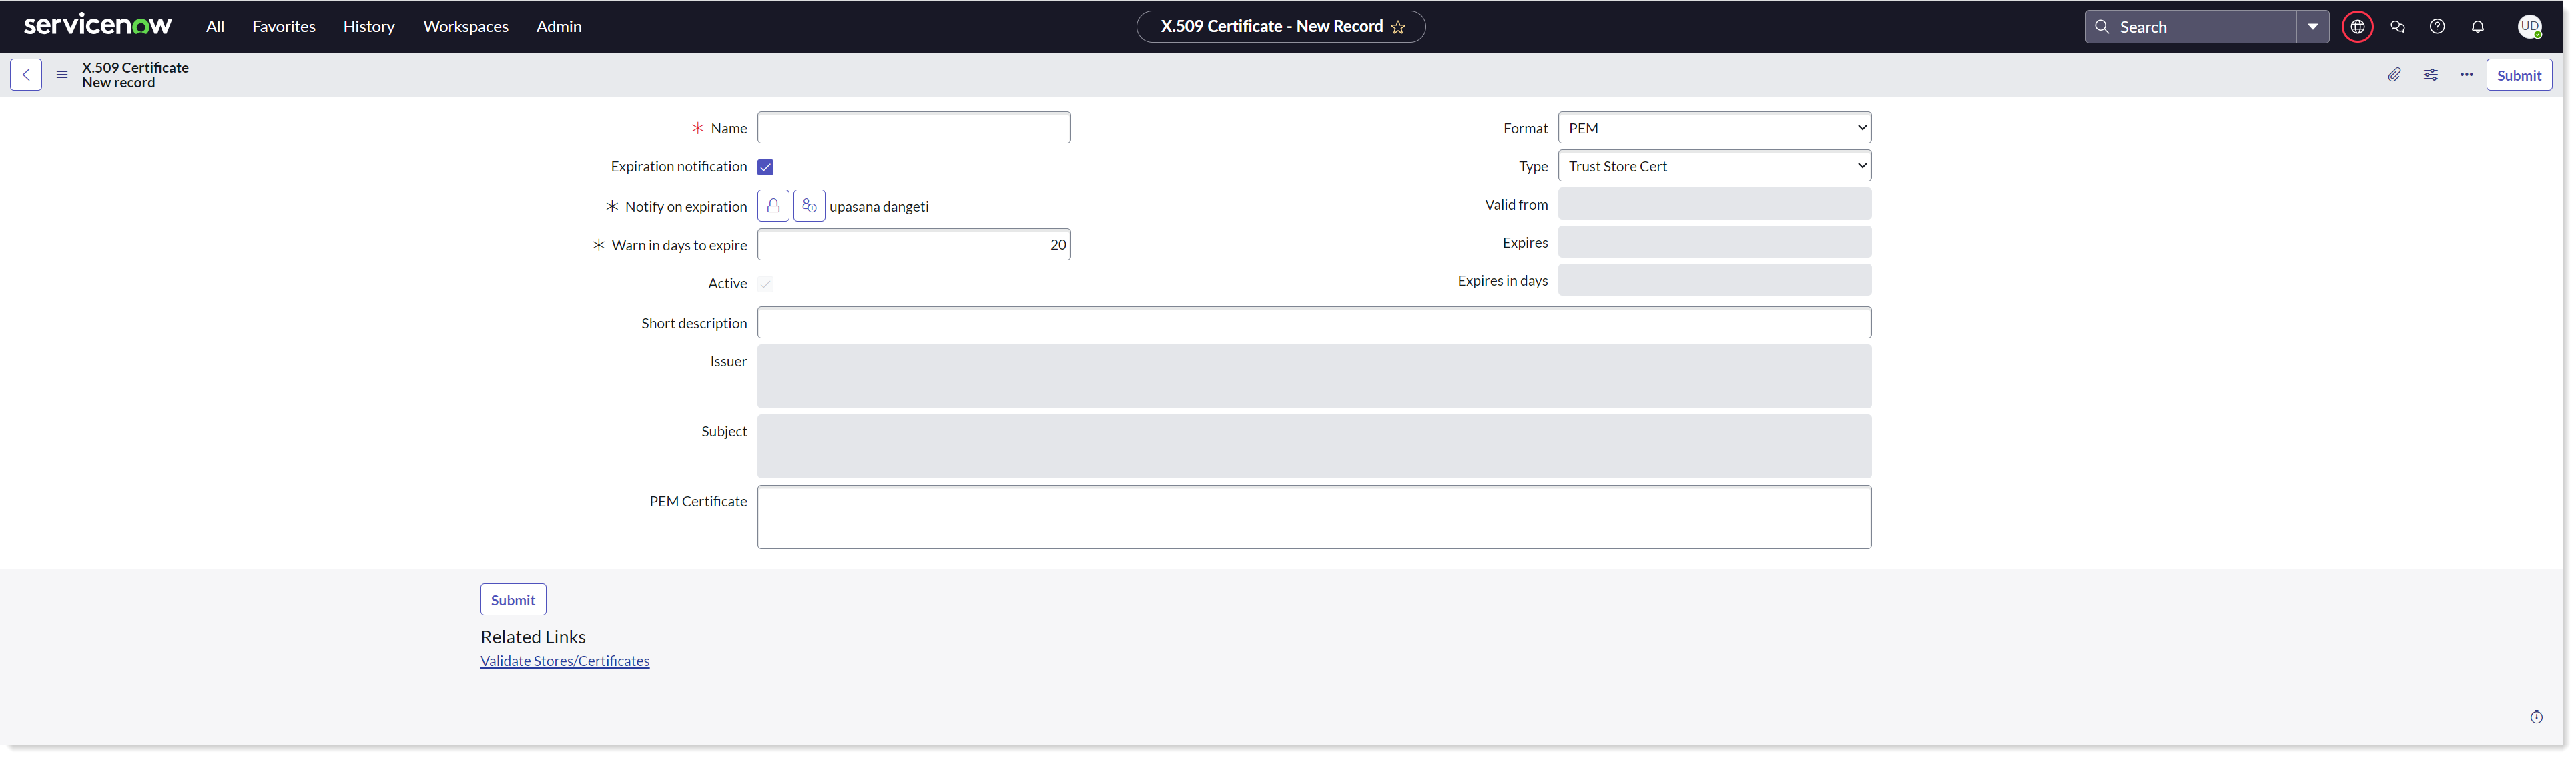
To upload the PEM certificate in your ServiceNow instance-
Provide the required details and attach the PEM certificate so that the identity provider can verify communications with the service provider.
Select Type as Trust Store Cert.
Copy the content of the PEM file and paste it into the PEM certificate field.
Now click on the Submit button to save the record.
Click on Validate Stores/Certificates link to validate the certificate.
Take a note of the SysID of the PEM certificate for future use.
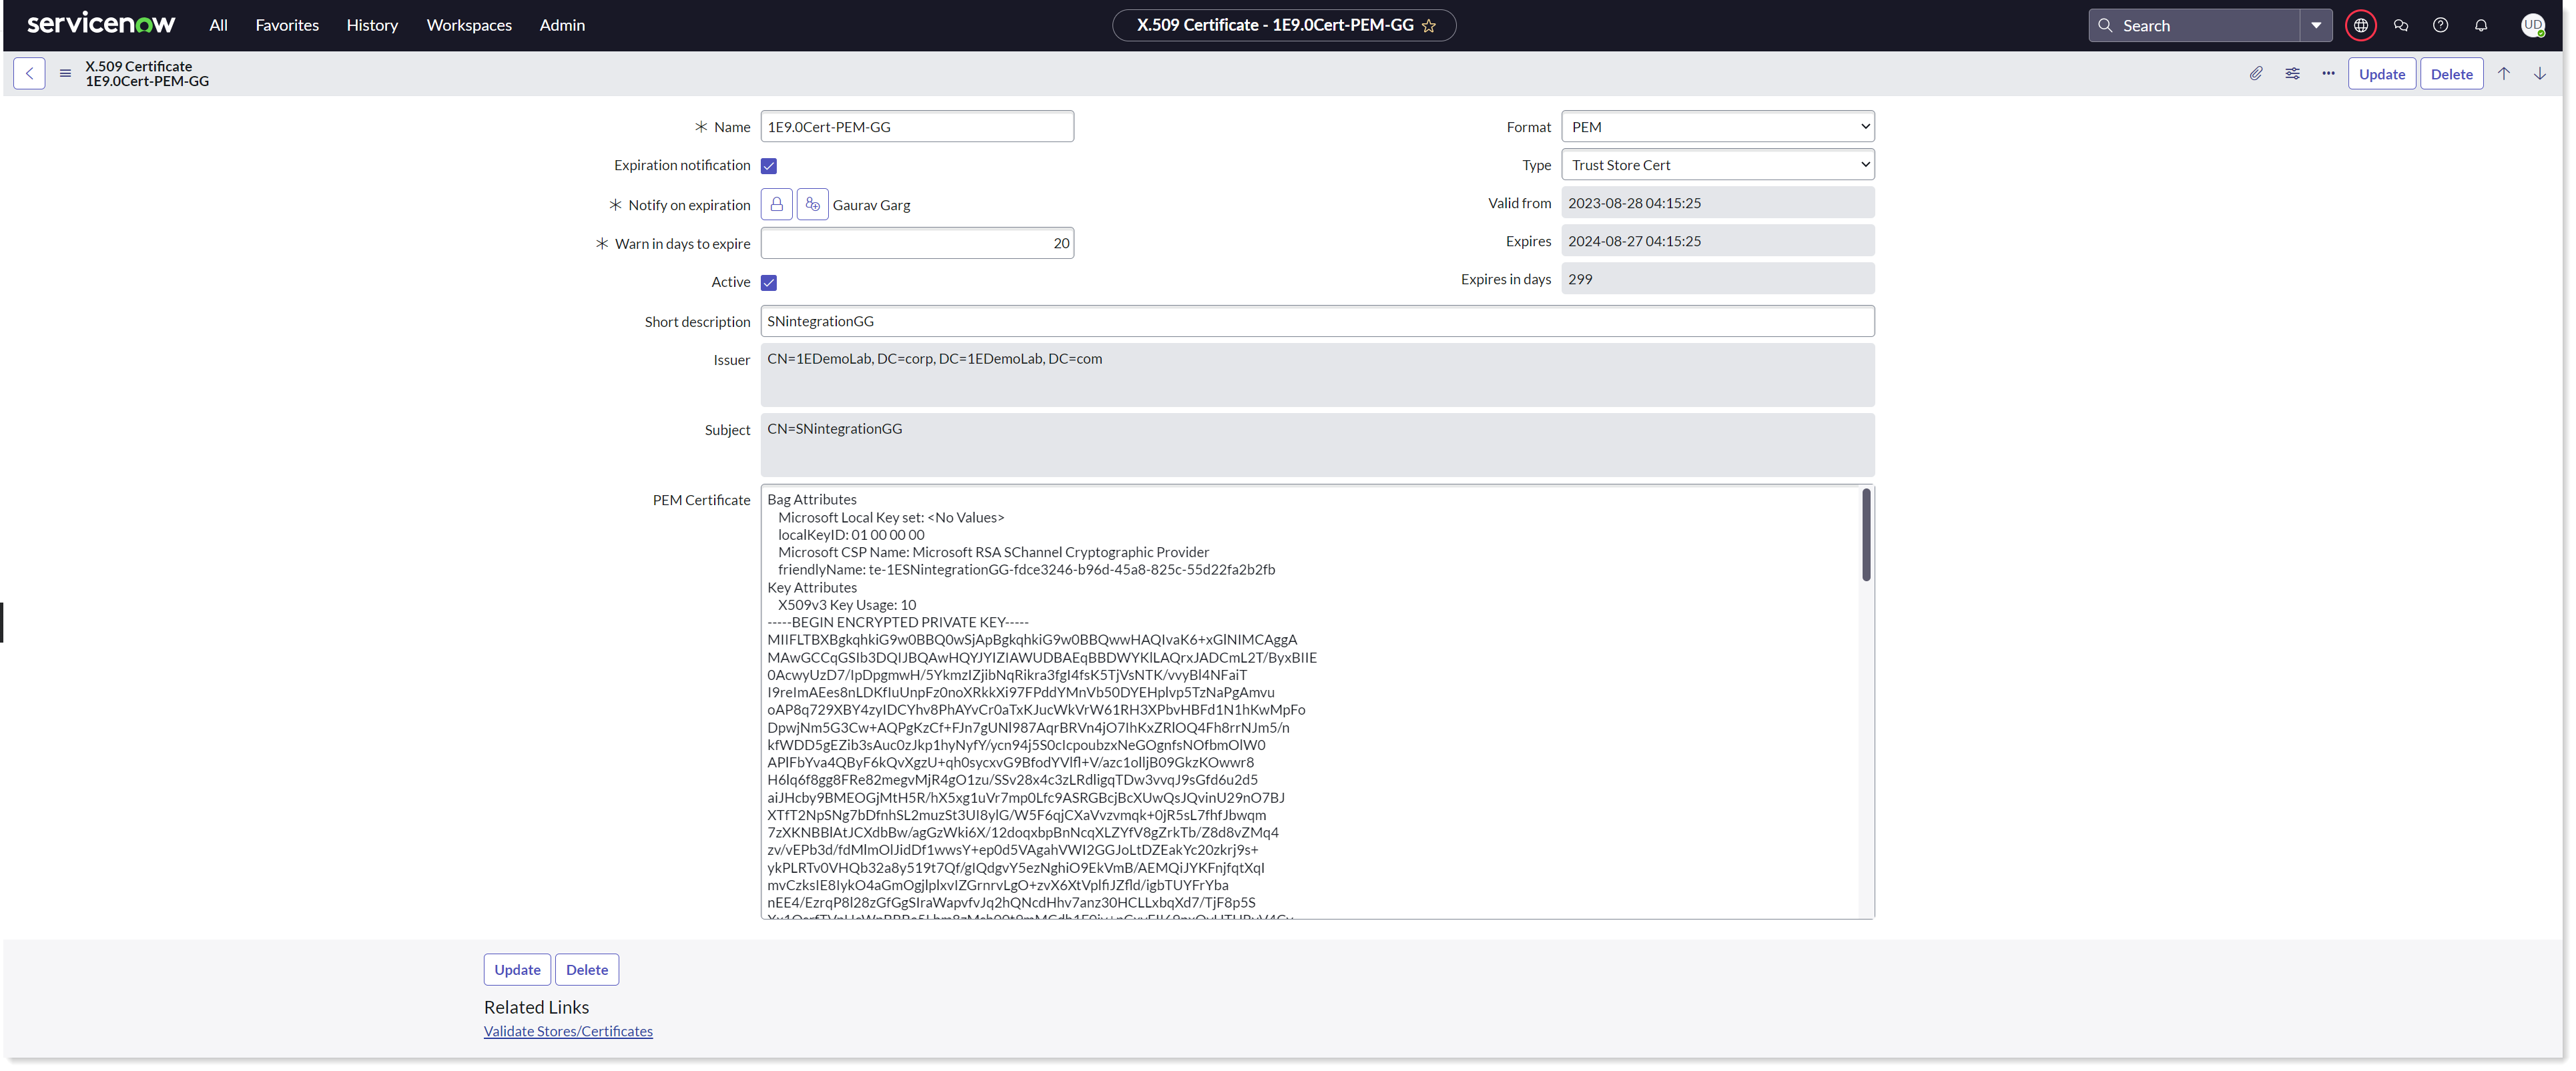
To upload the JKS certificate in your ServiceNow instance-

Provide the required details.
Select Type as Java Key Store.
Attach the JKS certificate generated in the above step to enable the JWT client authentication.
Enter the Key store password.
Now click on the Submit button to save the record.
Click on Validate Stores/Certificates link to validate the certificate.
You can see that the certificates are now added to the Certificates table.
Configure a JWT signing key
To configure JWT signing key on your ServiceNow instance, follow the below steps:
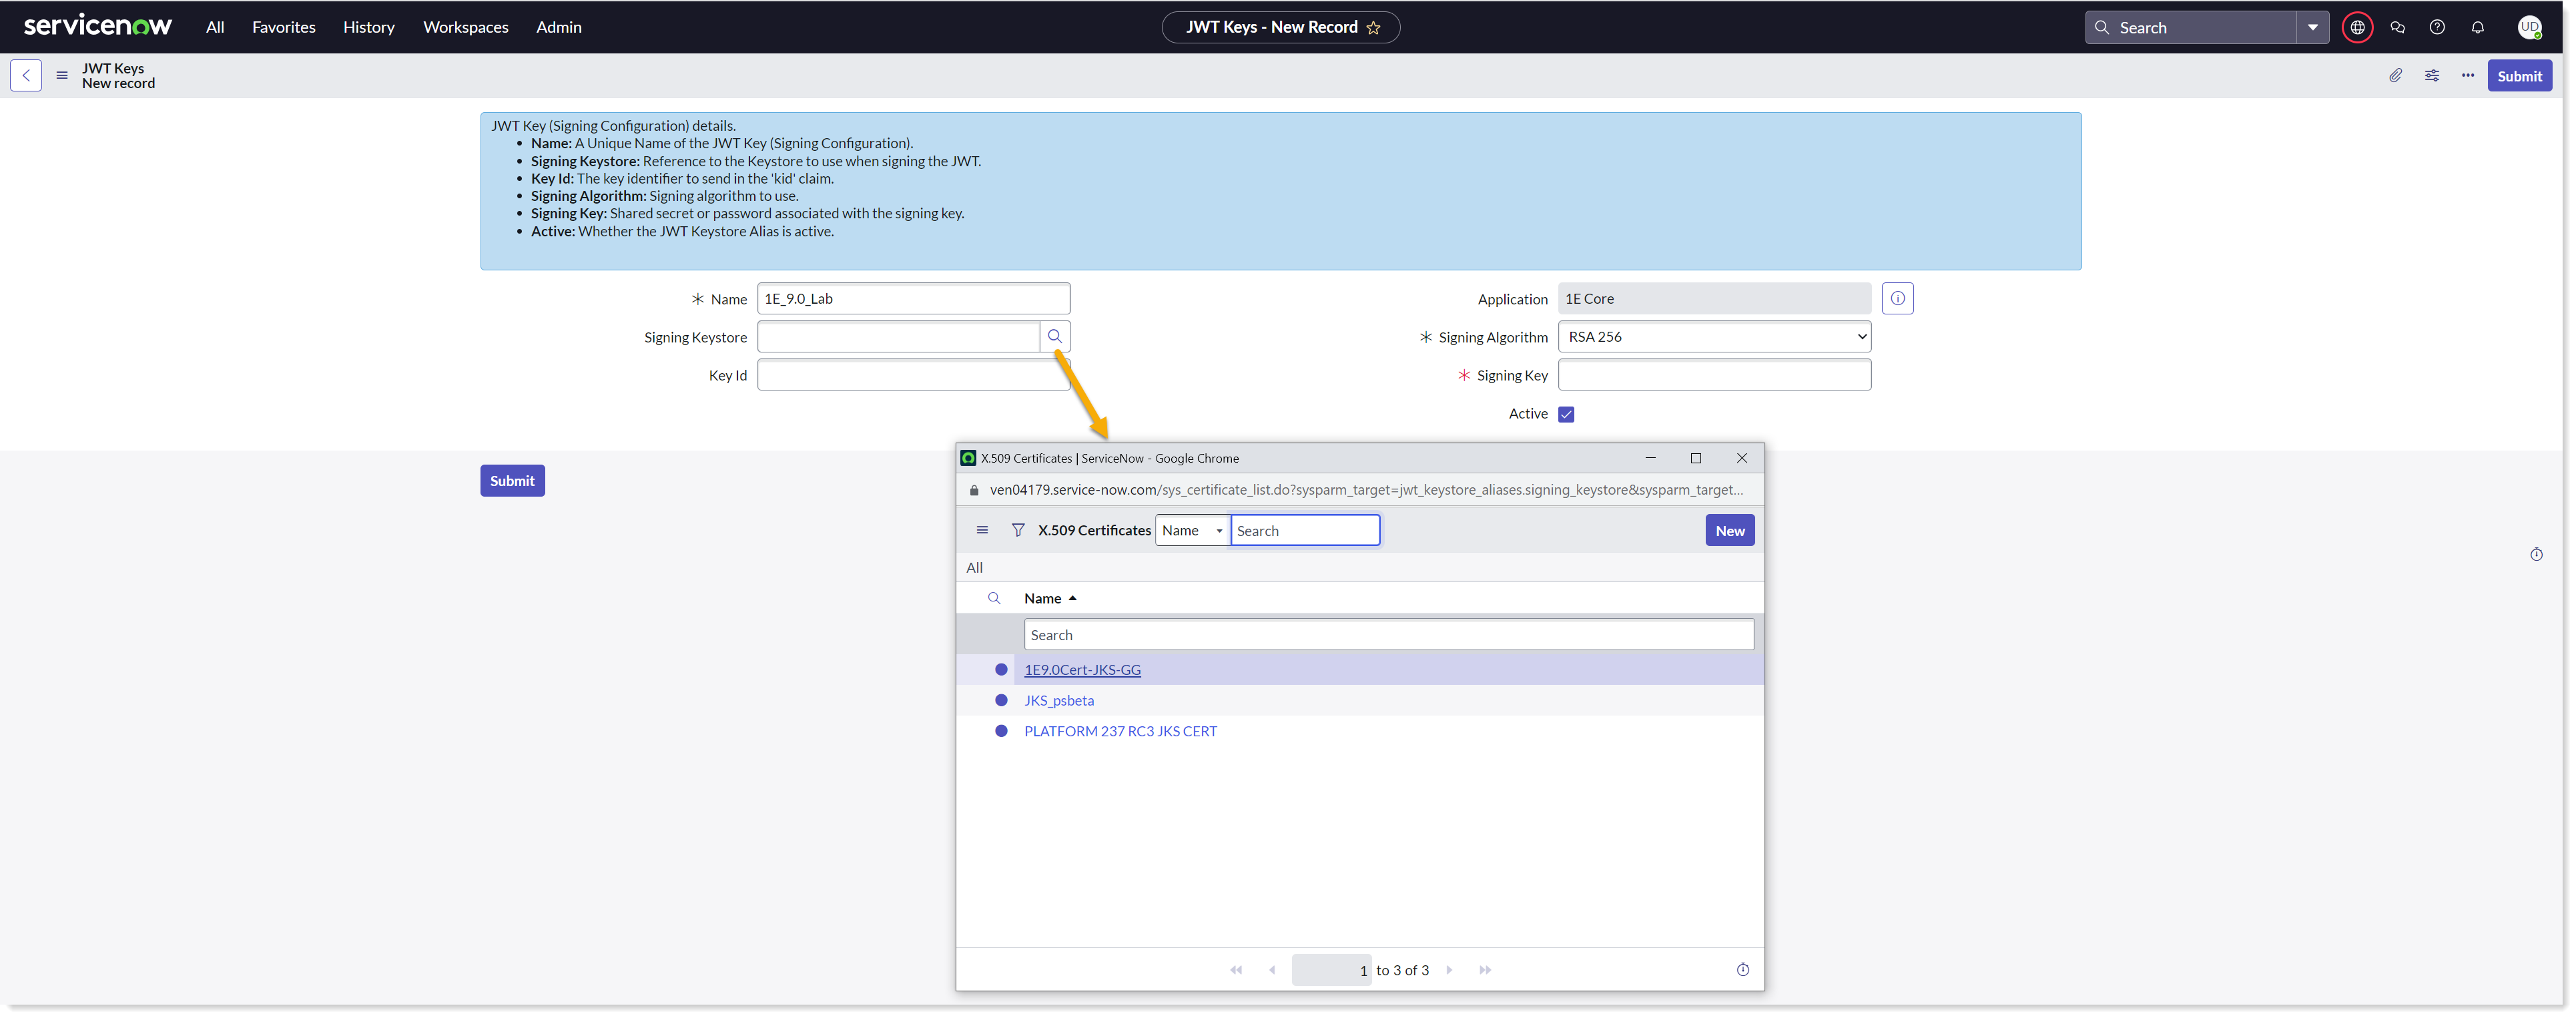
Navigate to System OAuth → JWT Keys.
Create a new record for JWT Keys.
Provide a descriptive Name.
Select the JKS certificate uploaded earlier using the lookup list into the Signing Keystore field.
Enter the Keystore password saved earlier into the Signing Key field and click on Submit to save the record.
Create a JWT provider
To configure JWT provider on your ServiceNow instance, follow the below steps:
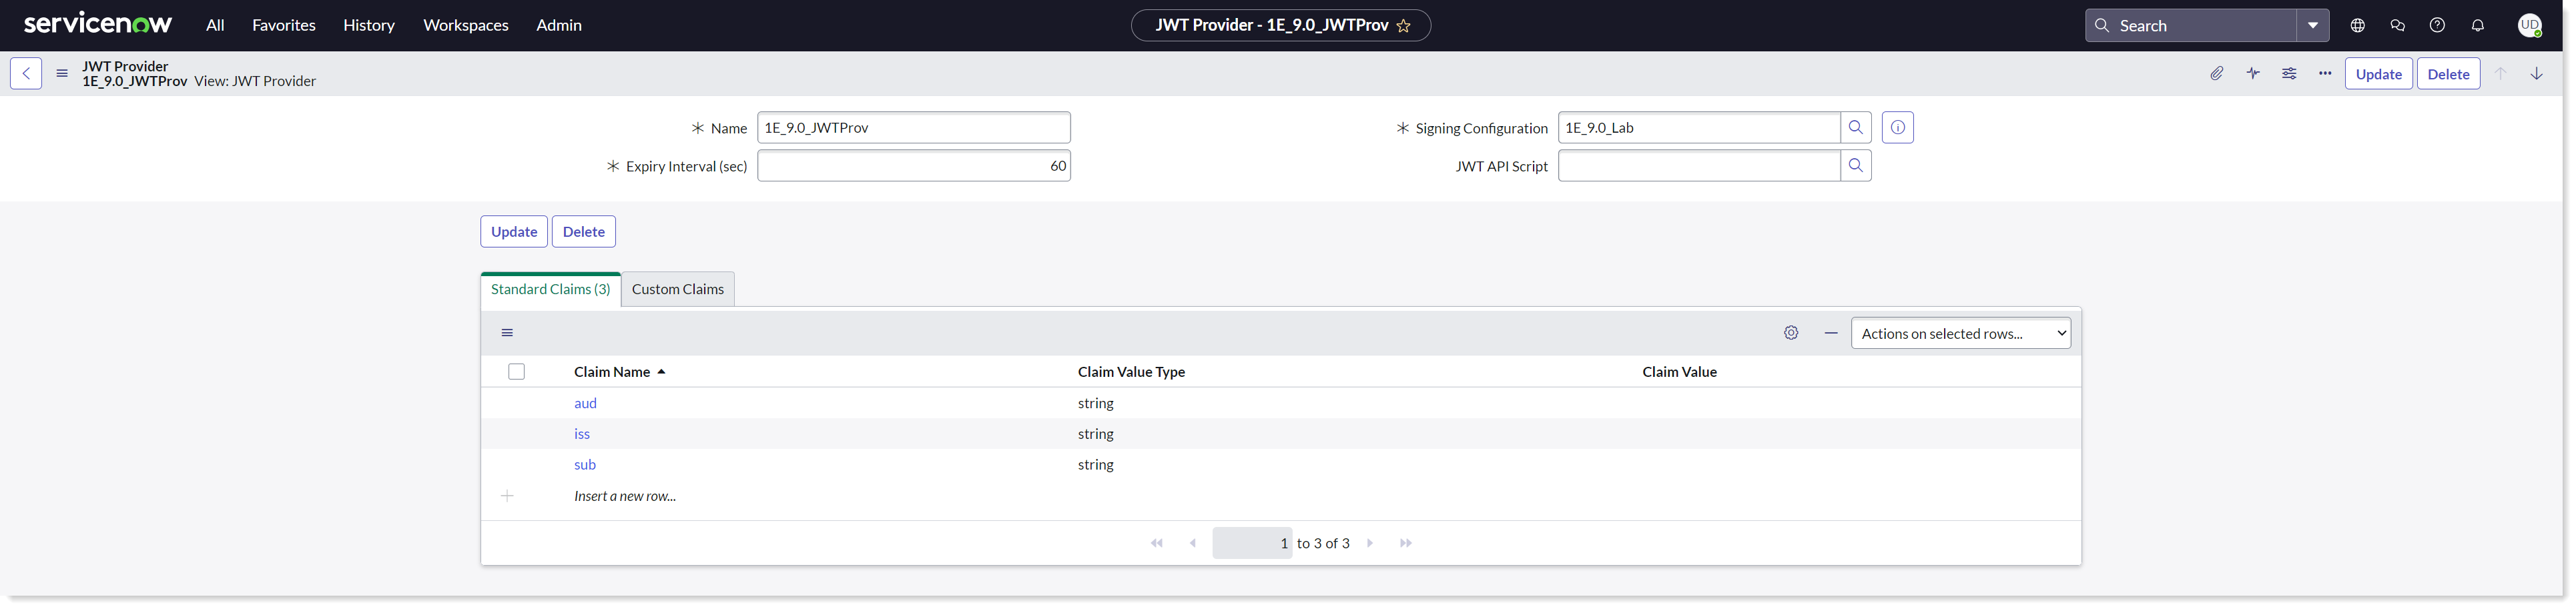
Navigate to System OAuth → JWT Providers.
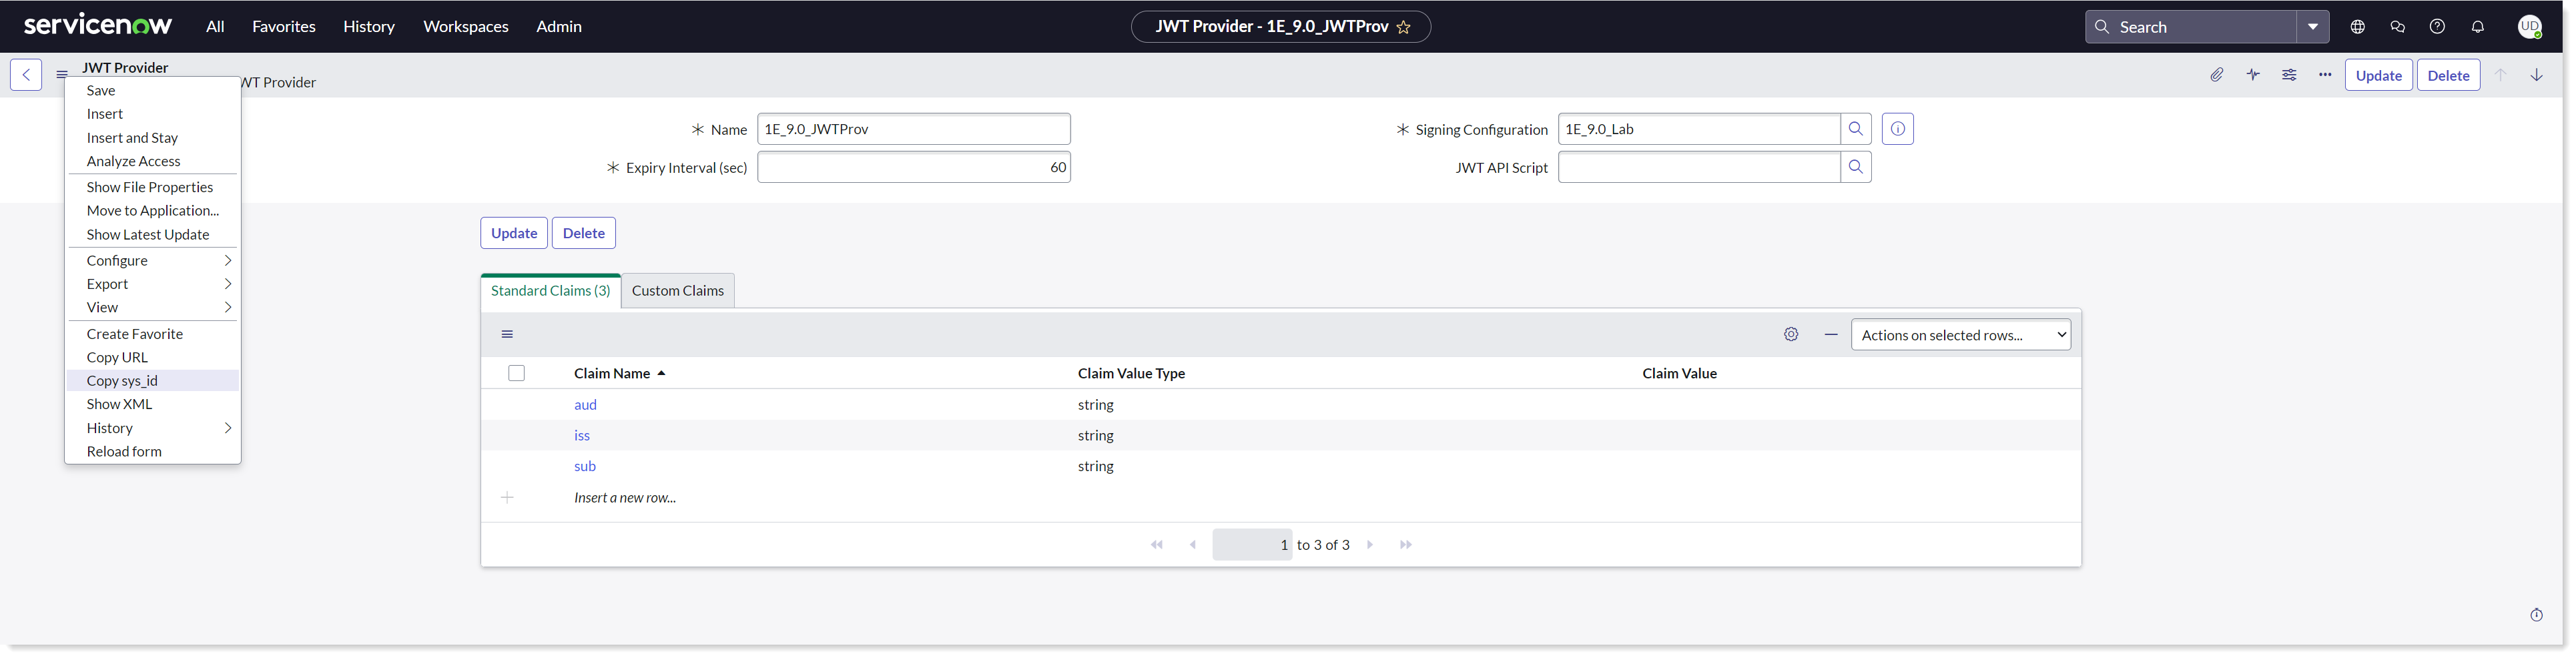
Create a new record for JWT Providers and fill in the claim values as shown in the picture above.
Ensure that you have the required permissions.
Provide a descriptive Name.
Select the JWT Key created earlier using the lookup list into the Signing Configuration field.
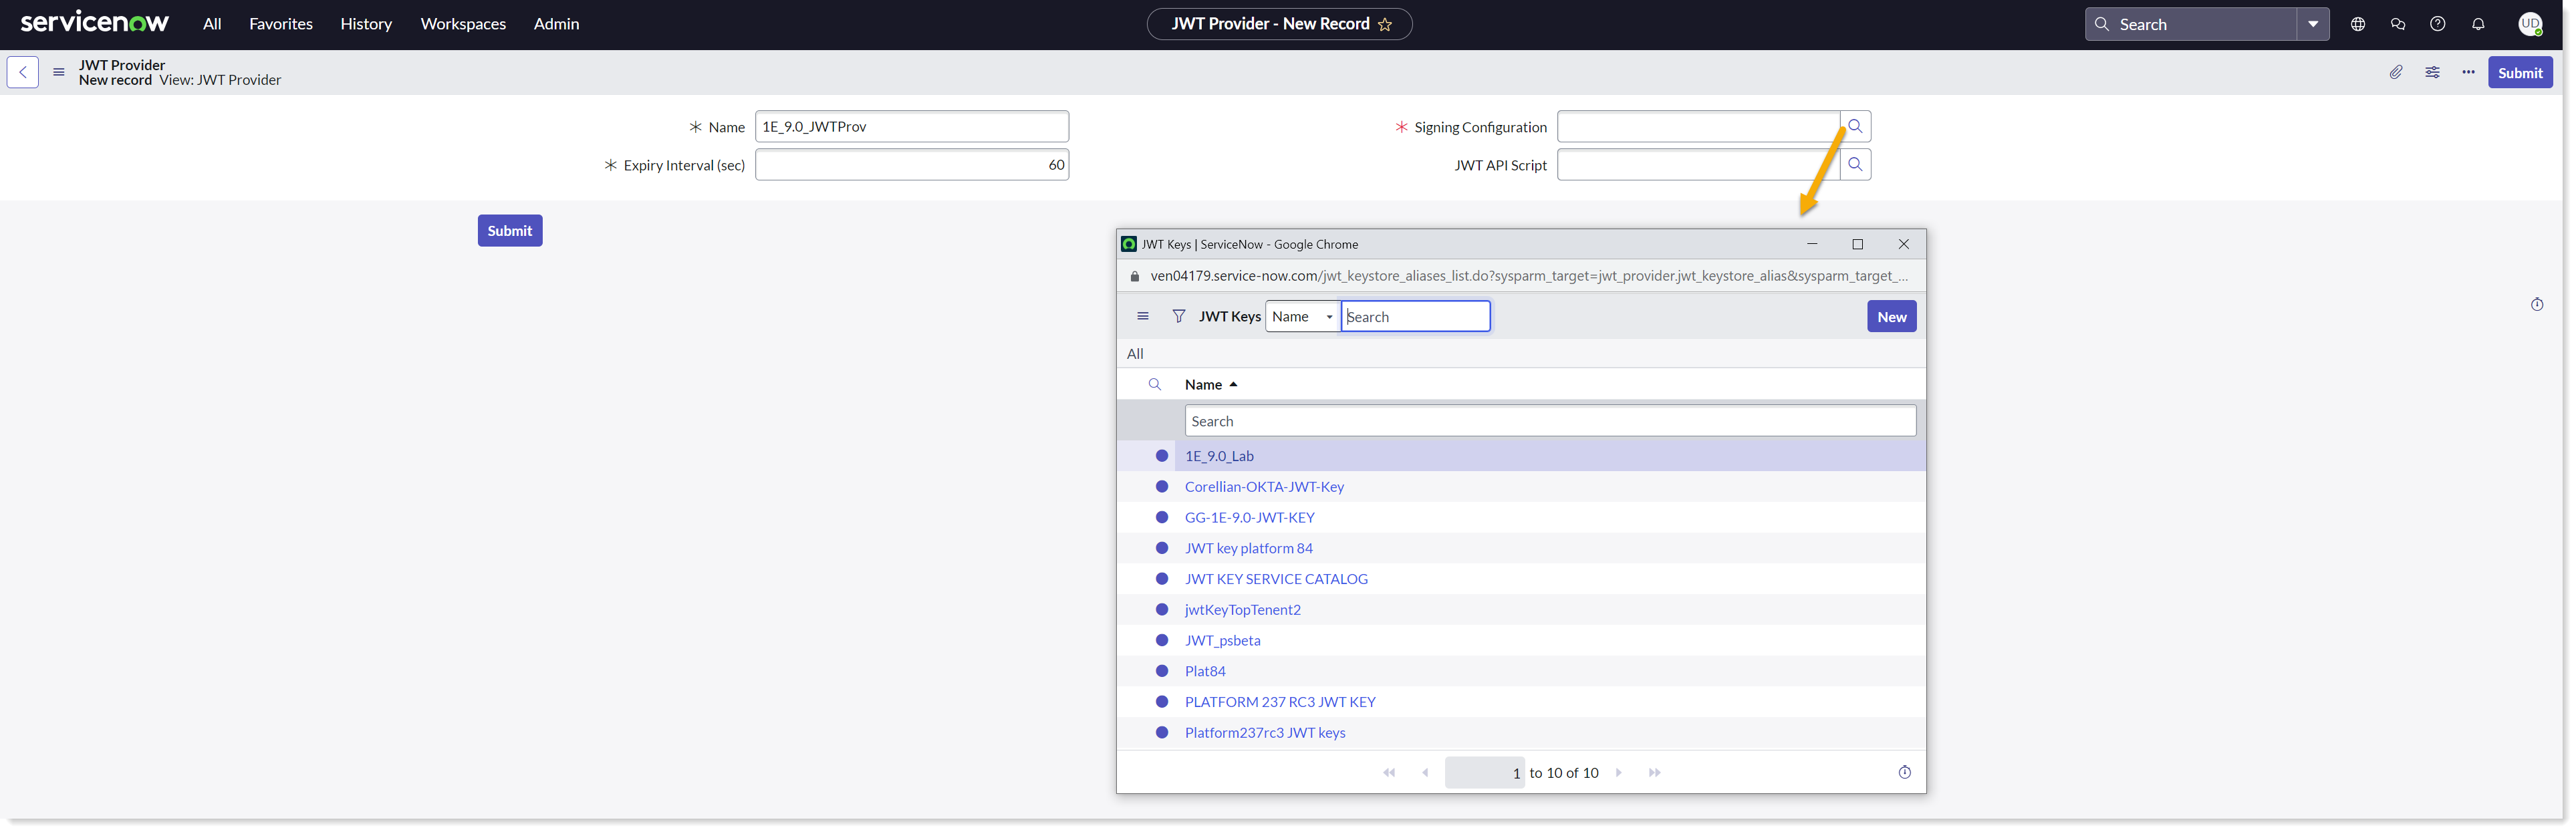
Copy the SysID of the JWT Provider's record for future use. This SysID is passed to retrieve JWT Token.
Okta IdP
For more information on how to configure, please refer to Provisioning and Upgrading Guide for 1E 24.1.
Get the 1E Virtual Assistant application
To get the latest version of the 1E Virtual Assistant application installed, you can consider either of the below choices:
If you are a new customer, you can get the 1E Virtual Assistant application from ServiceNow app store. To install the application, refer App installation.
However, if you already have and older version of 1E Virtual Assistant application on your ServiceNow instance, then refer to Upgrading to upgrade your application.
Prerequisite
The following information is required for the preparation of certificates:
.pfx certificate containing a private key
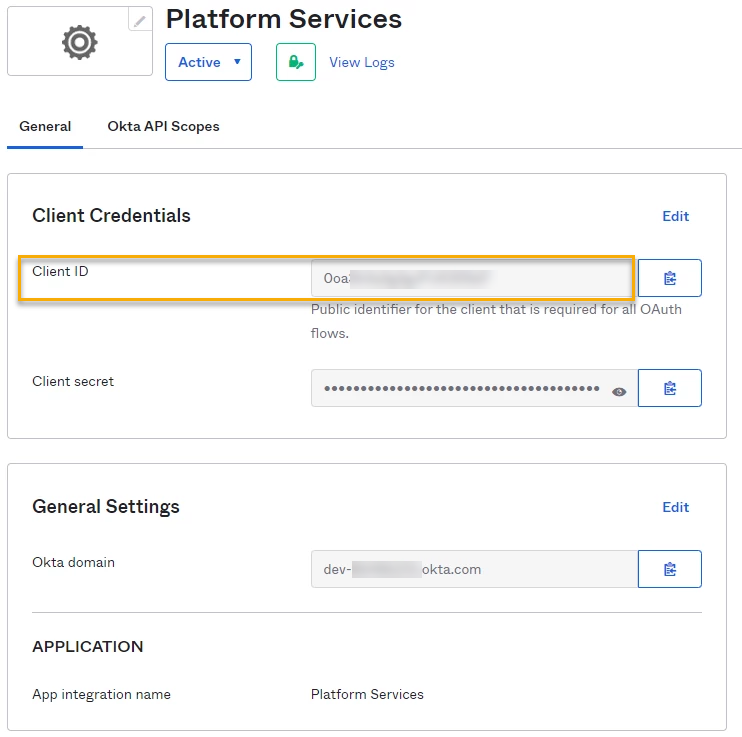
The Client ID from Okta, as shown in the picture below.
You need the following tools:
1E PowerShell toolkit (available on 1E Support Portal)
Configure Okta and 1E
Install the certificate with private key locally to the local machine personal certificate store. Ensure that you have the required permissions to access the private key.
Navigate to 1E PowerShell toolkit and import it to the PowerShell window using:
PS c:\Users\administrator\Downloads\1.2.3> Import-Module .\ps1etoolkit.psd1 - force
Login to your 1E instance using Set-1E Server as
PS C:\Users\administrator\Download\1.2.3> Set-1EServer Platformtest.appteam.cloud.1e.com
You would be redirected to Okta login page and enter your credentials.
Get the AppID of the certificate using:
Get-1ECertificateThumbprint-StoreName localmachine\my|fl*.
Alternatively, you can also find the AppID from the Okta portal as shown below:
Now make a note of the AppID and then create a mapping using:
Add-1EJwtPrincipalMapping-Identifier <Certificate AppID> -Principal 1EUser@domain.com
Note that 1EUser@domain.com should be a principal with appropriate permissions in 1E.

Export the certificate that you have imported in the above steps in .CER format.
Login with the administrator principal and upload the certificate in your Okta instance.
Preparing the certificates for ServiceNow
Follow the below given steps to prepare the certificates:
The .pfx certificate has to be converted into .PEM and .JKS file types.
To convert the .pfx certificate, you need to first install OpenSSL and keytool applications on your machine.
After installing the applications, copy the .pfx certificate in the same directory where these applications reside.
Copy the entire content of the bin folder of OpenSSL into the bin folder of Java.
Now open the PowerShell/CMD where the .pfx certificate resides and run the following commands:
To generate the .PEM file:
openssl pkcs12 -in <filename>.pfx -out <filename>.pem
To generate the .JKS file:
openssl pkcs12 -export -in <filename>.pem -out <filename>.p12 -name MyCert
keytool -importkeystore -srckeystore <filename>.p12 -destkeystore <filename>.jks -srcstoretype pkcs12 -deststoretype JKS
Take a note of the JKS keystore password for future use.
Upload both PEM and JKS certificates into certificates table (sys_certificate) in ServiceNow.
ServiceNow OAuth steps
Now on your ServiceNow instance, configure the following OAuth steps:
Upload PEM and JKS certificates
Configure a JWT signing key
Configure a JWT provider
Upload PEM and JKS certificates
To upload the certificates, navigate to System Definition → Certificates and create a new record as shown in the picture below.
To upload the PEM certificate in your ServiceNow instance-
Provide the required details and attach the PEM certificate so that the identity provider can verify communications with the service provider.
Select Type as Trust Store Cert.
Copy the content of the PEM file and paste it into the PEM certificate field.
Now click on the Submit button to save the record.
Click on Validate Stores/Certificates link to validate the certificate.
Take a note of the SysID of the PEM certificate for future use.
To upload the JKS certificate in your ServiceNow instance-
Provide the required details.
Select Type as Java Key Store.
Attach the JKS certificate generated in the above step to enable the JWT client authentication.
Enter the Key store password.
Now click on the Submit button to save the record.
Click on Validate Stores/Certificates link to validate the certificate.
You can see that the certificates are now added to the Certificates table.
Configure a JWT signing key
To configure JWT signing key on your ServiceNow instance, follow the below steps:
Navigate to System OAuth → JWT Keys.
Create a new record for JWT Keys.
Provide a descriptive Name.
Select the JKS certificate uploaded earlier using the lookup list into the Signing Keystore field.
Enter the Keystore password saved earlier into the Signing Key field and click on Submit to save the record.
Create a JWT provider
To configure JWT provider on your ServiceNow instance, follow the below steps:
Navigate to System OAuth → JWT Providers.
Create a new record for JWT Providers and fill in the claim values as shown in the picture above.
Ensure that you have the required permissions.
Provide a descriptive Name.
Select the JWT Key created earlier using the lookup list into the Signing Configuration field.
Copy the SysID of the JWT Provider's record for future use. This SysID is passed to retrieve JWT Token.
Settings for Modern Authentication
There are few more settings that are required by 1E Virtual Assistant application for it to work on Modern Authentication.
System property | Value |
|---|---|
x_1e_virtual_agent.pem_certificate | Requires the SysID of the PEM Certificate record in sys_certificate table |
x_1e_virtual_agent.jwt_provider | Requires the SysID of the JWT Provider record in jwt_provider table |
x_1e_virtual_agent.key_id | The App ID generated by the resource server (also known as App ID) and sent as a kid claim |
To view and configure the values of the system properties, follow the below steps:
Login to your ServiceNow instance.
To open the System Properties table, type sys_properties.list in the filter navigator and press enter.
The System Properties table opens up into a new page, and now look for the details of the above listed properties in the table as shown below.
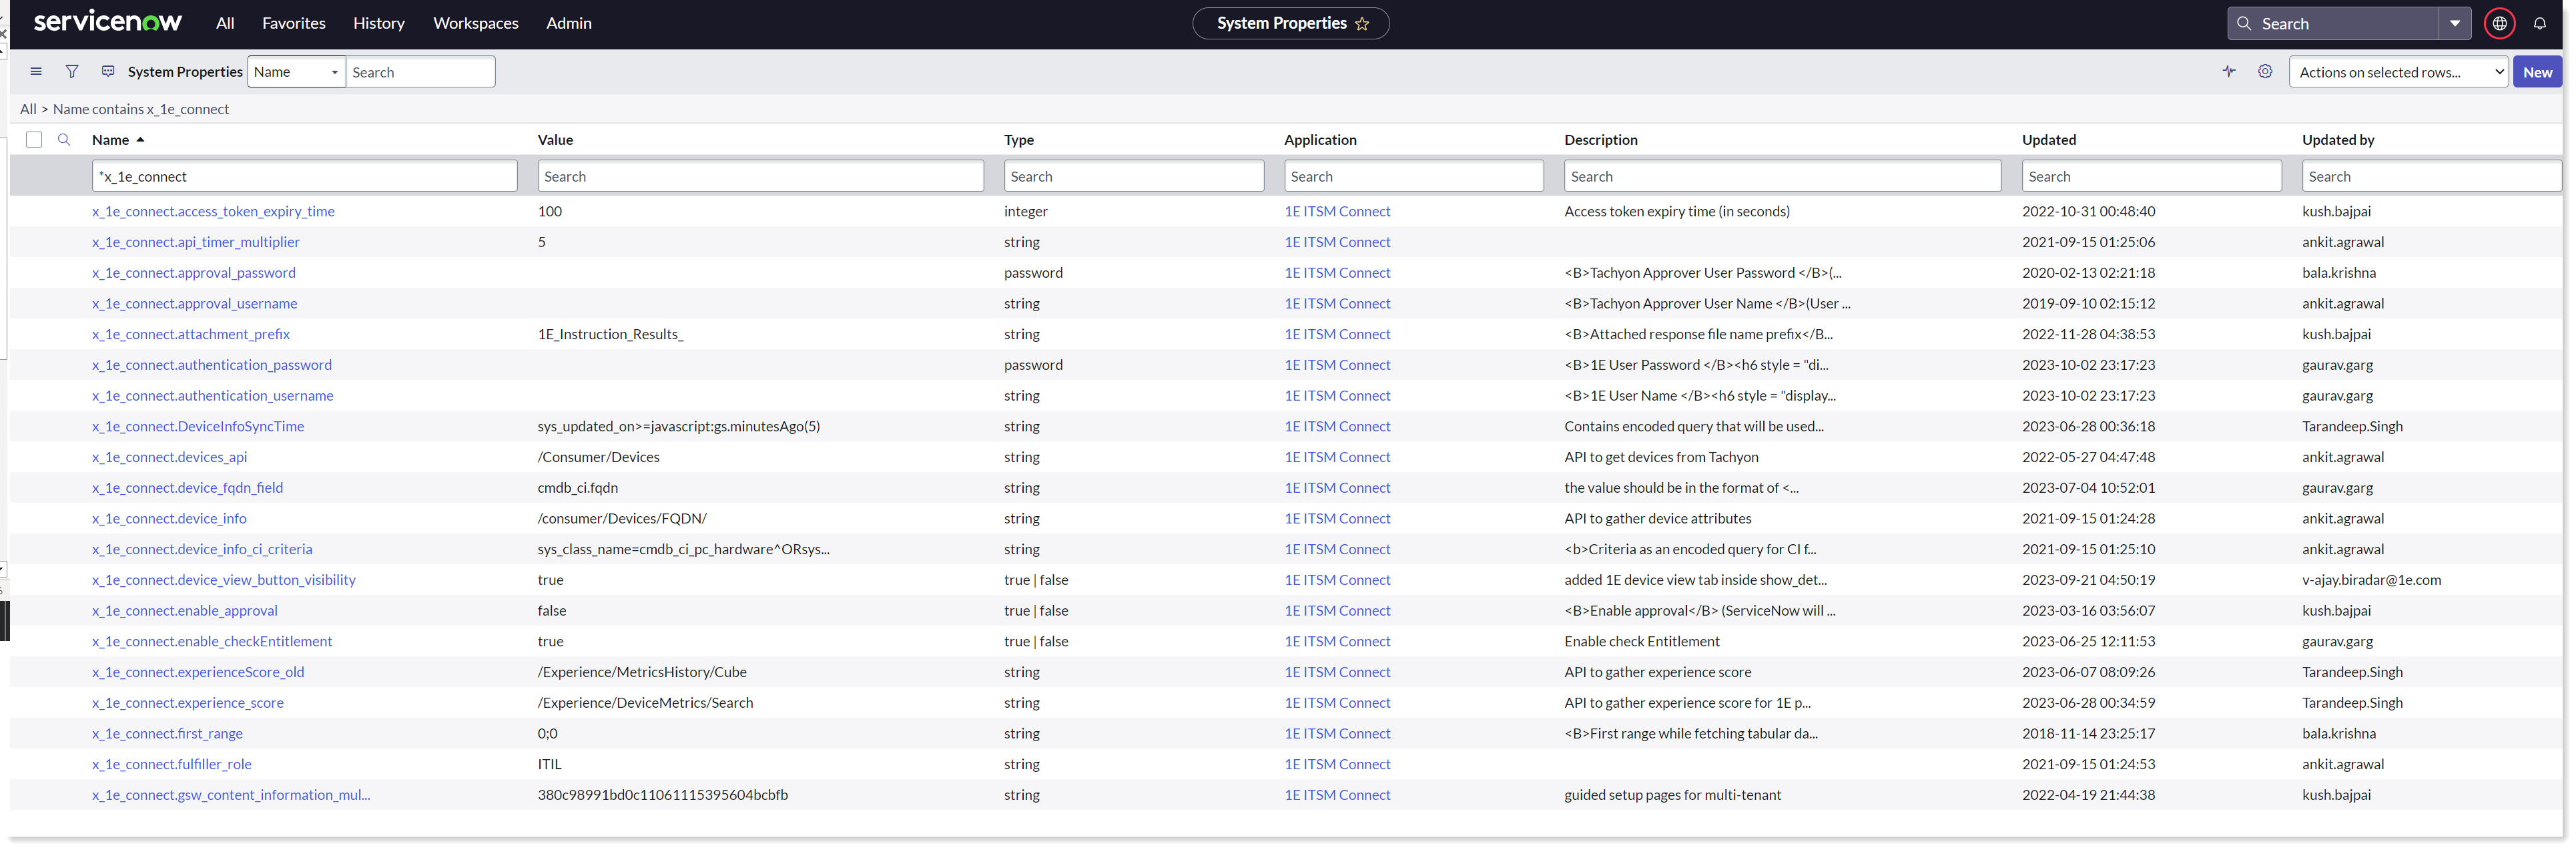
You can edit the values of the desired system property as per the details given in the above table.