Preparation for Basic Authentication
Below, given are the steps to be followed to configure your ServiceNow instance for Basic Authentication:
Installing 1E
Installing and configuring 1E Core
Add the 1E ITSM Connect app proxy user to 1E
Check your 1E license
Adding the 1E ITSM Connect app 1E user account as a 1E user
Installing 1E
For information on installing 1E 8.1 (on-premises), please refer to Planning for 1E 8.1.
Installing and configuring 1E Core for Basic Authentication
Please refer to the 1E Core 4.0.8 - Preparation for Basic Authentication page for more details on preparing the 1E Core application. In that documentation, you will need to follow the instructions for the following:
Disable 1E Two-factor Authentication.
Check your 1E License.
Enable basic authentication for the Consumer node of the 1E website.
Add the 1EServiceNowCore Consumer.
Bypass approval for the 1EServiceNowCore Consumer in the 1E database.
Add the 1E ITSM Connect app proxy user to 1E
ServiceNow's users that log in to the 1E ITSM Connect application will actually be interacting with 1E using a proxy user that is configured on the 1E ITSM Connect app's App Configuration page. This proxy user retrieves and executes instructions and fetches responses from 1E using 1E's API and the consumer added above.
In our example we will add a user to 1E, which must already exist in AD, that will have the following function and the following system roles applied:
Proxy User account | Function | Assigned 1E role |
|---|---|---|
ITSMConnectUser | 1E user | 1E ITSM Connect Actioner |
System (global) roles allow access to all instruction sets and all devices. We could define more granular permissions using custom roles instead of system roles. This would involve creating a custom role in 1E and assigning specific instruction sets and management groups to the role.
Note
Please refer to:
Design Considerations to understand more about app roles, their proxy users, 1E roles, instruction sets and management groups
Permissions Menu for 1E 8.1 for details on how to permission roles in 1E.
1E ITSM Connect post-installation tasks Page for details on how to configure proxy users in ServiceNow
User Management for information on how to set up users in ServiceNow.
Check your 1E license
If you intend to utilize the Experience Analytics features of 1E, you need to have a suitable license with the Experience consumer added to it. Without this, you will not get the Experience Analytics features in 1E ITSM Connect.
If you have not yet installed 1E, then you will need to obtain a 1E license file, and check it as follows:
Open your Tachyon.lic license file using Notepad.
Confirm the following exist in the features section:
Feature name="Experience"
Consumer name="Experience" enable="on"
If it is not there, then you should contact SalesOps@1e.com to get an updated license file.
<Consumer name="Experience" enable="on"> </Consumer>
If you have already installed 1E, check your license as follows:
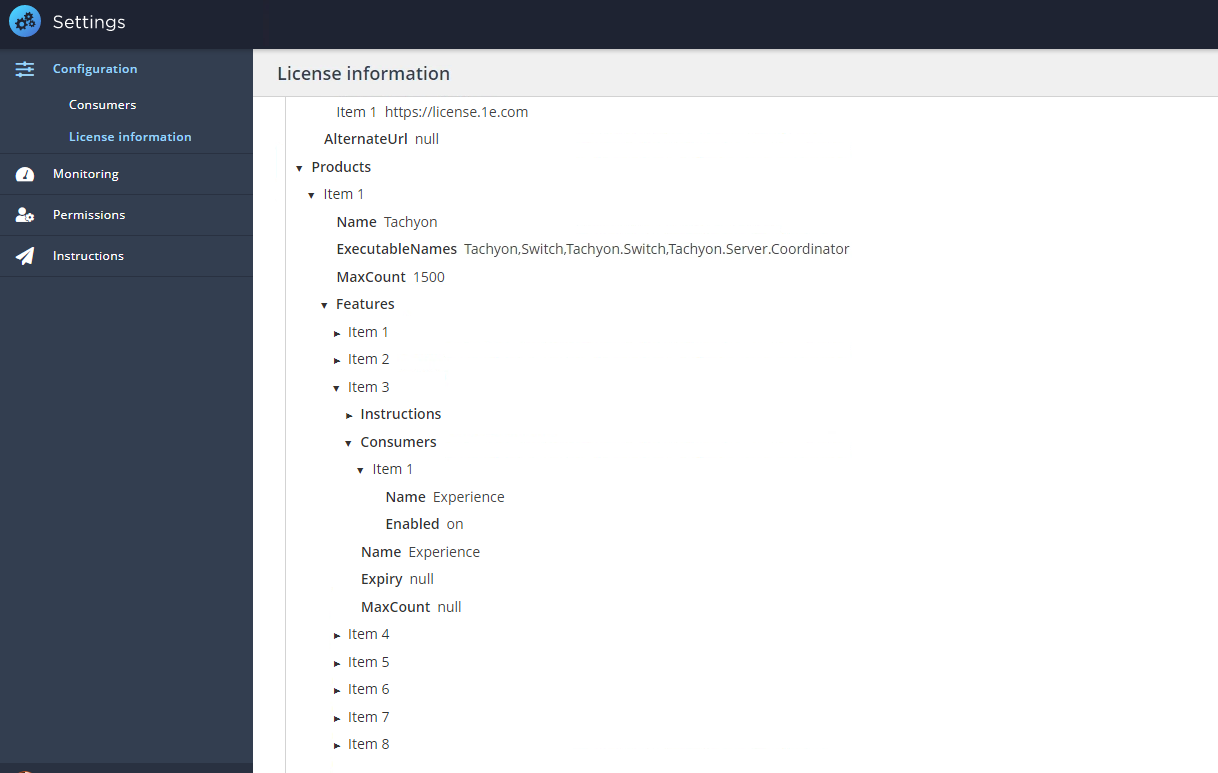
Login to 1E as a Full Administrator, using the Settings app, and navigate to Configuration → License information page.
Check that a feature with the name Experience exists there.
If it is not there, then you should contact SalesOps@1e.com to get your license enhanced.
If your 1E system has access to the 1E Licensing service via the Internet, then your license will be updated automatically.
Adding the 1E ITSM Connect app 1E user account as a 1E user
To configure the 1E user:
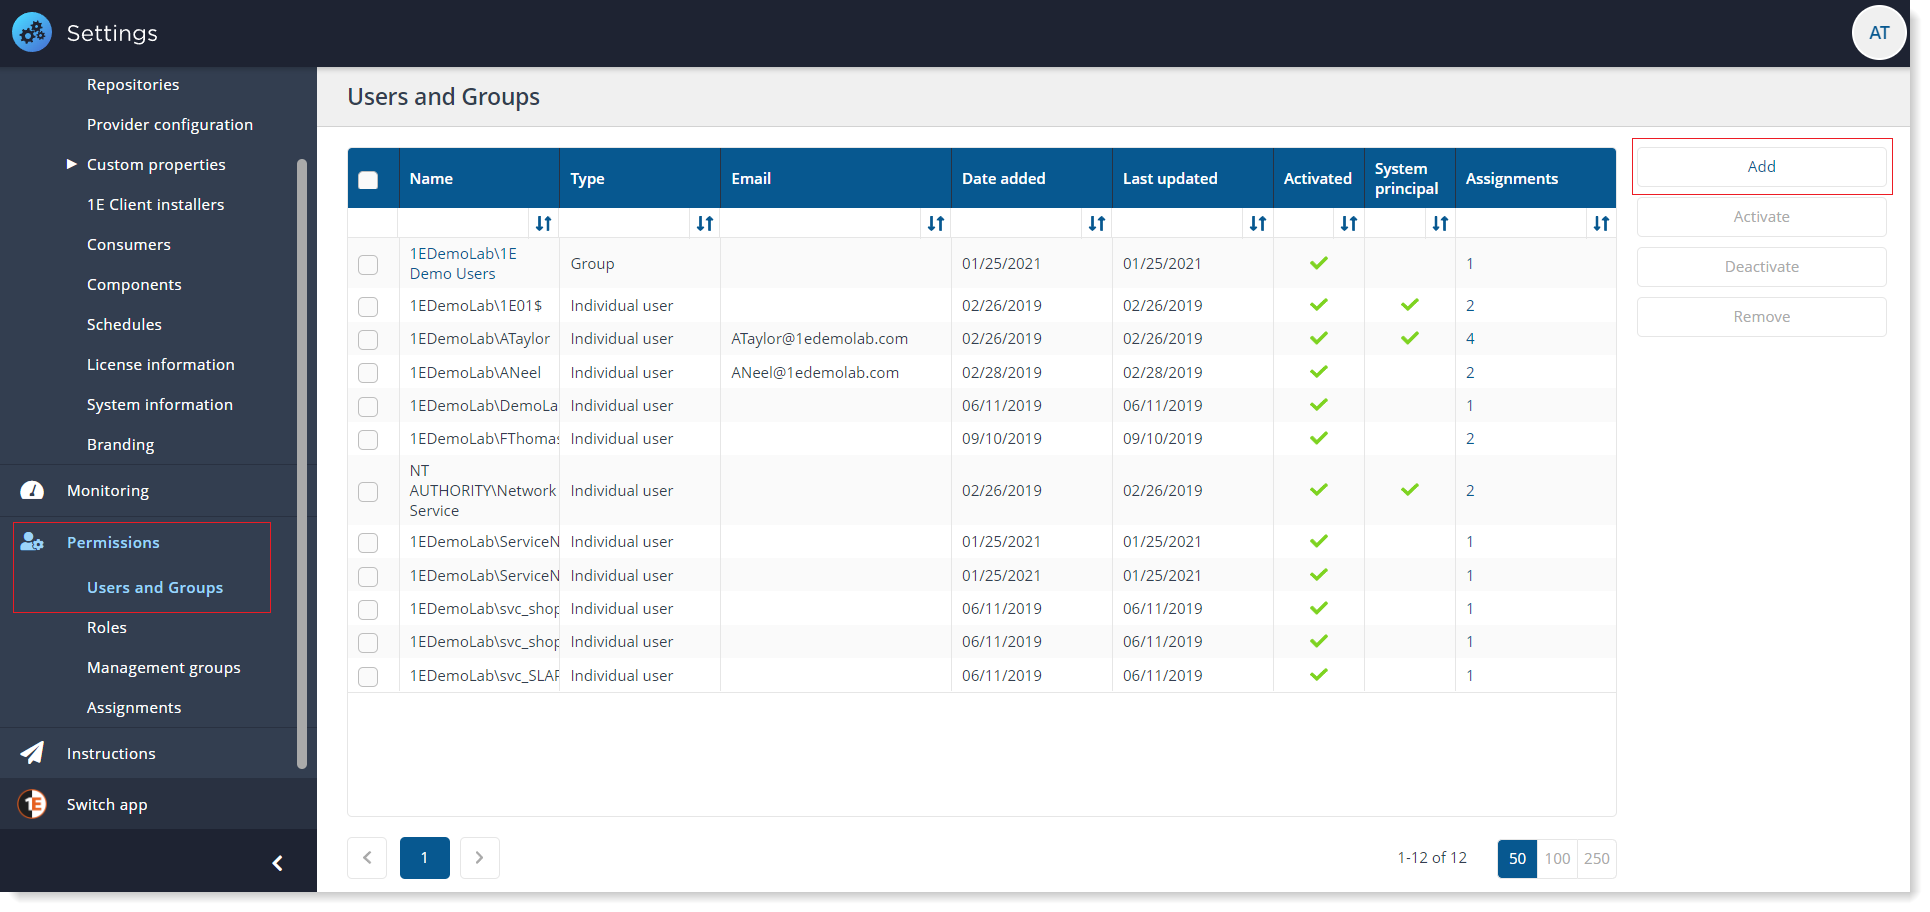
Login to Settings app using a 1E user account that has at least the Full Administrator rights:
Navigate to Permissions→Users and Groups.
Click on the Add button. The Add user popup window will open.
In the Select AD user or security group field, type the name, or part of the name, for the AD user or security group that you want to add and click on search icon.
1E will return a list of any matching users from AD.
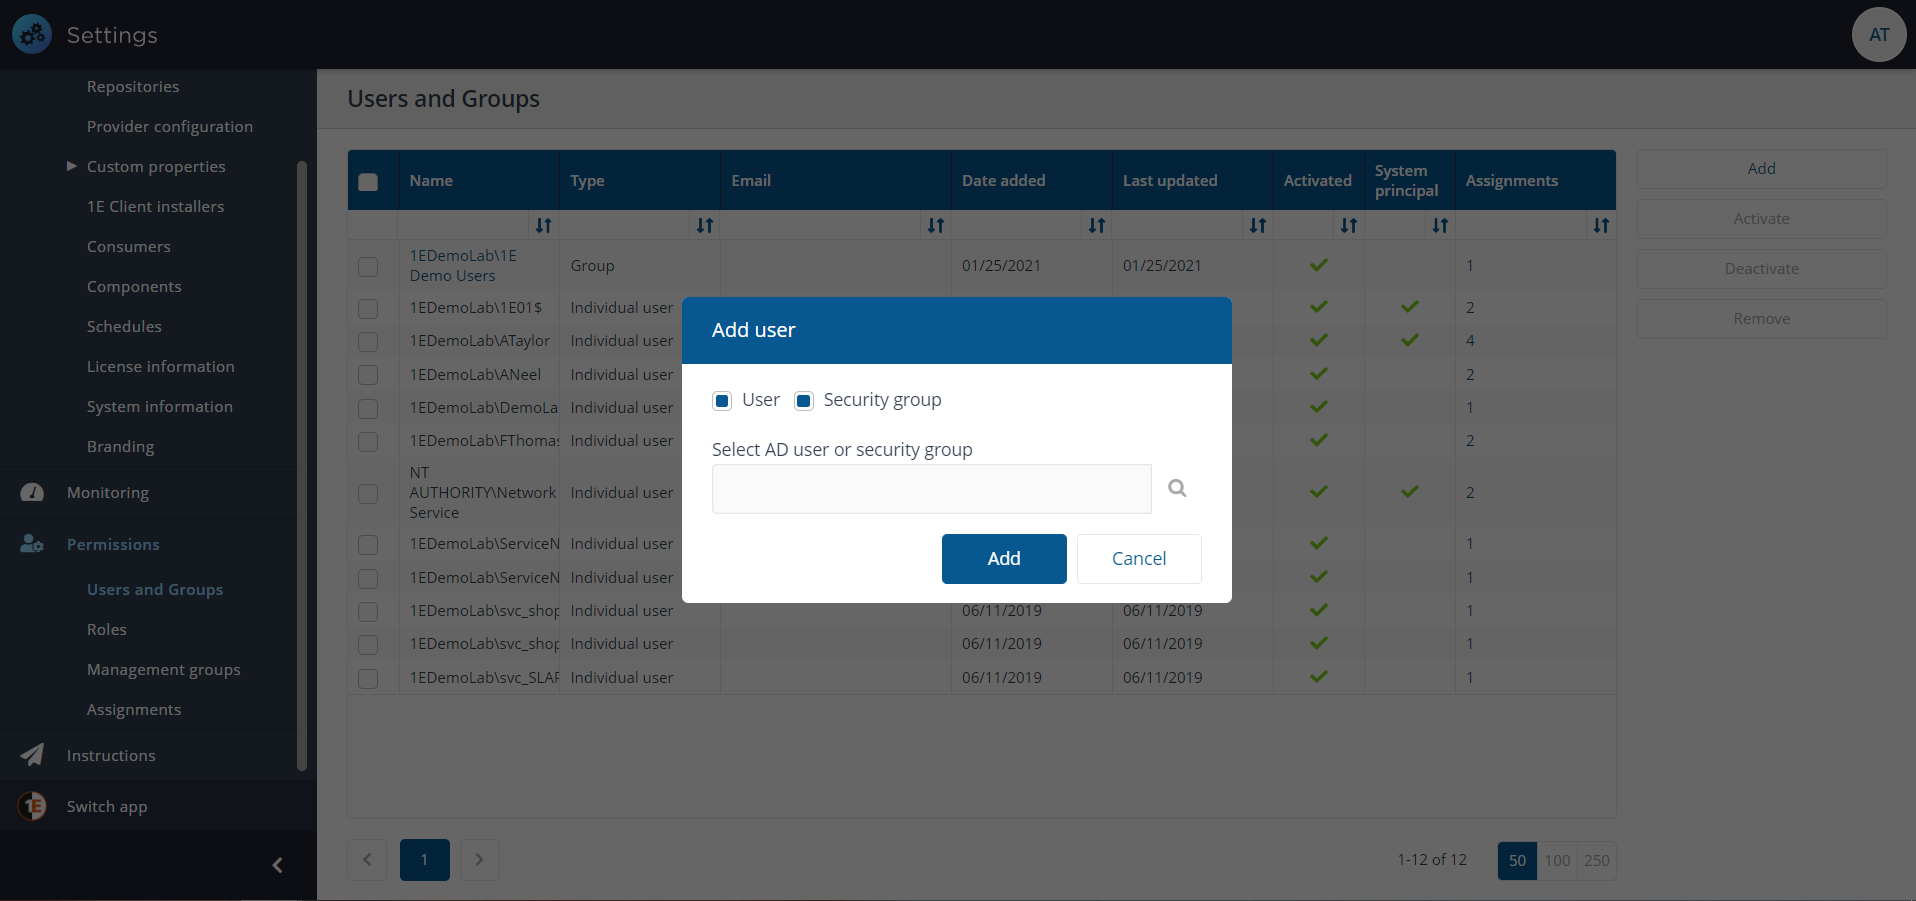
Select the one you want from the list user, for example, ITSMConnectUser.
Once you have selected the user, click on Add button.
Now that the user has been added, you have to assign role(s) to the user.
To assign a role to the user, select the user on the Users and Groups page and click on Assignments link for the user or group you want to add the role to.
This displays the Assignment page focused on the selected user.
On the Assignments page, the focus is on Users and Groups.
Click the plus sign button to add a Role i.e. All Instructions Actioner and required associated Management Group i.e. All Devices.
Now click on Save button to save the changes made. You can add as many roles as per your requirement.