Post-installation tasks for 1E CMDB Connect
Post-installation tasks, these tasks include mandatory and optional configuration tasks.
Required tasks
The following tasks must be performed post-installation of SGC for 1E.
App Configuration
After a successful 1E CMDB Connect install, an admin user must complete and save the App Configuration form listed under the 1E CMDB Connect module. Completing the configuration allows the 1E CMDB Connect app to communicate with 1E.
To test whether the application is successfully synced with 1E server, click on Test Server Connection in the top right corner. Once the connection is established, click on Retrieve Instruction to import the instructions from 1E into ServiceNow.
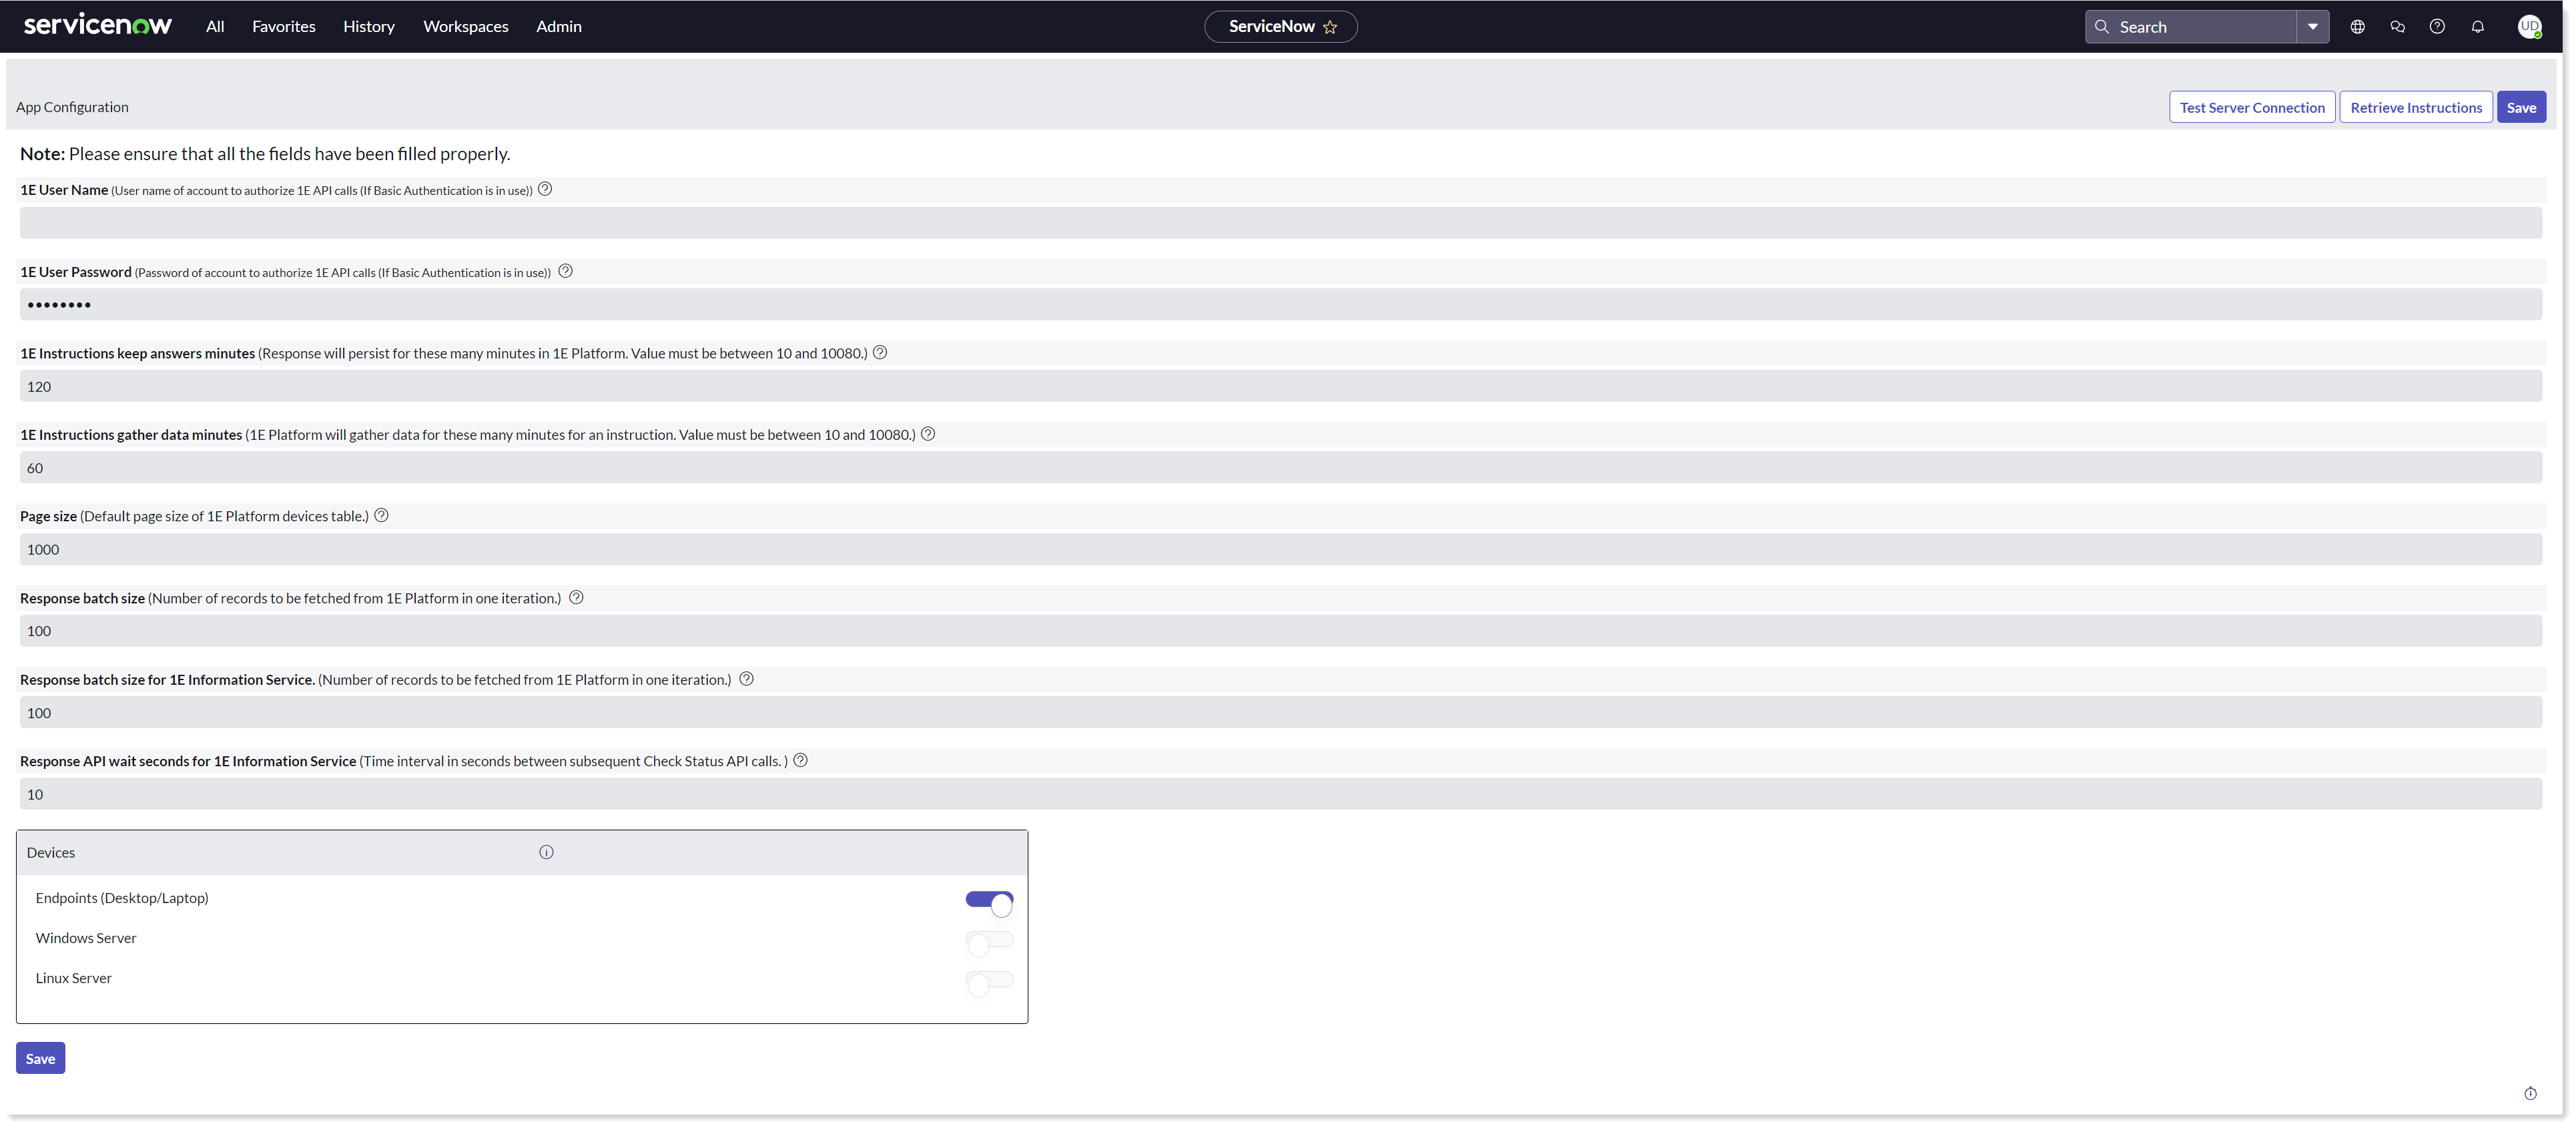
The App Configuration page displays these fields:
Configuration field | Description |
|---|---|
1E User Name | This is the user configured in ServiceNow and is responsible to fetch or execute instructions to or from 1E. Enter the 1E username and domain here. |
1E User Password | This is the password for 1E user to fetch and execute instructions. |
1E Instructions keep answers minutes | This value is used when ServiceNow sends an instruction to 1E and displays how long a 1E response is active after the instruction is executed, with a default value of 120 with a valid range between 10 and 10080. The same feature is available in 1E Core as well. If an admin has not provided a value, 1E uses the value saved in the 1E Core app. |
1E Instructions gather data minutes | This value shows the timeframe in minutes for how long 1E should gather the instruction response data. It has a default value of 60 with a valid range between 10 and 10080. The same feature is available in 1E Core as well. In case admin has not provided any value, then 1E server by default considers the value saved in 1E Core app. |
Page size | When devices are fetched (synced) from 1E into ServiceNow, these are fetched into batches. This feature sets the batch size for same. The default value is set to 1000. |
Response batch size | The responses of instruction that are fetched from 1E into ServiceNow are fetched into batches. This feature sets the batch size for these responses. The default value is set to 100. |
Response batch size for 1E Information Service | The feature 1E Information Service trigger 1E instructions on all available end-user devices at once. These responses of instructions that are fetched from 1E into ServiceNow are fetched into batches. This feature sets the batch size for these responses. The default value is set to 1000. |
Response API wait seconds for 1E Information Service | When an instruction is triggered from ServiceNow to 1E as a part of 1E Information Service, there is a continuous calling from ServiceNow to 1E for fetching the responses. In case there is no response available on 1E for this instruction, then the next response call is triggered after these many seconds. The default value is set to 10. |
There is a continuous counter on 1E from ServiceNow for getting responses. If responses are not empty, then the counter is set to 0 whereas if responses are empty (i.e. there is no response) then the counter is increased by 1. In case there is no response for more than three times from 1E, then we increase this wait time as shown in the following formula:
Wait time = (Counter value / 3) * 5 * (Response API wait seconds for 1E Information Service)
For example: If wait counter is 7 and wait time is set to 10 seconds by an admin on the configuration page, then wait time = (7 / 3) * 5 * 10 = 2 * 50 = 100 seconds.
The value 5 here is called a poll multiplier. To change this value, update the value in the x_1e_tachyon_cmdb.pollMultiplier property.
The listed devices allow an admin user to configure the types of devices that are to be synced from 1E to ServiceNow. In the current version, only the Endpoints (Desktop/Laptop) are available for configuration.
Note
If Endpoints (Desktop/Laptop) is disabled, no devices are synced with 1E.
Personalizing your Computers List
To configure the Computers list for 1E CMDB Connect, follow these steps:
Type cmdb_ci_computer.list in filter navigator and press enter. If you have not added any fields to the Personalize List, then it will only show the default fields, as shown in the picture opposite.
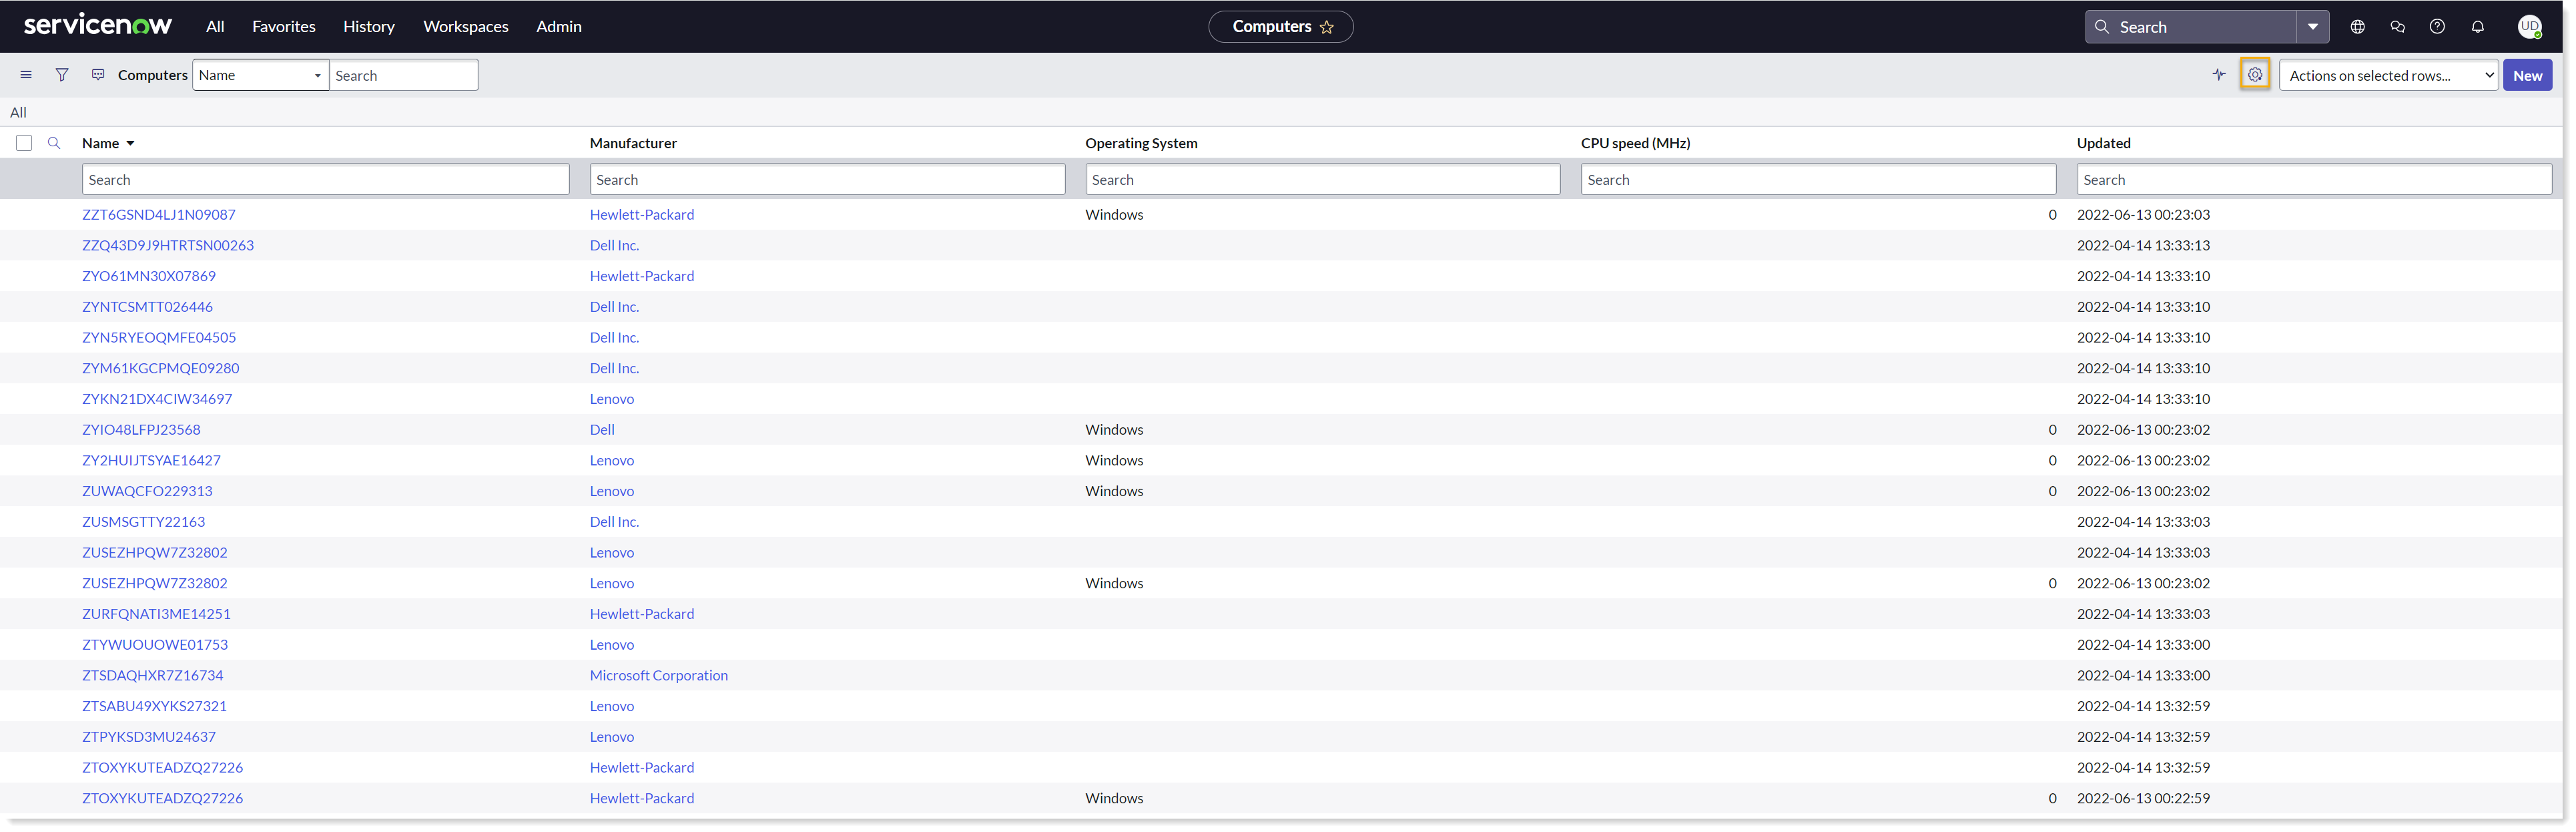
To add more fields, click on the Personalize List (cogwheel icon) given in the top right corner and then select the fields from Personalize List Columns that you want to see in your Computers table and click on OK to save.
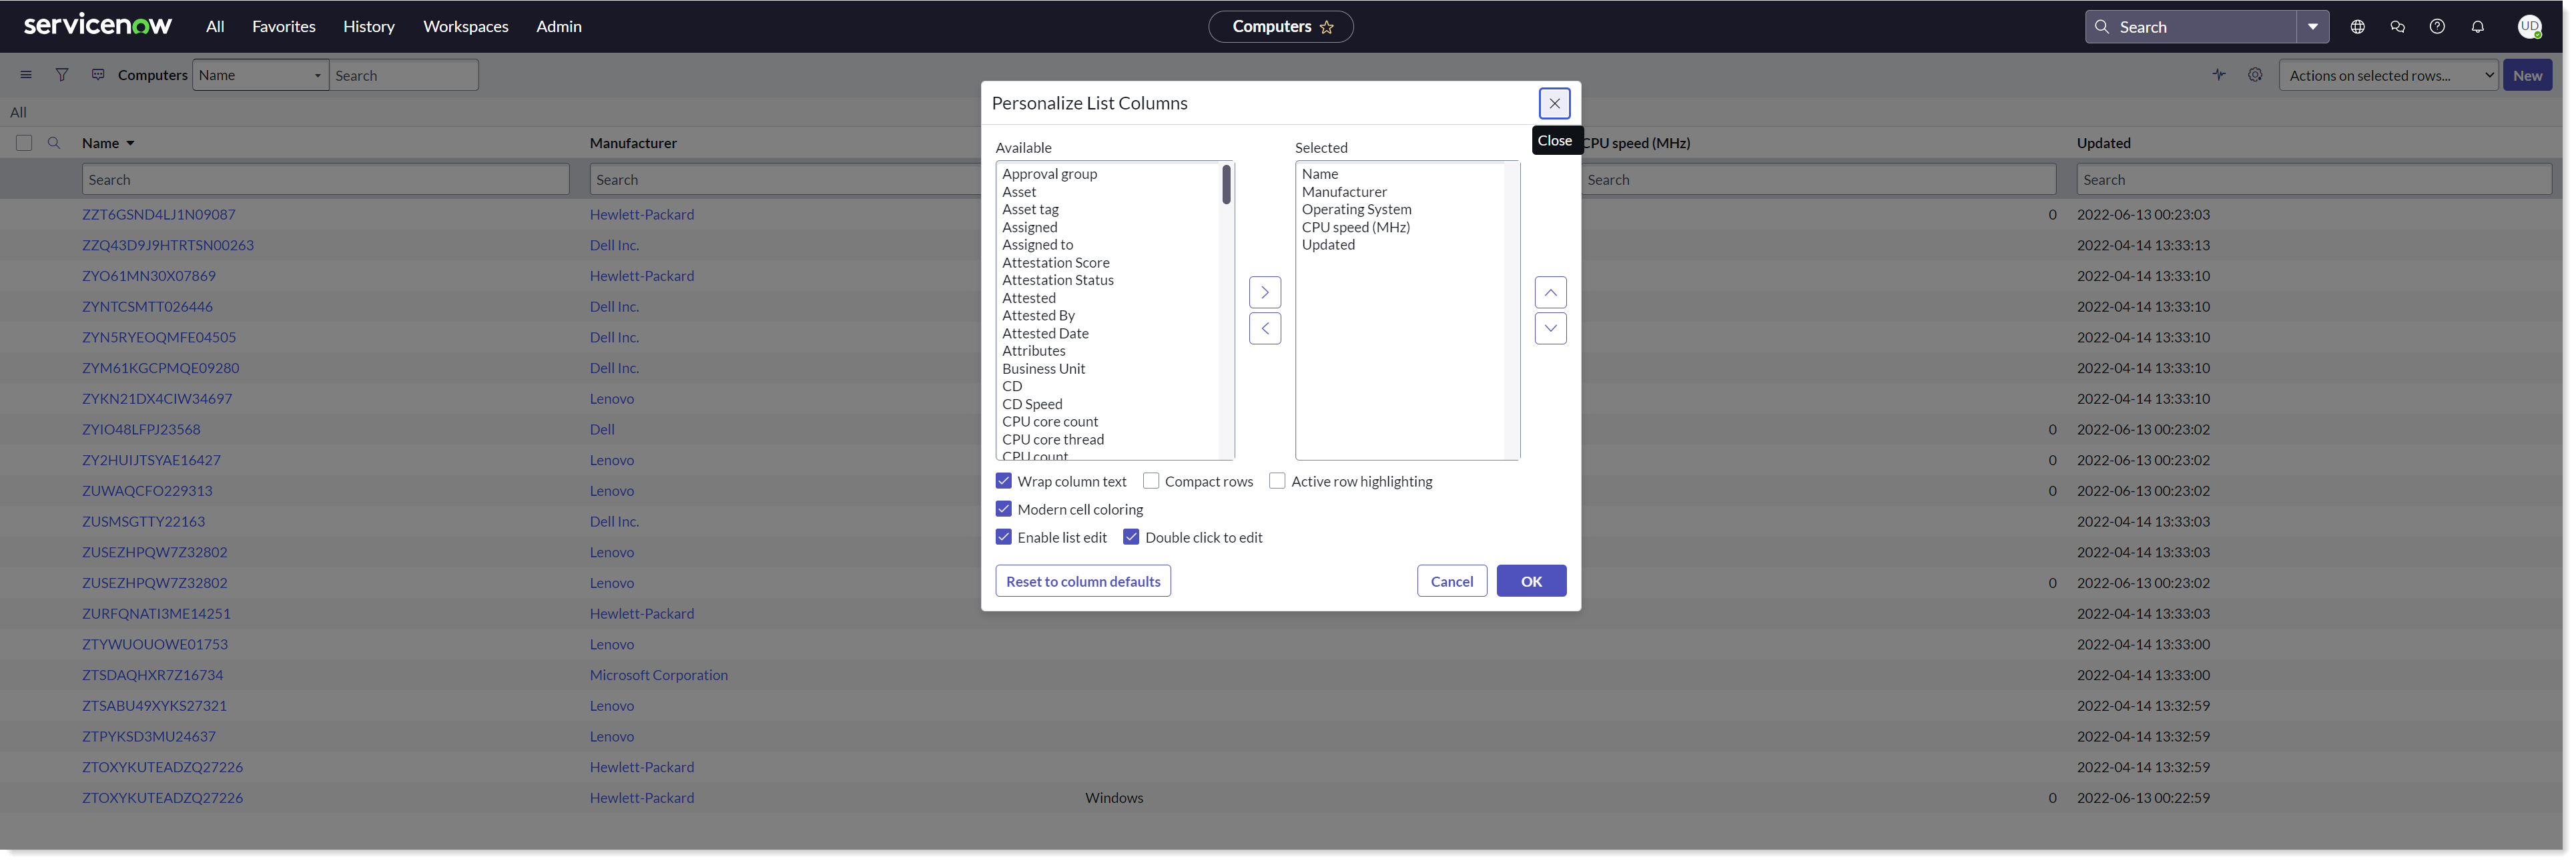
Once you refresh, you can now see all the selected fields in the Computers table.
Adding 1E CMDB Connect tab
To perform this task, ensure that your current application scope is Global.
To configure the Computer form for 1E CMDB Connect, follow these steps:
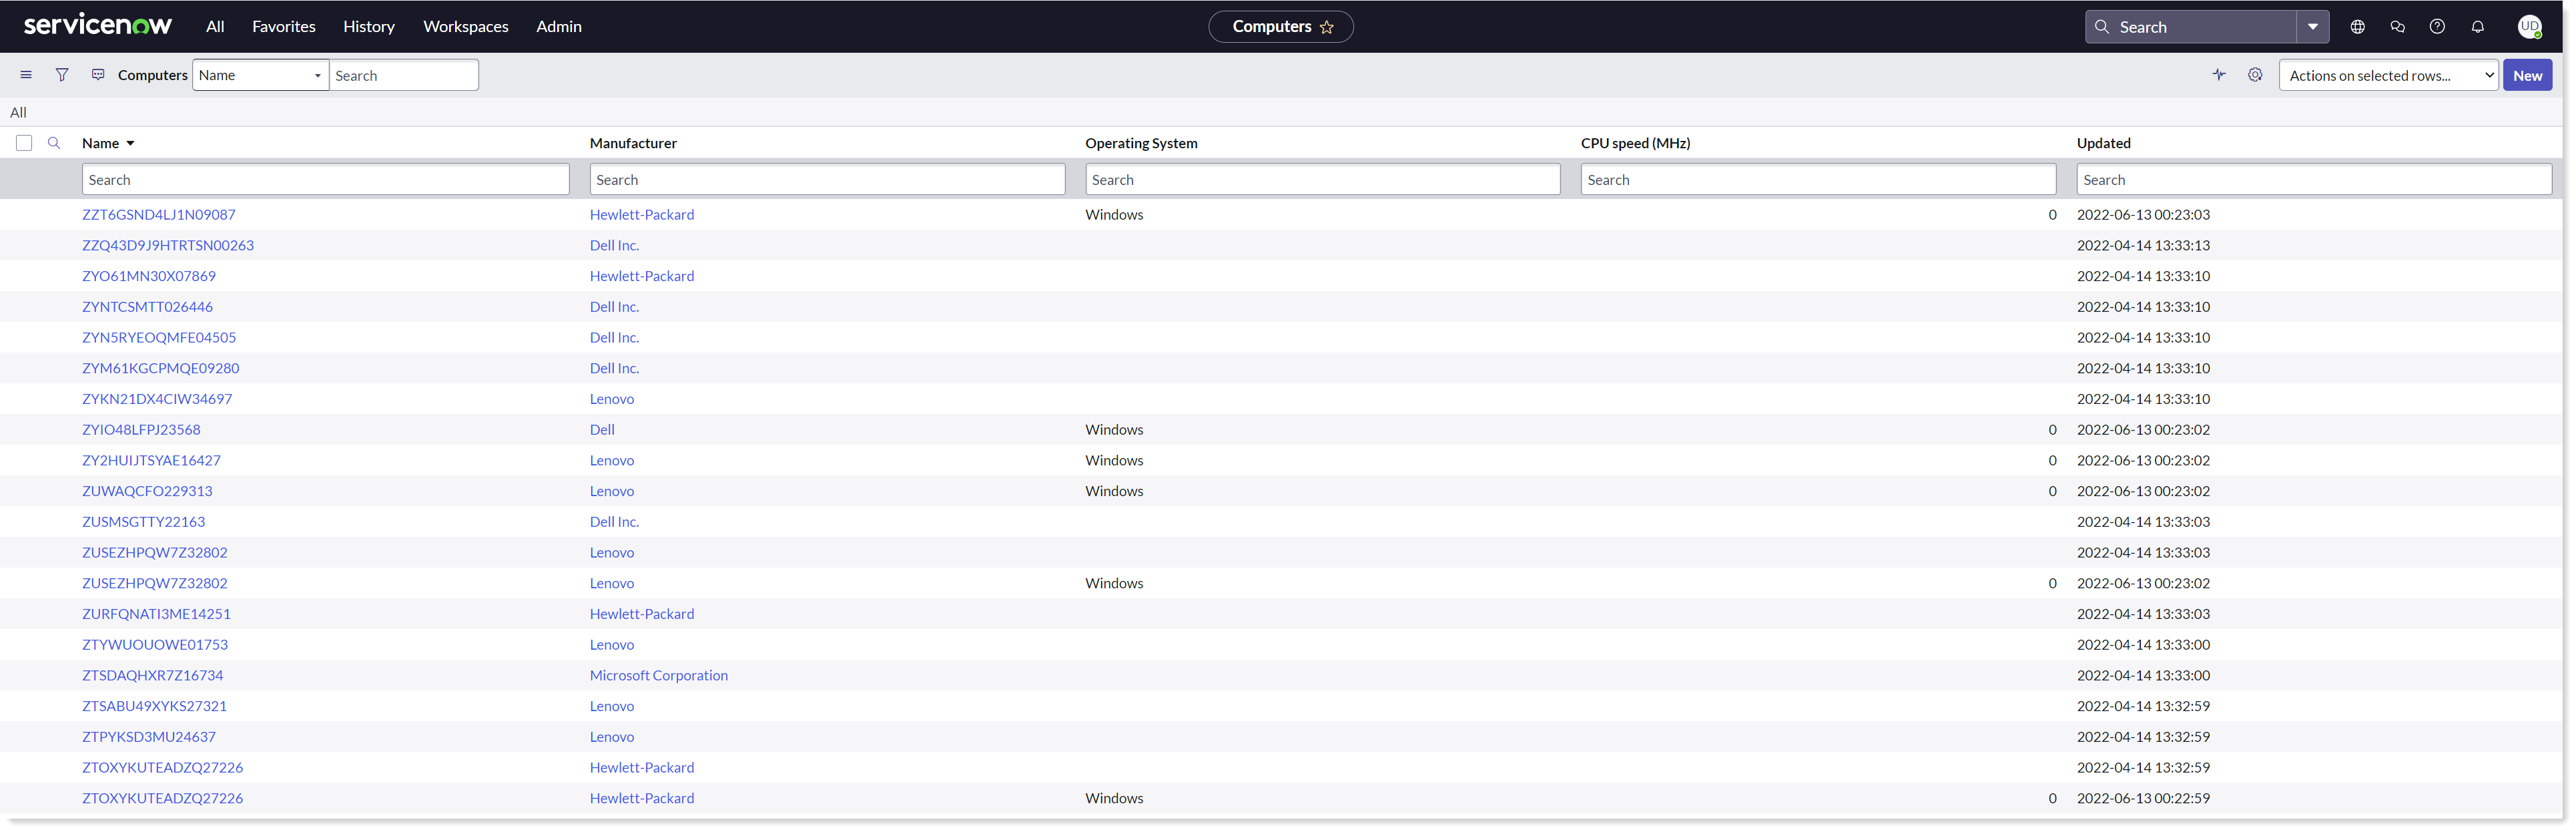
Type cmdb_ci_computer.list in filter navigator and press enter.
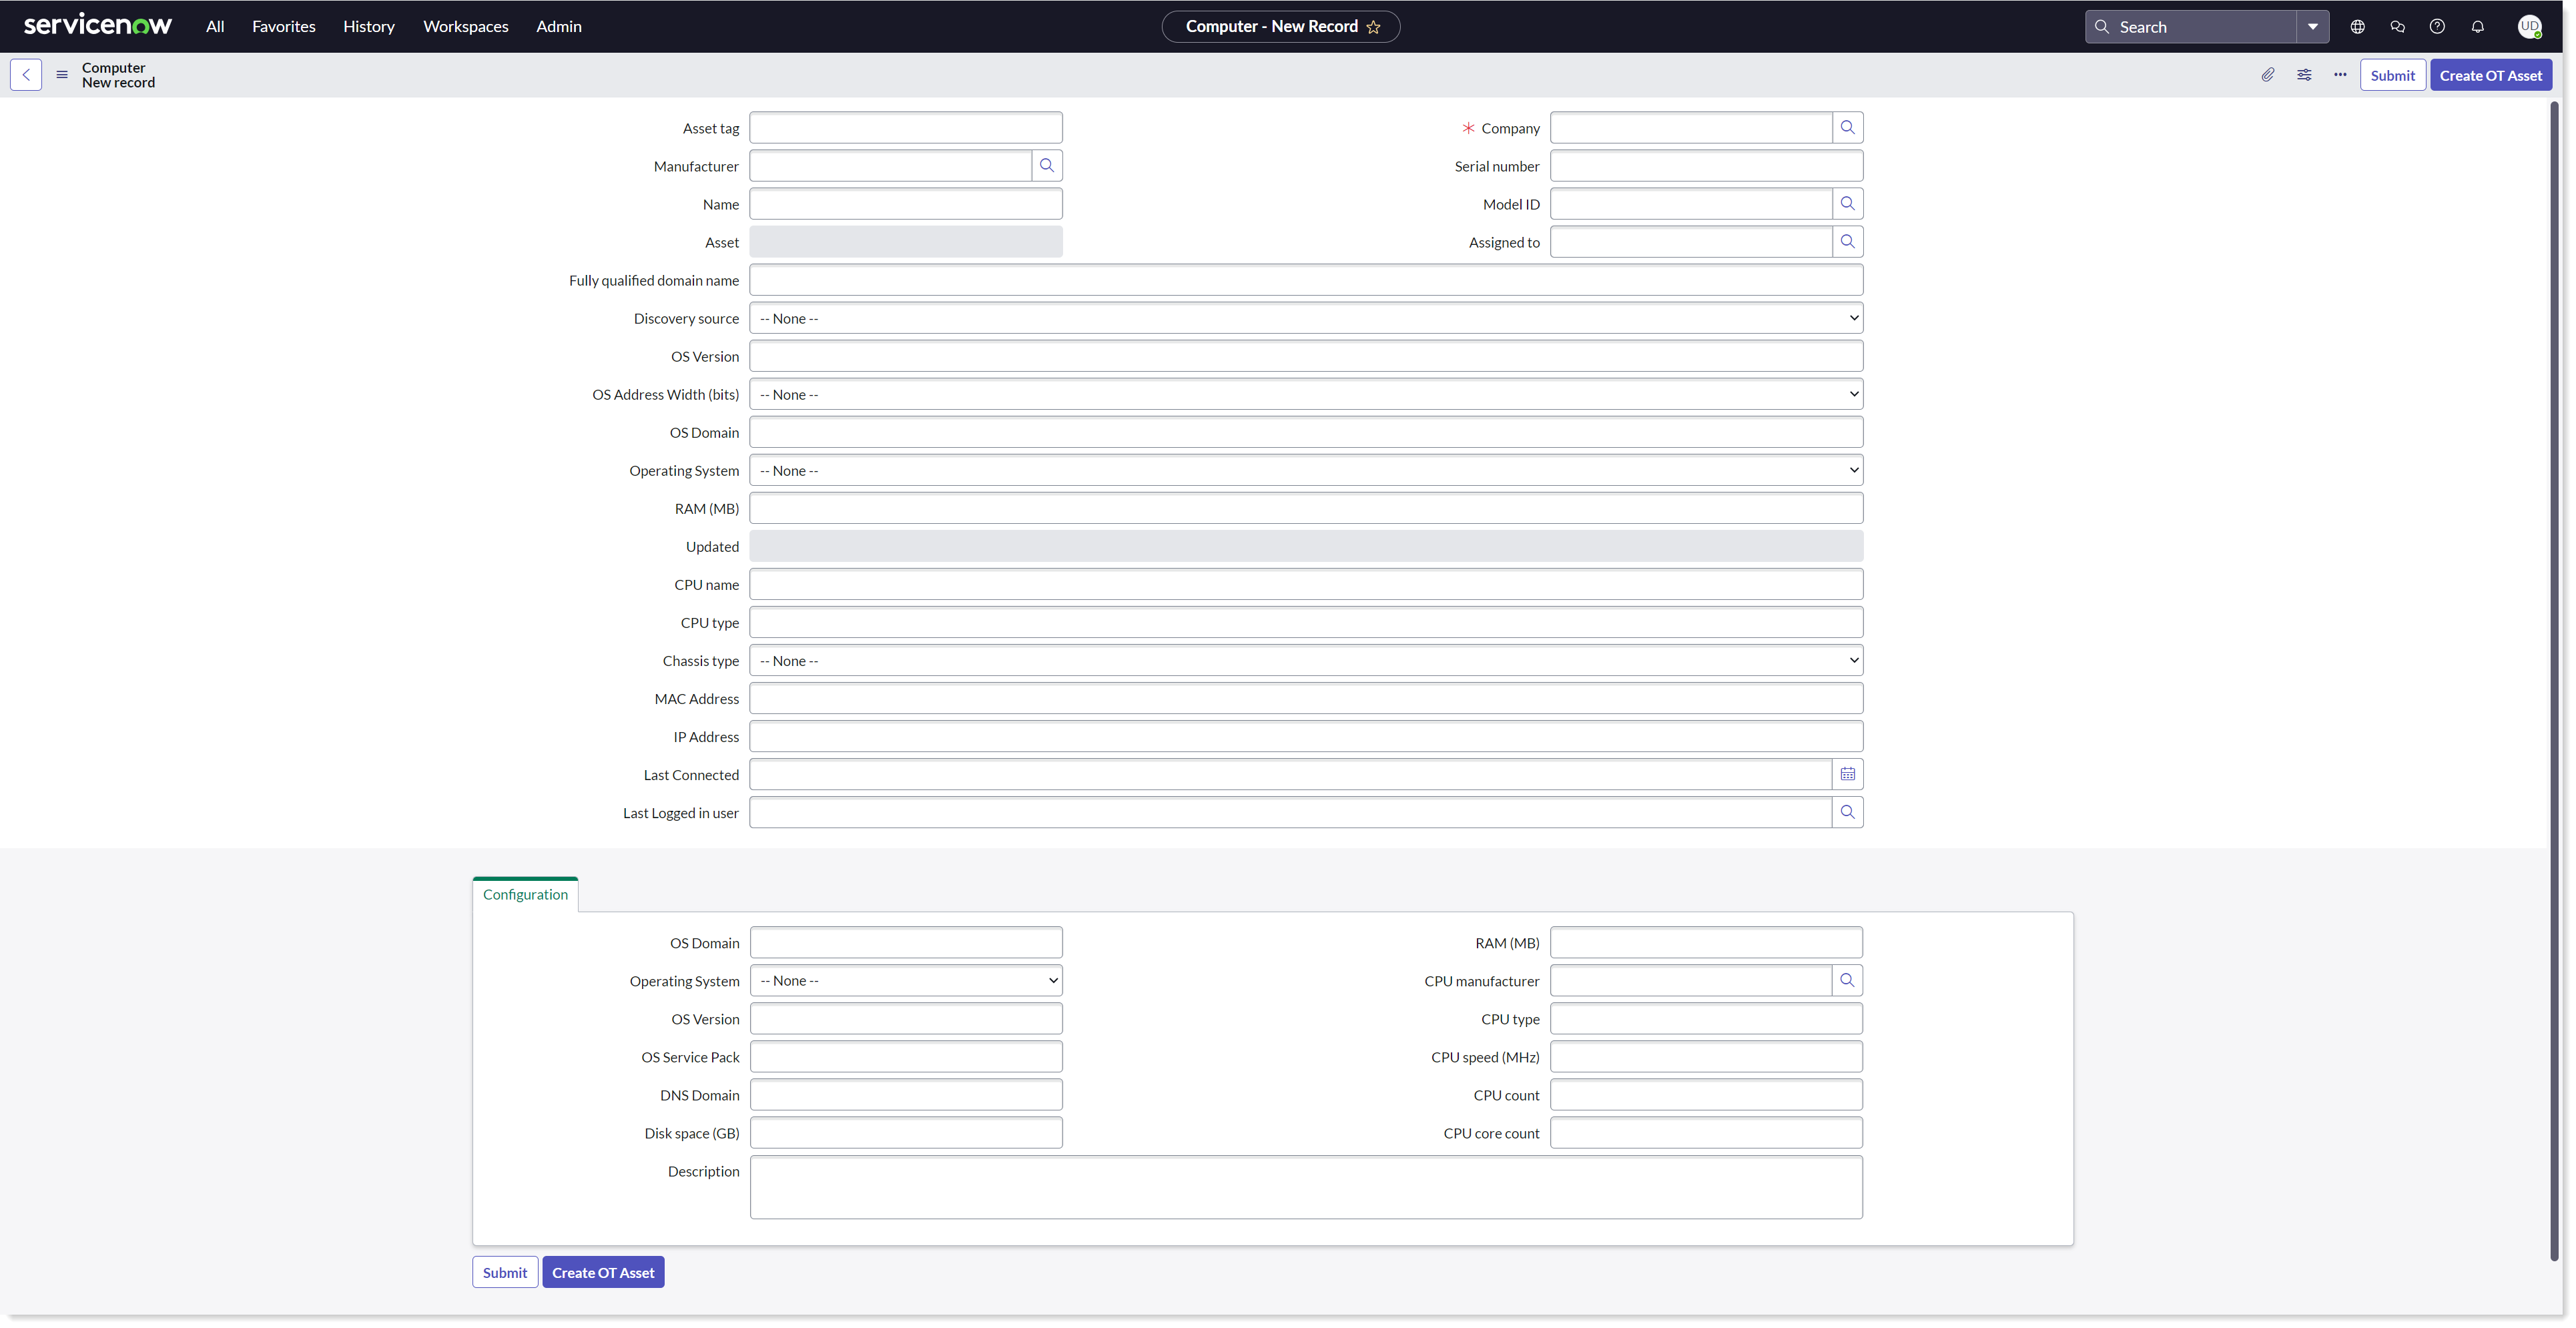
This opens up the Computers page as shown in the picture. To open an existing record of a device, click on the Name or Fully qualified domain name, whichever is the first field listed in the table. You can also click on the information icon of the device to open an existing record. You can also click on the New button given at the top for a blank record.
To open a new or blank record, you can click on the New button.
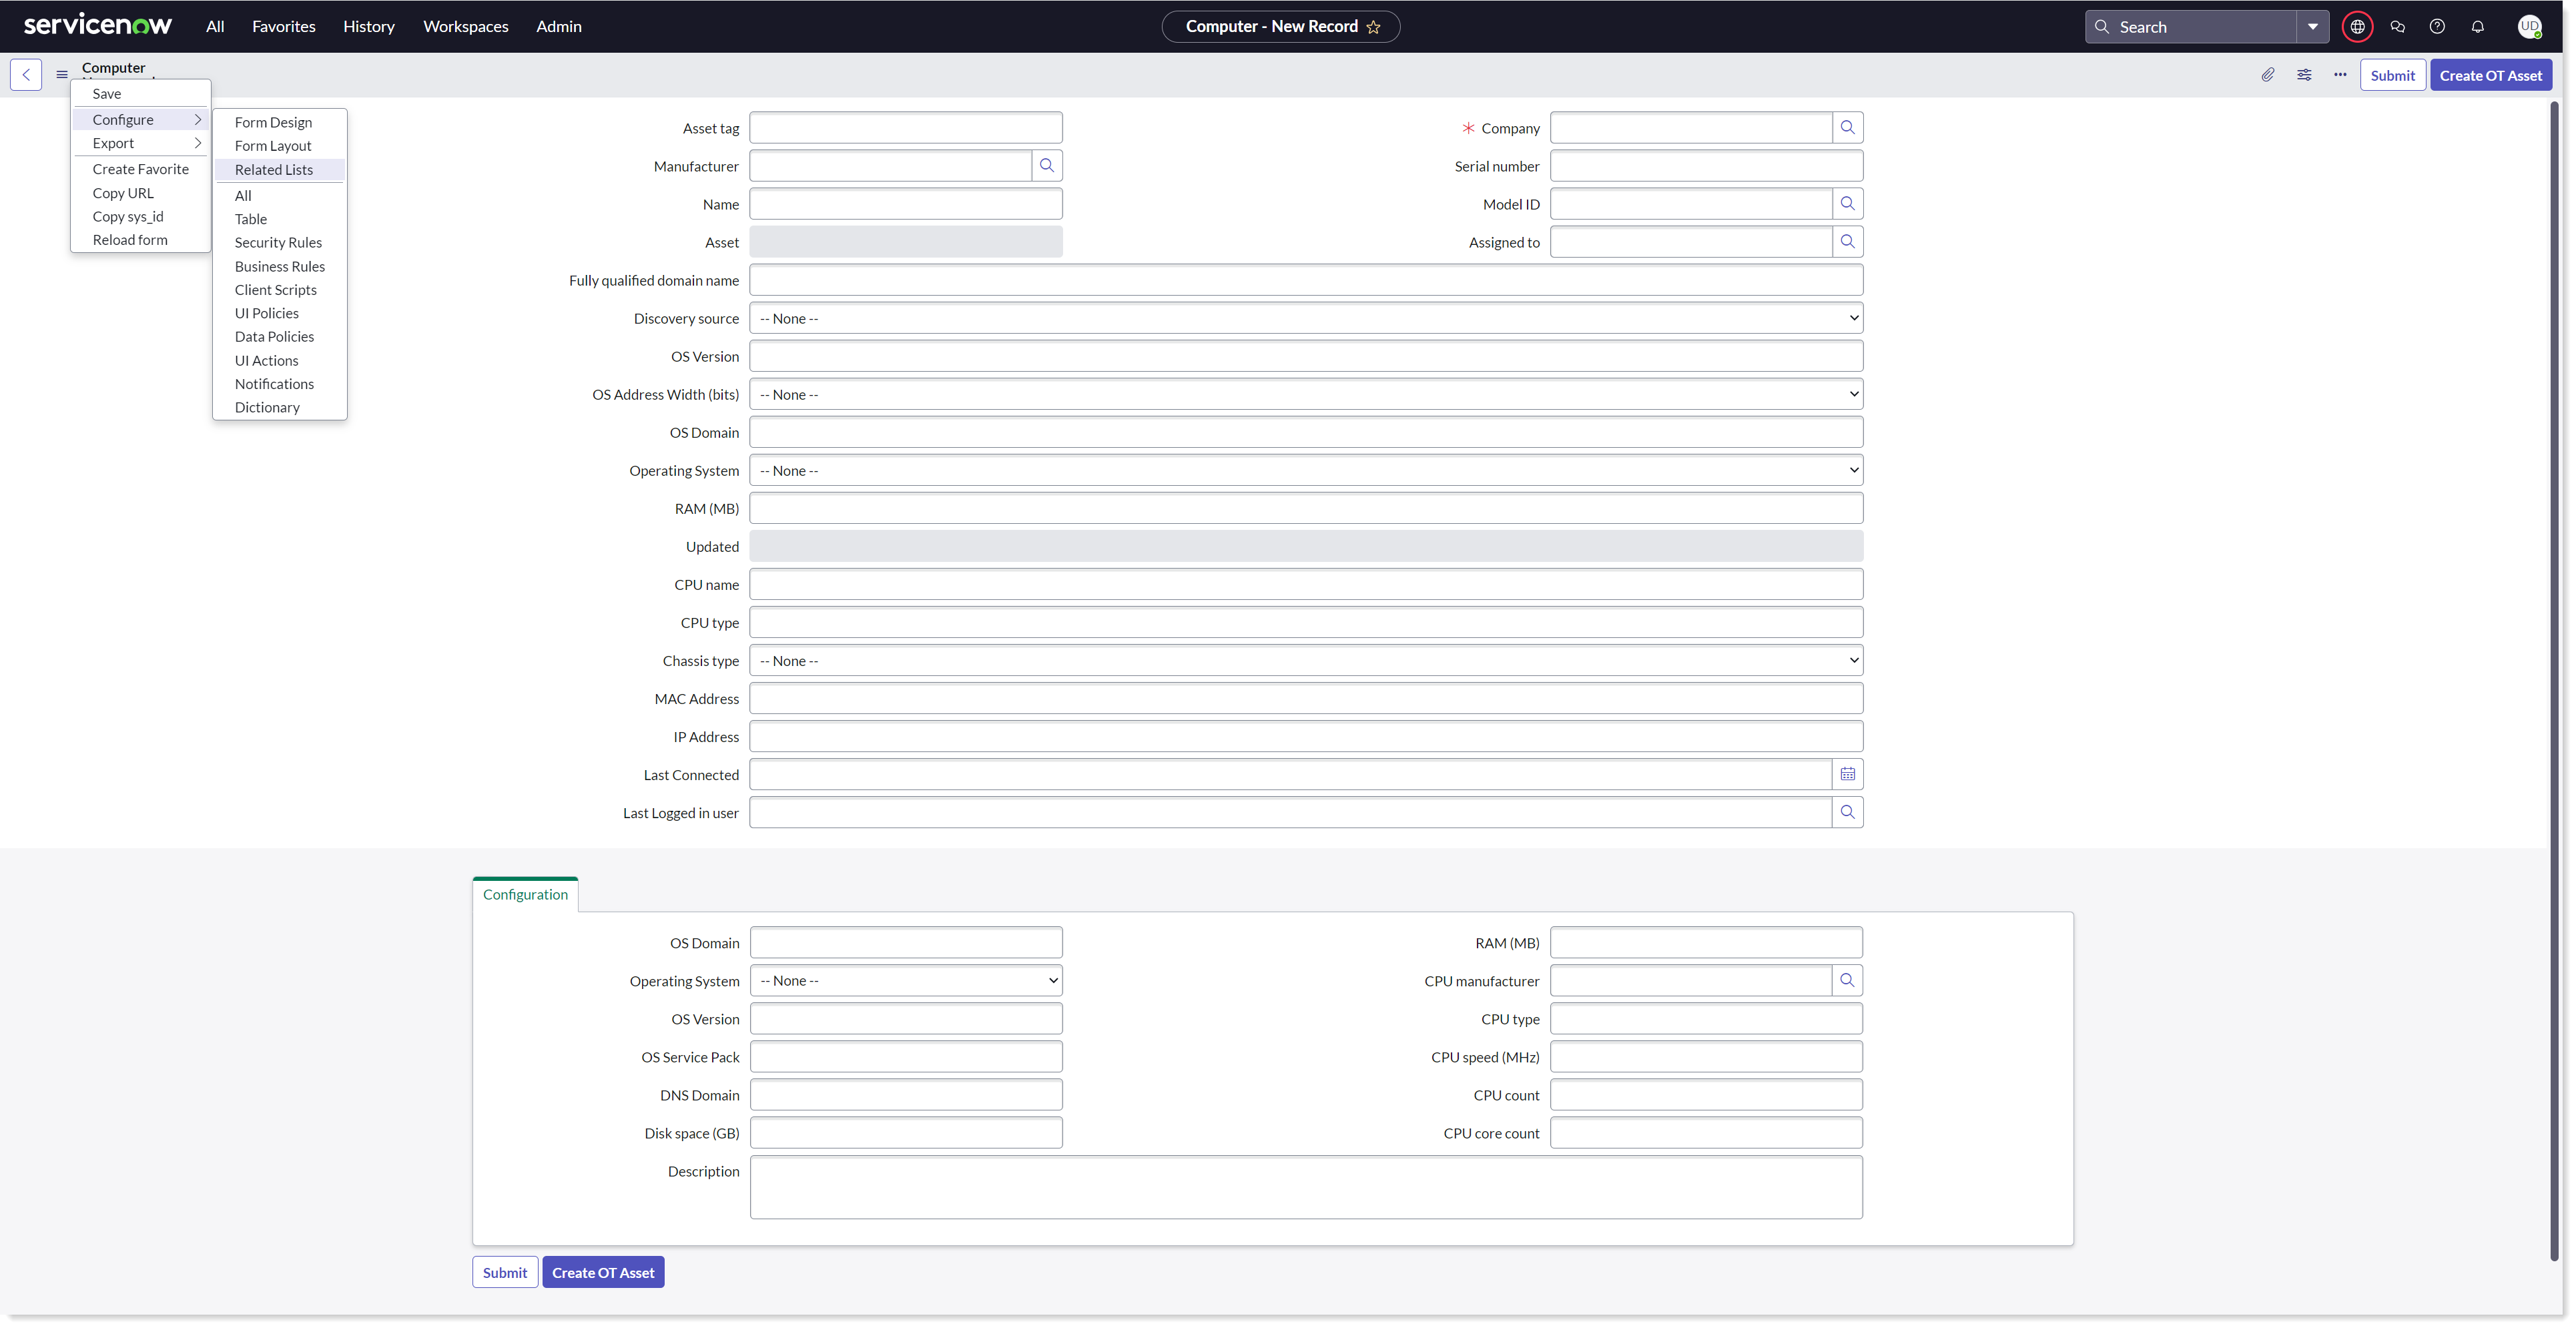
A form will open up as shown in the picture.
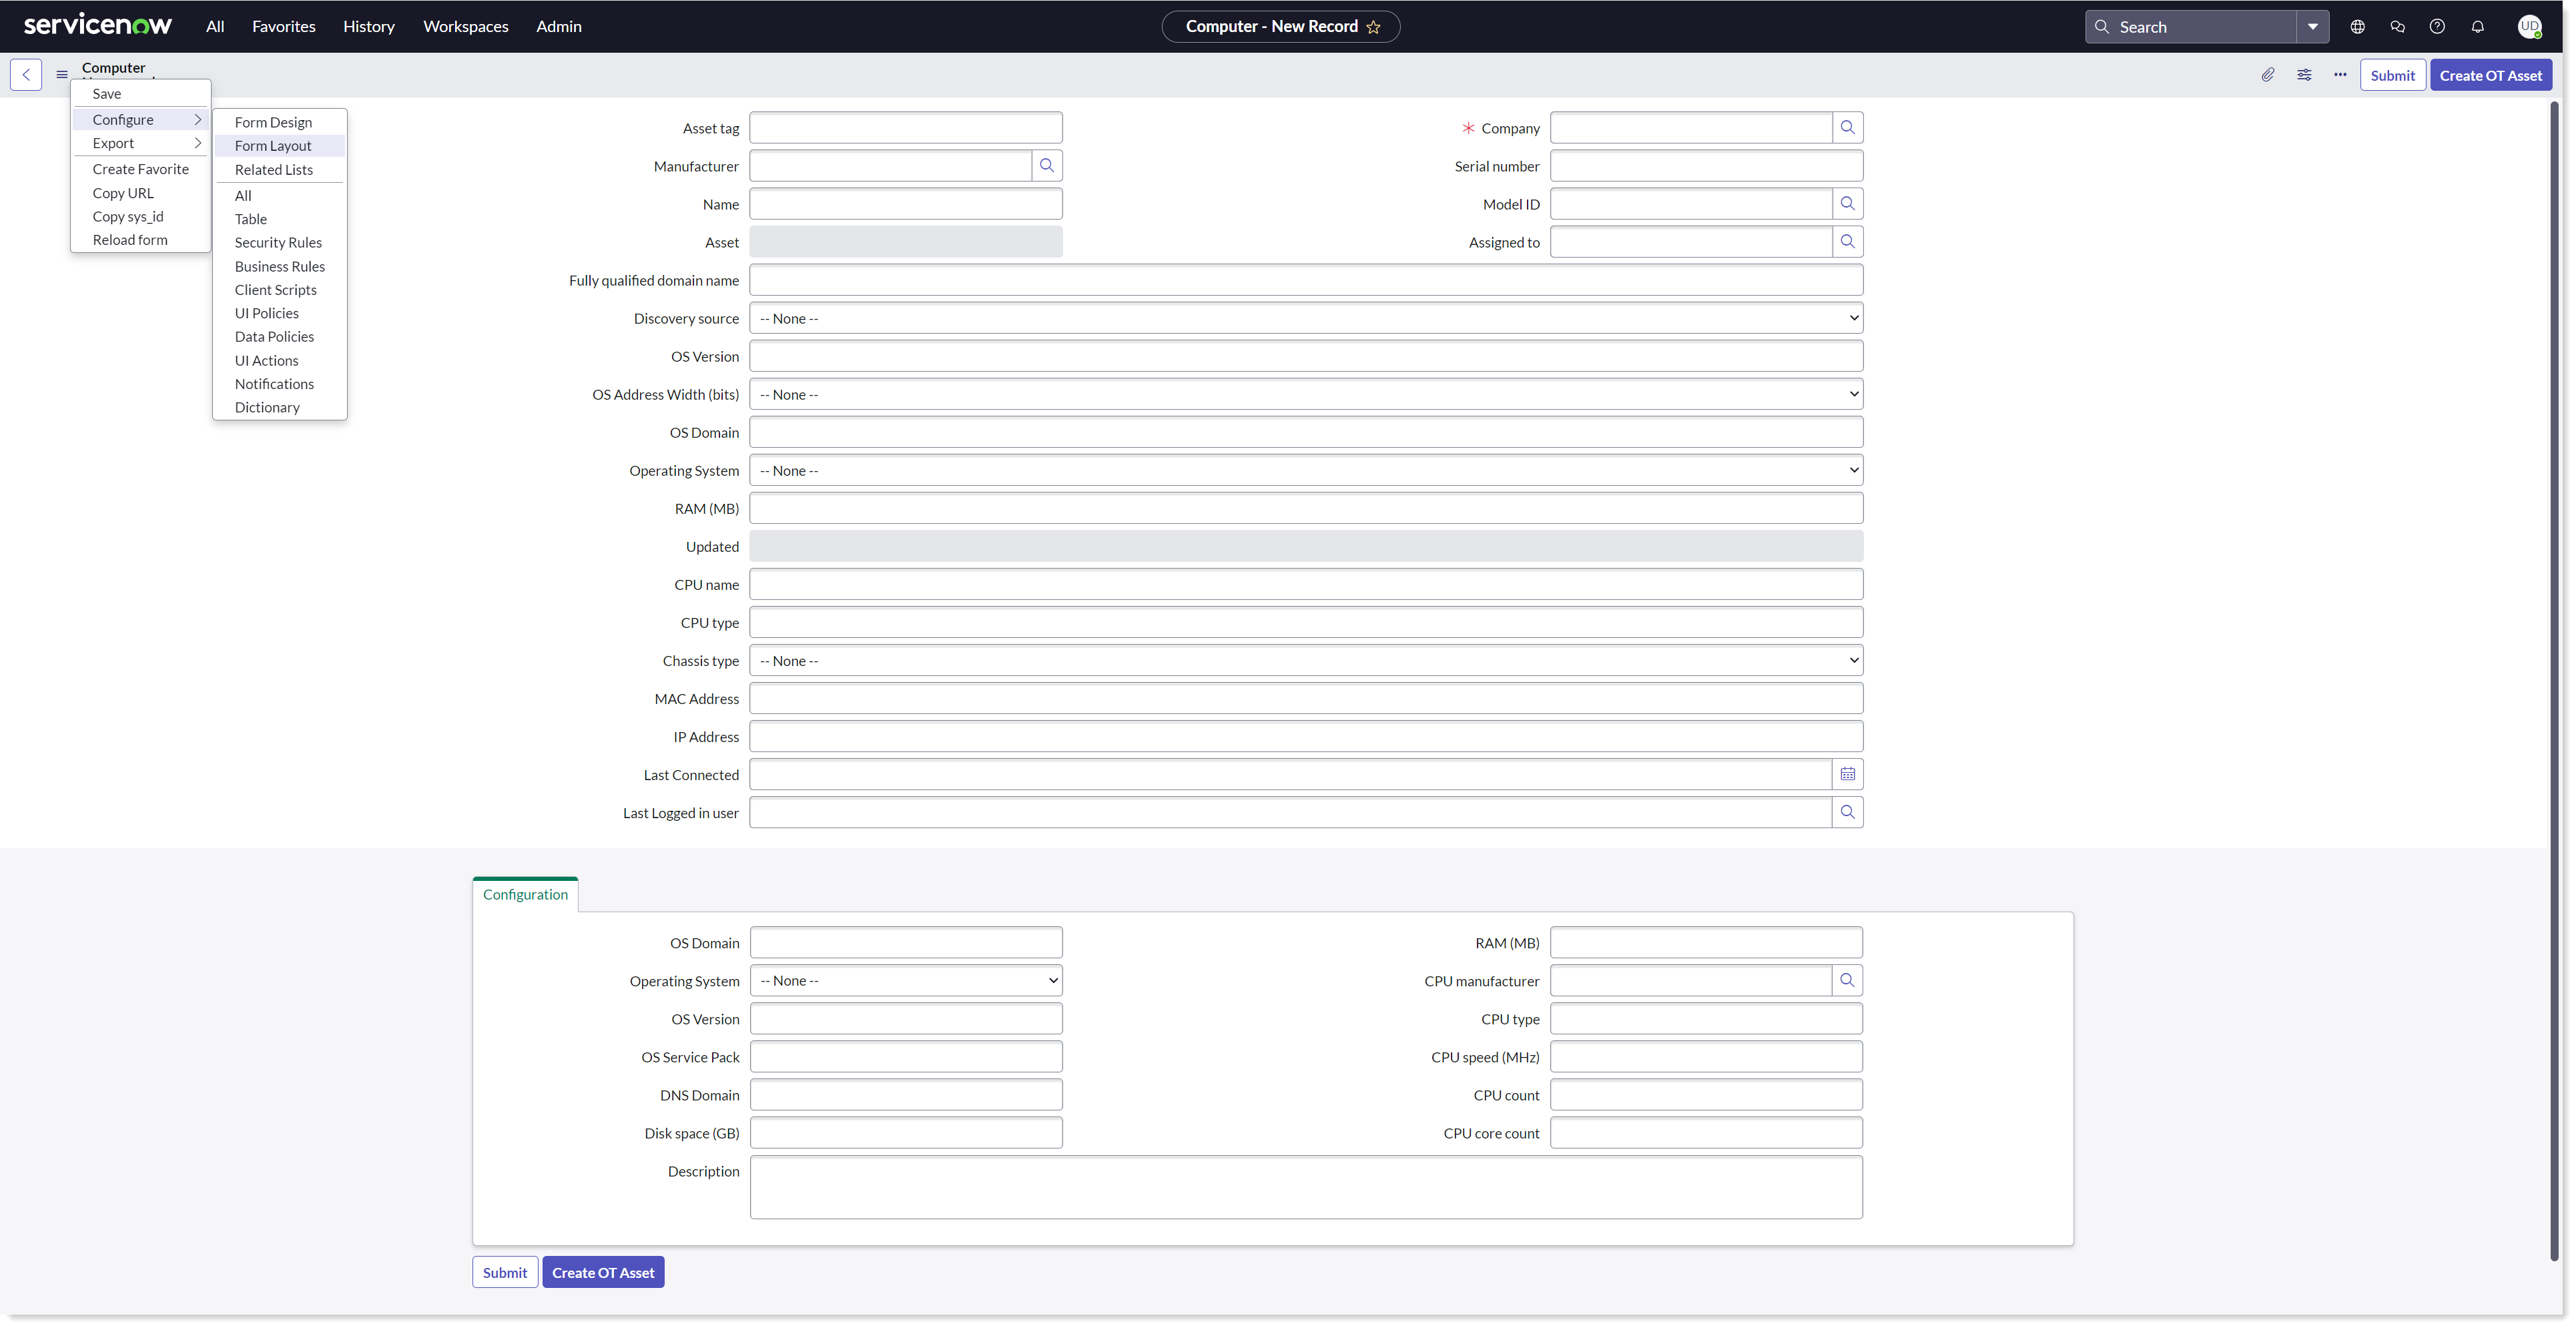
Click on the hamburger (three horizontal bars) and select Configure, then select Form layout as shown in the picture.
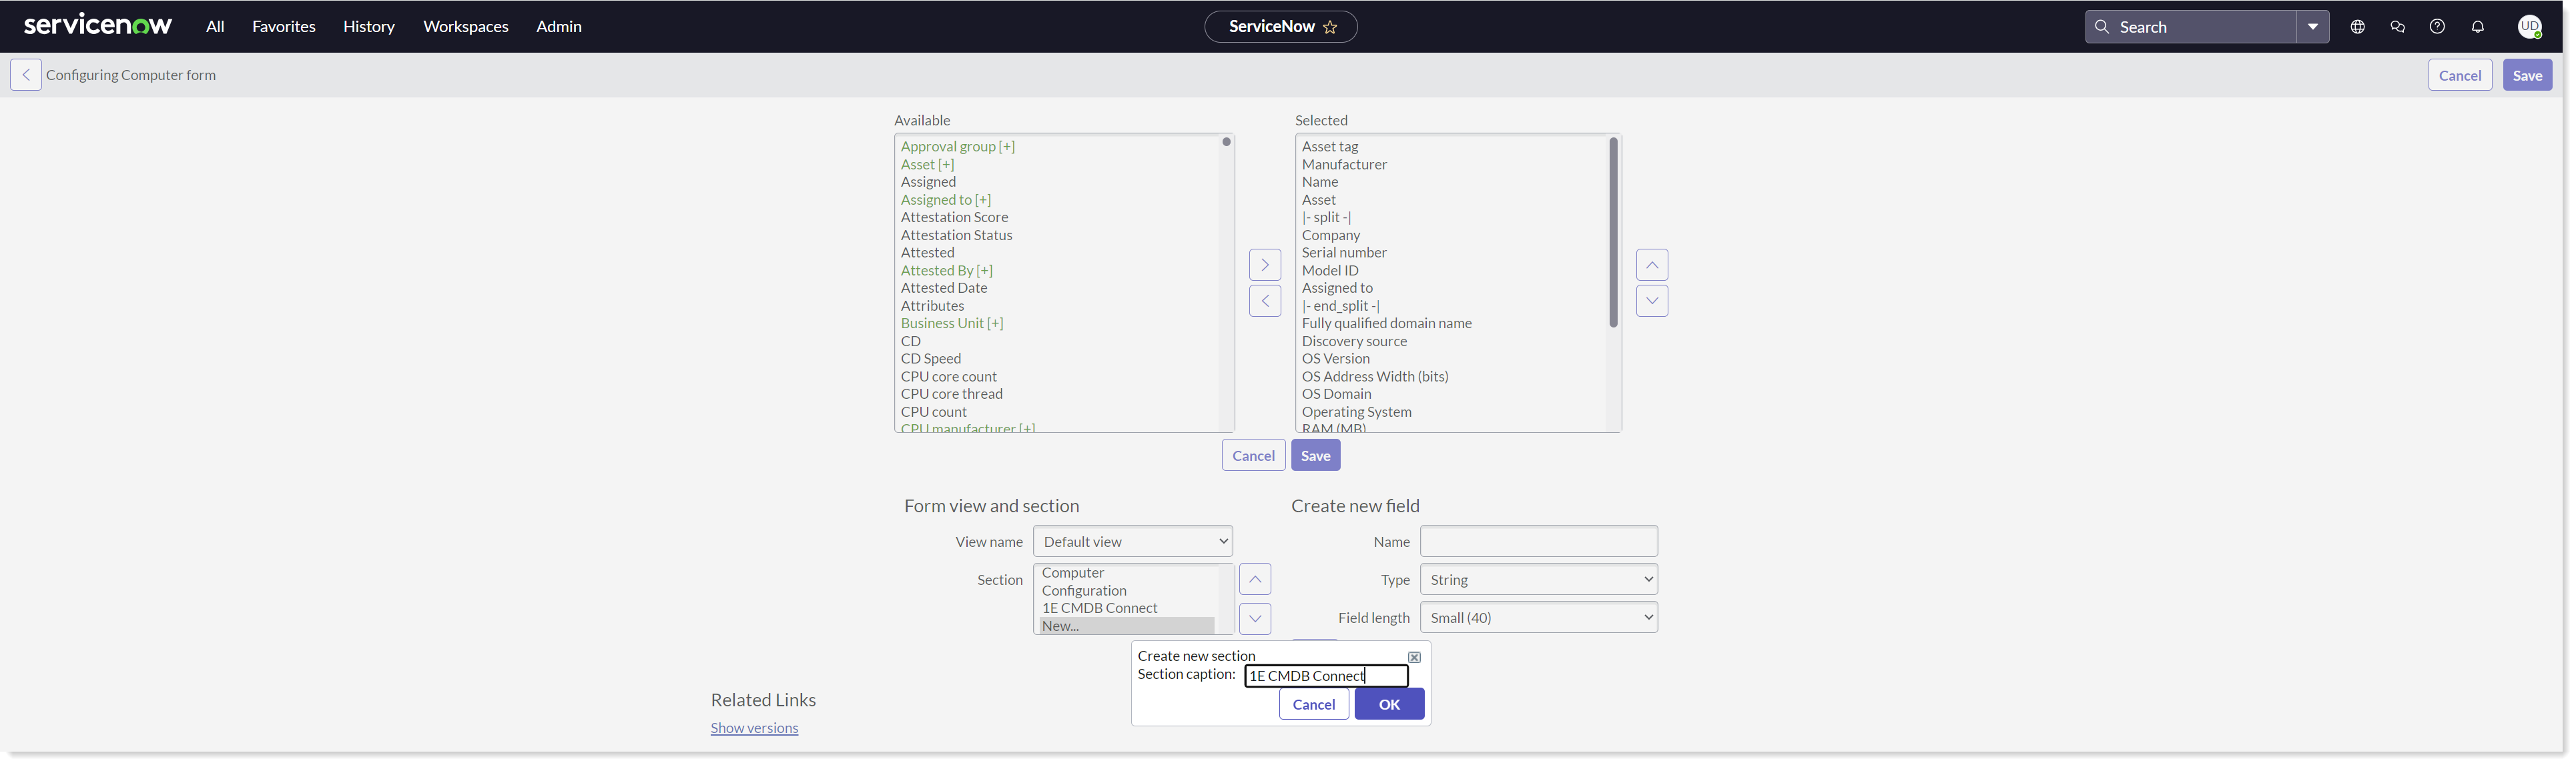
On the Configuring Computer Form page, under the Form view and Section, select New... item in the Section drop down list to create a new section.
A pop-up for Create New Section opens up. Type the section caption as 1E CMDB Connect and click OK.
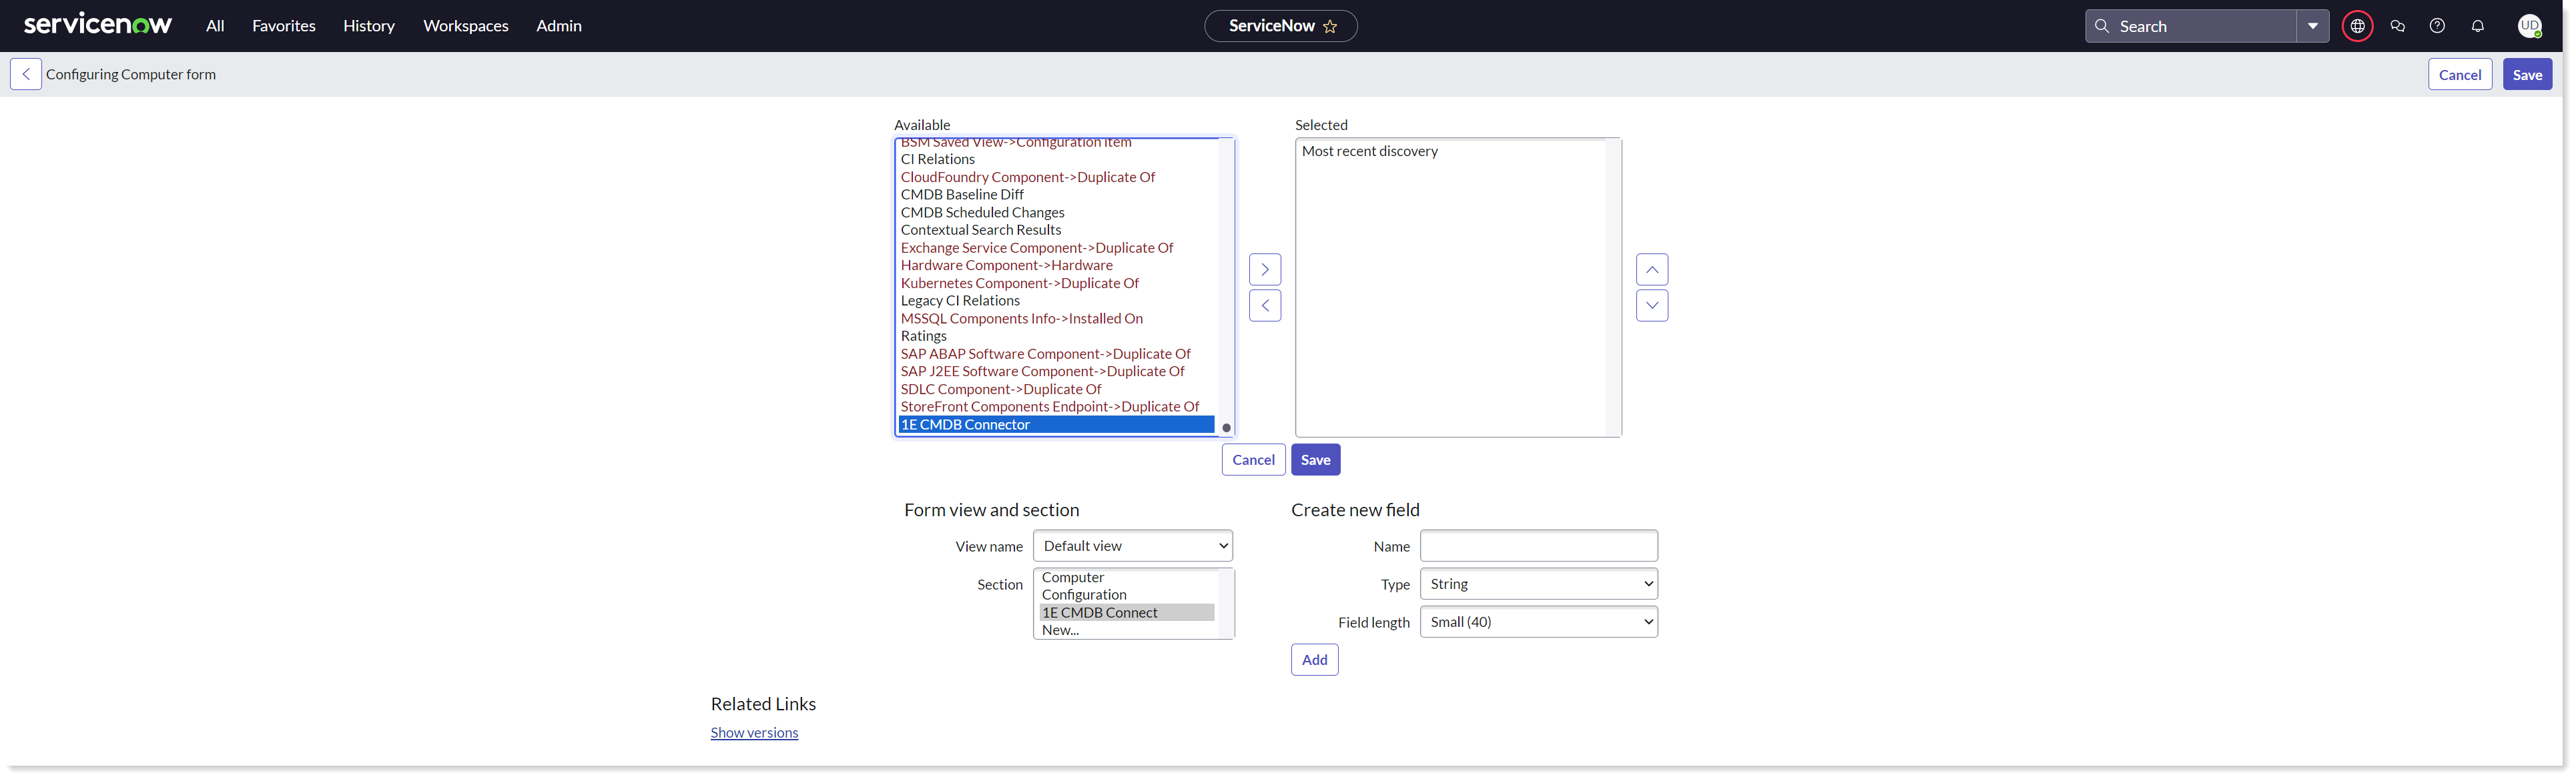
After successful creation of the section, select 1E CMDB Connect in Section and move 1E CMDB Connector item from Available to Selected list box. Click on Save to complete the form layout setup.
Now open any existing record for device in cmdb_ci_computer table, and you can see that the 1E CMDB Connect tab is now available.
Note
An admin user can add multiple tabs of any specification as required.
Adding Related Lists
To perform this task, ensure that your current application is Global.
Follow these steps to configure Related Lists:
Type cmdb_ci_computer.list in the filter navigator and press enter.
To open an existing device record on the Computers page, click on the Name or Fully qualified domain name, whichever is the first field in the table. You can also click on the information icon of the device to open an existing record. You can also click on the New button given at the top of the page for a blank record.
A form will open up as shown in the picture.
Click on the hamburger (three horizontal bars), select Configure, then select Related Lists as shown in the picture.
On the Configuring related lists on Computer form screen, select all six options present in Available list and move them onto the right under Selected list using > arrow as shown in the picture below.
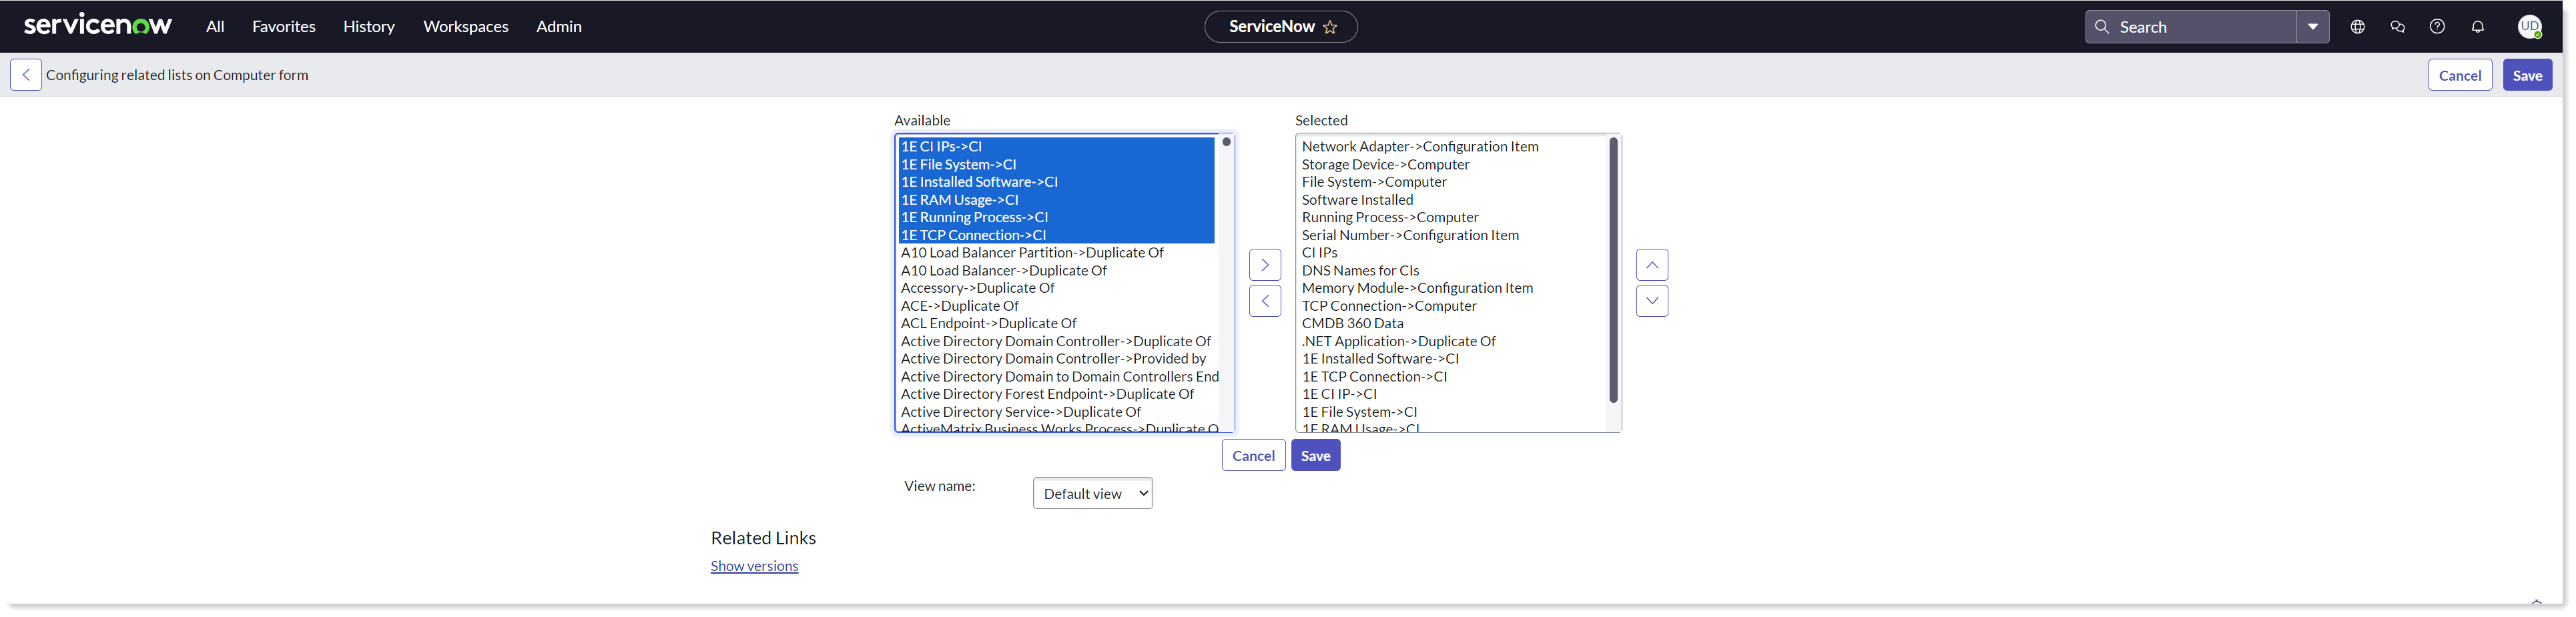
Click on the Save button to save the selection of lists. Now open any existing record for device in cmdb_ci_computer table and observe that the related lists are available.
For each selected related list, there is a respective button added on the Computer page. When you click on a button, the related 1E instruction is triggered. The table below shows the mapping between the related list and the respective Tachyon instruction:
Related list | Required 1E instruction |
|---|---|
1E CI IPs | 1E-Explorer-TachyonCore-GetIpAddresses.xml |
1E File Systems | 1E-Explorer-TachyonCore-LogicalDiskDetails.xml |
1E Installed Software | 1E-Explorer-TachyonCore-AllInstalledSoftware.xml |
1E RAM Usage | 1E-Explorer-Examples-GetMemoryFromSysInfo.xml |
1E Running Process | 1E-Explorer-TachyonCore-NetworkListeningProcessesAndPorts.xml |
1E TCP Connections | 1E-Explorer-Examples-GetConnections.xml |
Note
An admin user can add any number of Related Lists as required.
Adding 1E Tachyon as a discovery source
Follow the steps below to add '1E Tachyon' as a discovery source:
Type sys_choice.do in the filter navigator. This opens into a form that allows an admin user to add a new record to the sys_choice table.
In Table dropdown list, select Configuration Item [cmdb_ci].
In Element Textbox type discovery_source.
Type 1E Tachyon in Label text box.
Type 1E Tachyon in Value text box.
Click on Submit button.
1E Tachyon is successfully added as a discovery source.

User Roles provided by 1E CMDB Connect
ServiceNow provides role based access to users. 1E CMDB Connect provides three custom roles, as displayed in the following list.
Role | User Persona | Additional role required (if any) | Description |
|---|---|---|---|
x_1e_tachyon_cmdb.admin | App Administrator | None | This user will be able to modify App configuration settings. As an App Administrator a user will have access to other features like 1E Import Schedules, Instruction Definition, 1E Information Service, Triggered Information and Support. |
x_1e_tachyon_cmdb.config_manager | App Manager | None | This user will have access to the 1E Information Service module to run any 1E instructions on the devices. |
x_1e_tachyon_cmdb.user | App User | None | This user will be able to view the device information fetched from 1E. The user will also be able to view the Related Lists available on the same Computer page. |