Verifying
Verification of AppClarity after installation.
Verifying the AppClarity installation
AppClarity is a consumer of 1E. When it's installed, all its components will be added to the 1E portal.
The 1E Portal website will be available after installation using the 1E DNS Alias FQDN. For example:
After installation, log on to 1E using the 1E installation account
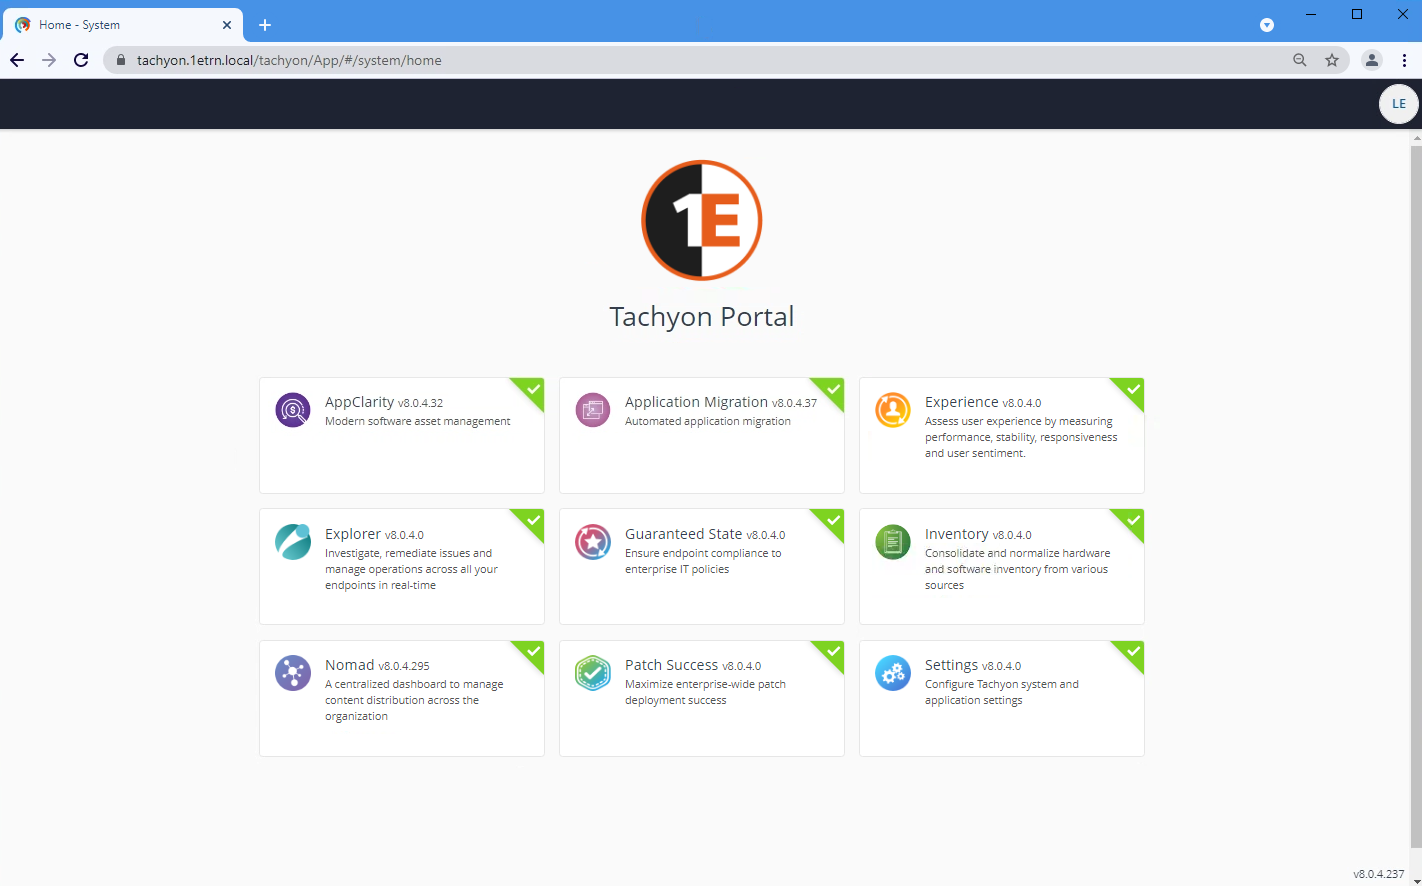
Once you've entered the site, a list of 1E applications are displayed, to confirm that AppClarityis present.
Accessing AppClarity
The 1E installation account is restricted by default to a minimum set of permissions required to bootstrap other users into the system but not access any of the applications other than Settings.
If you used the 1E installation account to install AppClarity or you followed the instructions for setting the 1E roles for the AppClarity installation account - please refer to Accounts needed to install AppClarity for more details.
Initially, you will not be able to access AppClarity as you require a 1E account with permissions to view the application. If you click on AppClarity on the list of applications displayed on first entering the portal, you will see a screen similar to the one shown.
Note
AppClarity now comes with a number of roles that can be applied to 1E users. Refer to 1E roles for configuring AppClarity and AppClarity user roles for details.
Tip
You can view which applications are installed and manage them using the Maintenance screen in the 1E installer. Refer to Maintenance for details.
Adding the AppClarity Administrator role to a user to verify AppClarity installation
To verify AppClarity installed successfully, you will need to add the appropriate permissions to a 1E account. You'll first need to add an existing AD domain user to 1E.
Adding 1E users
Log on to the 1E portal using a 1E user account with the Full Administrator, or the Installer role if it is a new 1E installation.
Navigate to the Settings→Permissions→Users and Groups page.
Click on the Add button, doing this displays the Add user popup.
In the Select AD user or security group field, type the name, or part of the name, for the Active Directory user or security group that you want to add, then click the search icon.
Select the Active Directory user or security group from the list of matching names displayed in the drop-down list and click Add.
You can now apply the AppClarity Administrator role to the user you've just added.
Adding 1E roles to users or groups
Once added to 1E, you can use Assignments to edit the roles for a 1E user or group:
On the Settings→Permissions→Users and Groups page, click on the Assignments link for the user or group you want to add the role to, this displays the Assignments page focused on the selected user.
On the Assignments page, the focus is on Users and Groups.
Click the plus sign button to add a Role and your choice of associated Management Group.
Once you've selected your 1E Roles and Management Groups, click the Save button.
For details about how Assignments in 1E refer to Assignments page.
The Assignments page lets you view and manage current assignments for 1E roles, management groups, users and groups, from this page you can:
View all current assignments
Add new assignments
Remove current assignments.
Verifying AppClarity in the 1E portal
Log on to 1E as the new 1E user with the AppClarity Administrators role set.
The new Tachyon user will now have permissions to view and interact with the AppClarity application. They will be able to complete the verification of the AppClarity installation. To do this:
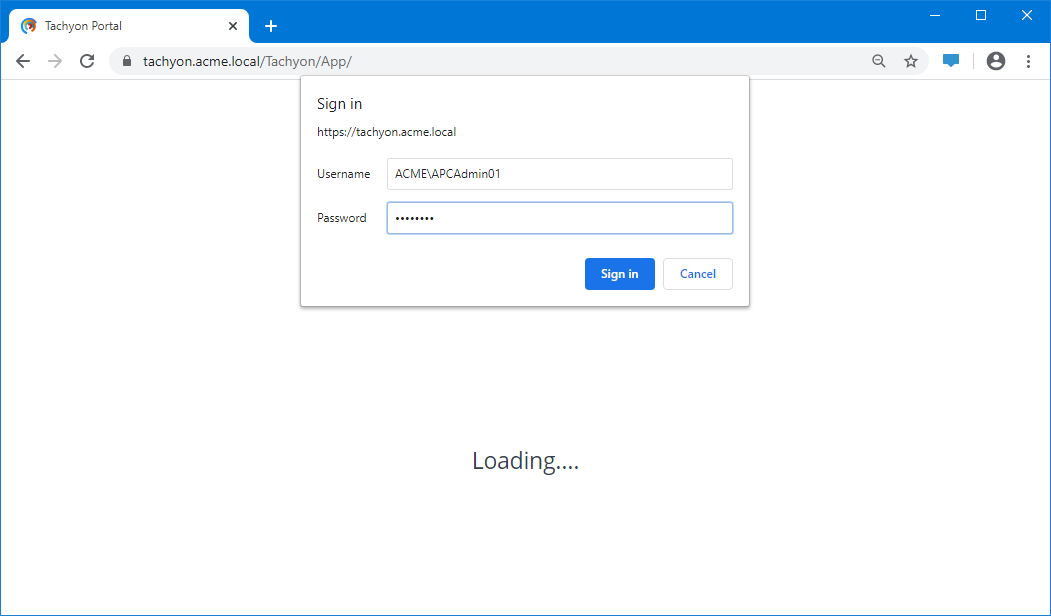
Log on to the 1E portal using the credentials for the 1E user added in the previous steps. In our example, this is ACME\APCAdmin01, as shown.
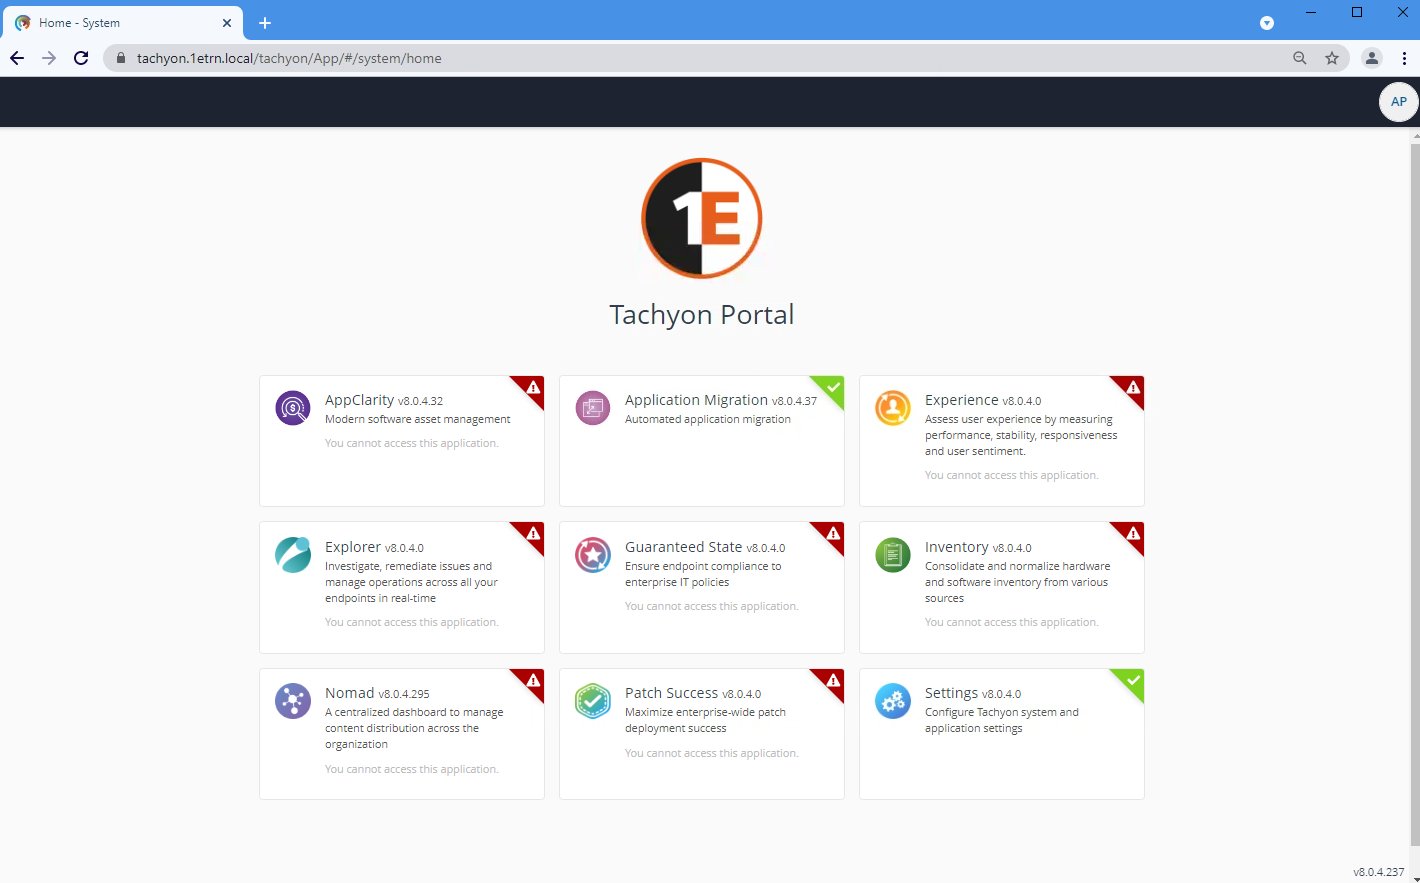
The user credentials will be verified and then the applications list will be displayed, as shown. Click on the AppClarity application at the top of the list.
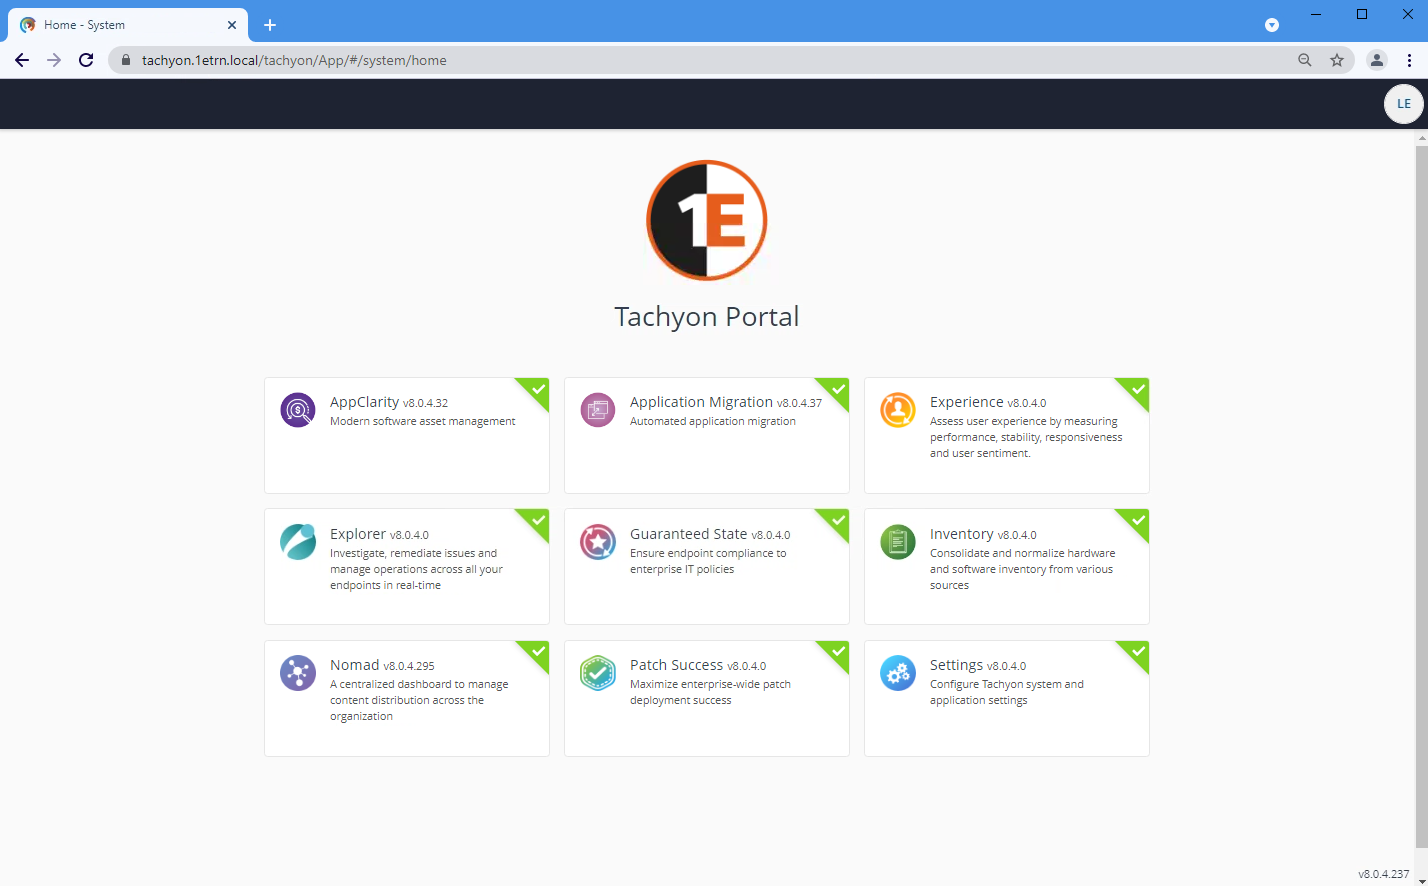
This time, the user has the correct role set to be able to view the AppClarity application.
Verifying the application
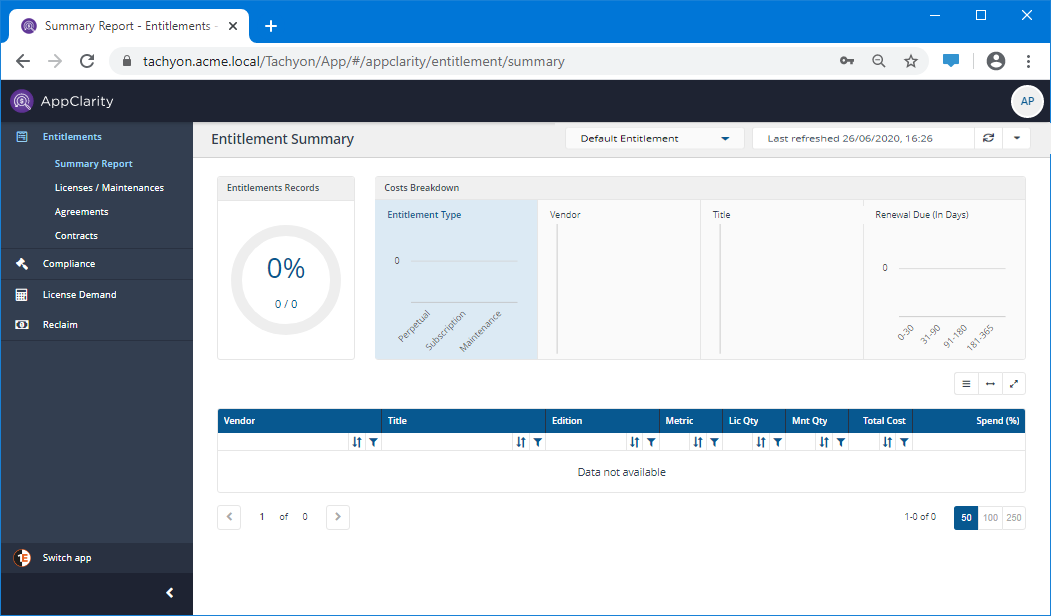
Once you've entered the application, you will see four main headings:
Entitlements
Compliance
License Demand
Reclaim.
The first page that is displayed is the Entitlement Summary. Initially the page will contain no data, and you'll see the message Data not available. For now don't worry about this, information will appear later after you've entered and published your first entitlement.
Verifying the new AppClarity default repositories
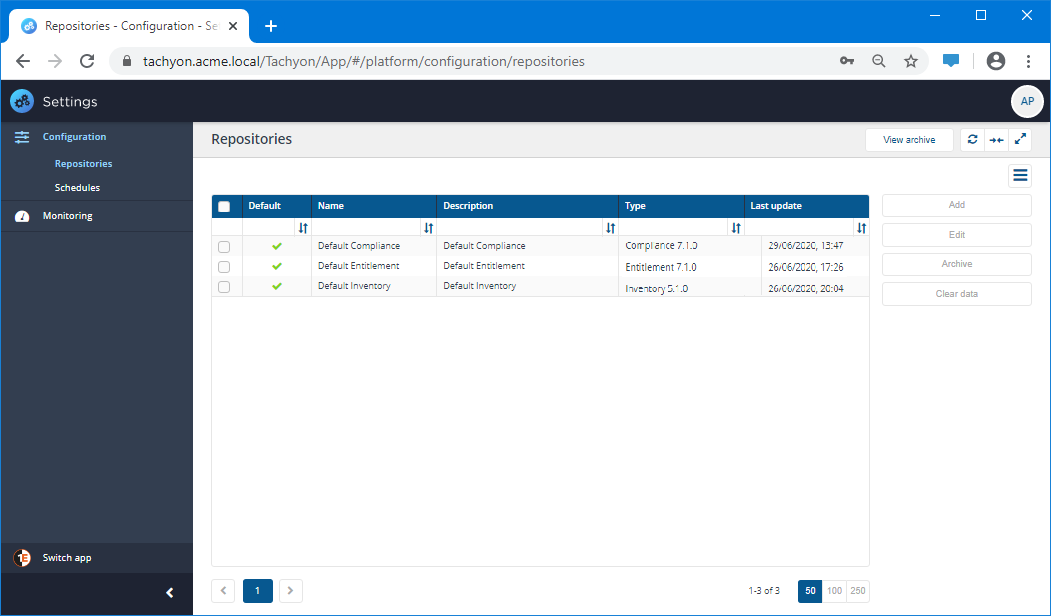
When AppClarity is installed it creates two new default repositories in 1E, one for each new repository type:
Default compliance
Default entitlement.
You can verify these have been added in the Settings application:
From the Switch app menu at the bottom-left of the console select Settings.
In the Settings application navigate to Configuration->Repositories.
Verify the two new default repositories have been added.
Verifying the new AppClarity repository types
When AppClarity is installed it creates two new repository types in 1E:
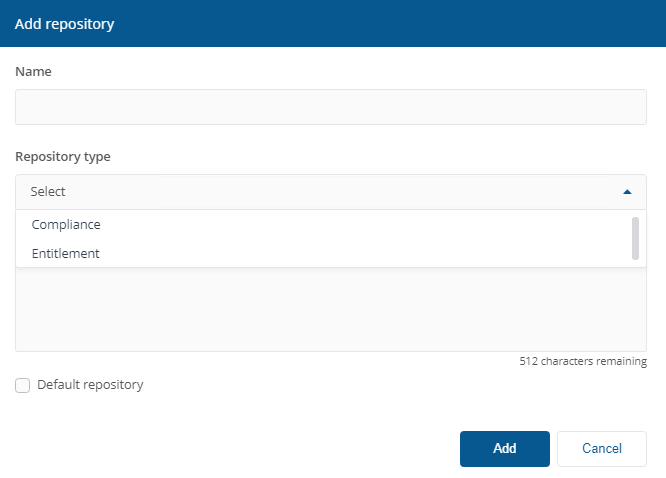
Entitlement - this can be used to create new repositories to hold your licenses
Compliance - this can be used to create new repositories to hold different compliance positions - derived from a combination of an Inventory repository and an Entitlement repository.
To verify these have been added, in the Settings application:
Navigate to Settings → Configuration → Repositories.
Select any of the displayed repositories then click Add.
In the Add repository dialog click on the Repository type dropdown.
Verify that the two new repository types have been added.
Click Cancel.
