Defining your own policy
How to define a policy in Endpoint Automation.
For details of policy objects you can use to create your own policies, please refer to 1E DEXPacks reference.
Defining a policy
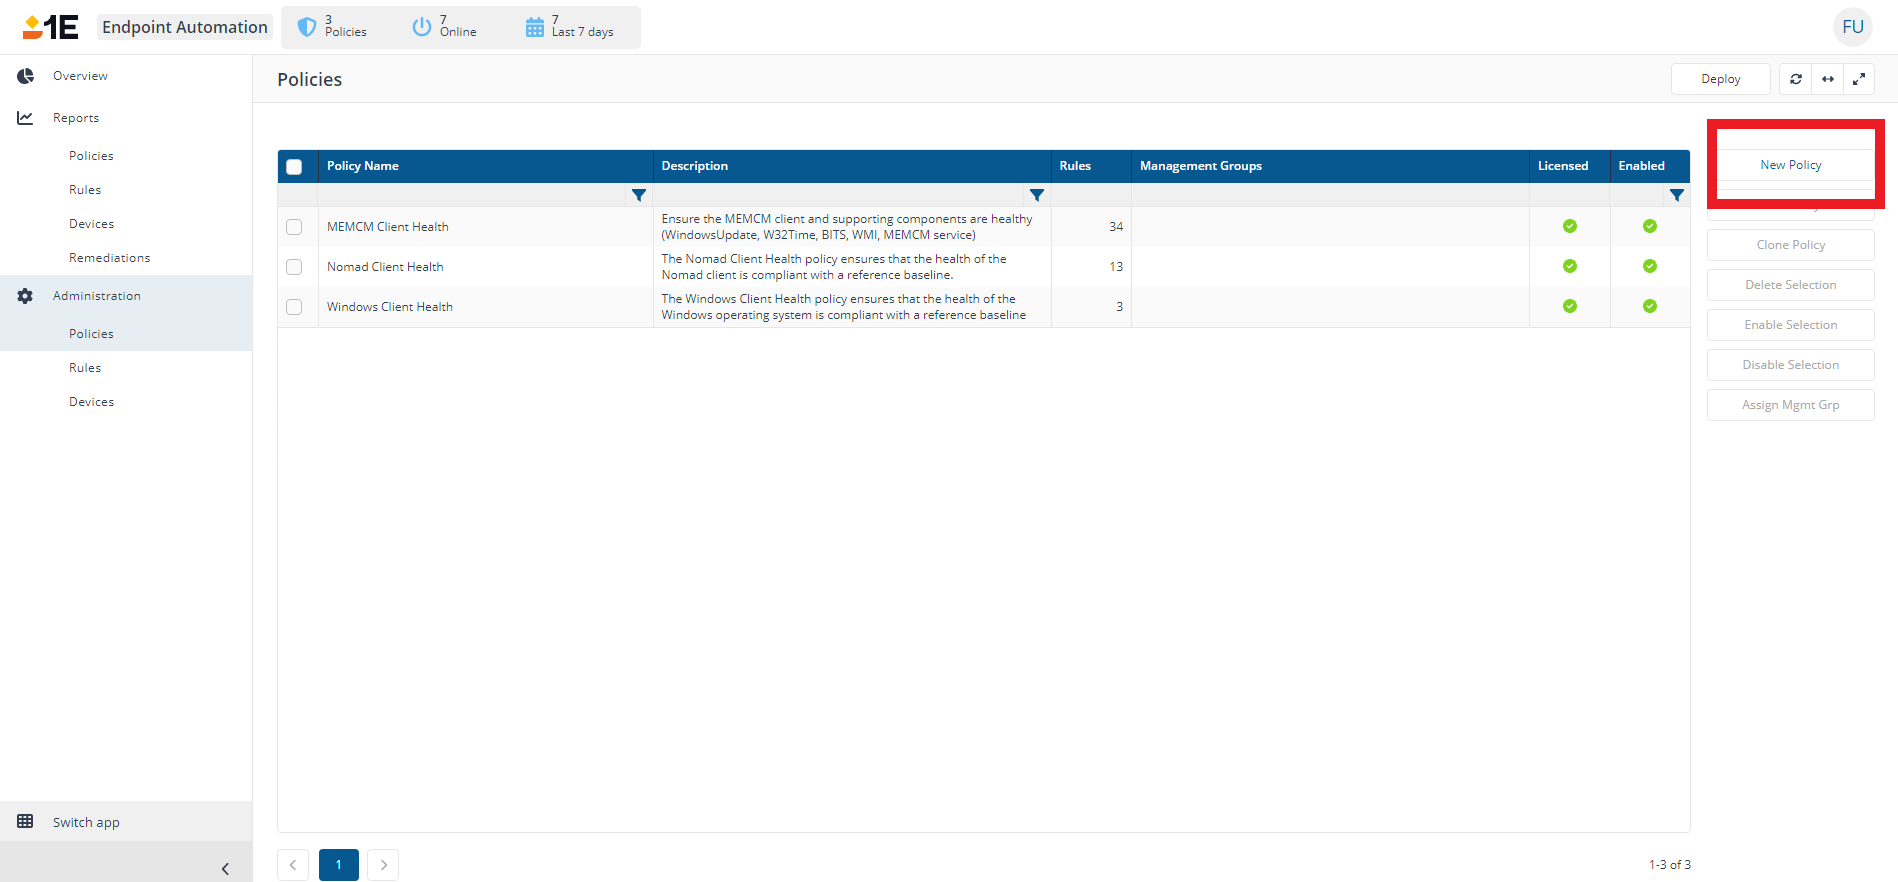
You define a policy from Endpoint Automation->Administration->Policies.
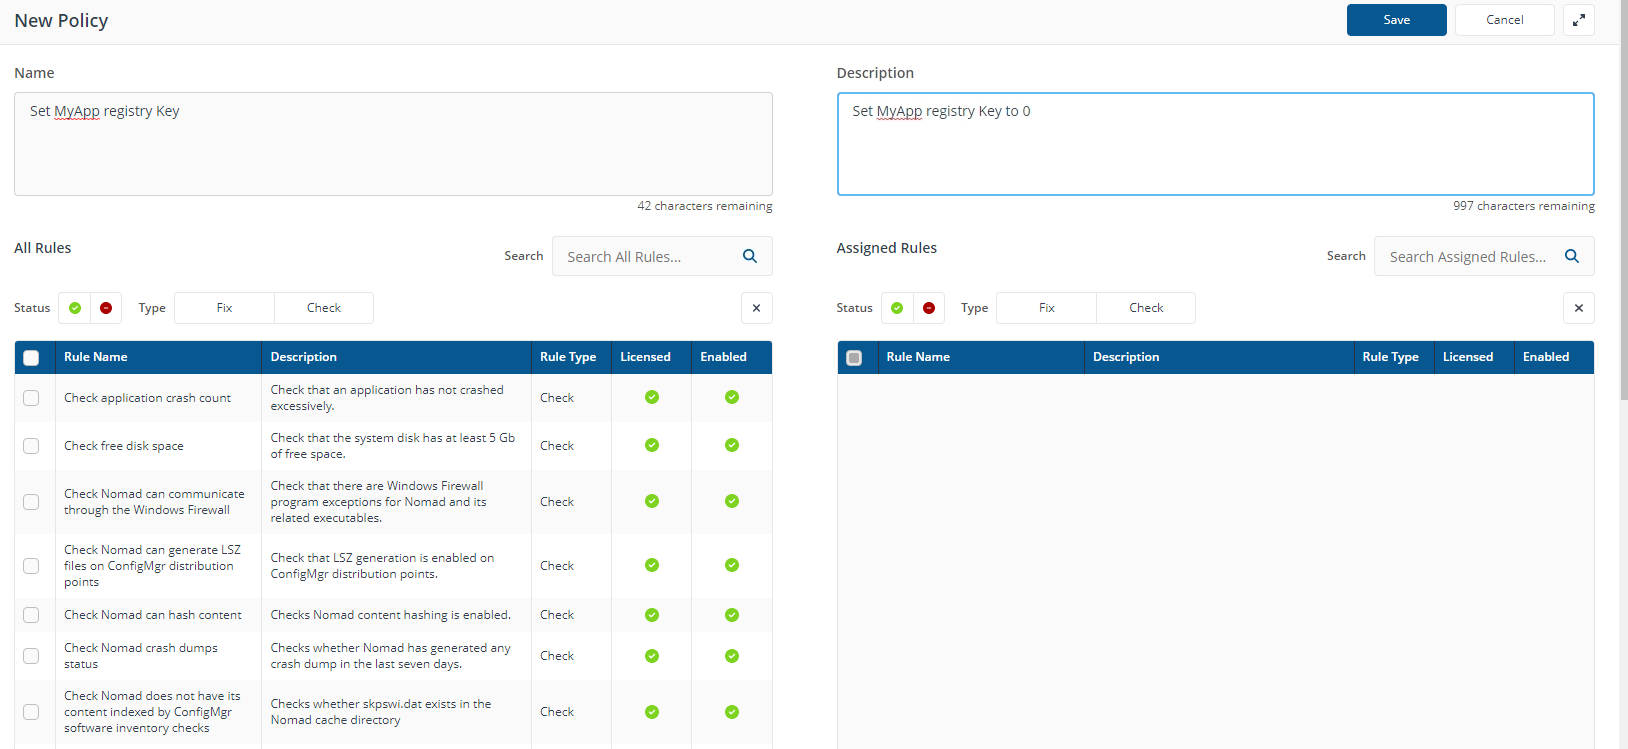
Click New Policy, enter a name and description for the policy and click Save.
Note
The Managing rules section explains how to create and add rules for the new Policy.
Managing rules
Policies need rules in order to be of any use. The following headings show how to define rules, caveats for editing rules and how to associate rules with policies.
Defining a rule
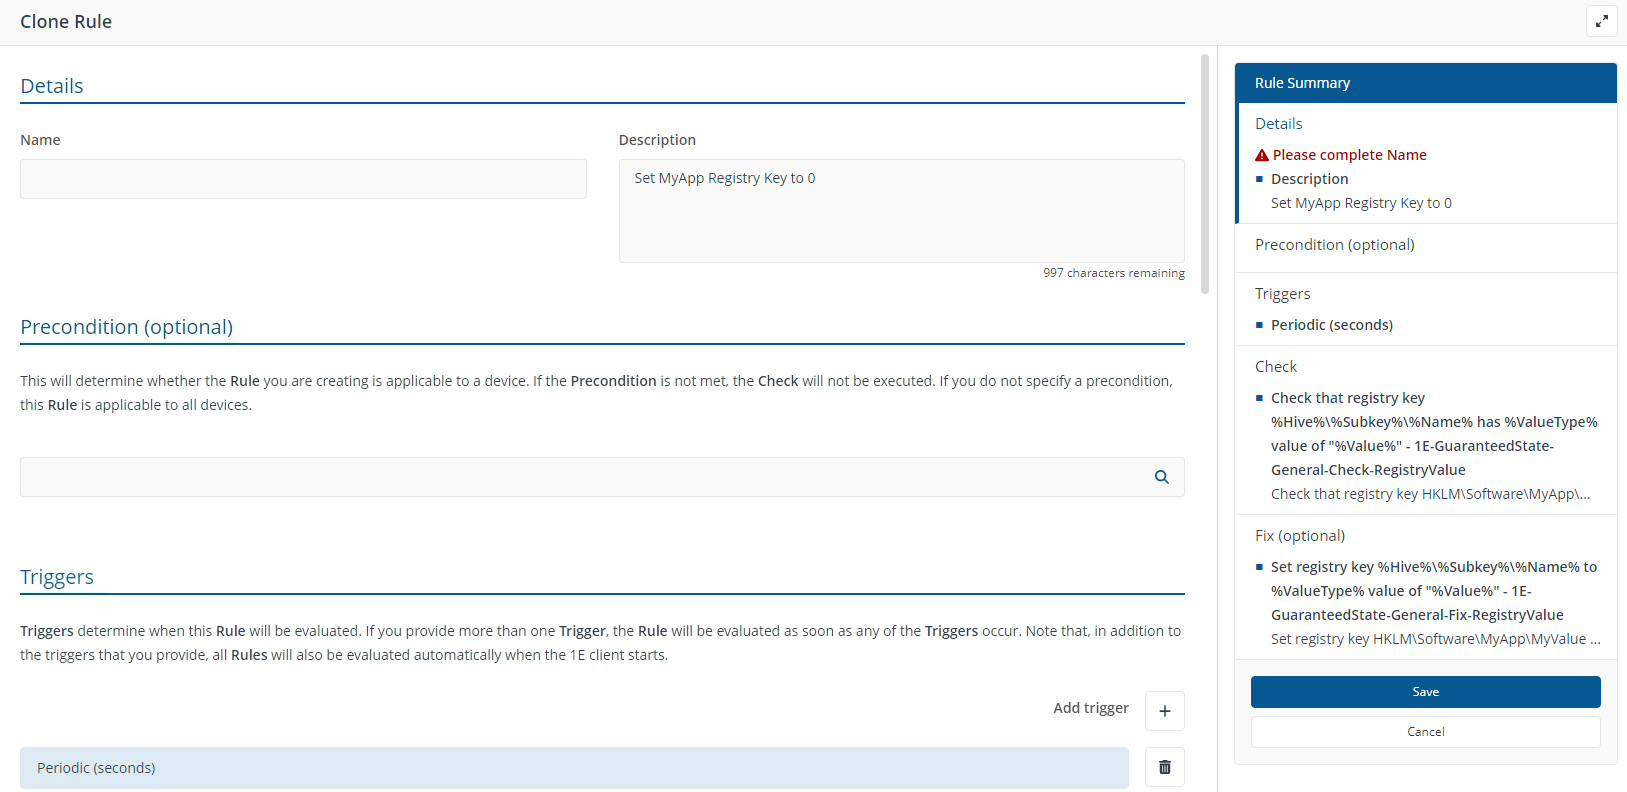
You define a rule from Endpoint Automation->Administration->Rules. Click New Rule then enter a name and description.
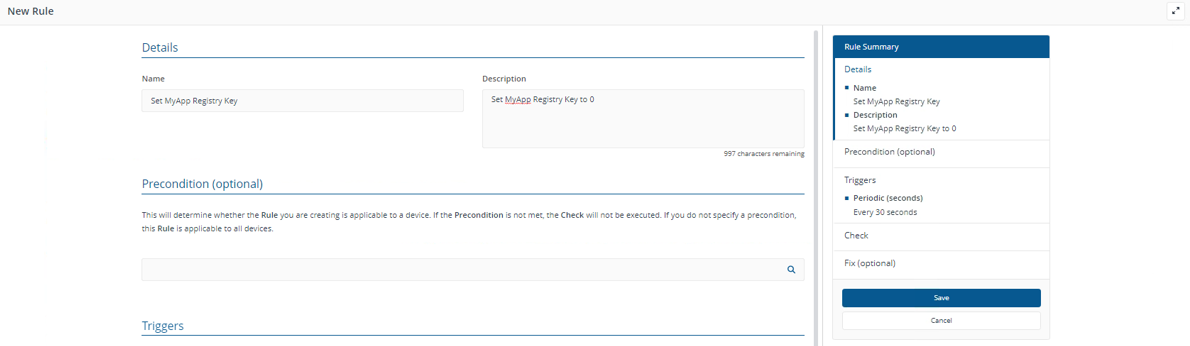
In the Triggers section for our example we're going to define that the rule should be evaluated periodically, every 30 seconds. In the search window we choose Periodic (seconds) and set the number of Seconds to 30.
You can add multiple Triggers using the add triggers plus sign, in this example we'll just use one.
Note
Do not specify a period less than 30 seconds. The rule may be accepted by the management interface but the 1E Client will not apply it.
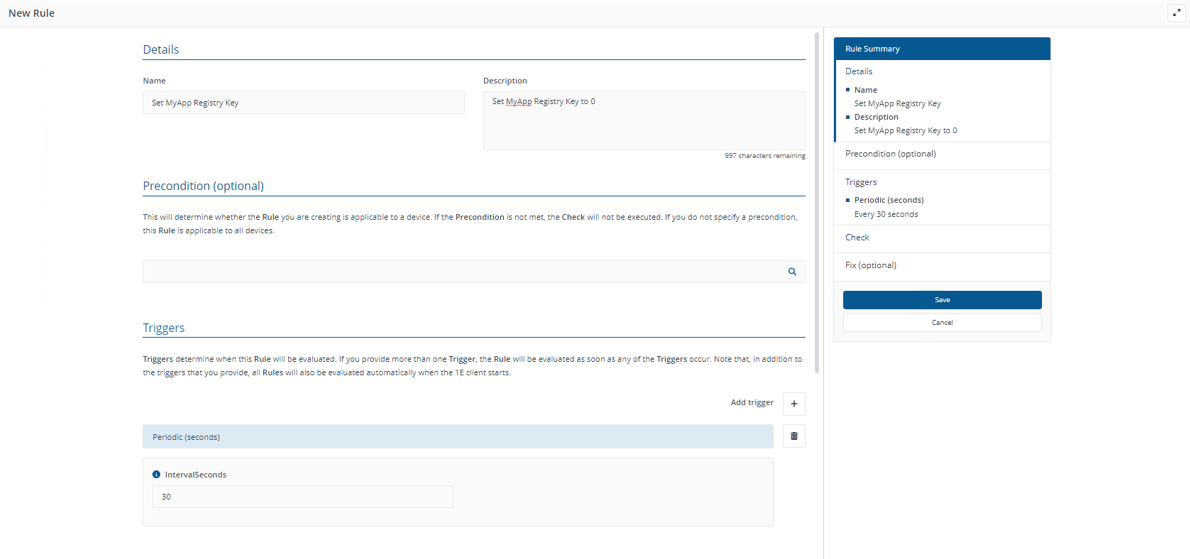
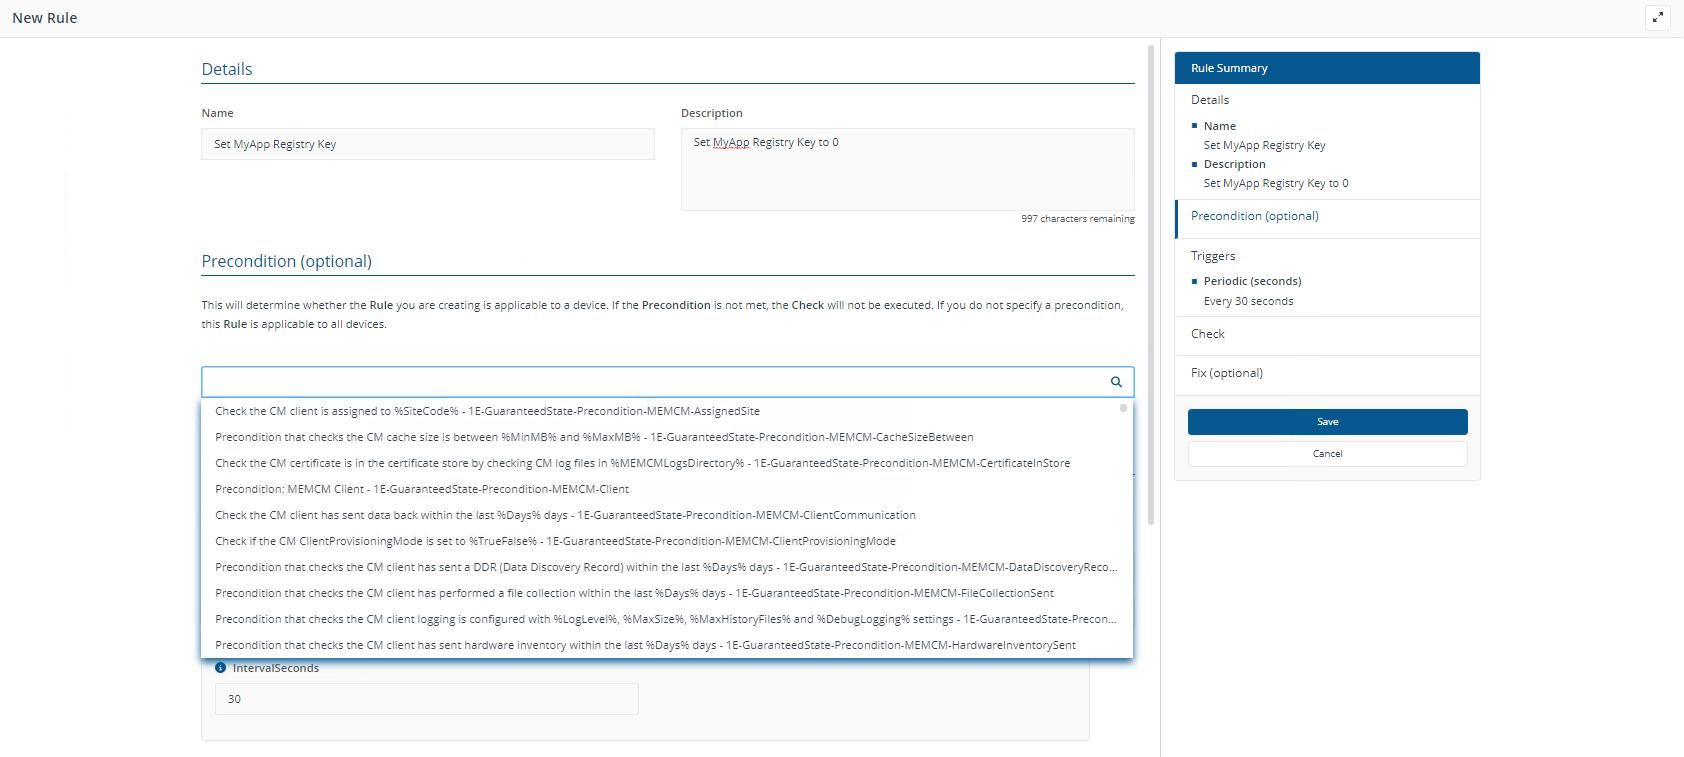
In the Precondition section, the example does not define a precondition rule, but you can review the available choices, if you do want to set one.
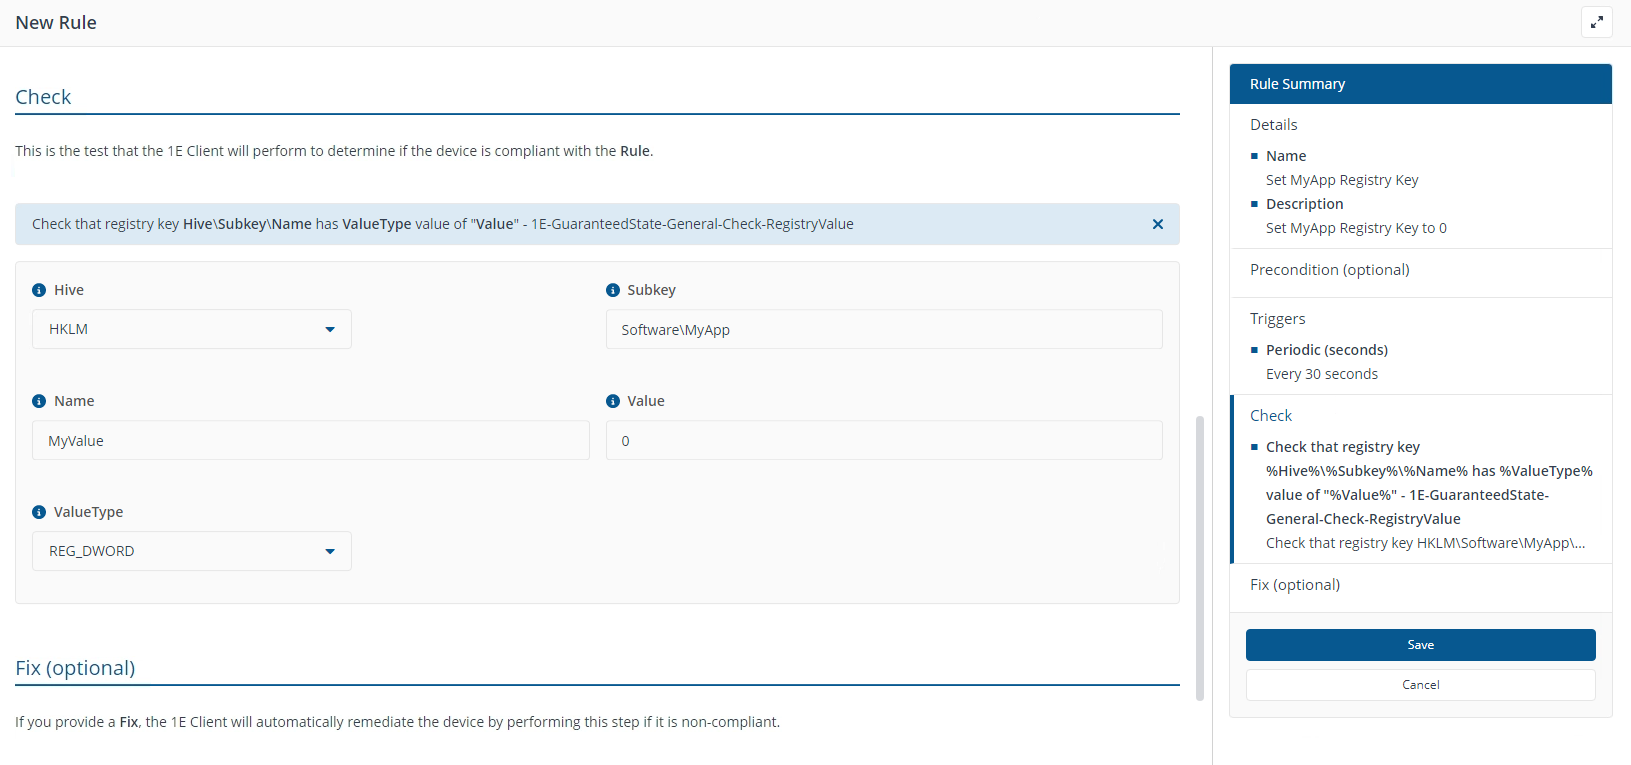
In the Check section, we'll define a check rule that requires that there is a value MyValue in the registry hive HKLM and subkey SOFTWARE\MyApp. Its value should be of type REG_DWORD and it should be 0.
If any part of the Subkey is missing, or the Name or Value fail to match this check rule, then the fix rule will be applied.
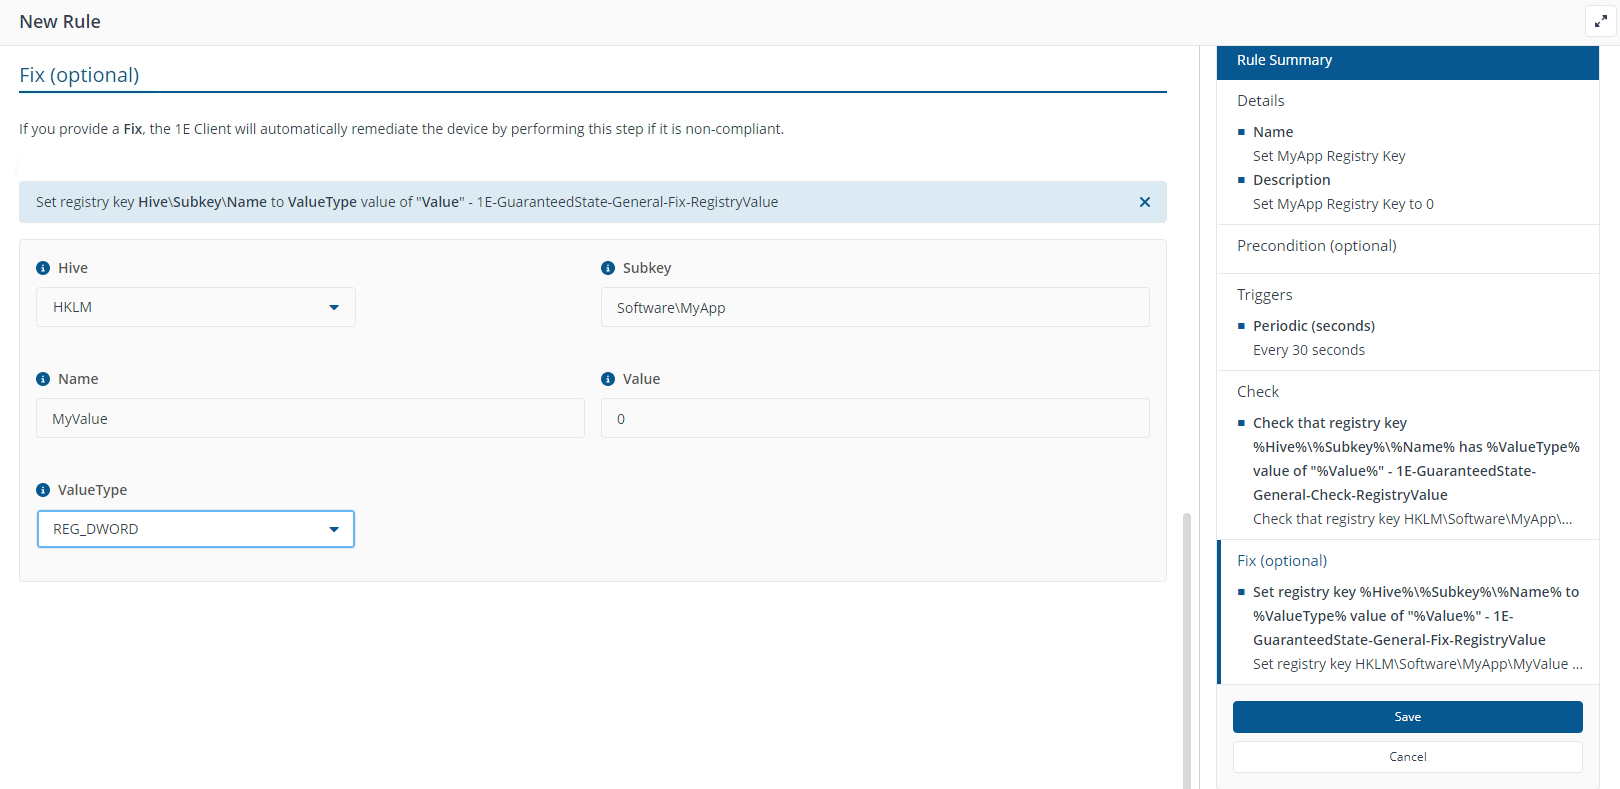
In the Fix section, the fix rule will be identical to the check rule. This means that if the registry is not consistent with the check rule, it will be made consistent.
If any part of the Subkey does not exist, or the Value or Name is missing or has a different value or type, then all of these discrepancies will automatically be corrected and the registry value made to be consistent with the check rule.
Then click Save.
Editing existing rules
You can edit a rule by selecting it with the checkbox on the left and then selectingEdit Rule.

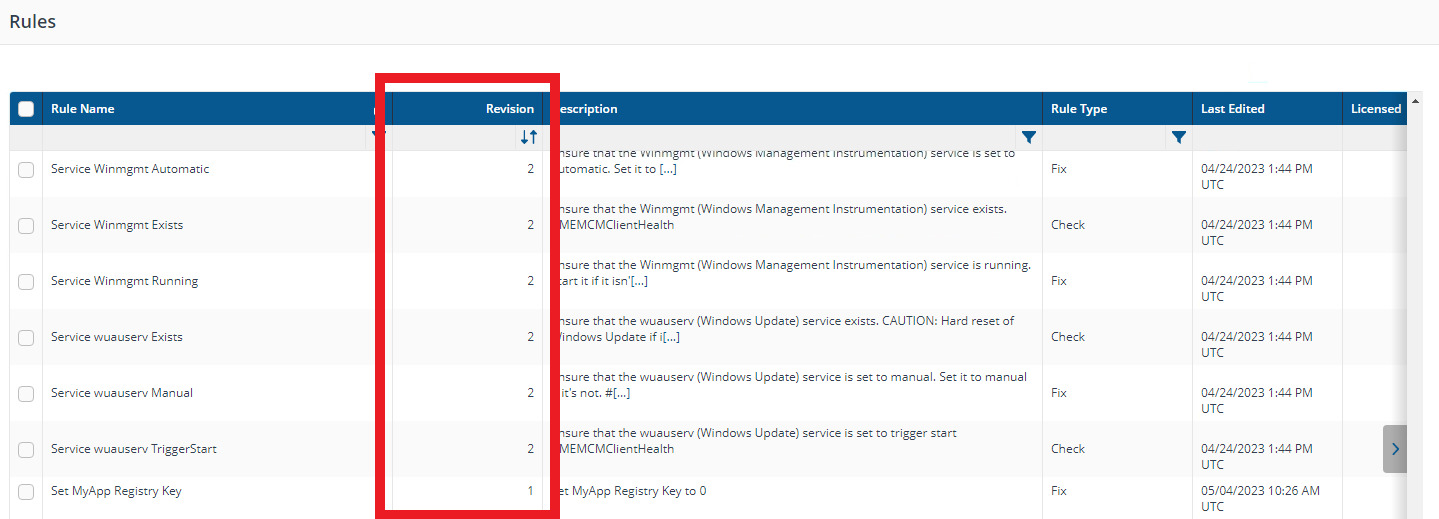
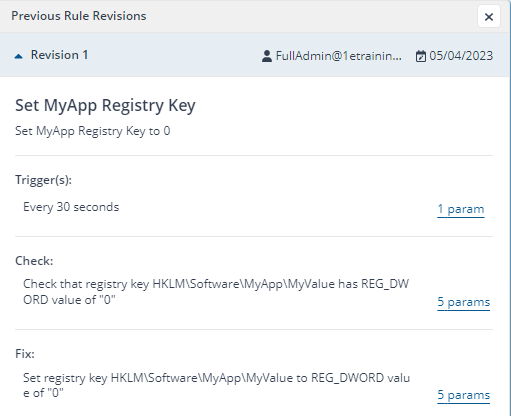
Rule revisions
When a rule is edited a Revision history is created, this is visible in the Revision column of the Rules screen.
Selecting the Rule via the adjacent checkbox causes the Edit button to become enabled
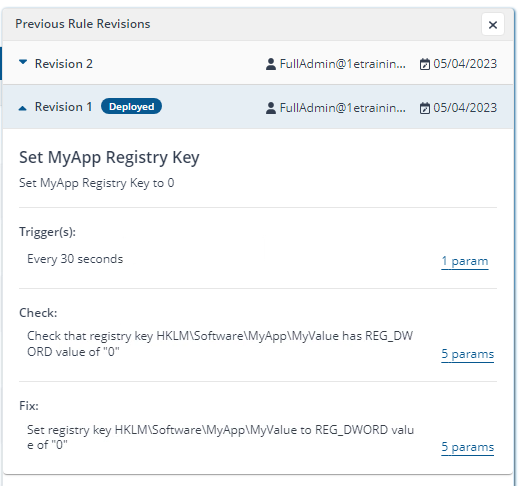
Clicking the Edit button then opens the Rule for editing, in this example, the trigger was changed from Periodic (seconds) to be when a Registry entry changes. Selecting this trigger added additional fields to be populated which were, the Hive, Subkey and whether to includeSubkeys
Note
To make best use of the real time features of Endpoint Automation it is much more effective to trigger when something changes, rather than checking at set periods, as any change will be reported back, and if a Fix has been specified the device will immediately be remediated.

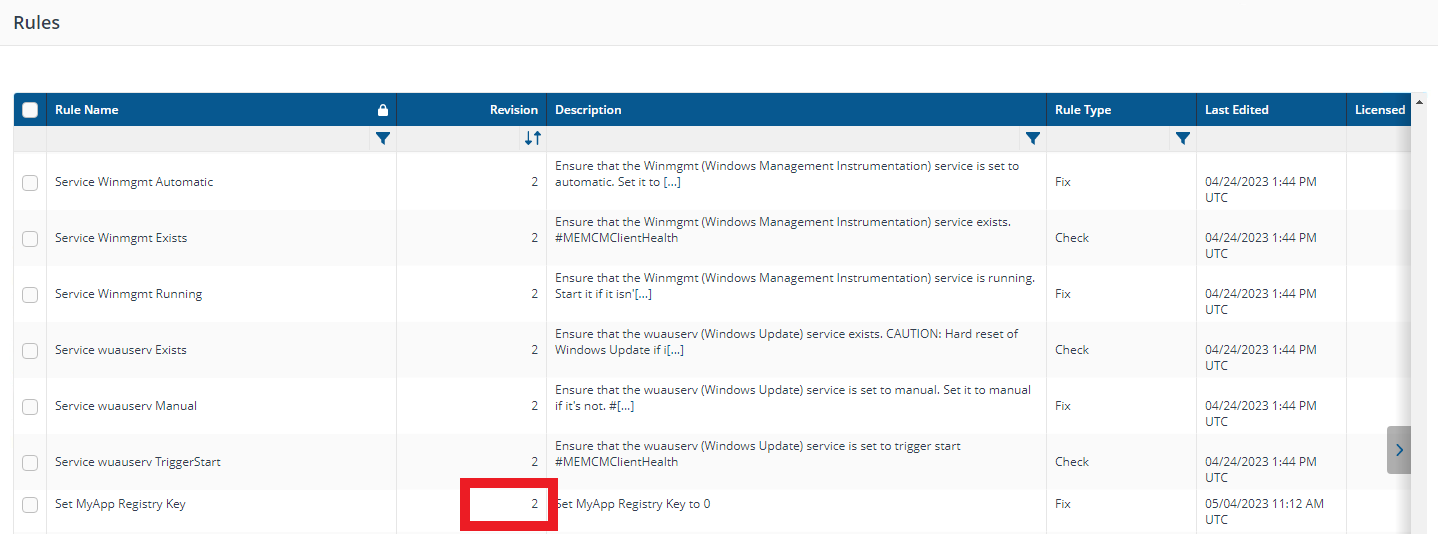
Once the changes are made, click Save to close the Edit screen, the Revision number will now be incremented by 1.
It is then possible to view the changes by clicking on the details link in the Details column.

Once clicked this will show the revision history, opening with the latest revision details displayed.
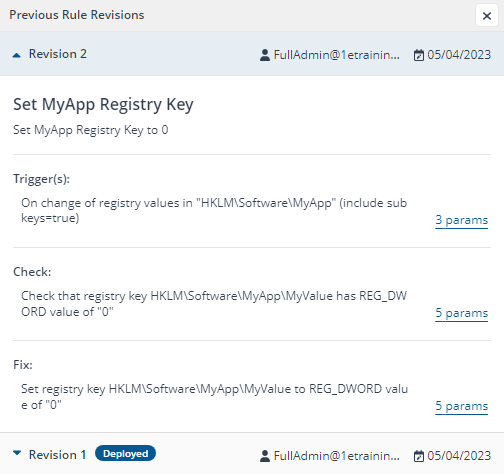
You can then select an earlier Revision to compare the changes.
Cloning a rule
You can clone (copy) a rule by selecting it with the checkbox on the left and then selecting Clone Rule. When you do this, a copy of the rule is made.
You will be prompted to enter a new name for the cloned rule. After this you can modify any property of the cloned rule and save it.
Viewing Rule Details
You can view the rule details for a rule by clicking the View Details link displayed on the rules page under the Details column, showing:
Heading | Description |
|---|---|
Description | Rule description entered when the rule was created. |
Check | The verification that a device has a particular state. |
Fix | The defined desired state for the device and the enforcement that state. |
Triggers | The definition of the conditions causing a rule to be evaluated. |
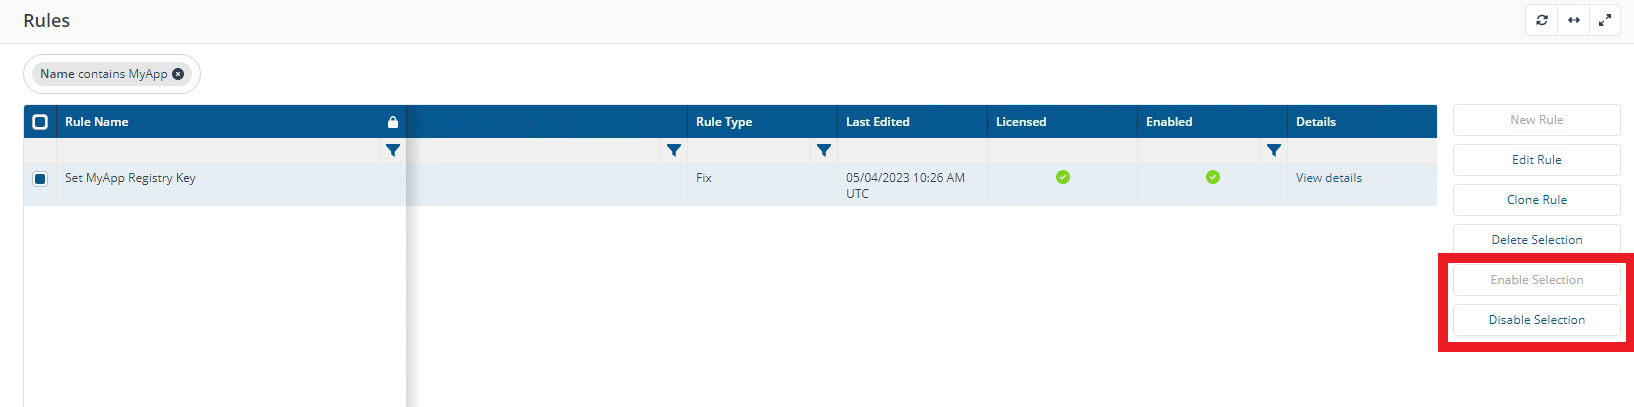
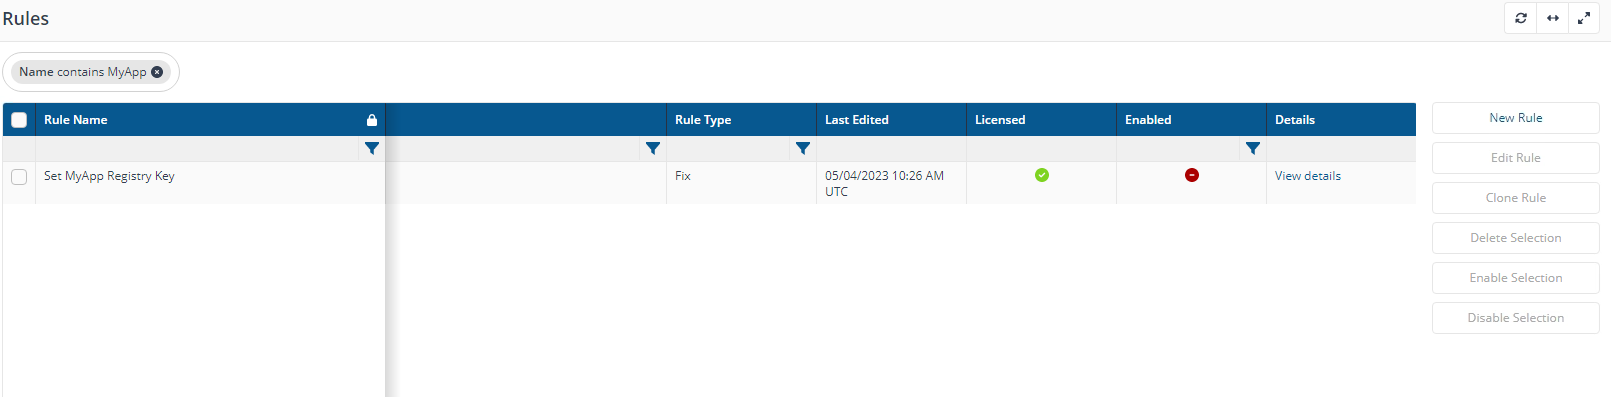
Enabling and disabling rules
You can enable and disable rules by selecting the rule with the checkbox on the left and then selecting Disable Selection, if the rule is enabled, or Enable Selection, if the rule is disabled.
Disabled rules are shown with a disabled icon against them  .
.
A disabled rule ceases to have effect within any policy that refers to that rule, when that policy is redeployed. In effect, a disabled rule acts as if the rule is not part of the policy.
You must redeploy any policies which contain a disabled rule for the change to become effective on any devices targeted by the policies.
If you enable a previously disabled rule then the rule becomes active again. You must redeploy any policies containing the rule for the change to become effective on any devices targeted by the policies.
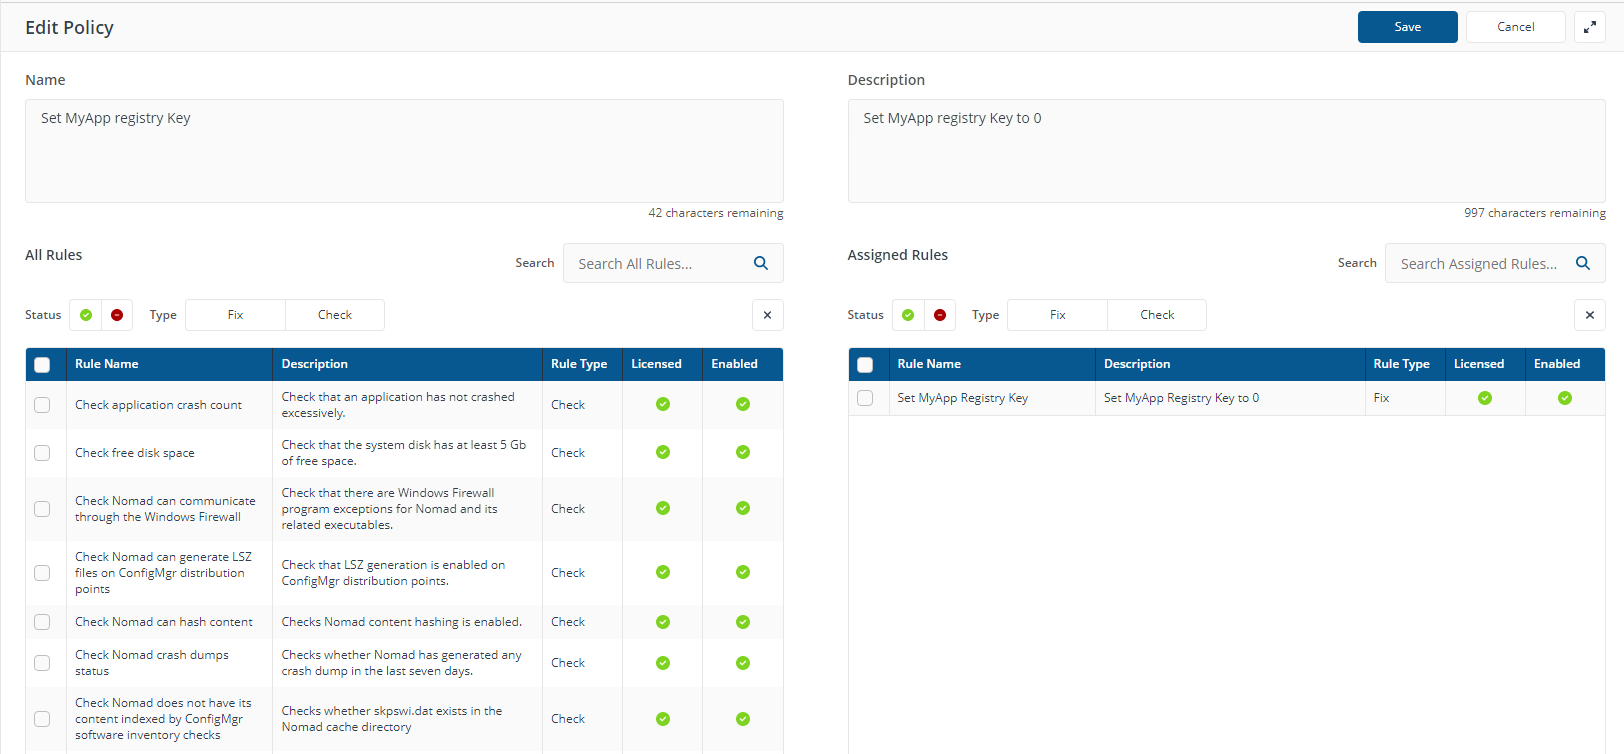
Associating a rule with a policy
You associate a rule with a policy from Endpoint Automation →Administration→Policies by selecting the policy using with the checkbox on the left, then selecting Edit Policy.
The available rules are on the left of the page. You select the rule(s) you want to associate with the policy using the checkboxes and then click the  button.
After selecting all the rules you want to associate, click Save.