Installing Shopping Central
How to install Shopping Central using the interactive installer wizard or in unattended mode - also includes basic instructions on uninstalling Shopping Central.
Note
You must ensure a suitable web server certificate exists in the local machine certificate store, and permissioned to allow the Shopping Installer Account and Shopping Central service account to read it. Default permissions are sufficient. For web server certificate requirements, please refer to Preparation: Shopping Server certificate.
Shopping 6.1 onwards only supports HTTPS connections to the Shopping website, because supported browsers block Cross-Origin Resource Sharing (CORS) in non-secure contexts such as HTTP.
Licenses
If you do not have a valid license key when you install Shopping 6.1, you will be able to automatically use a 30-day evaluation. If you have a Shopping 5.x license and are entitled to upgrade, or if you need to run Shopping beyond the evaluation period, contact Sales for a new license key.
You will need a Tachyon license that covers the Shopping-specific instructions if you want to use the client-side features of Shopping's Order Tracking feature. Contact 1E for a Shopping 6.1 addition to your Tachyon license if you do not already have it.
Intune
If you're planning to use Shopping with Intune, you should follow the instructions on Enabling Intune integration before starting the installation of Shopping central.
Tachyon
To use Shopping with Tachyon, you should follow the instructions on Enabling Tachyon integration before starting the installation of Shopping Central.
Installing Shopping central with the wizard
To install the Shopping central components, start a command prompt with elevated rights using Run as administrator , change directory to the location where you downloaded ShoppingCentral.msi and run the following suggested command-line:
msiexec /i ShoppingCentral.msi /l*v ShoppingCentralInstaller.log
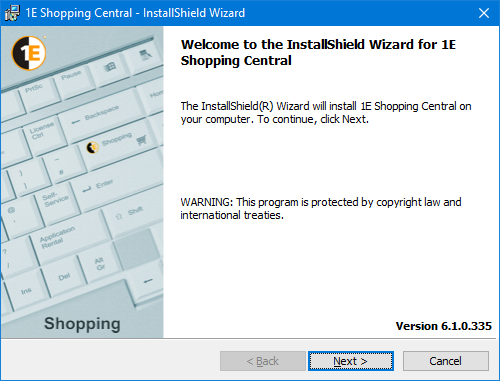
Welcome
This screen provides the version number for Shopping and outlines what the wizard will do.
Click Next to go to the next screen.
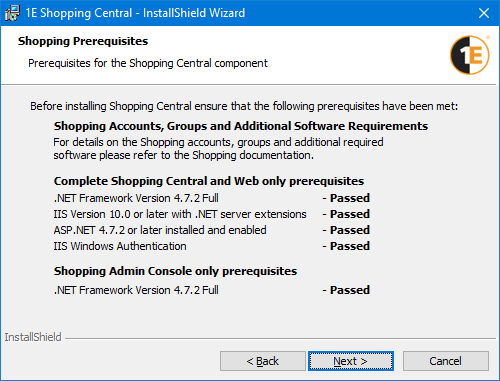
Shopping Prerequisites
On the Prerequisites screen, background checks are run to ensure the prerequisites are met.
Click Next.
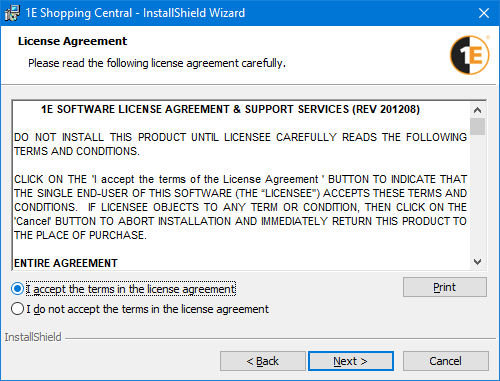
License Agreement
On the License Agreement screen, accept the license agreement.
Click Next.
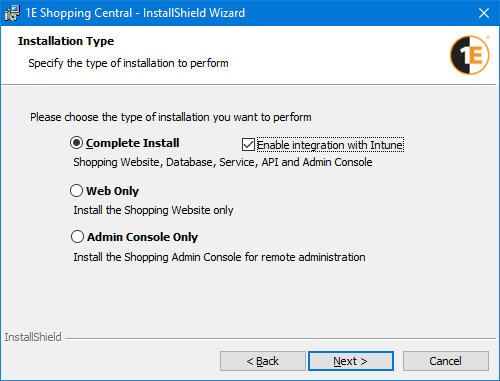
Installation Type
On the Installation Type screen, choose from the following options, and then Click Next .
Installation Option | Explanation |
|---|---|
Enable integration with Intune | Early in the Shopping Central installation wizard, when you specify the installation type you can indicate whether Intune integration should be enabled. You can use Shopping 6.0 with Microsoft Intune in much the same way as with Configuration Manager. You can do this by checking Enable integration with Intune. Refer to Enabling Intune integration for details on how to:
|
Complete Install | Installs the Shopping Web application, Shopping APIs, Shopping database, Shopping Admin console and Shopping services. |
Web Only | Installs only the Shopping Web on secondary devices. It requires a complete Shopping installation to already exist on the network as the installer will prompt you for the host, port and IP address for the Shopping website. |
Admin Console Only | Installs only the Admin console on secondary devices. It requires a complete Shopping installation to already exist on the network as the installer will prompt you for the location of the Shopping database server. |
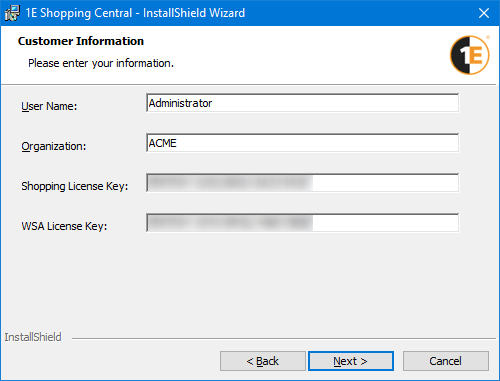
Customer Information
Enter the following and click Next:
The name and organization details
License key for Shopping
License key for Windows Servicing Assistant (WSA)
Note
If you are evaluating Shopping, leave the license key blank for a 30-day evaluation period.
WSA is optional. It does not have an evaluation period. If you do not have a license key for WSA, then leave the field blank; you will be able to create WSA applications in the Shopping Admin console but users will not be able to launch them.
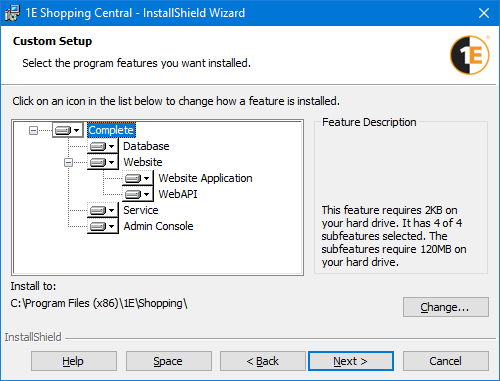
Custom Setup
This corresponds to the installation type you chose in step 4.
You can change the default installation location for each component by selecting the component and click Change...
Feature | Installation location |
|---|---|
Complete | C:\Program Files (x86)\1E\Shopping\ |
Database | C:\Program Files (x86)\1E\Shopping\Database\ |
Website | C:\Program Files (x86)\1E\Shopping\WebSite\ |
Website Application | C:\Program Files (x86)\1E\Shopping\Website\Shopping\ |
WebAPI | C:\Program Files (x86)\1E\Shopping\WebSite\ShoppingAPI\ |
Service | C:\Program Files (x86)\1E\Shopping\CentralService\ |
Admin Console | C:\Program Files\1E\Shopping\AdminConsole\ |
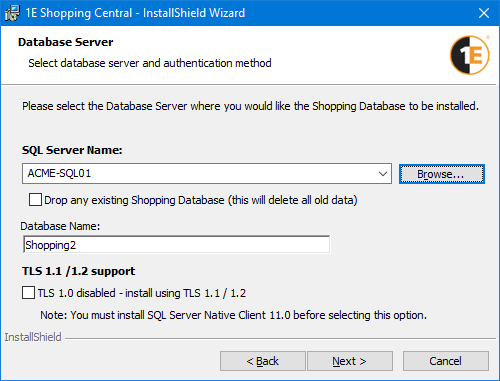
Database Server
Enter the following.
The name of the SQL Server instance to host the Shopping database. Checks are made to see if the machine is an SQL Server. You have the option to drop any existing Shopping database.
Warning
If you are upgrading and want to preserve your existing data, ensure that you do not select the Drop any existing Shopping database option.
Note
The SQL Server Name defaults to
(local)which sets Shopping to use the local machine to host the Shopping database. Both SQL alias and FQDN are supported for determining the SQL Server by the Shopping Central installer. You can also set a named instance using the format:<ServerName>\<InstanceName>.For example, if there is an SQL named instance called
Adminon the serverSMS01, populate the SQL Server Name: field withSMS01\Admin. You can also change the name for the Shopping database that gets created.When upgrading Shopping, if a database with that name already exists it will be upgraded, otherwise a new database will be created. If the default database name was changed for a previous Shopping installation, you will need to enter that name if you want it upgraded.
If TLS 1.0 is disabled on either server that will host the Shopping website or SQL Server, then:
Enable the checkbox TLS 1.0 disabled - install using TLS 1.1 / 1.2.
Install SQL Server Native Client 11.0 as described in Preparation: Installing when TLS 1.0 is disabled.
Click Next.
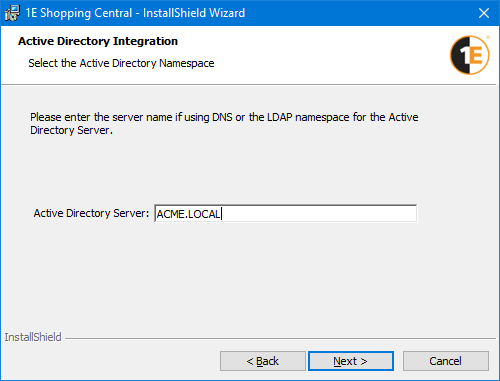
Active Directory Integration
Enter the details to access an AD domain controller. This may be specified using the server name or the LDAP namespace. For example, a particular DC can be referenced using the server name such as ACMEDC01 or an AD namespace such as ACME.local.
The AD server value defaults to localhost. Change this to refer to the AD domain controller. For details about which DC to nominate, see Active Directory Requirements. Using the AD namespace is preferred in that if you specify a domain controller and that DC becomes unavailable, you won't be able to open the Shopping console.
Access to the AD server or namespace will be verified when you click Next.
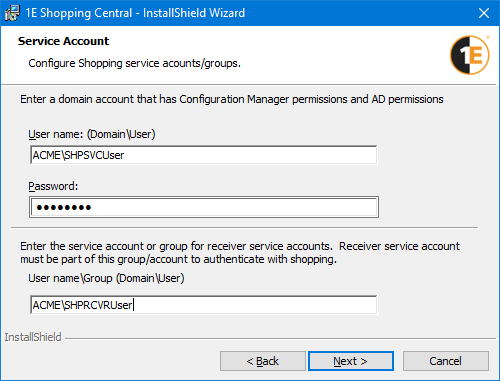
Service Account
Enter the name and password for the Shopping Central service domain account. It must have the appropriate security rights already, please refer to Preparation: Shopping Central Service Account for details.
For example, to set the ShoppingSrv service account for the ACME domain, enter ACME\ShoppingSrv in the User name: field. The name and password for the account will be verified when you click Next.
You must also set an account or group to be used by the Shopping Central website to validate communications from the Shopping Receivers. If you provide a:
Domain account, this same account must be used by all Shopping Receivers
Security group, all the service accounts used for by Shopping Receivers must belong to this group.
This second option is of particular use when using the network service account for the Shopping Receivers. In this case, you simply add the computer account where the Receiver service is running to the security group provided here.
Click Next.
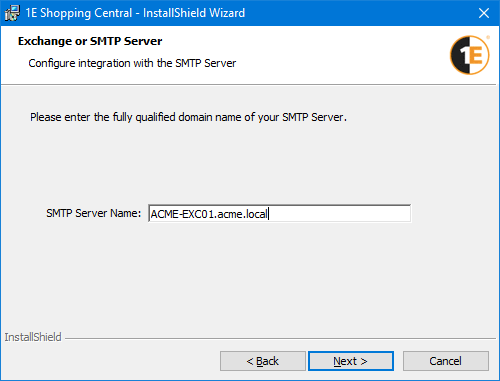
Exchange or SMTP Server
Enter the fully qualified domain name for your Exchange or SMTP server. The SMTP server name defaults to localhost for locally defined SMTP servers.
You can change the SMTP server name to an external server by entering its name into the field. For example, you could set the SMTP server name to the fully qualified server name for an Exchange server such as smtp.acme.local. The server entered will be verified when you click Next.
Click Next.
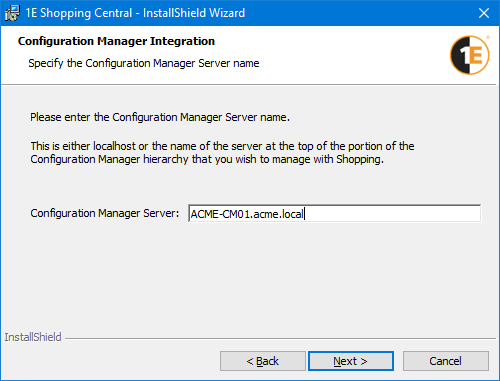
Configuration Manager Integration
Enter the Configuration Manager server name (it defaults to local host) but you can set this to a remote server by entering the server name in the Configuration Manager Server field.
Note
This is normally the Configuration Manager CAS site server but if you have multiple sites in your ConfigMgr hierarchy, this could be the ConfigMgr Primary site server for any sites you want to manage with Shopping.
Click Next.
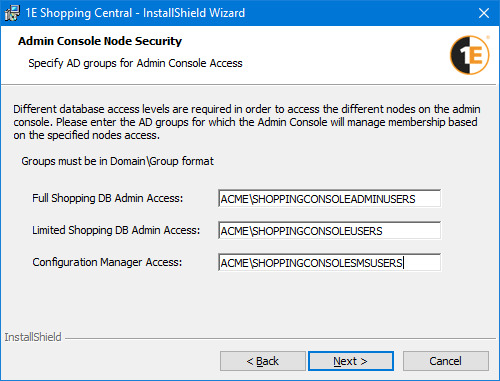
Admin Console Node Security
Enter the Shopping security groups as described in Preparation: Shopping Console Access groups.
For example, we have created three Shopping security groups:
These groups are required even if you are not using the Console Node Security feature. If you want to use the Console Node Security feature the ShoppingConsole_Admins group must be configured so that it has security permissions in AD to write to itself and to the two other groups.
Other permissions are added to the groups automatically during installation if the installation account has AD Rights to update these groups. The accounts will be validated and warnings are raised if problems are encountered.
Click Next.
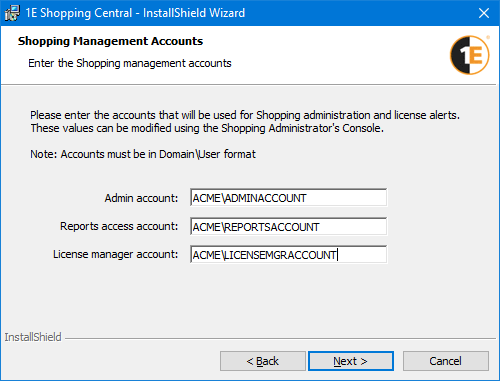
Shopping Management Accounts
Enter the details for specific accounts/groups used by Shopping to manage information, for more details please refer to Preparation: Shopping Administrator groups.
Account | Explanation |
|---|---|
Admin account | Refers to the Shopping Administrators group that has default access to all the nodes in the Shopping Admin console and is able to see the Administration tab on the Shopping Web portal. |
Reports access account | Refers to the Shopping Report Managers group, that is granted web access to reports, using the Reports tab on the Shopping Web portal, detailing the types of Shopping interactions that have been made. |
License manager account | Refers to the License Managers group, whose members are sent emails of any license threshold notifications. |
The entries will be validated and warnings are raised if problems are encountered. The installer searches for email addresses for the Admin and License manager accounts using each account's AD-defined mail field. If these are not found a warning is not displayed, and they will have to be added in the Shopping Admin Console Web settings post installation.
Note
1E recommends using AD Groups instead of individual accounts because groups can be managed outside of Shopping.
Click Next.
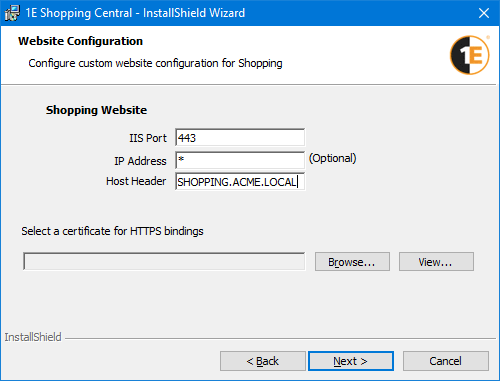
Website Configuration
Enter the IIS Port, which defaults to 443, and Host Header for the Shopping Website. You can provide an IP address for it and if you want to be non-specific about the IP address, use *.
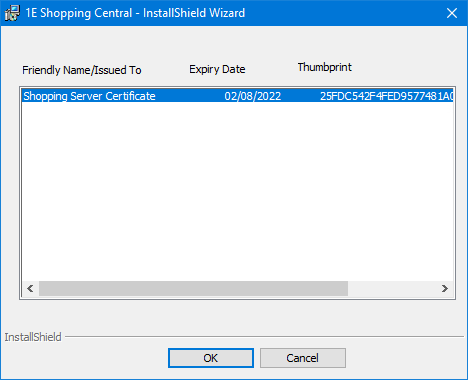
As the Shopping Central installer defaults to using HTTPS, you will also need to select a Web Server certificate that will be used for the HTTPS bindings. To select the certificate, click on the Browse... button - which displays a dialog containing a list of the Server certificates available on the local computer.
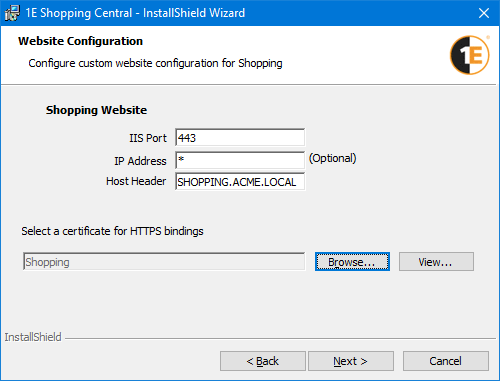
In our example, a Server certificate has been previously requested specifically for Shopping. When you have selected the certificate, click OK, to set this on the Website Configuration screen.
Once a certificate has been set, you can also click View... to display its details.
Note
For IIS configuration requirements, please refer to Preparation: Shopping Central IIS configuration.
For web server certificate requirements, please refer to Preparation: Shopping Server certificate.
Click Next.
Note
The certificates list may be empty if you are not running as an elevated administrator, or your certificates(s) are not the correct type, or have expired.
For details on the certificate requirements, please refer to Preparation: Shopping Server certificate.
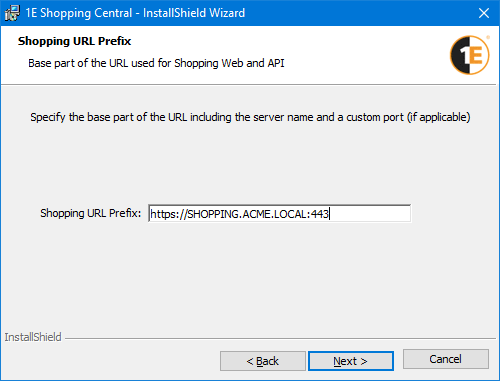
Shopping URL Prefix
Set the base URL for accessing the Shopping API so that the Shopping Central service can communicate with the Shopping Web. Typically, this is set to the host header you defined in the Web configuration screen plus the port number.
For example https://shopping.acme.local:443, or if you have modified the port from its default of 443, https://shopping.acme.local:4434
Click Next.
Warning
You must specify HTTPS. Do not specify HTTP.
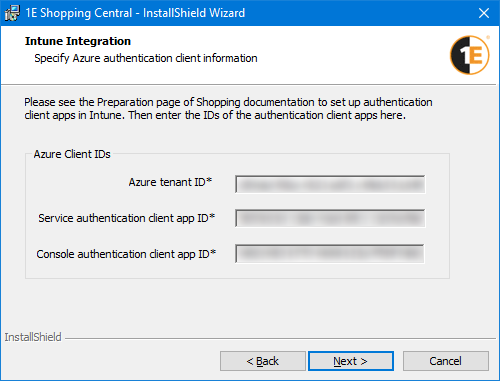
Intune Integration
If you enabled integration with Intune, specify the Intune Integration details, then Click Next.
ID | Note |
|---|---|
Azure tenant ID | This is the same as your Azure tenant ID, available in the Overview node of your AAD console. |
Service authentication client app ID | Available in the Overview node for the app in the App Registrations or Enterprise applications nodes of your AAD console. |
Console authentication client app ID | Available in the Overview node for the app in the App Registrations or Enterprise applications nodes of your AAD console. |
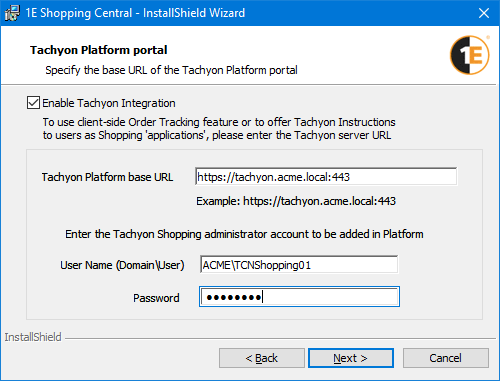
Tachyon Platform portal
You will need to check the Enable Tachyon Integration checkbox and provide details for your Tachyon Platform implementation, if you require either of the following Shopping features:
Shopping for Tachyon Instructions
Client-side Order Tracking - notifying Shoppers using a notification icon and toast popups
Field | Description |
|---|---|
Tachyon Platform base URL | Set this to the base URL for your Tachyon Platform implementation. For example: https://tachyon.acme.local:443/ |
User Name (Domain\User) | Set this to the user name for the account you want to use for running the Tachyon Instruction that implements the client-side Order Tracking feature and any Tachyon Instructions you are making available as Shopping applications. The user name must be provided in the form Domain\User. You could even set this to the account details you used for the Shopping Service account to save having to provision another account. The installer will:
|
Password | Set this to the password of the Tachyon user account you want to use for running Shopping instructions. |
Click Next to continue.
Note
Order Tracking emails are also available without Tachyon integration.
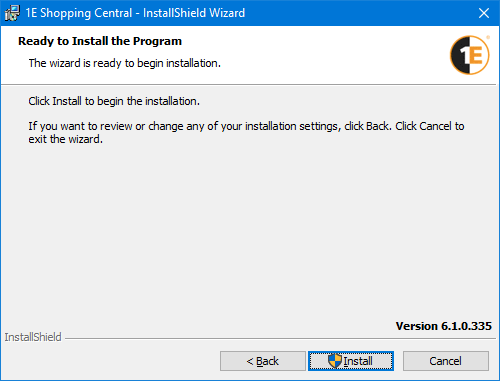
Ready to Install the Program
Click Install to start the Shopping installation.
InstallShield Wizard Completed
When the installer completes, optionally check Show the Windows Installer log, then click Finish to close the installer.
Installing Shopping in unattended mode
Note
You must ensure a suitable web server certificate exists in the local machine certificate store, and permissioned to allow the Shopping Installer Account and Shopping Central service account to read it. Default permissions are sufficient. For web server certificate requirements, please refer to Preparation: Shopping Server certificate.
Shopping 6.1 onwards only supports HTTPS connections to the Shopping website, because supported browsers block Cross-Origin Resource Sharing (CORS) in non-secure contexts such as HTTP.
You can install the Shopping Central service in unattended mode using the msiexec.exe command-line.
For example, to install all Shopping components with a Shopping service account, license it, setup the admin, reports and license manager accounts, define the Shopping security AD groups, locate the AD, SMTP, SQL and Configuration Manager server, then use an install script.
Command-line switches are described in Shopping Central installer properties.
Please note that:
If you use the example Shopping_Install.cmd then it must be placed in the same folder with the ShoppingCentral.msi.
The ^ at the end of each line is a continuation character used by batch scripts and included for clarity.
We recommend removing the /qn to perform a dry run through installation and validate all the parameters first, this allows to visually see and confirm the values entered.
Any items which include spaces in the name or groups should be enclosed in quotes "" as shown.
Mandatory properties
The IISHOSTHEADER, THUMBPRINT and SHOPPINGURLPREFIX properties are required for an unattended installation. They create the HTTPS binding for the Shopping website, select the web server certificate, and the URL used by users and Receivers to connect to the Shopping website. Each must have the same FQDN which also matches a Subject Alternate Name (SAN) in the Web Server certificate.
The binding can also include:
IISIPADDRESS– you can provide a custom IP address for the Shopping Website, set it to * if you want it to be non-specificIISPORT– the IIS port for the Shopping Website
For IIS configuration requirements, please refer to Preparation: Shopping Central IIS configuration.
Windows Servicing Assistant
Note
Add WSAPIDKEY if you will be using Windows Servicing Assistant.
Integrating Shopping with Tachyon
If you want to integrate Shopping with Tachyon, add the following command-lines (substitute the [parameters>] for your environment):
ENABLETACHYONSUPPORT=1 ^
PLATFORMURL=[URL to tachyon platform] ^
PLATFORMUSERNAME=[Username for user account to be added and permissioned in Tachyon Platform] ^
PLATFORMPASSWORD=[Password for user account to be added and permissioned in Tachyon Platform] ^
Integrating Shopping with Application Migration
Ensure that the parameters you provide are correct. No validation takes place for this part of the unattended installation, nor are integration errors logged. If the integration fails, configure the parameters manually, refer to Integrating with Application Migration.
If you want to integrate Shopping with Application Migration, add the following command-lines (substitute the [parameters>] for your environment):
APPMIGRATIONENDPOINTURL=http://[host:port] ^
APPMIGRATIONMODE=1 ^
SLAPLATFORMUSERNAME=[domain\user] ^
SLAPLATFORMPASSWORD=[password] ^
Integrating Shopping with Intune
If you want to integrate Shopping with Intune, add the following command-lines (substitute the [parameters>] for your environment):
ENABLEINTUNESUPPORT=1 ^
AZURETENANTID=[Azure tenant ID] ^
SERVICECLIENTAPPID=[service authentication app ID] ^
CONSOLECLIENTAPPID=[console authentication app ID] ^
Download Shopping_Install.cmd ...
Shopping_Install.cmd
msiexec /i ShoppingCentral.msi ^
ACTIVE_DIRECTORY_SERVER=ACME.local ^
INSTALLDIR="C:\Program Files (x86)\1E\Shopping" ^
SVCUSER=ACME\ShoppingSrv ^
SVCPASSWORD=svcpassword ^
SHOPPINGCONSOLEADMINUSERS="ACME\FullShopAdminsGroup" ^
SHOPPINGCONSOLEUSERS="ACME\PartShopAdminsGroup" ^
SHOPPINGCONSOLESMSUSERS="ACME\ShopSMSUserGroup" ^
ADMINACCOUNT="ACME\ShopAdminsGroup" ^
REPORTSACCOUNT="ACME\ShopReportsGroup" ^
LICENSEMGRACCOUNT="ACME\ShopLicenseMgrsGroup" ^
PIDKEY=abcdef-1234-5678-8765-4321 ^
WSAPIDKEY=abcdef-1234-5678-8765-4321 ^
SQLSERVER=ACME-SQLSERVER ^
SMTP_SERVER_NAME=smtp.acme.local ^
SMSPROVIDERLOCATION=SMS01 ^
IISHOSTHEADER=shopping.acme.local ^
THUMBPRINT=88ca58f5f14ec12187433ae91b514f9e1425cdb6 ^
SHOPPINGURLPREFIX=https://shopping.acme.local ^
RECEIVERACCOUNT="ACME\ShopReceiversGroup" ^
DATABASENAME=Shopping2 ^
DATABASE_COMMANDTIMEOUT=3600 ^
DATABASE_CONNECTIONTIMEOUT=30 ^
DATABASE_MODE=multiuser ^
USEGLOBALCATLOG=1 ^
ENABLETLS12=0 ^
/l*v %temp%\ShoppingCentral-install.log /qn

@echo Press any key to close
@pause>nul
Upgrading
Refer to Upgrading to Shopping for details.
If you use the above script to upgrade Shopping, and the command-line encounters errors, a rollback occurs which may leave your production system in an unstable state. Should that happen, you can restore the database and the files from the backup you made.
If you are having trouble with the restore, contact 1E support for assistance.
Prior to running an upgrade (this is recommended and good practice):
Backup your Shopping database (Shopping2).
Backup the binaries and files in the installation folder typically located at: C:\Program Files (x86)\1E\Shopping. Ensure that you copy all folders and files.
Test the unattended installation command-line in your lab environment to ensure it works before running it on your production environment.
Post Installation
Uninstalling Shopping
Shopping can be uninstalled from Windows Control Panel, Programs and Features or by running the ShoppingCentral.msi and choosing the Remove option. Alternatively, you can run a command-line to uninstall Shopping with: msiexec /x ShoppingCentral.msi /qb
When you uninstall Shopping central, its database (Shopping2) is left on the database server. If you subsequently reinstall Shopping, you have the option to drop the old database in the installer screen.