Customizing the Windows Servicing Assistant
How to customize the Windows Servicing Assistant
There are certain elements in the Windows Servicing Assistant (WSA) Wizard that you can customize to suit your environment. These are:
Text on the Wizard screens
Company logo
The image for the tip on how to discover a new PC name
Customizing text strings
You can customize the text in any of the WSA Wizard screens by editing elements that contain simple name/value pairs in the WsaStrings.resx XML file. Each data row contains a name and a value as well as a type or mimetype. The type corresponds to a .NET class that support text/value conversion through the TypeConverter architecture. Classes that don't support this are serialized and stored with the mimetype set.
To customize the text on the WSA screens:
Navigate to
C:\Program Files (x86)\1E\Shopping\WebSite\ShoppingAPI\GlobalResources\Make a backup of the
WsaStrings.resxfile.Edit the
WsaStrings.resxXML file. If you do modify the contents of this file, we recommend you only modify the data attributes (<data name>and<value>.In our example, the
<data name>attribute is associated with a particular element in the user interface and the<value>attribute is associated with the text for that element.<?xml version="1.0" encoding="utf-8"?> <root> ... <data name="SplashScreen_LoadingDeployments" xml:space="preserve"> <value>Loading Deployments...</value> </data> <data name="SplashScreen_SettingUpWizard" xml:space="preserve"> <value>Setting up assistant...</value> </data> <data name="SplashScreen_GettingTargetMachine" xml:space="preserve"> <value>Loading CA Information...</value> </data> ... </root>Save the file.
When the WSA wizard starts, it calls the Shopping API to get the custom strings:
http://<shoppingBaseUrl>/shopping/WindowsServicingAssistant/LocalizedStrings
If the API does not return a custom string, the WSA wizard will fall back to using the string embedded within its own binary for the missing string. If the API call fails entirely, no custom string is shown.
If you want to know how customizing these text strings affect the WSA Wizard, see Customizing text strings for the WSA Wizard.
Customizing the logo
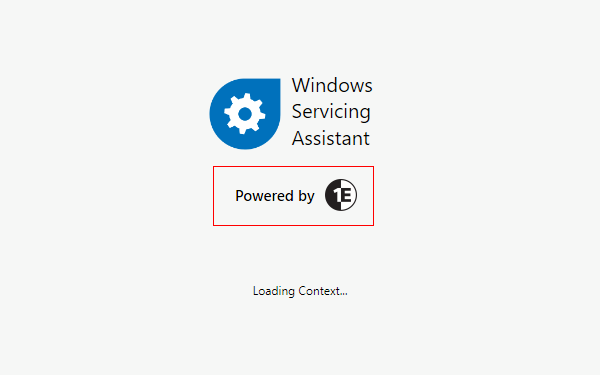
When Windows Servicing Assistant starts, it displays a logo on the Splash screen followed by the Welcome screen. You can replace the default logo with your own.
 |
To customize the logo on the Splash and Welcome screens:
On the Shopping server, navigate to
C:\Program Files (x86)\1E\Shopping\WebSite\Shopping\Assets\images\.Replace
CompanyLogo.pngwith one of your own logo. The image file must be in a PNG format (123x34 pixels) and calledCompanyLogo.png. If the image does not conform to these dimensions, it will be resized before it is displayed on the Wizard.
When the wizard launches, it calls the Shopping API to get the company logo:
http://<shoppingBaseUrl>/WindowsServicingAssistant/CompanyLogo
The API returns the company logo for the wizard to display. If for any reason, the API fails to return the file, the wizard will show the default  logo.
logo.
Customizing the Find Computer Name image
On the WSA New PC screen, an image is displayed to help the user discover the name of their new computer when they click How do I find the name of my new PC? link. You can replace this image with one of your own to best suite your environment.
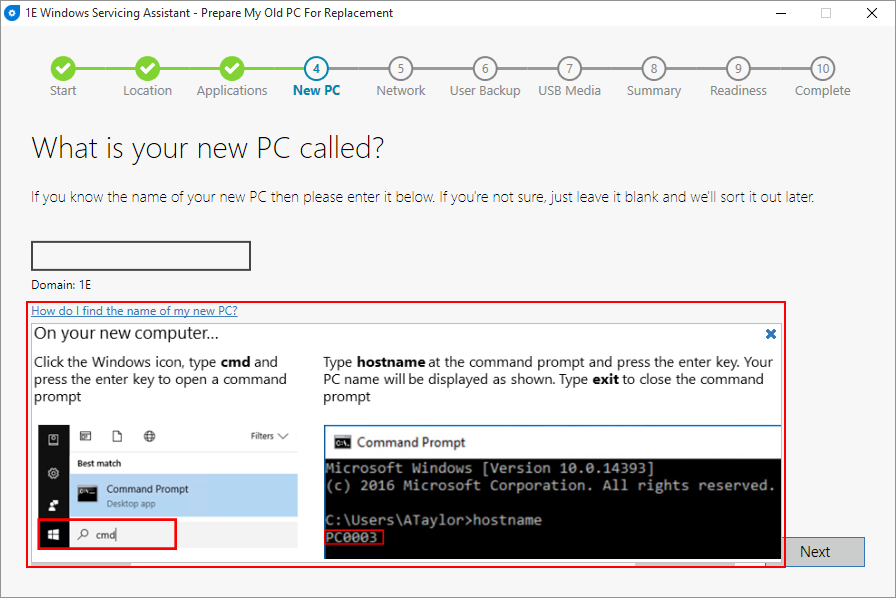
To customize the image to help the user locate their new computer name on the WSA New PC screen:
On the Shopping server, navigate to
C:\Program Files (x86)\1E\Shopping\WebSite\Shopping\Assets\images\.Replace
GetComputerName.pngwith one of your own. The image file must be in a PNG format (826x262 pixels) and calledGetComputerName.png. If the image does not conform to these dimensions, it will be resized before it is displayed on the Wizard.
When the WSA wizard starts, it calls the Shopping API to get the computer name image:
http://<shoppingBaseUrl>/WindowsServicingAssistant/ComputerNameImage
The API returns the computer name image file for the WSA wizard to display. If for any reason, the API fails to return the file, the wizard shows the default image bundled with it.