Authentication Proxy
The Authentication Proxy is used to enable any 1E 23.7 on-premises components that normally use AD for authentication to authenticate with your IdP instead.
Make sure you meet the requirements in the following table.
Please note the following, when the 1E Authentication Proxy is installed to support either an on-premises or SaaS version of 1E platform.
On-premises installation - the server where you have installed 1E platform will already have all the required Windows IIS roles, services, and features installed.
1E SaaS implementation - the server you have identified to host the 1E Authentication Proxy must have certain Windows features installed.
The roles, role services, and features in the following scripts must be installed or enabled as a minimum. The Name column in the Additional server features table is the reference used in PowerShell commands.
Install and configure steps for 1E Authentication Proxy
Use this section as a reference to install and configure the 1E Authentication Proxy.
The Requirements section talks through the need for a signing certificate and walks through the process of creating one called 1EAuthProxy and refers to that certificate from there on in. This section refers to the 1EIntegration certificate which you will have created if you have already worked through AAD - 1E Client Assertion or AAD - 1E Client Assertion.
It is assumed that your IIS web server, either using the existing on-premises 1E server or if SaaS then a local server identified to host the 1E Authentication Proxy, has been configured with the required Windows IIS roles, services and features. It is also assumed that you have installed 1E PowerShell Toolkit v1.2.3.0 or later, refer to https://1e.my.site.com/s/article/TachyonPowerShellToolkit for details.
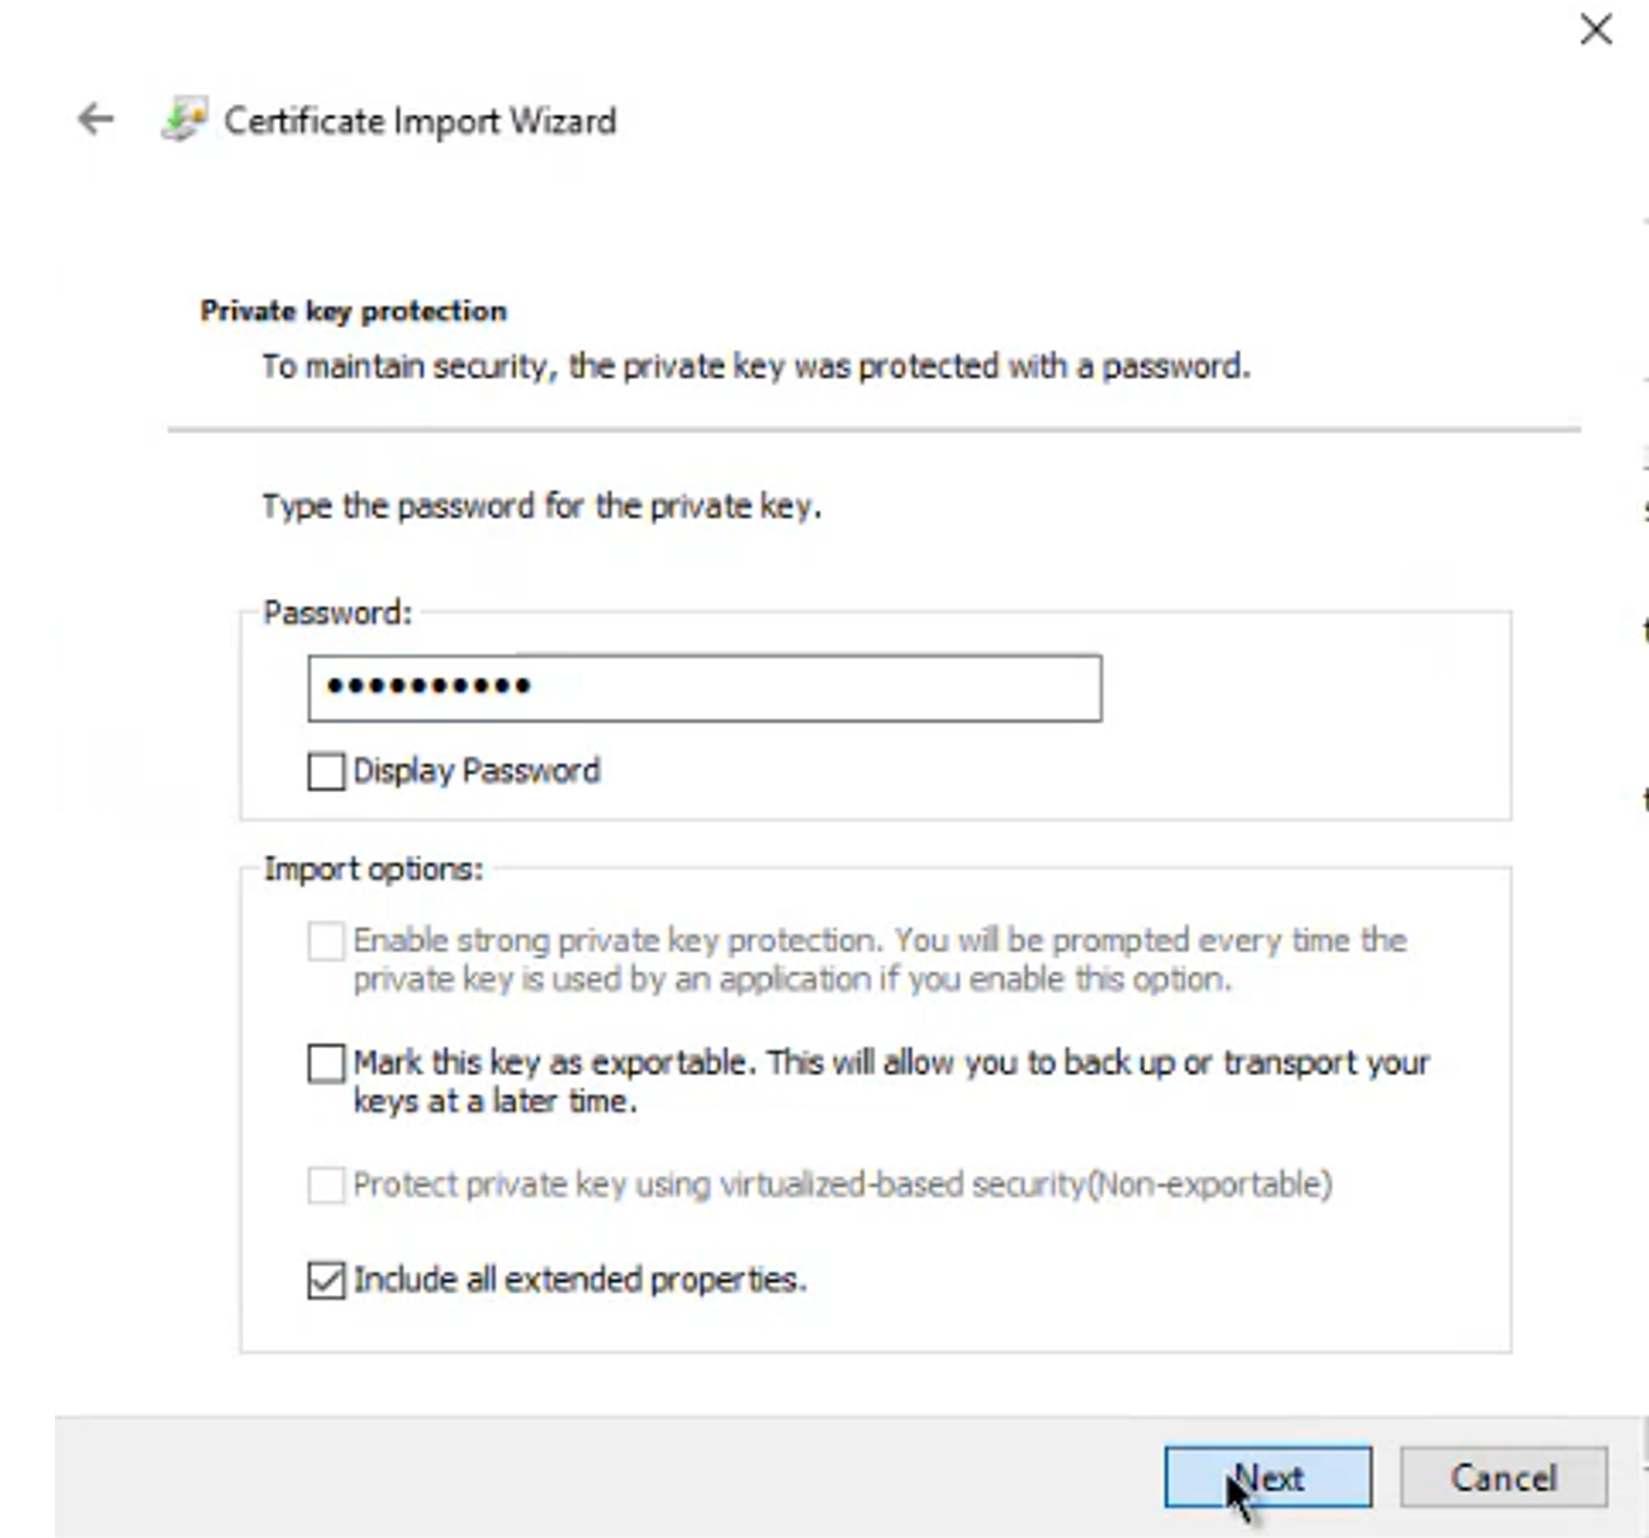
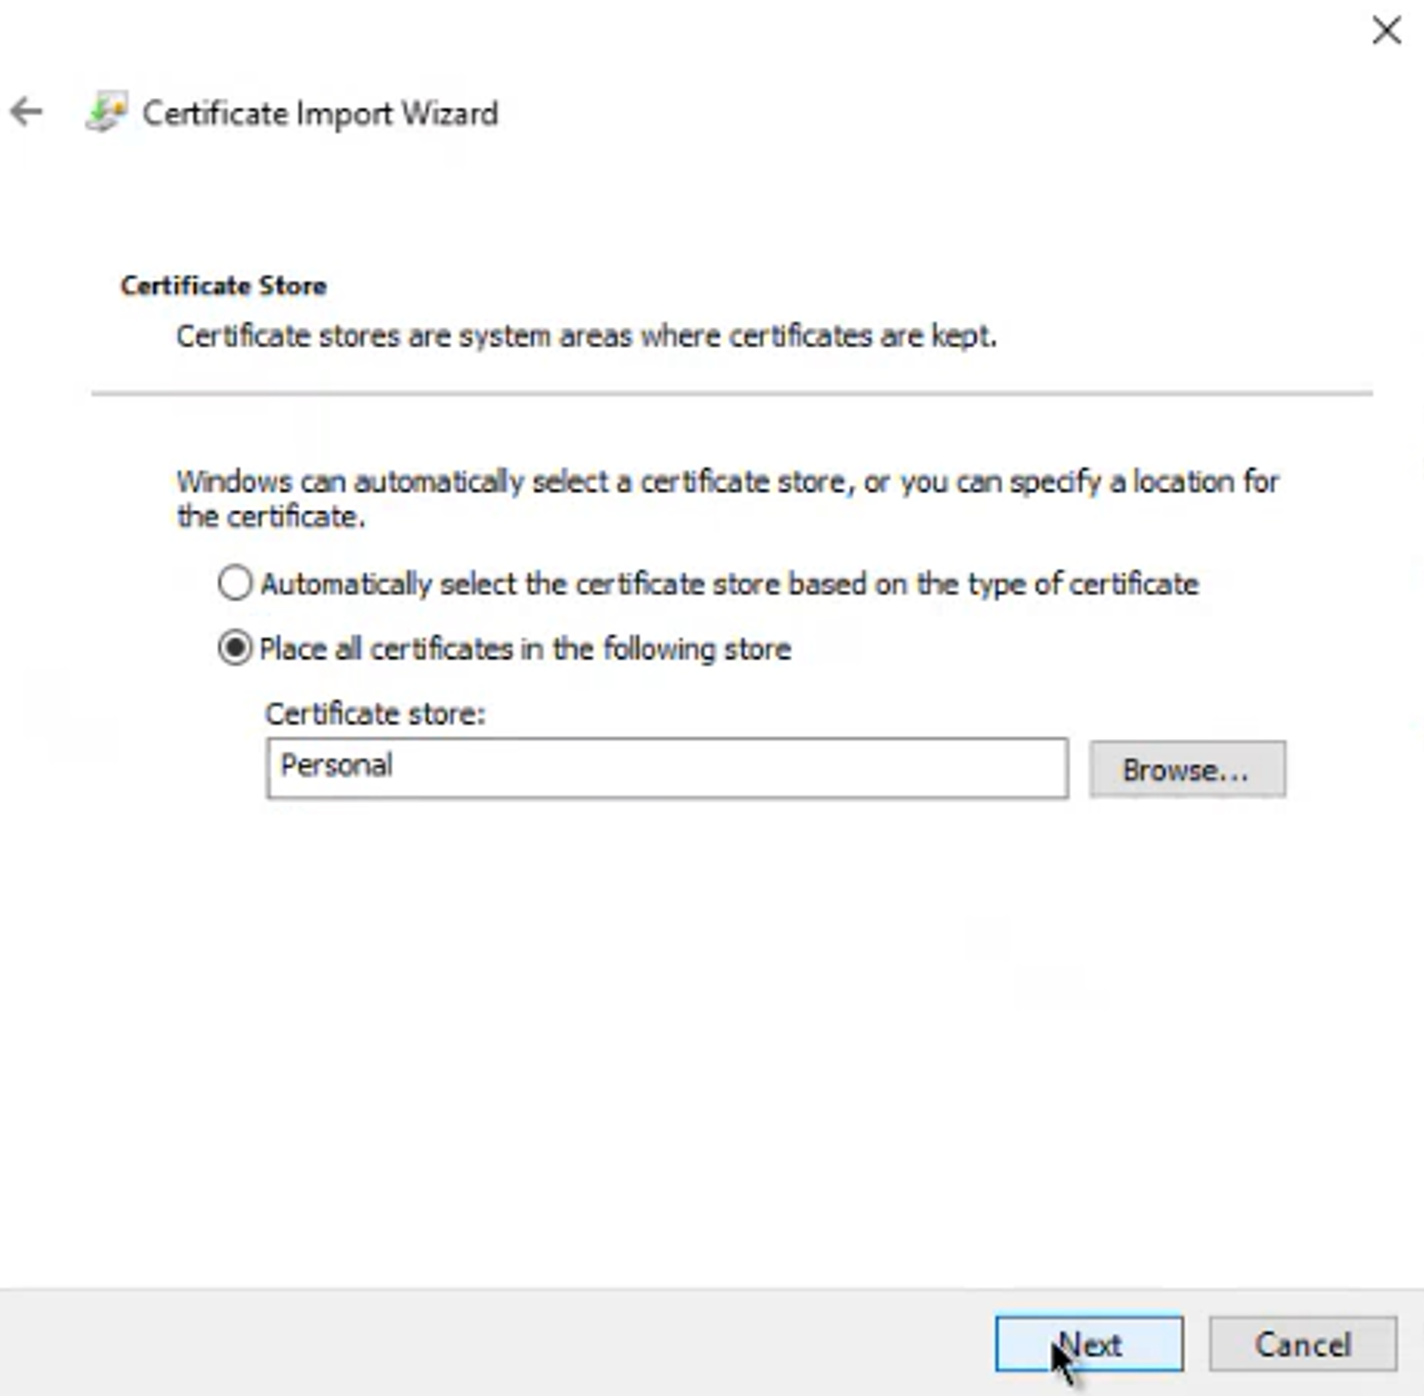
Copy the 1EIntegration.pfx file (Exported when you configured your the AAD applications) onto the server where you want to install your 1E Authentication Proxy.
Import the certificate into the local computer certificate store making sure not to enable the Mark this key as exportable option.
Run
certlm.mscRight-click the certificate and select All Tasks > Manage Private Keys...
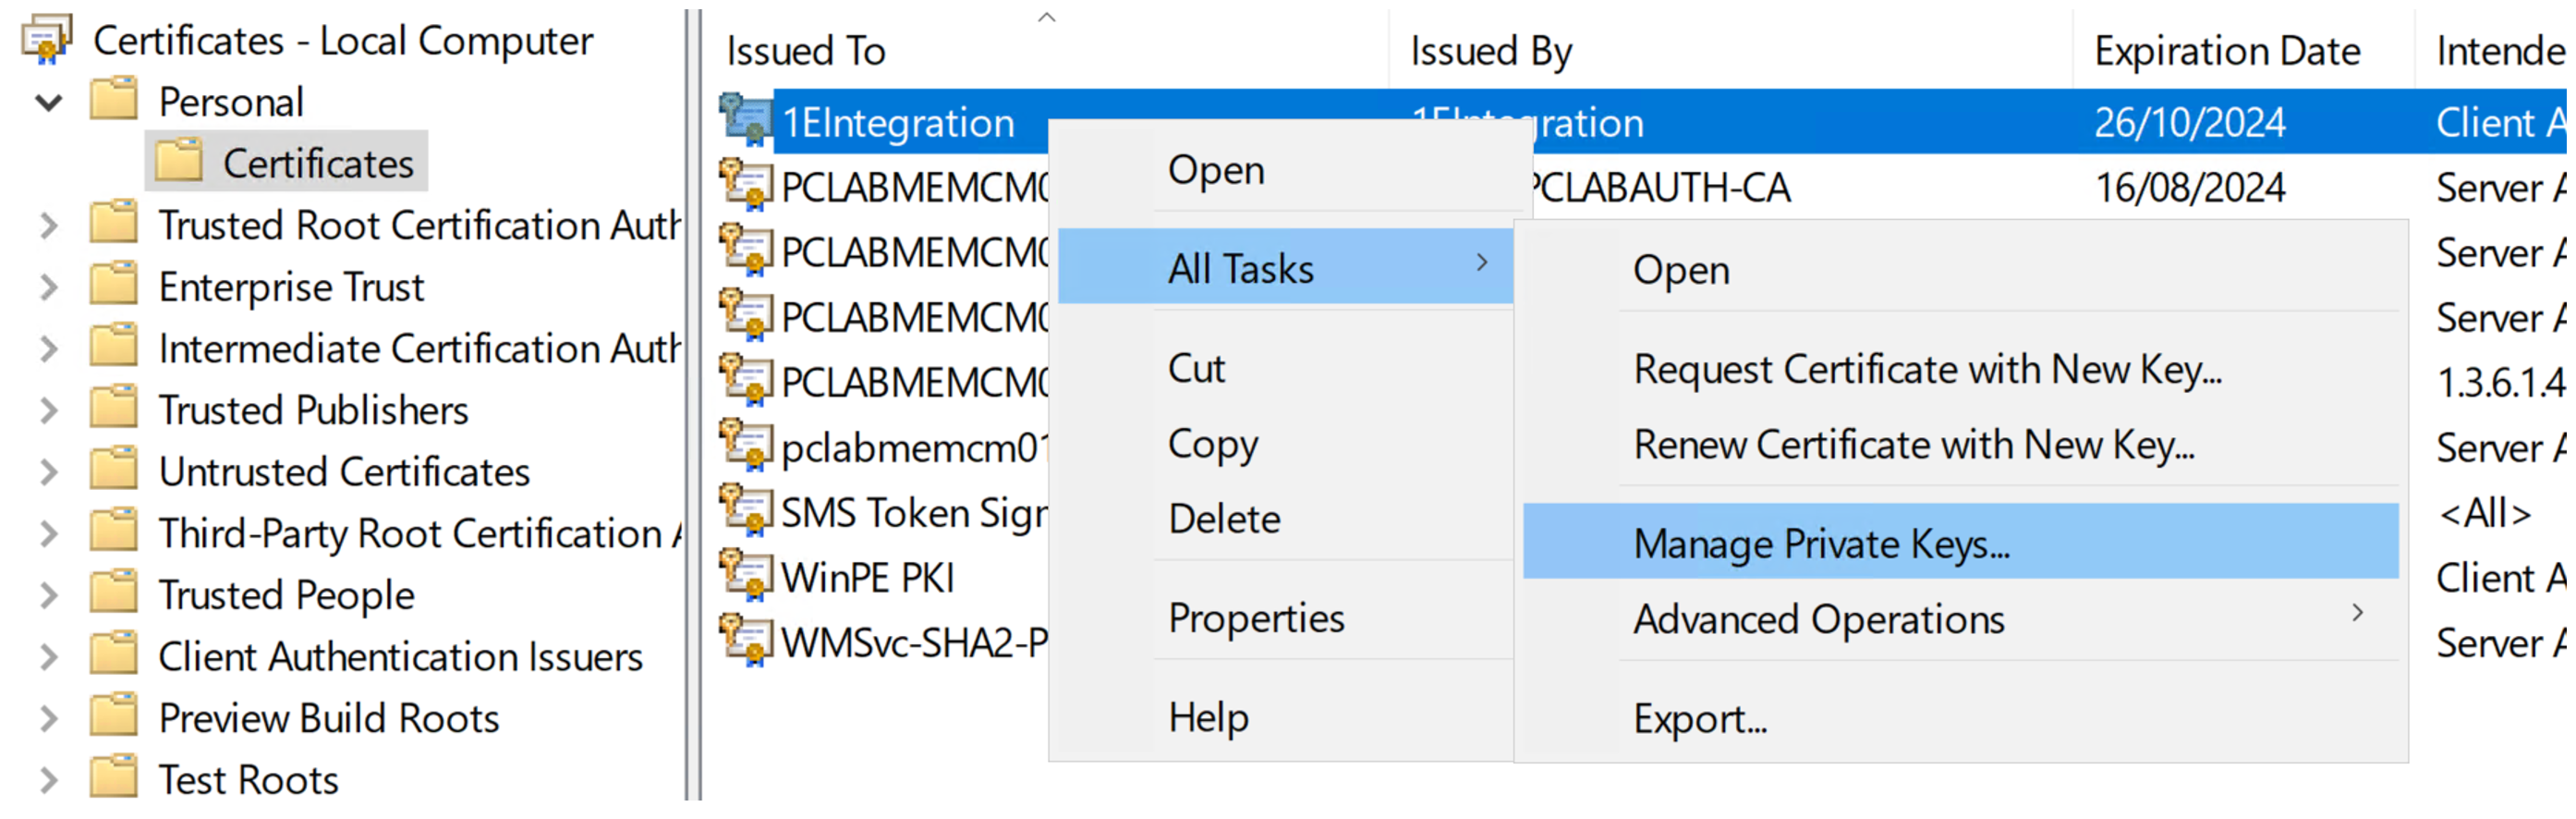
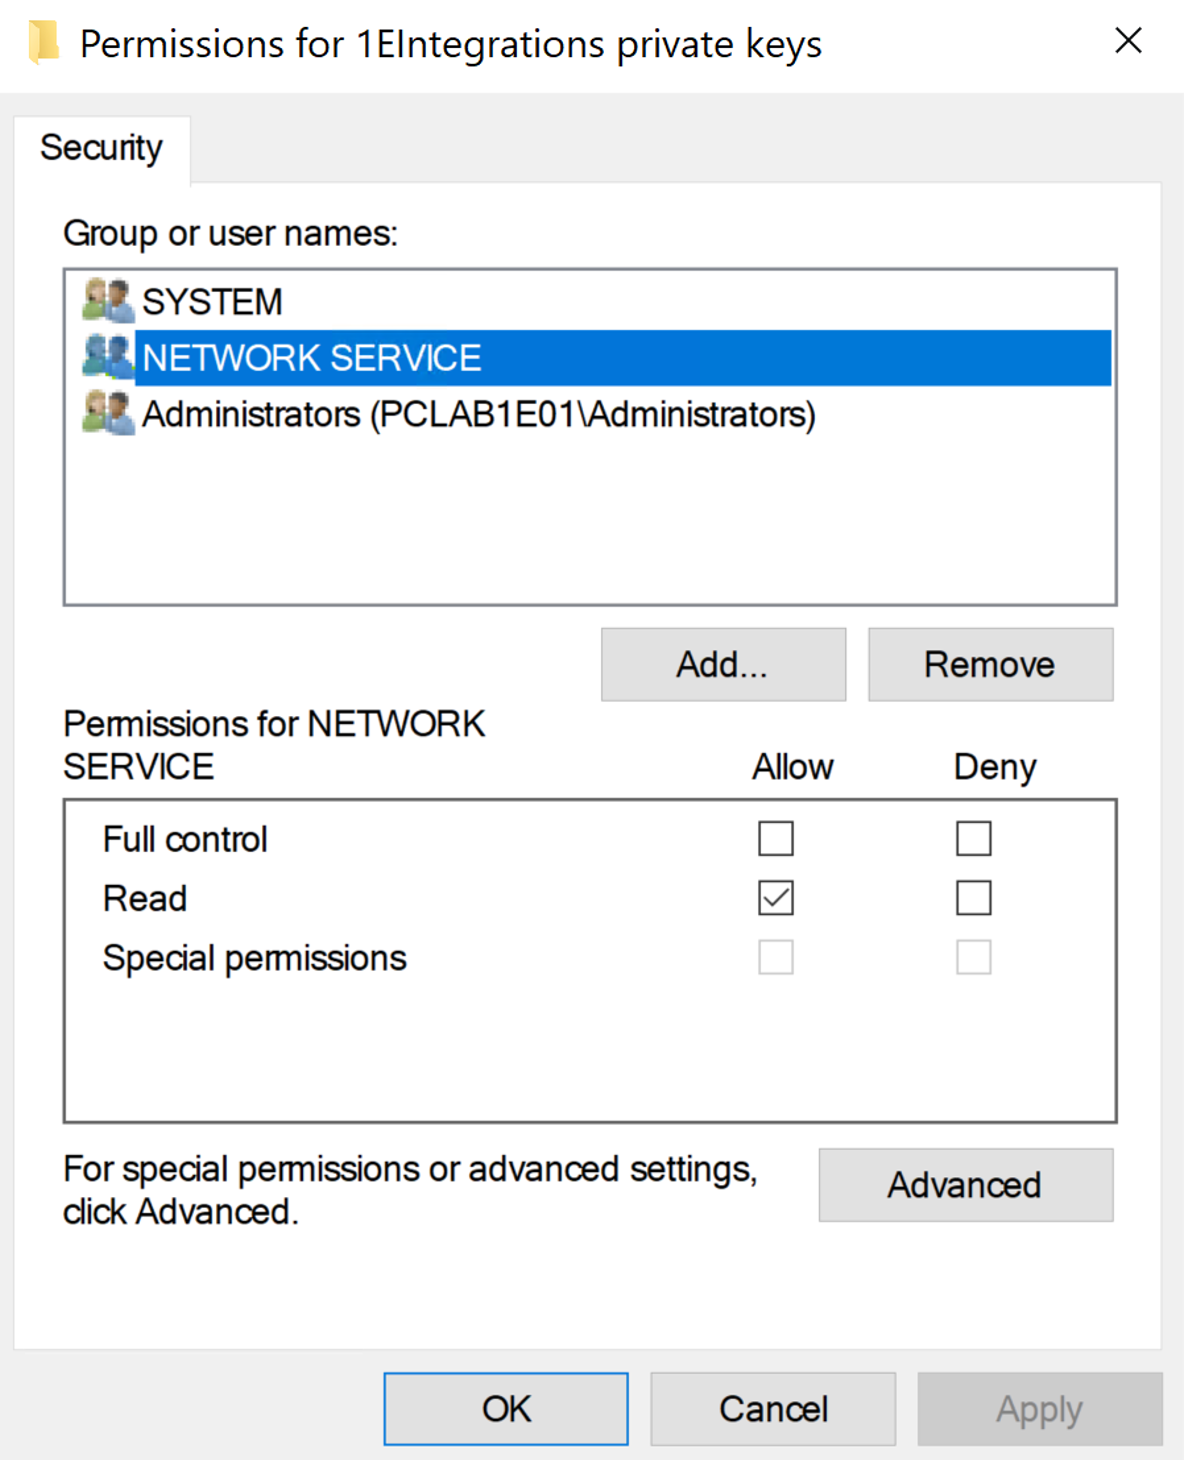
Add the Network Service account and assign it Read permissions.
From an Admin CMD prompt on the server where you install 1E Authentication, run the following command for a silent installation.
msiexec /i "<msi_path>\1EAuthenticationProxy.msi" installdir="<installation_path>" /l*vx "<logfile_path>\AuthProxy.Install.log>"
For an interactive install, follow the steps in the expandable section. The process is the same for both on-premises and SaaS implementations of 1E platform.
Run the installer
1EAuthenticationProxy.msiand click Next.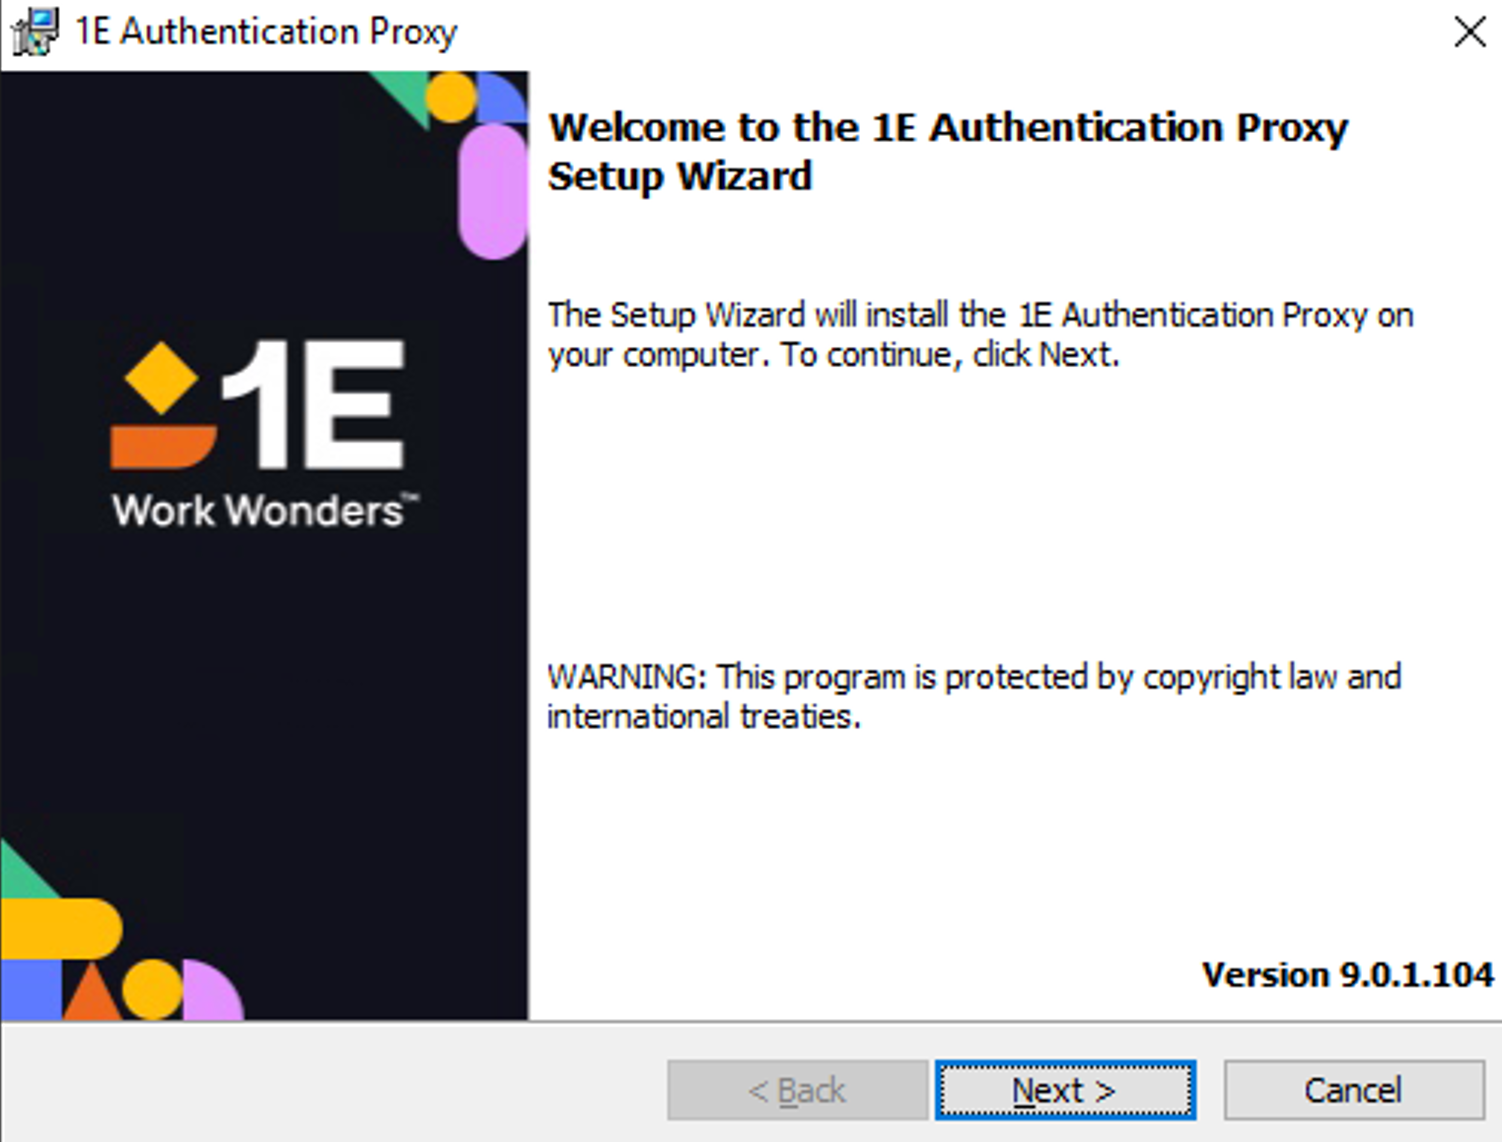
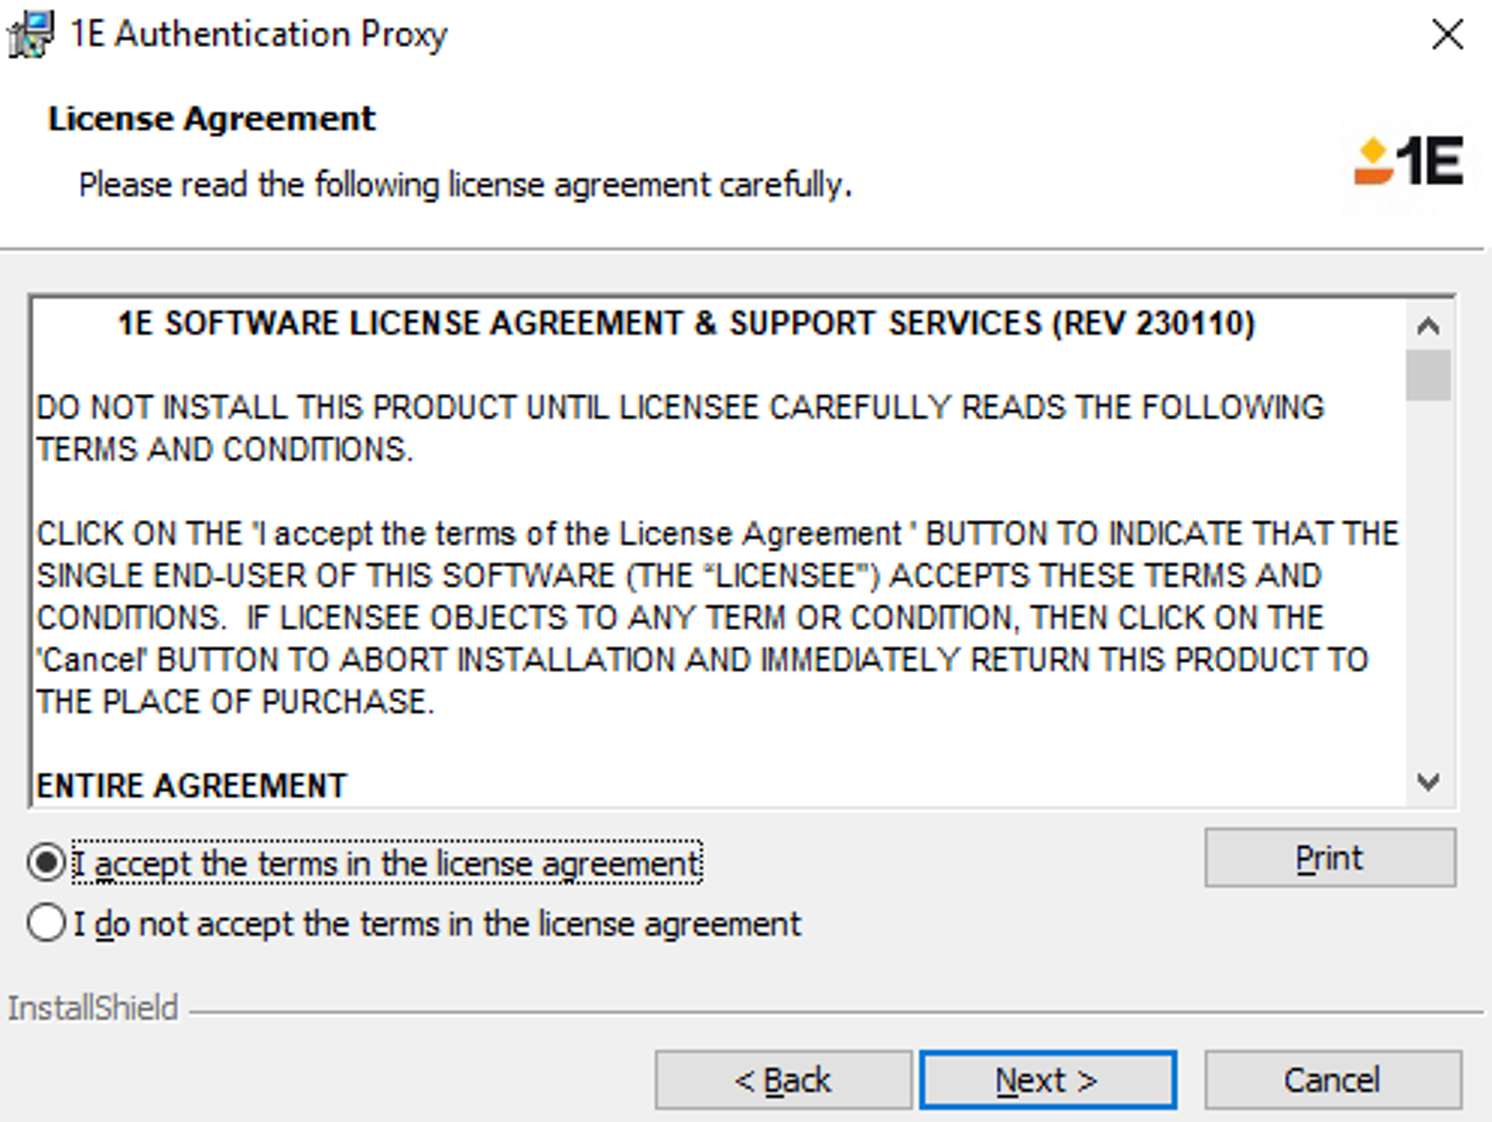
Accept the license agreement and click Next.
Select your required install folder and click Next.

Click Install.
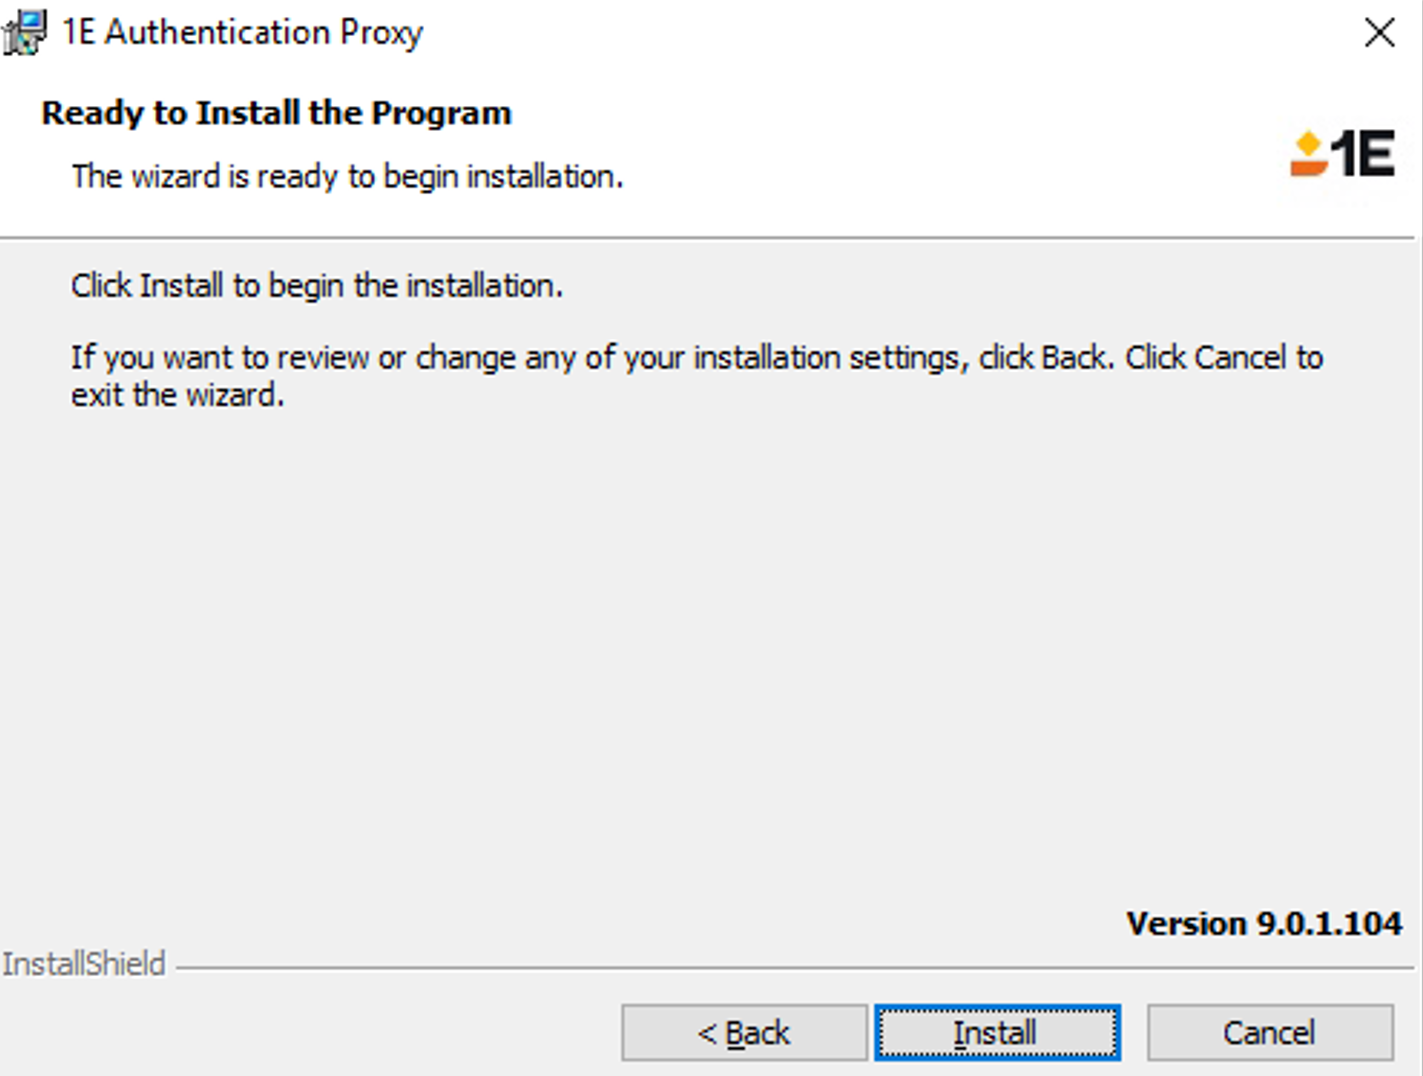
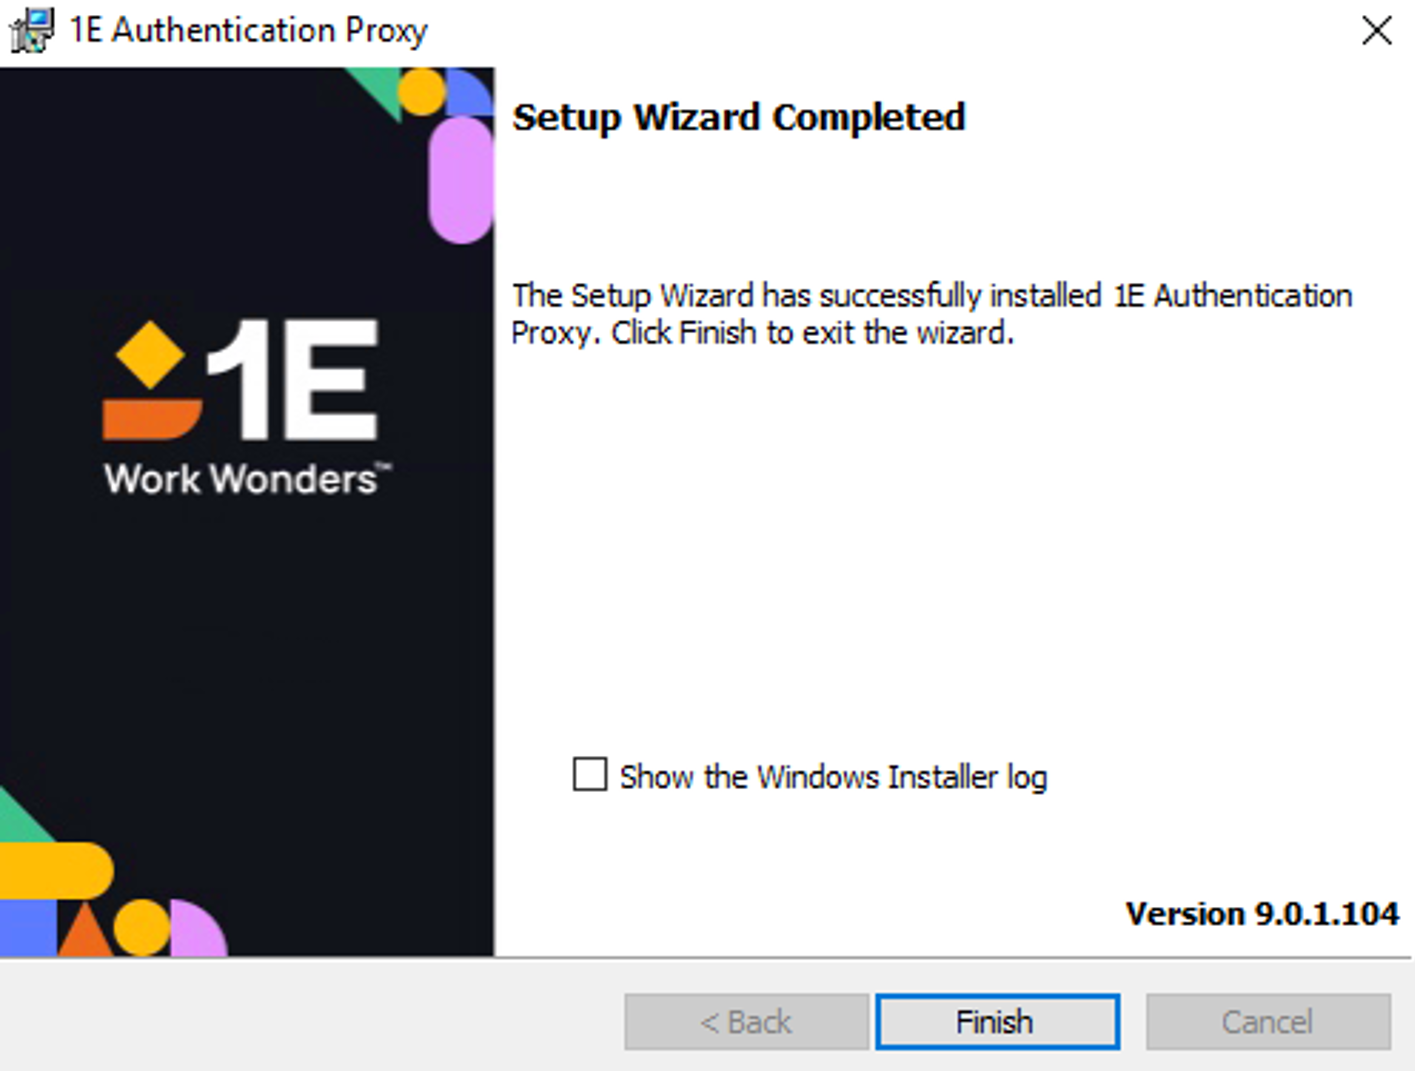
Click Finish when the install completes.
On the server browse to
http://localhost/AuthenticationProxyand you should see something similar to:
In a text editor open
<installation_path>\Web.configand in the<appsettings>section, update the value for theTachyonServerURL.Update the value for the
AuthAppIdthis is the value of the Application (client) ID for the 1E Integrations app created when you worked through the AAD - 1E Client Assertion or AAD - 1E Client Assertion.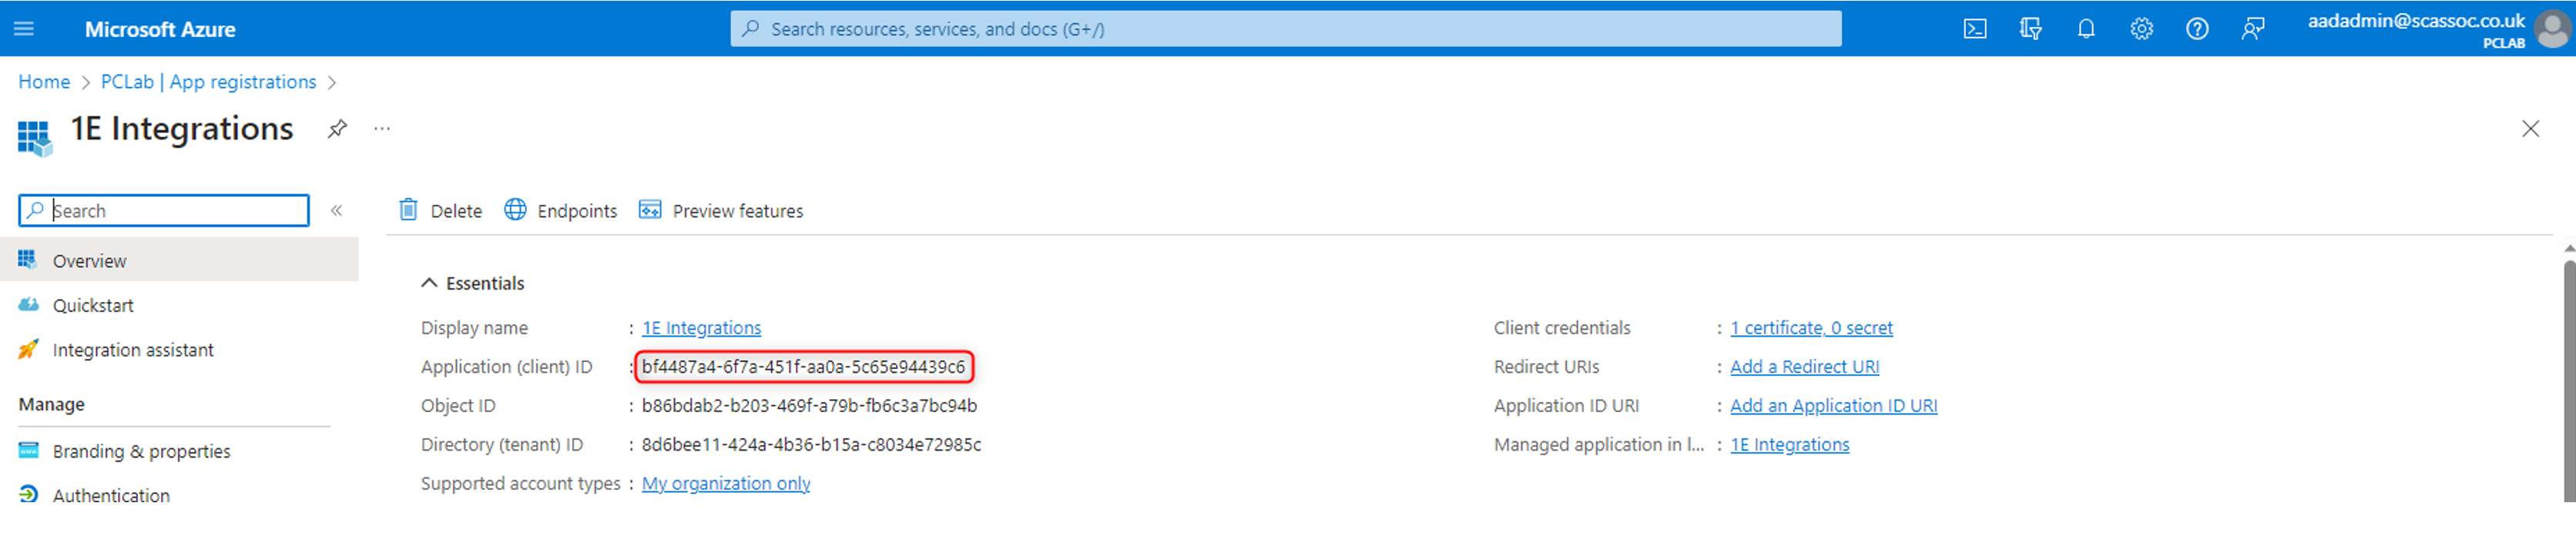
Update the value for the
AuthCertSubjectwith the name of the certificate that was added to the 1E Integrations app. This will be the 1EIntegration certificate.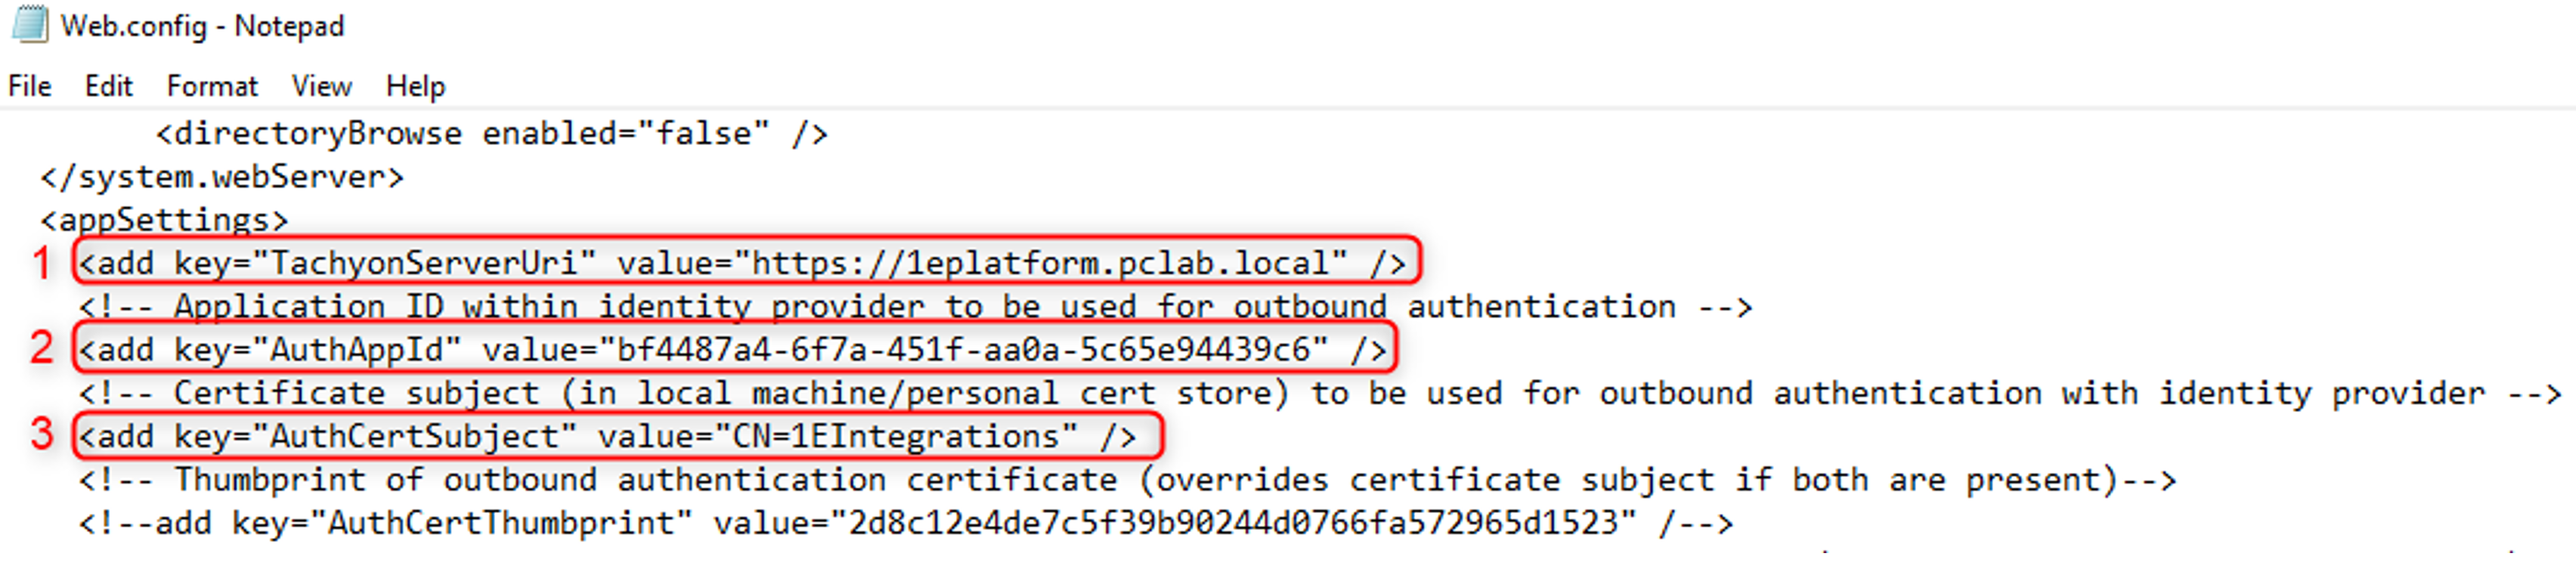
In the
<PrincipalMappings>section, you need to add one line for each user that is going to use the 1E Authentication Proxy in the format shown below, and then save the modifiedweb.configfile.<PrincipalMapping In="domain\user" Out="user@fqdn"

Open IIS Manager and with the Default Web Site selected, click on Bindings…

Add an https binding using the relevant Web server certificate.
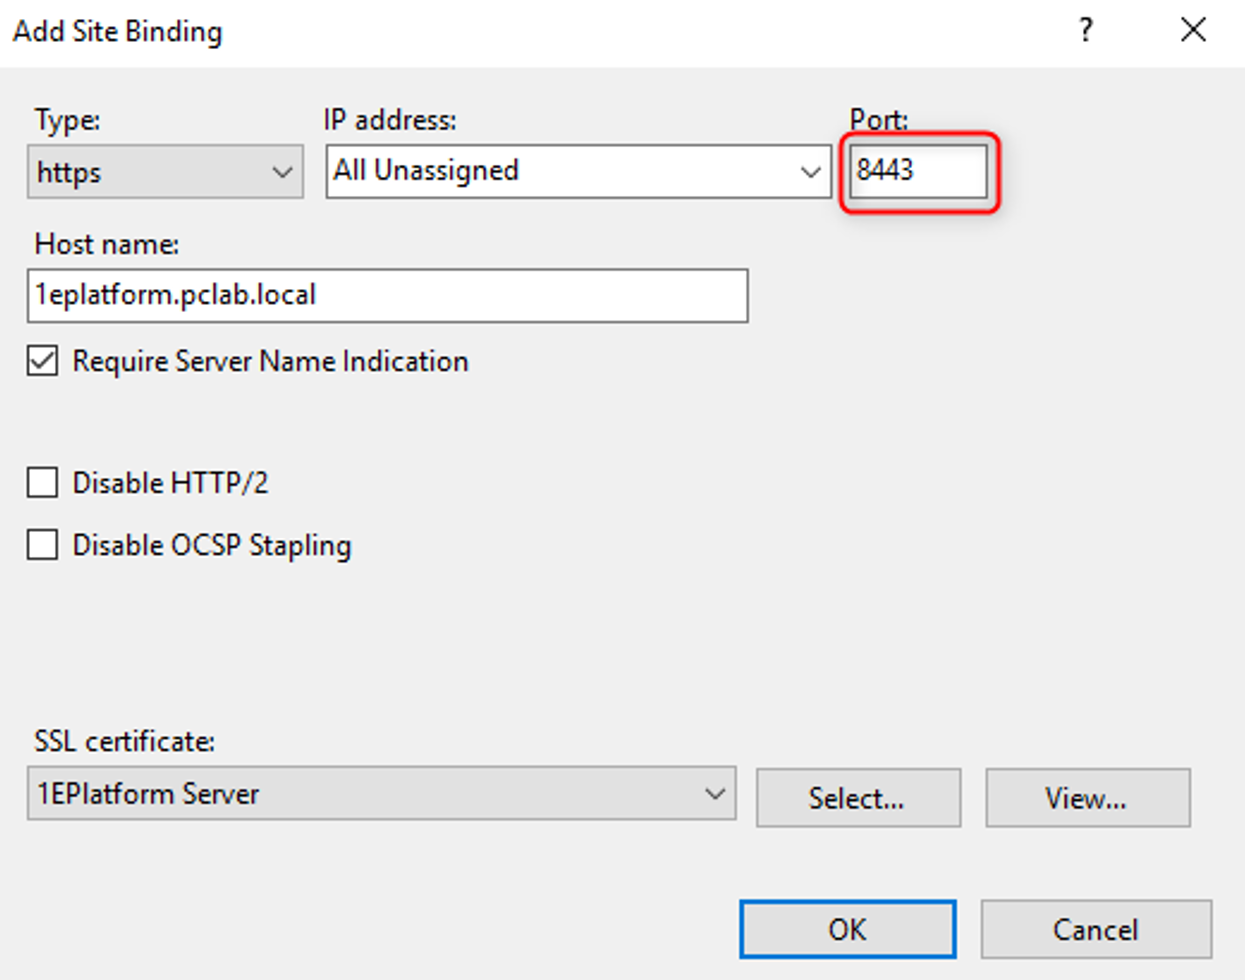
Note
If you have an on-premises installation of 1E and are installing your Authentication proxy on it, then you will need to use a port other than 443 as this will be used by the 1E Portal.
You also may need to open the port you configured the https binding to use in any firewalls.
Open a web browser and navigate to
http://<dns alias>of the auth proxy>:<port>/AuthenticationProxyyou should see something similar to the following:
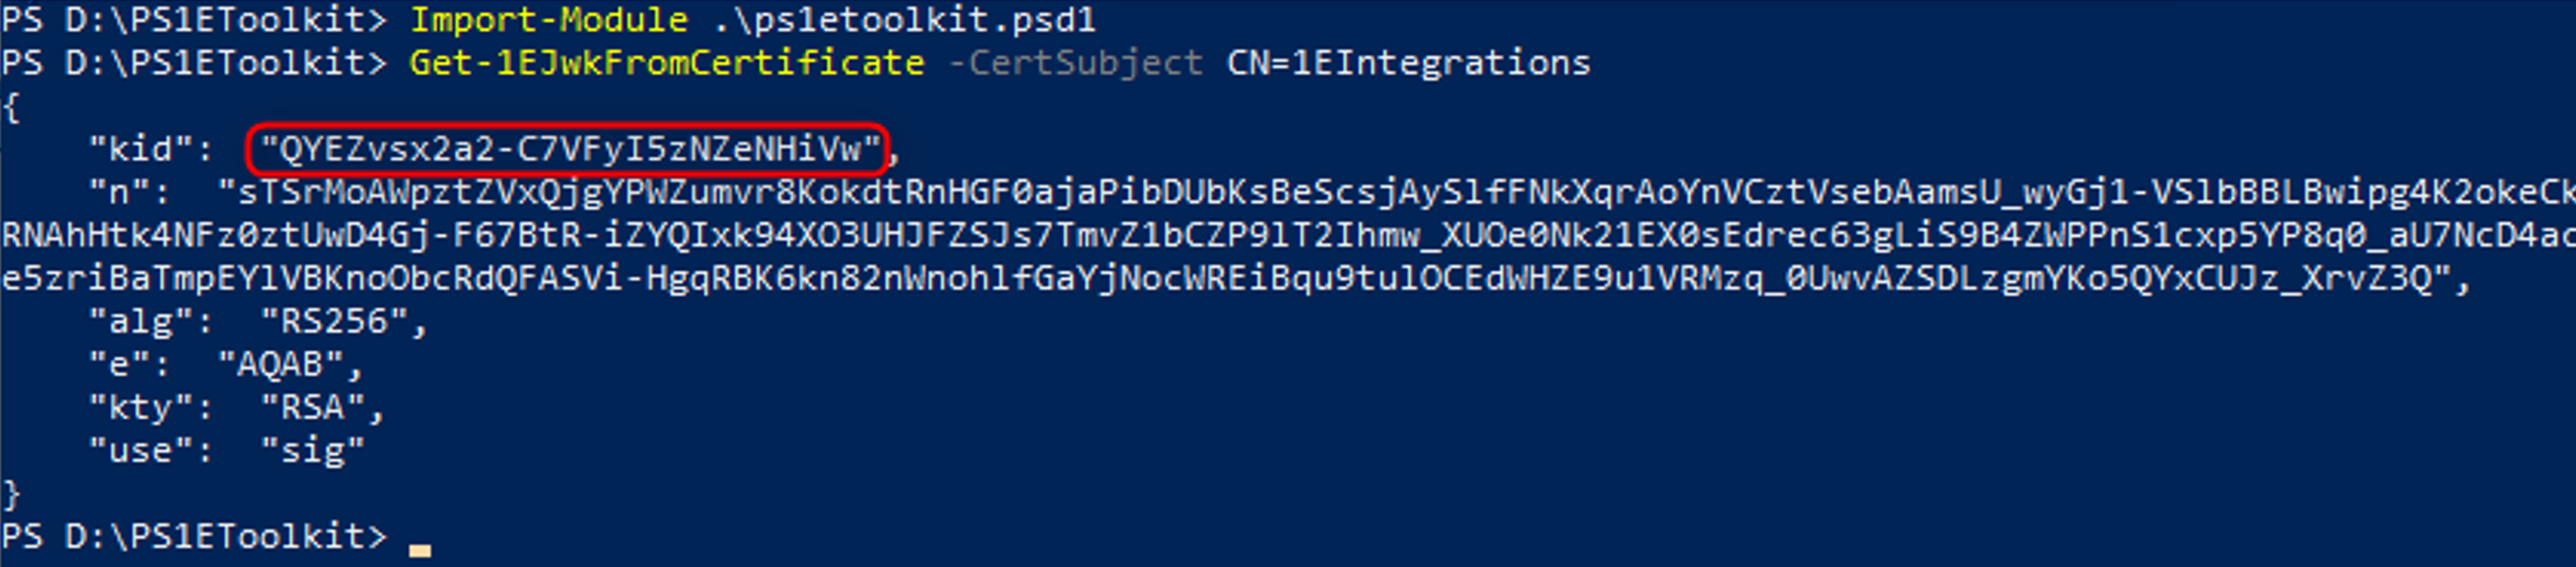
Open an Admin PowerShell CMD prompt and enter:
Import-Module .\ps1etookit.psd1
To get the kid of the 1EIntegration certificate used earlier, enter:
Get-1EJwkFromCertificate -CertSubject CN=1EIntegrations
At the PowerShell prompt enter.
Set-1EServer <1Eplatformserver>

A browser window will open, enter your credentials and click Next.
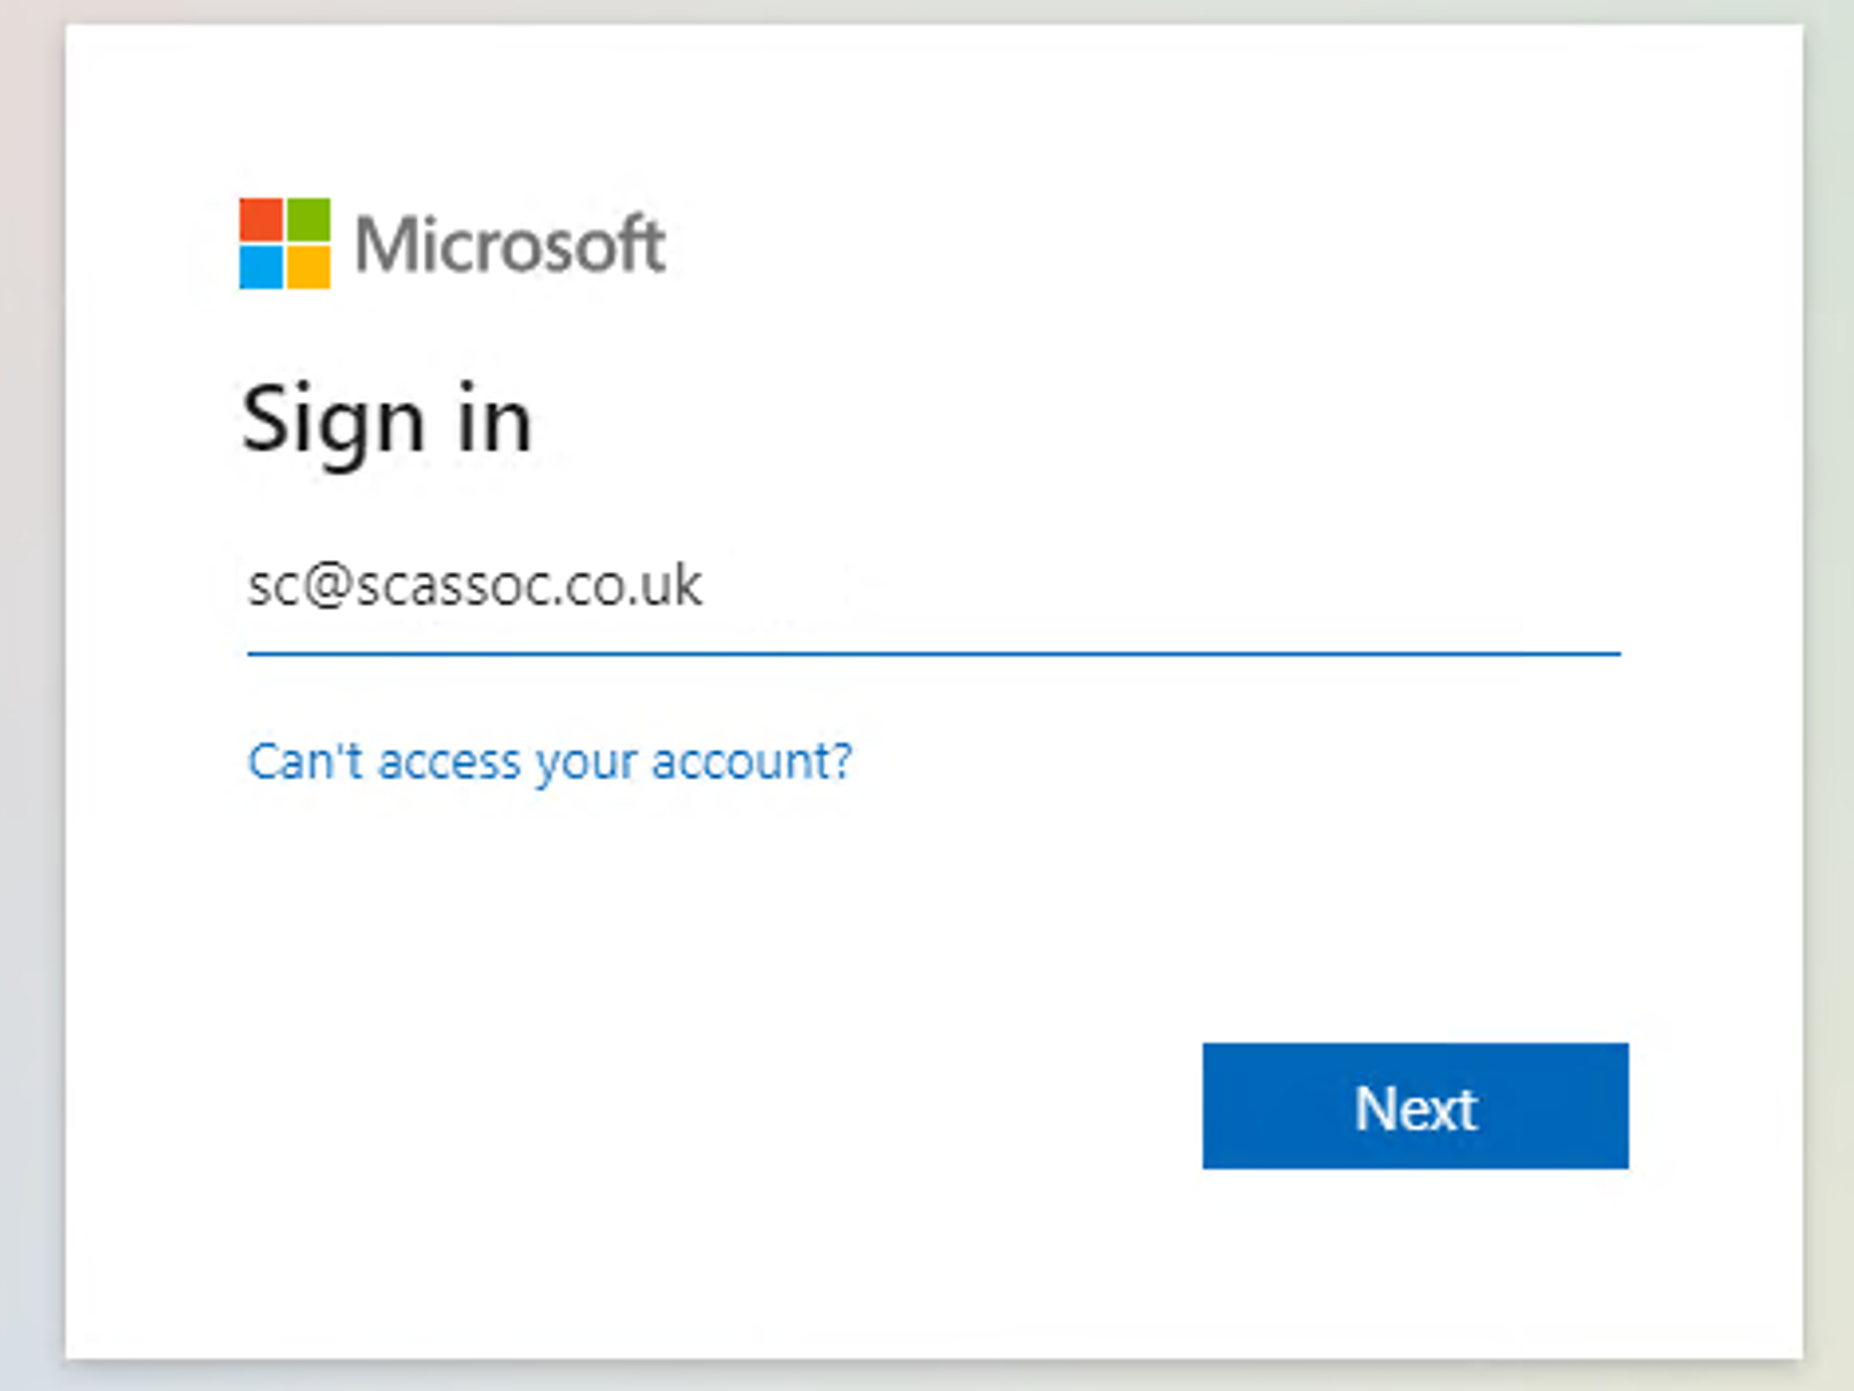
Once validated you will receive confirmation that you have been authenticated and you can return to the PowerShell prompt.

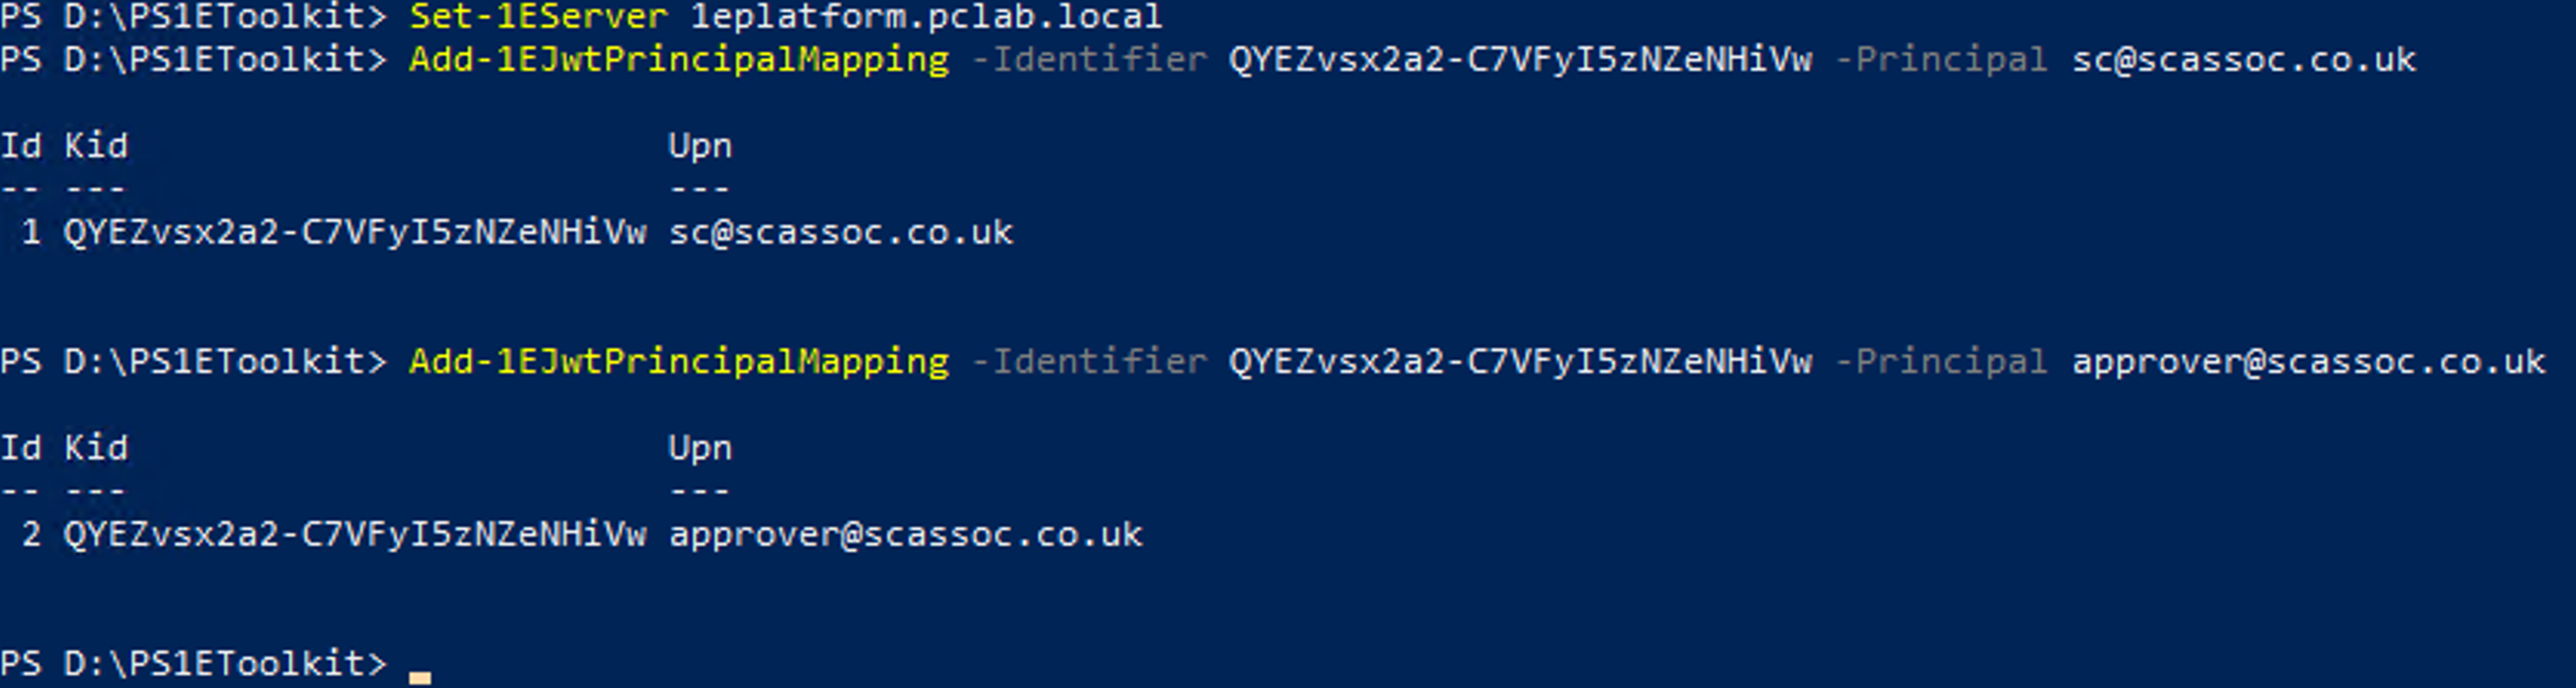
For each user defined in the
<PrincipalMappings>section of theweb.configfile added earlier, enter the following command:Add-1EJwtPrincipalMapping – Identifier <kid> -Principal <UPN>
On-premises installations only - using a text editor, open
C:\ProgramData\1E\Tachyon\tenantconfig.json and add the value of the Application (client) ID for the 1E Integrations app created earlier to theClientAssertionAppIdentry, making sure it is within double quotes.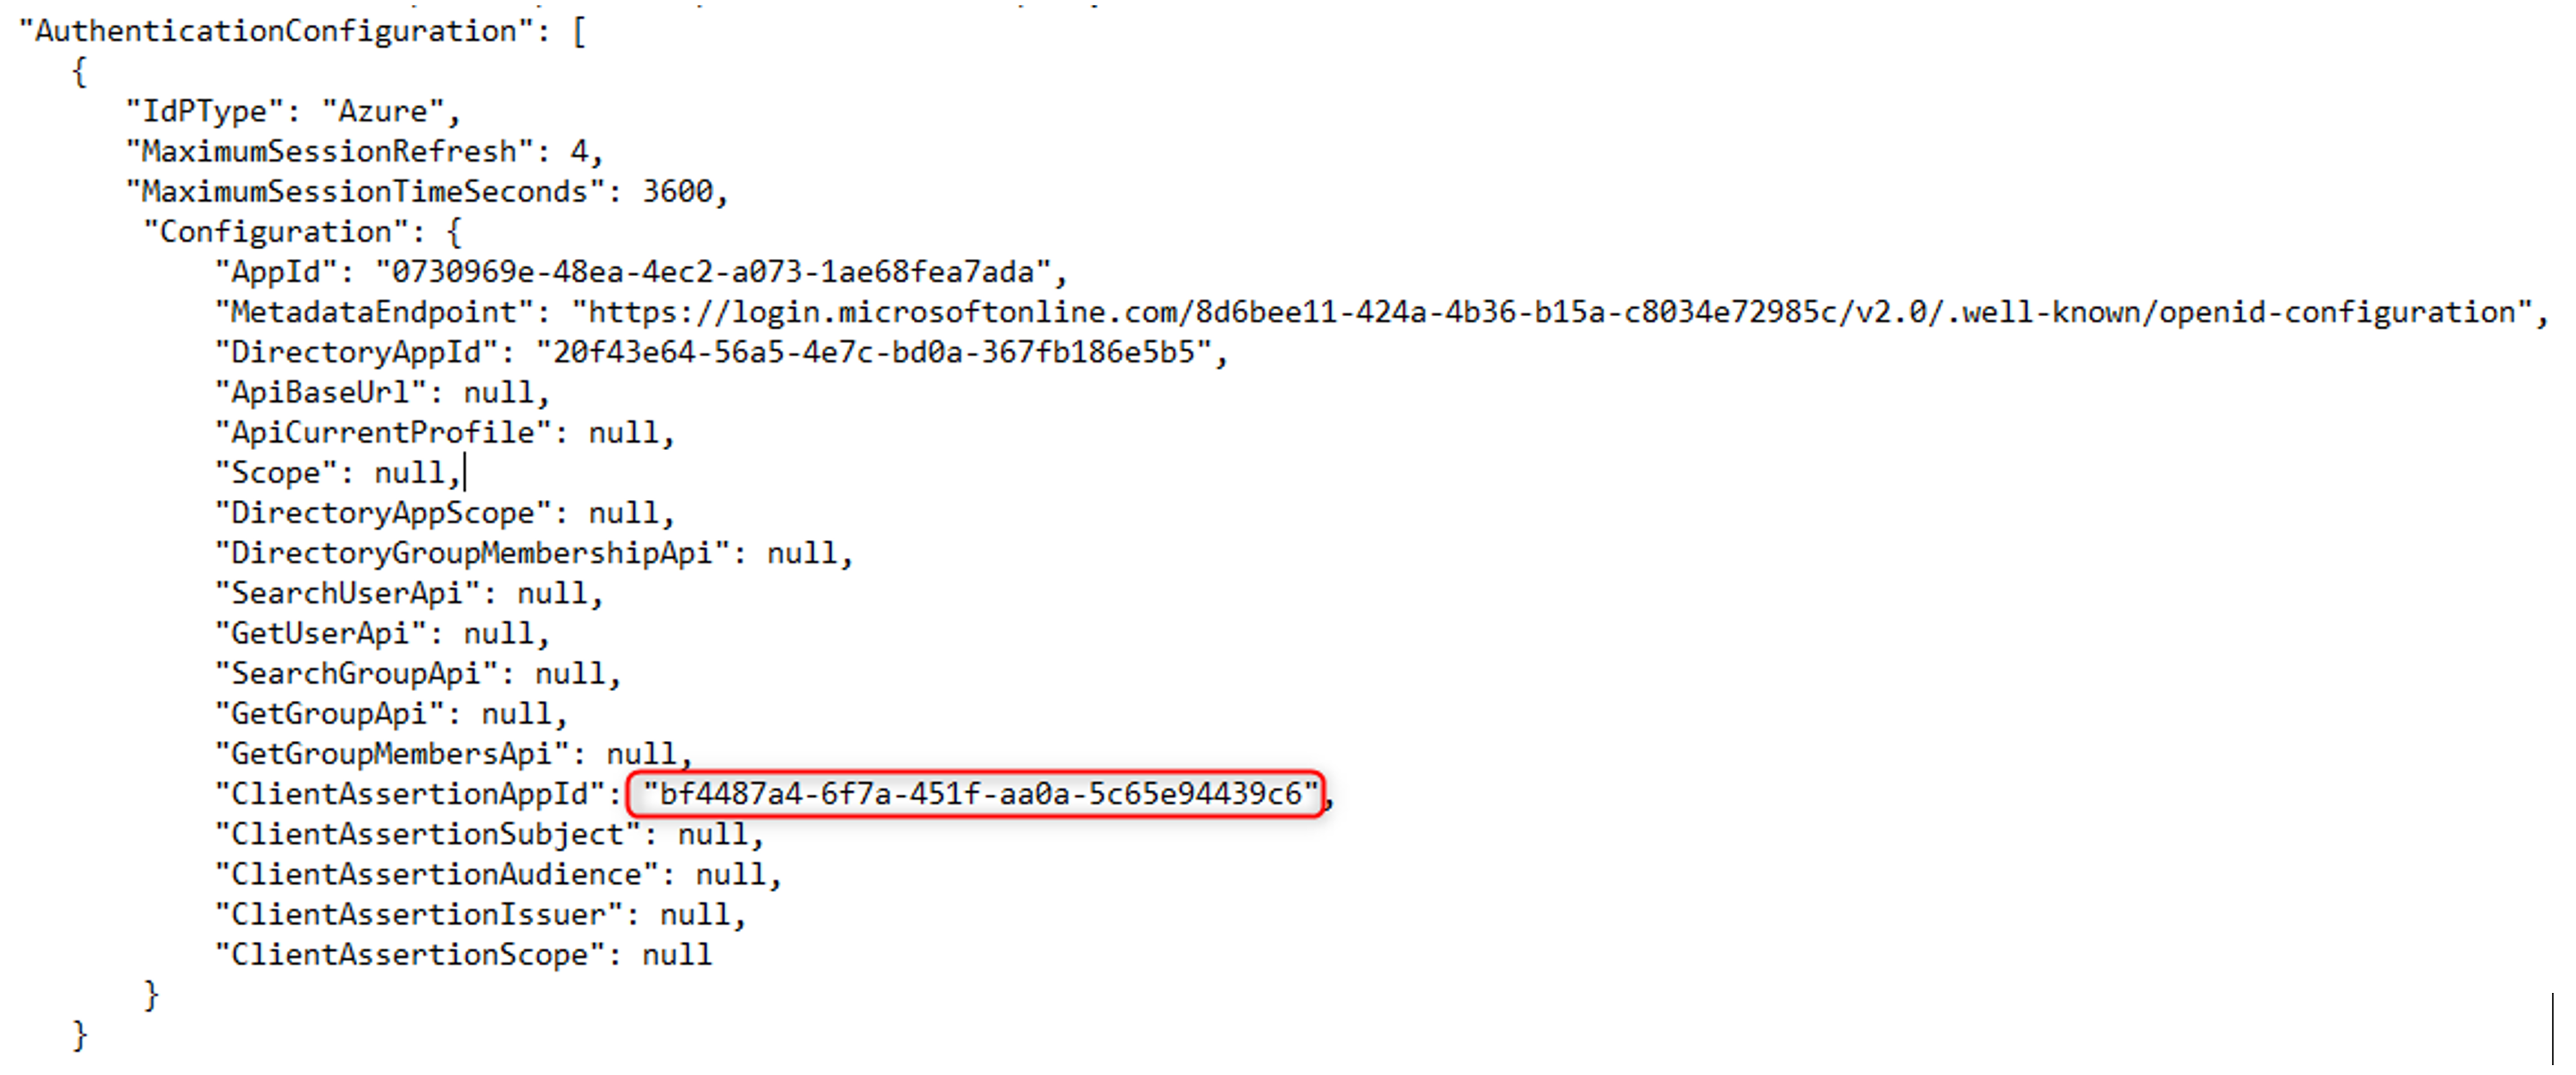
Note
For Okta this is the value of the Client ID for the
1E Integrationsapp.Save the file and then run IISRESET from and Admin CMD prompt for the changes to take effect.
SaaS only - if not already done so, provide 1E with this Application ID (AAD) or Client ID (Okta).
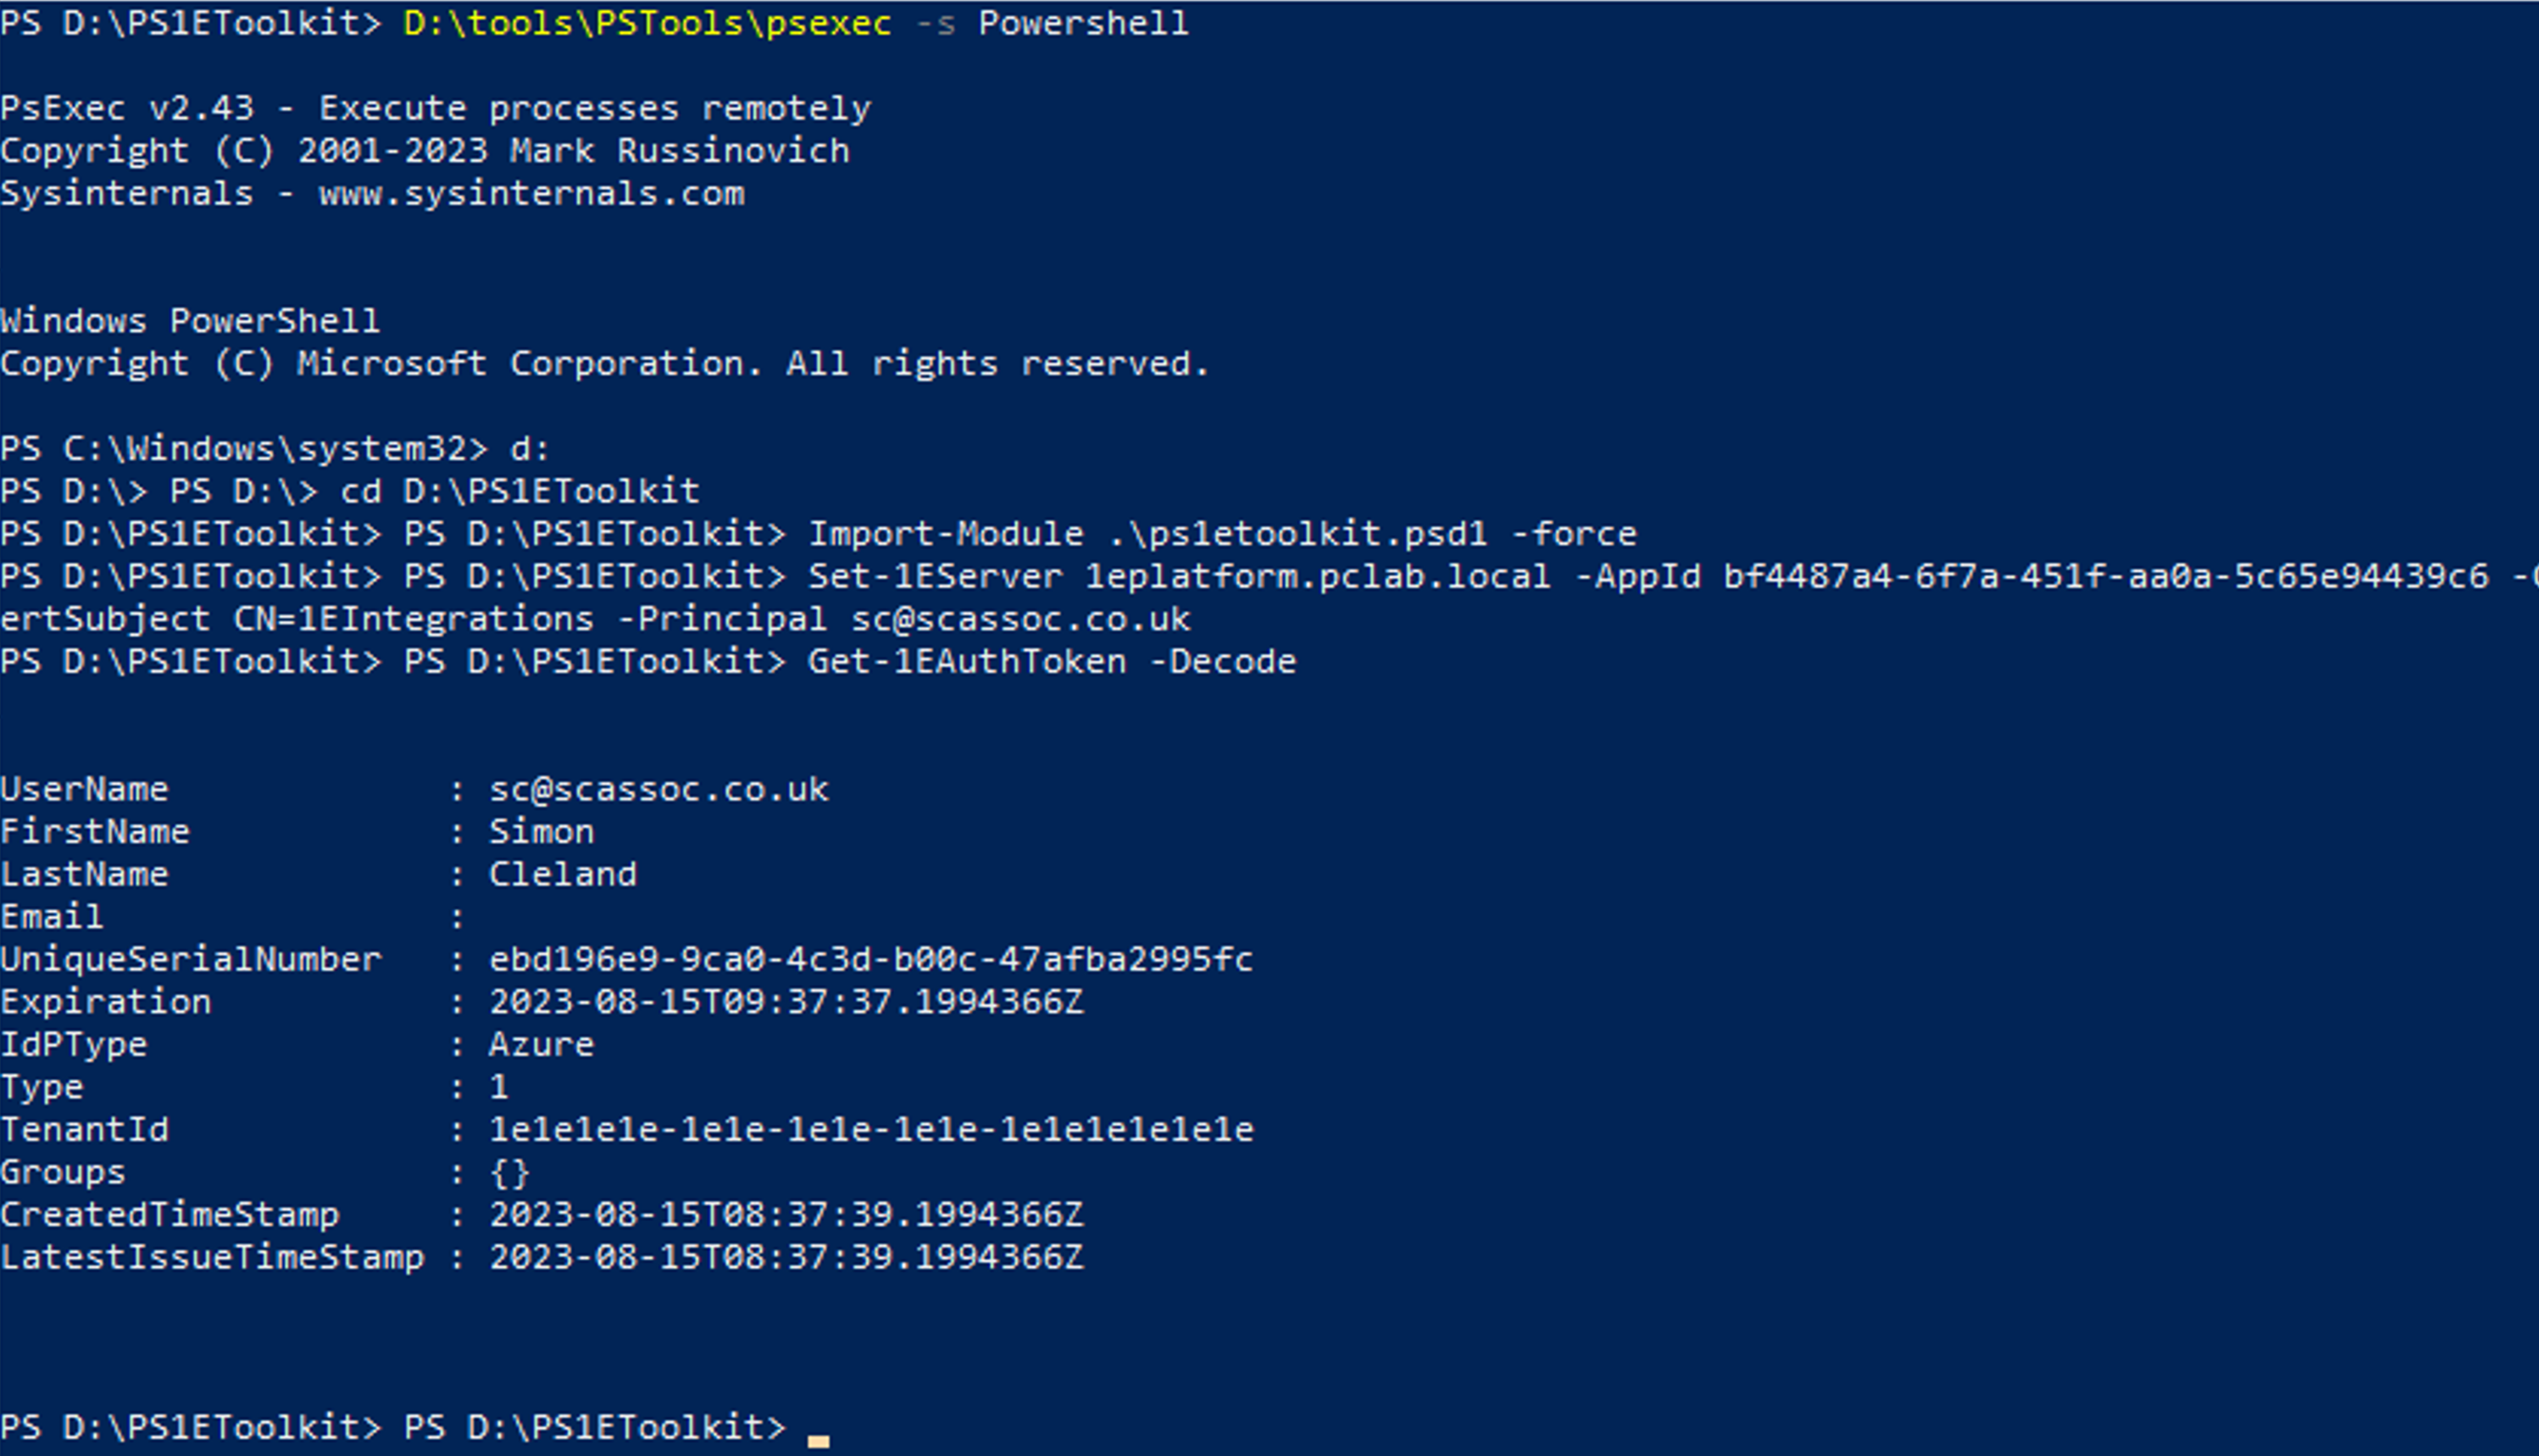
To validate everything is running correctly, from an Admin CMD prompt use PSEXEC to open PowerShell and enter the following commands:
Import-Module
.\ps1etoolkit.psd1 -force

Set-1EServer
<server DNS Alias> -AppId <Application ID> -CertSubject
CN=<Certificate subject name> -Principal <UPN of the user>

Get-1EAuthToken
-Decode
This will return the 1E internal authentication token of the mapped user confirming that the authentication proxy is configured correctly.