Configuring ASP.NET for Windows Server 2012 R2
To configure ASP.NET (must be ASP.NET 4.5 for FIPS compliance) for Windows Server 2012 R2:
Start Server Manager.
From the Manage menu (top-right menu bar), select Add Roles and Features.
On the Before you begin, page click Next.
On the Installation Type page, ensure Role-based or feature-based installation is selected and click Next.
On the Server Selection page, ensure the local server is selected and click Next.
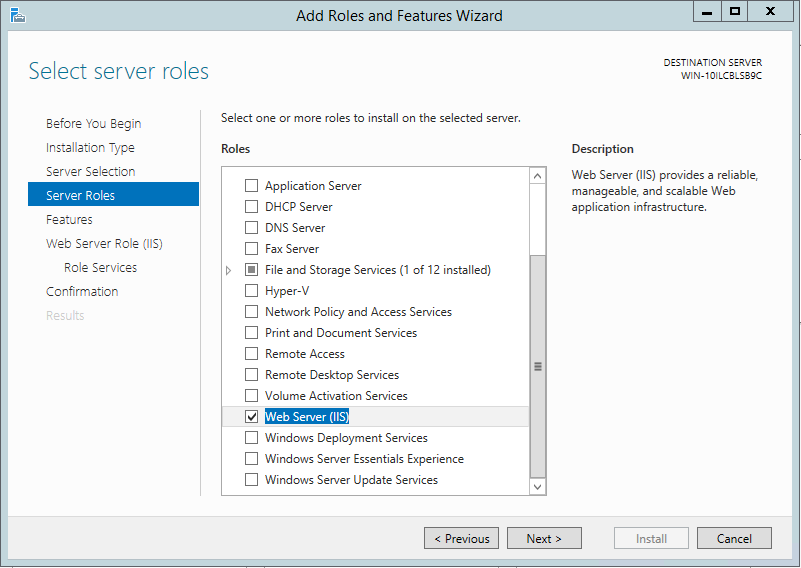
On the Server Roles page, check the Web Server (IIS) server role.
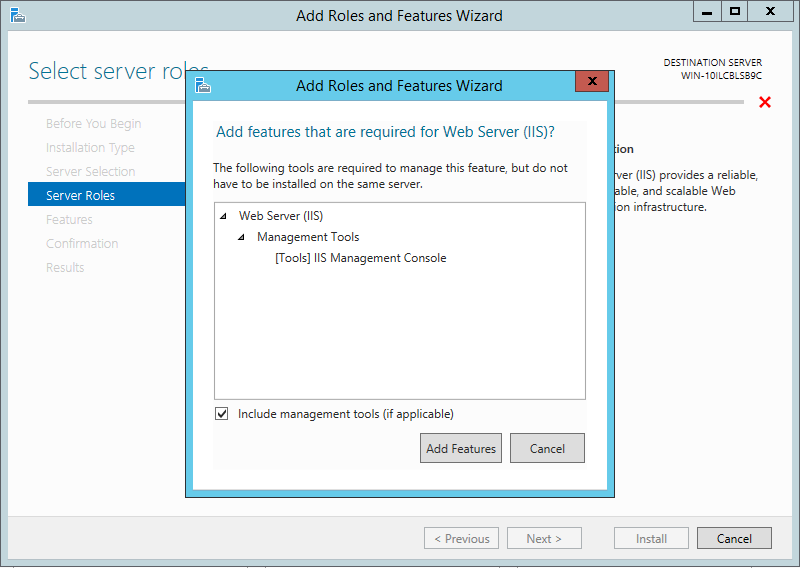
In the dialog, click Add Features to add the features required for Web Server (IIS).
The Web Server Role (IIS) page is added after the Web Server (IIS) is checked on the Server Roles page.
On the Role Services page under Web Server Role (IIS), expand the Security node and check Windows Authentication.
Expand Application Development and check the ASP.NET 4.5 node (this also checks a number of other options, such as ISAPI Extensions and ISAPI Filters).
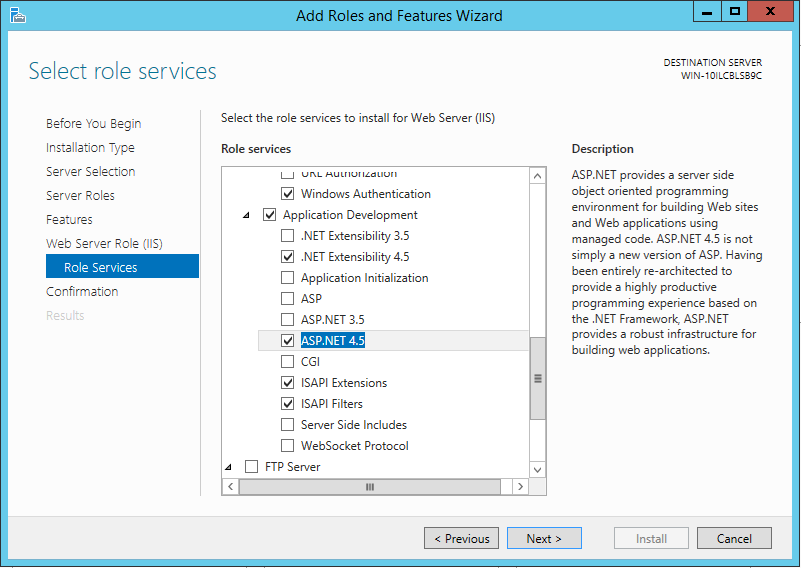
When you select ASP.NET 4.5 you will be prompted to add features related to that role. Click Add Features in the dialog to add all the features.

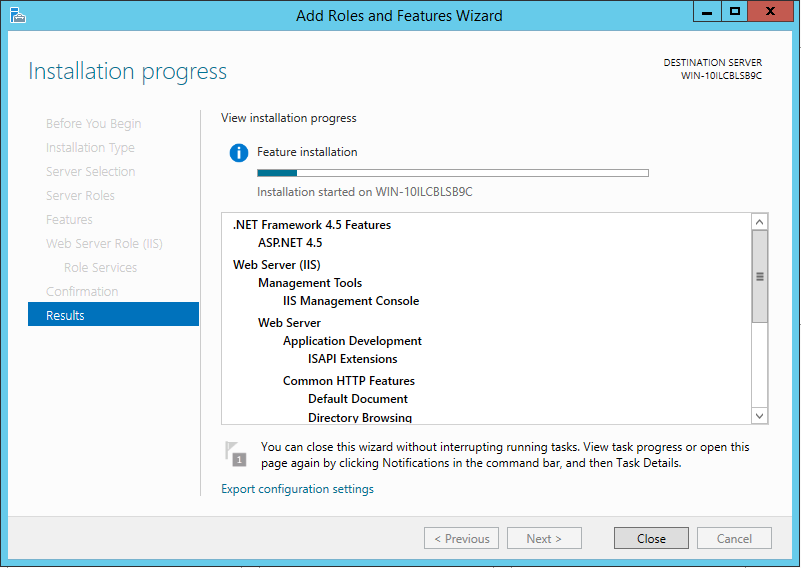
After you have made the necessary changes, click Install to begin the role installation. Installation progress is displayed while the components are being installed.