Managing processors
Note
From 1E Catalog 1.2.100 and later Processor identification and normalization has greater accuracy and coverage.
To achieve this we removed the current dependency on Processor frequency during normalization. We did this because processors can run at a variety of speeds, so using the processor frequency for normalization does not help to identify processor type. For example, you could have up to 10 different speeds for a single processor because an OS typically reports the speed of a processor as it’s currently running.
Now, one of the following criteria has to match during normalization:
SourceFamily and SourceModel
SourceName.
This change makes finding matches more successful because there's no need to evaluate every source field.
In the following example, the two source entries will be matched to the same processor because the SourceName values are the same:
SourceVendor | SourceFamily | SourceName | SourceModel | SourceFrequency | SourceSocket |
|---|---|---|---|---|---|
GenuineIntel | Intel Xeon | Intel(R) Xeon(R) CPU E5-2637 v4 @ 3.50GHz | NULL | 3500 | NULL |
GenuineIntel | NULL | Intel(R) Xeon(R) CPU E5-2637 v4 @ 3.50GHz | NULL | NULL | NULL |
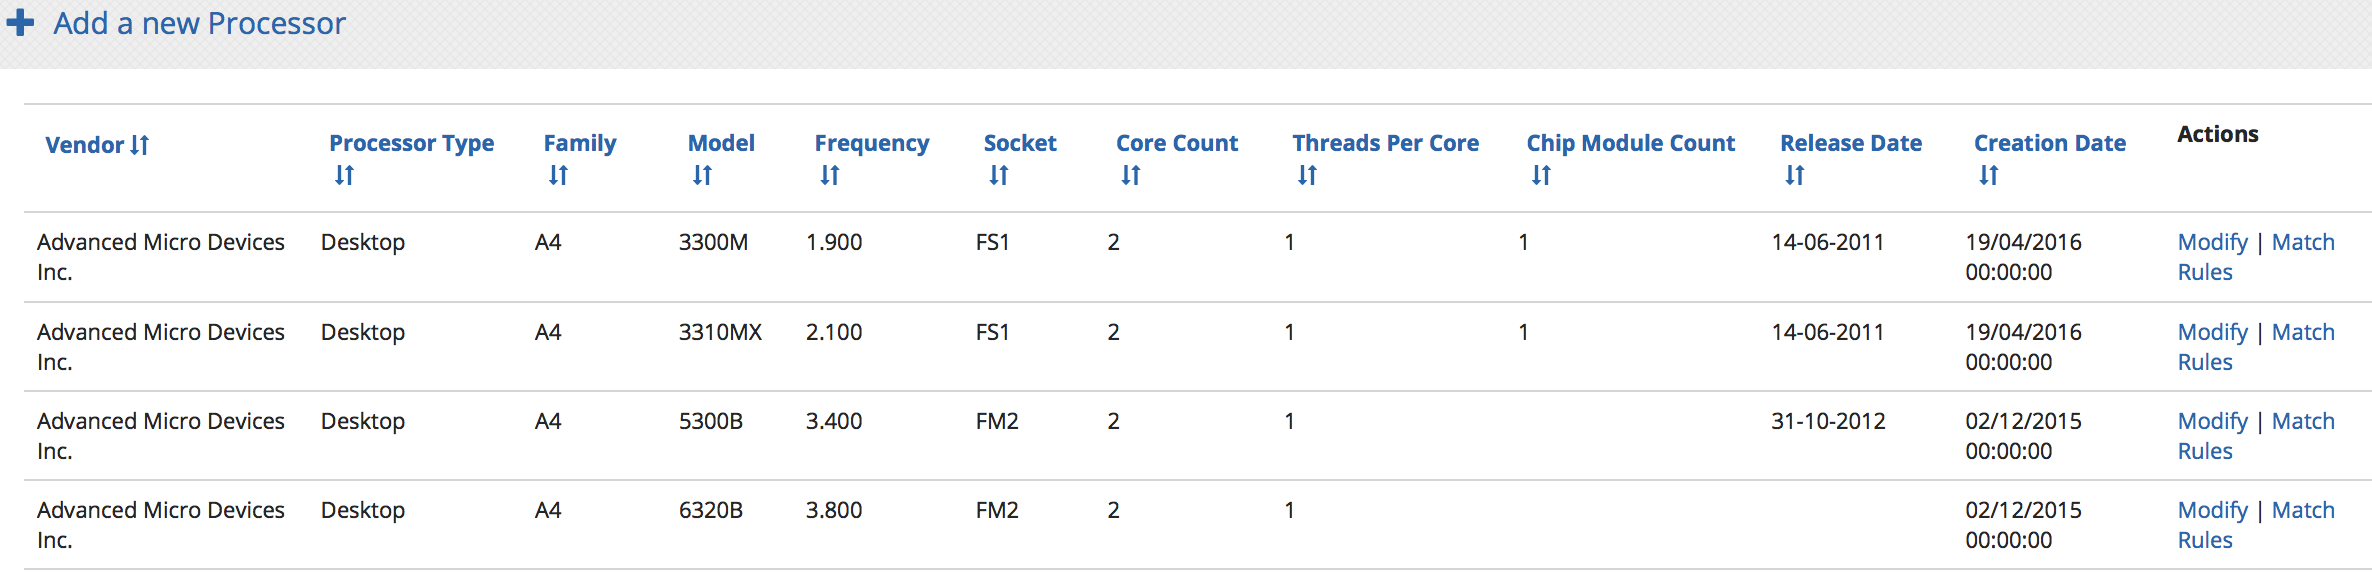
To manage processors:
Click the Processors link - top right of the screen.
On the Processor screen, click Add new processor.
On the Add a new Processor screen - fields marked with a red asterisk are mandatory:
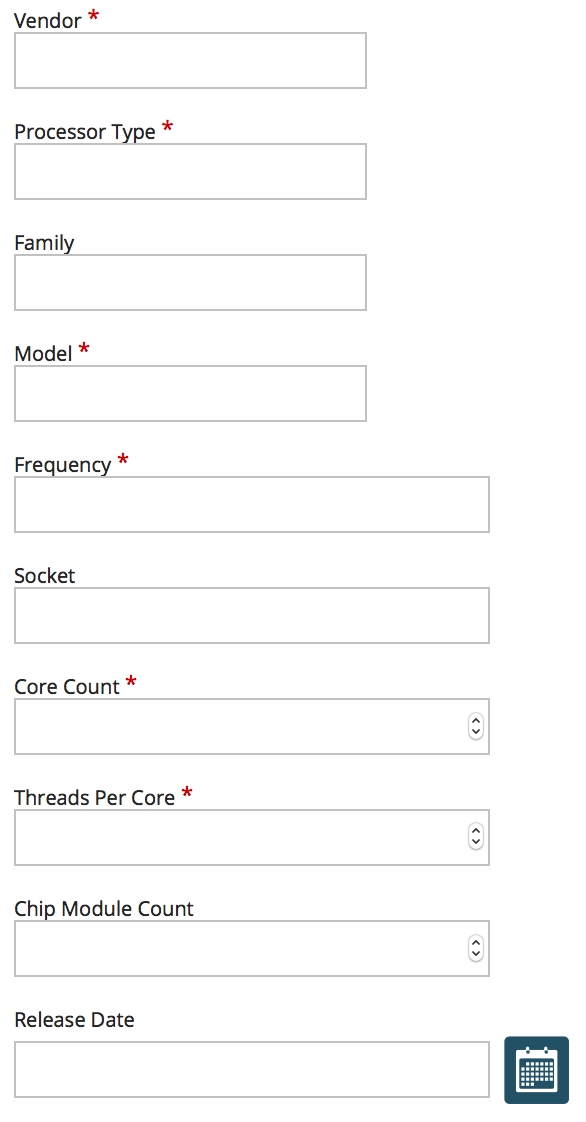
Vendor - enter the name of the vendor
Processor Type - enter the type of processor such as desktop, server
Family - enter the family for the processor such as A4, Athlon XP, Atom, Corei5, Corei7, Pentium, Xeon
Model - enter the model of the processor such as 260M, T2500, Z670
Frequency - enter the processor frequency in GHz such as 0.600, 2.500
Socket - enter the model of the socket supported by the processor such as FM1, FCBGA676
Core Count - enter the number of cores for the processor such as 1, 2, 4, 8
Threads Per Core - enter the threads for the processor core such as 1, 2
Chip Module Count - enter the count for it such as 1
Release Date - click the date icon and choose a date.
Click Save.