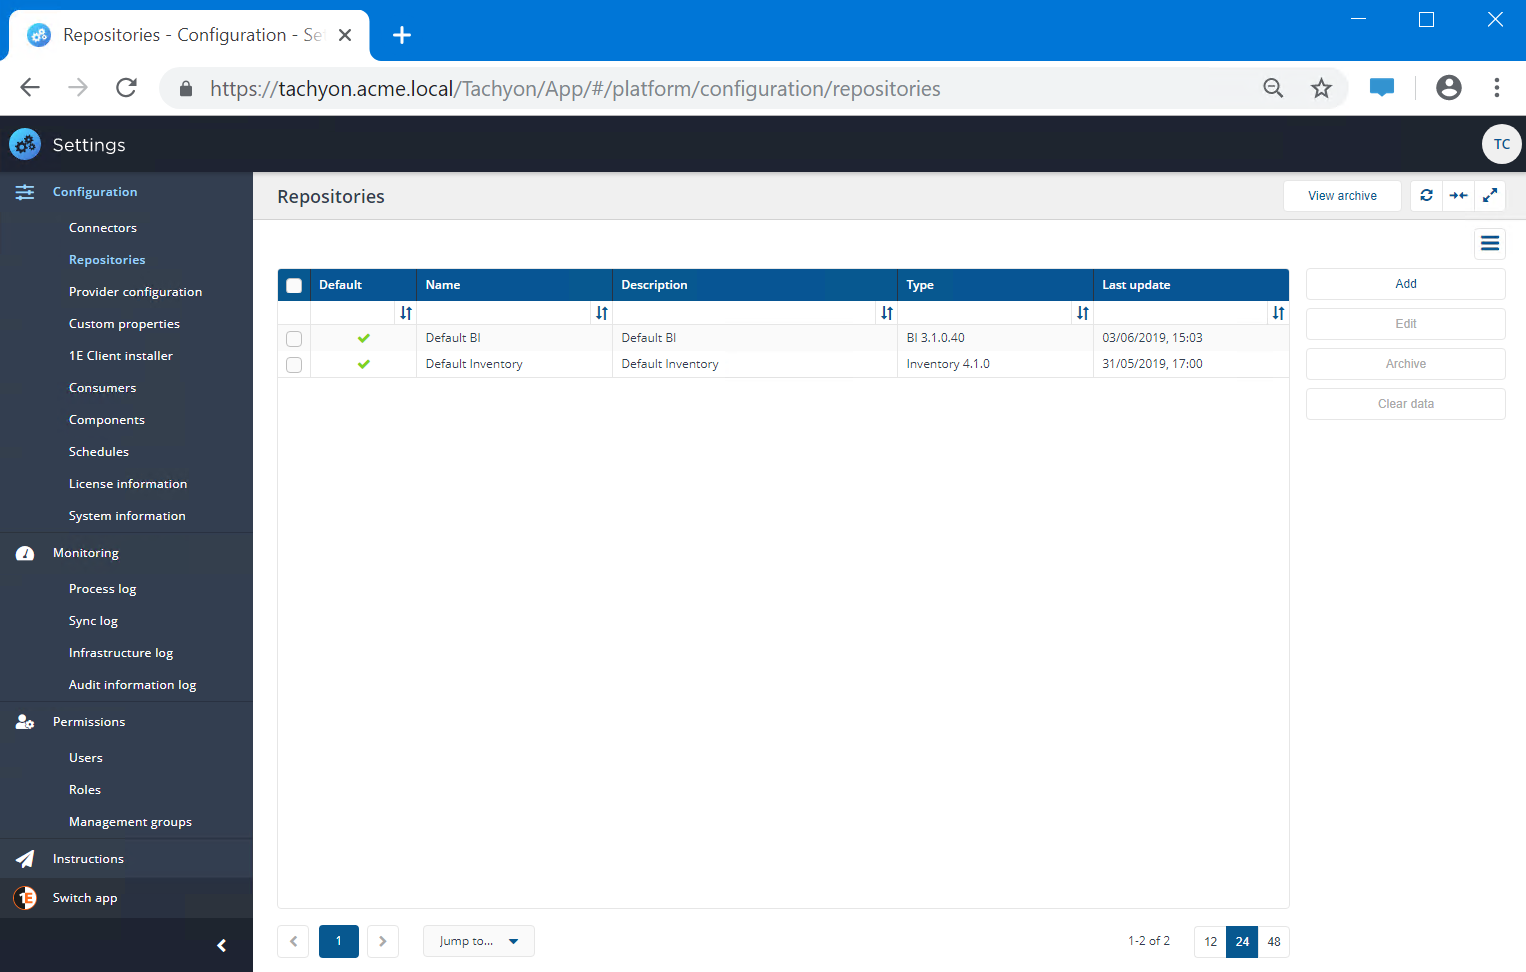
Repositories page
Repositories are used by applications to process and store information. Tachyon provides an Inventory repository out-of-the-box. Some consumer applications provide their own types of repositories.
Repository types | Used by | Used for |
|---|---|---|
Application Migration |
| Migration rules. |
Business Intelligence |
| Patch data for Patch Success. |
Compliance |
| Compliance data for AppClarity. Reclaim policies and history. |
Entitlement |
| Entitlements for AppClarity. |
Inventory |
| Hardware and software inventory for devices. Optionally stores associations between Catalog products and Configuration Manager packages and applications. |
A default repository is provided for each type of repository. You cannot delete a repository but you can change its details, clear its data or archive it. You can add further repositories for each type.
Repositories are populated using Connectors page which are executed either manually or on schedule, and data is then processed by applications. In some cases you can manually enter data.
Adding a new repository
Go to Settings → Configuration → Repositories
Adding a new repository
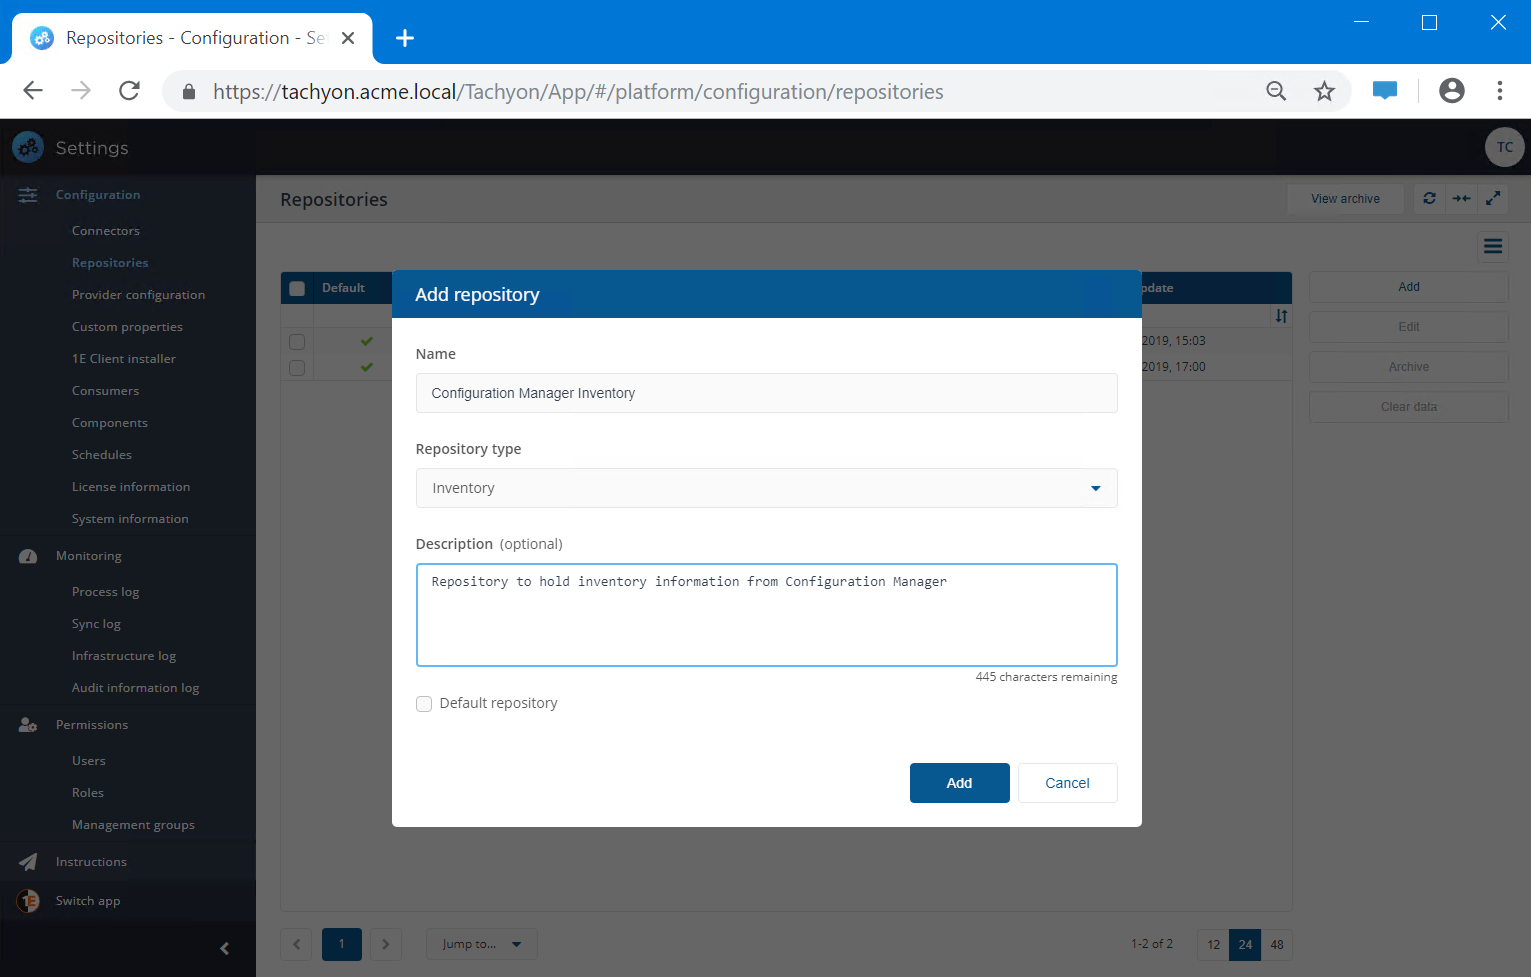
Click on the Add button.
In the Add repository popup enter the details for the new repository.
Enter a suitable Name for the repository this must not match any existing repository.
Select the Repository type.
Enter a suitable description for the new repository.
If you want the new repository to be the default for the selected Repository type then check the Default repository checkbox, otherwise leave this unchecked.
When all the settings have been made click Add to create the repository.
Tip
You should use a naming convention for repository names:
<scope> <repository type>
Naming with scope first makes it easier to know which repository you are using. The name of the repository you are currently using is visible in a drop-down list at the top of pages in the user interface.
Including the repository type in the name helps when creating an action or schedule.
Changing the name of a repository
Select a repository and click Edit
In the Edit repository popup change the Name
Change the description if required.
If you want the repository to be the default for the selected Repository type then check the Default repository checkbox, otherwise leave this unchecked.
Click Save.
Setting the default repository
Select a repository, for example Configuration Manager Inventory and click Edit.
In the Edit repository popup check the Default repository checkbox and click Save.
Confirm the repository is listed as Default for its repository Type.
From this point on all pages that show information from an inventory repository would show the Configuration Manager Inventory by default. You can still change the repository for a particular page by clicking on the repository selector at the top-right of the page.
If you no longer wish a repository to be the default, then you must choose another repository instead.
Tip
Repositories are useful when you want to segregate different types of data. For example, you could have one inventory repository for Configuration Manager inventory data, and another one for BigFix data. Alternatively, you can have connectors to different inventory sources pushing data into one repository. Any Management Groups that you create will span all the repositories you have.
Note
Once you've created a new repository you cannot delete it. You can only change its details, clear its data or archive it.
The name of a repository must be unique, but can be changed.
Setting a repository as the default repository means it is used as the default on certain screens.
Clearing data from a repository
This will reset all the data for a particular repository, which resets all the synced data imported by all/any of the connectors synced for that repository.
Note
We recommend you only use Clear Data under the following circumstances:
If the data in a repository is no longer needed you can clear its data to free up space in the database.
If you created connectors and associated them with the wrong repository and ran a synchronization action which returned inaccurate data
If the data source was corrupted and the synchronization returned unreliable data
If the synchronization failed after a partial completion
Warning
When you run Clear Data, scheduled or manual synchronization actions cannot take place. If there are existing background synchronization actions running, you will be notified when you attempt to reset your data.
Once you start a Clear Data action, do not cancel the process – when the deletion starts, existing data will lose its integrity and will no longer be reliable.
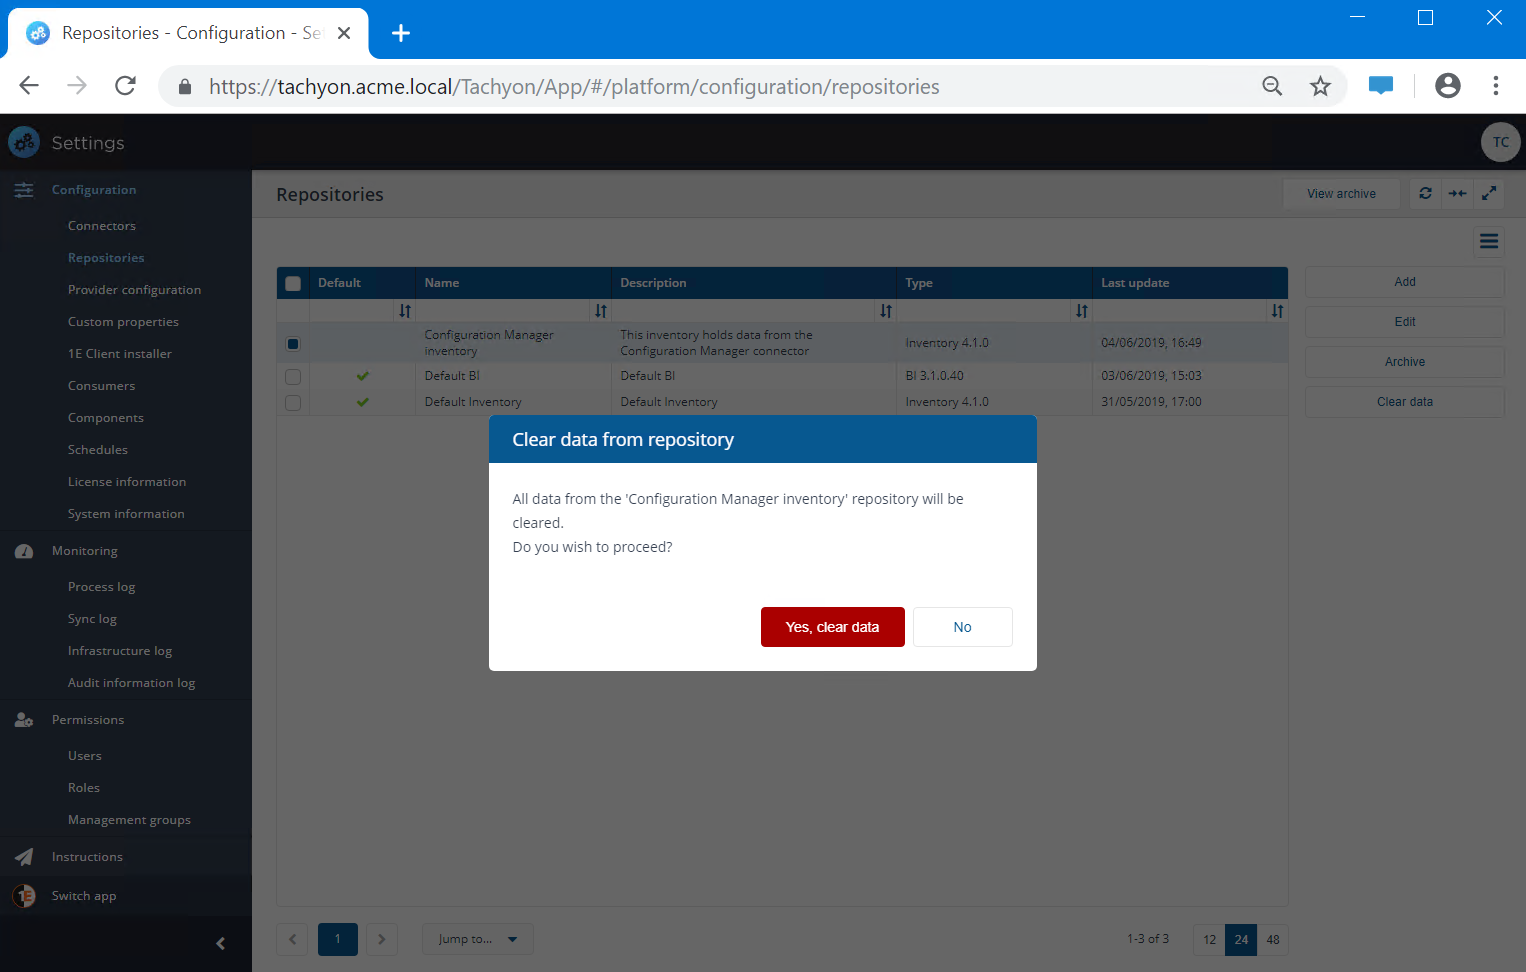
To Clear Data:
From the list of repositories, locate the active repository you want to clear the data from.
Check the box at the left-hand end of the repository's row.
Click the Clear data button.
In the Clear data from repository popup you will be asked if you want to proceed to clear the selected repository.
Note
If you click the Yes, clear data button all the data held in the repository will be lost and cannot be retrieved.
Click the Yes, clear data button to empty the repository.
The repository will then be cleared.
Note
If you only want to clear data for a specific connector then use the Clean Sync action:
Archiving repositories
Repositories cannot be deleted. When you no longer need a repository you can archive it. It's not deleted and can still be restored for future use.
Note
When you archive a repository you should be aware that any currently defined schedules that populate or process its data will still be active. You should disable these before archiving.
Archiving an existing active repository
To archive an active repository:
From the list of repositories, locate the active repository you want to archive.
Check the box at the left-hand end of the repository's row.
Click the Archive button.
In the Archive repository popup you will be asked if you want to proceed to archive the selected repository.
Click the Yes, archive repository button to archive it.
The repository will then be archived
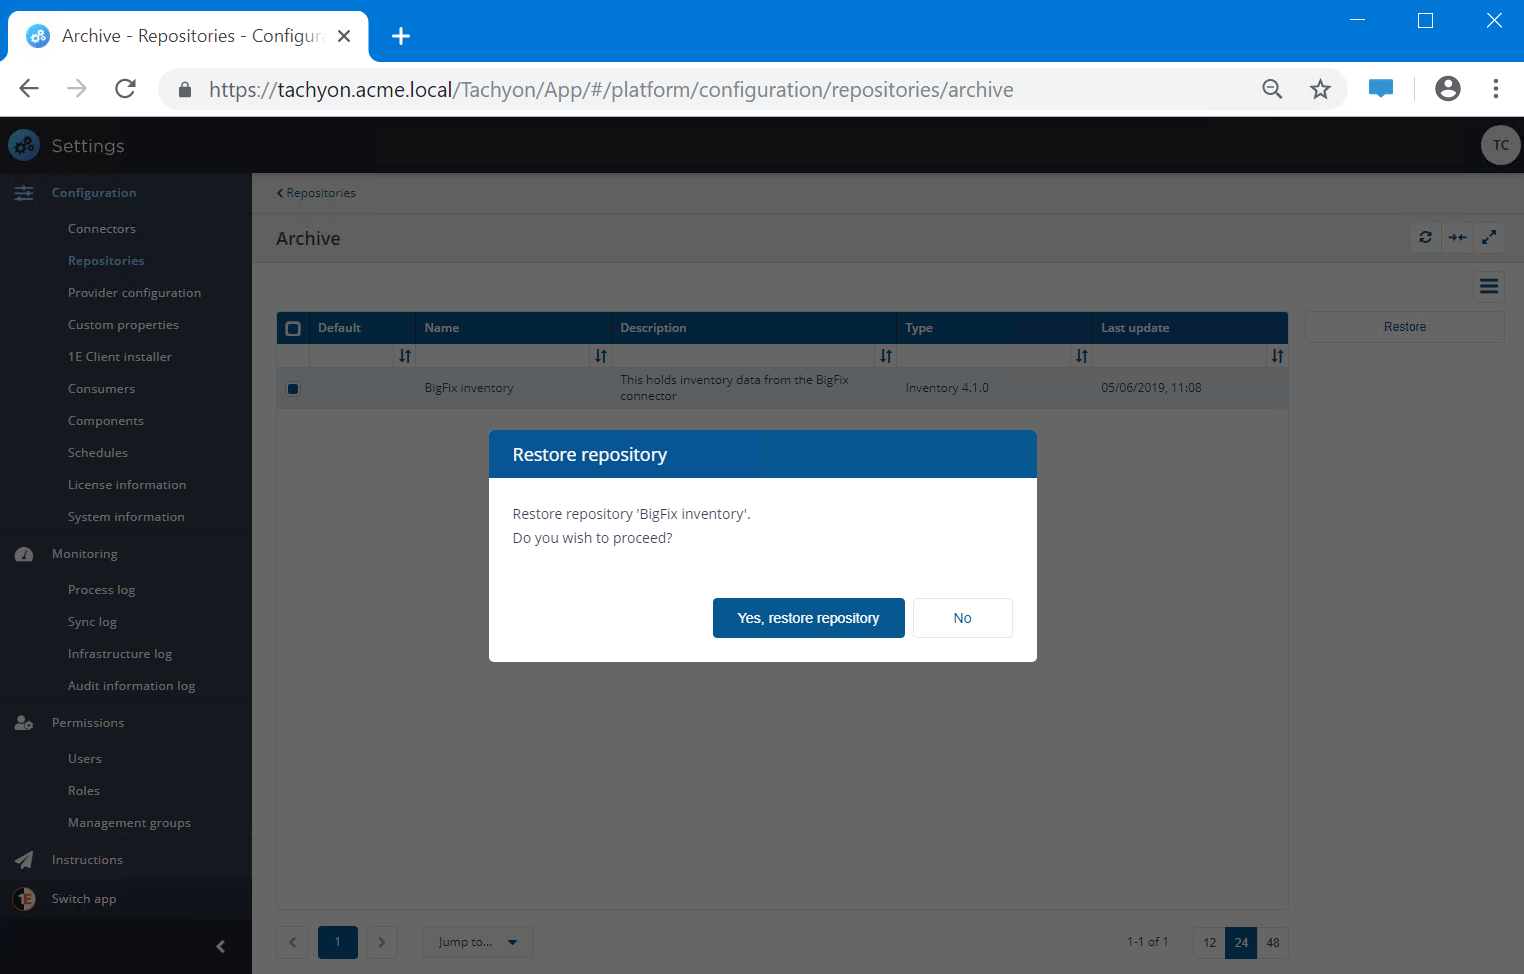
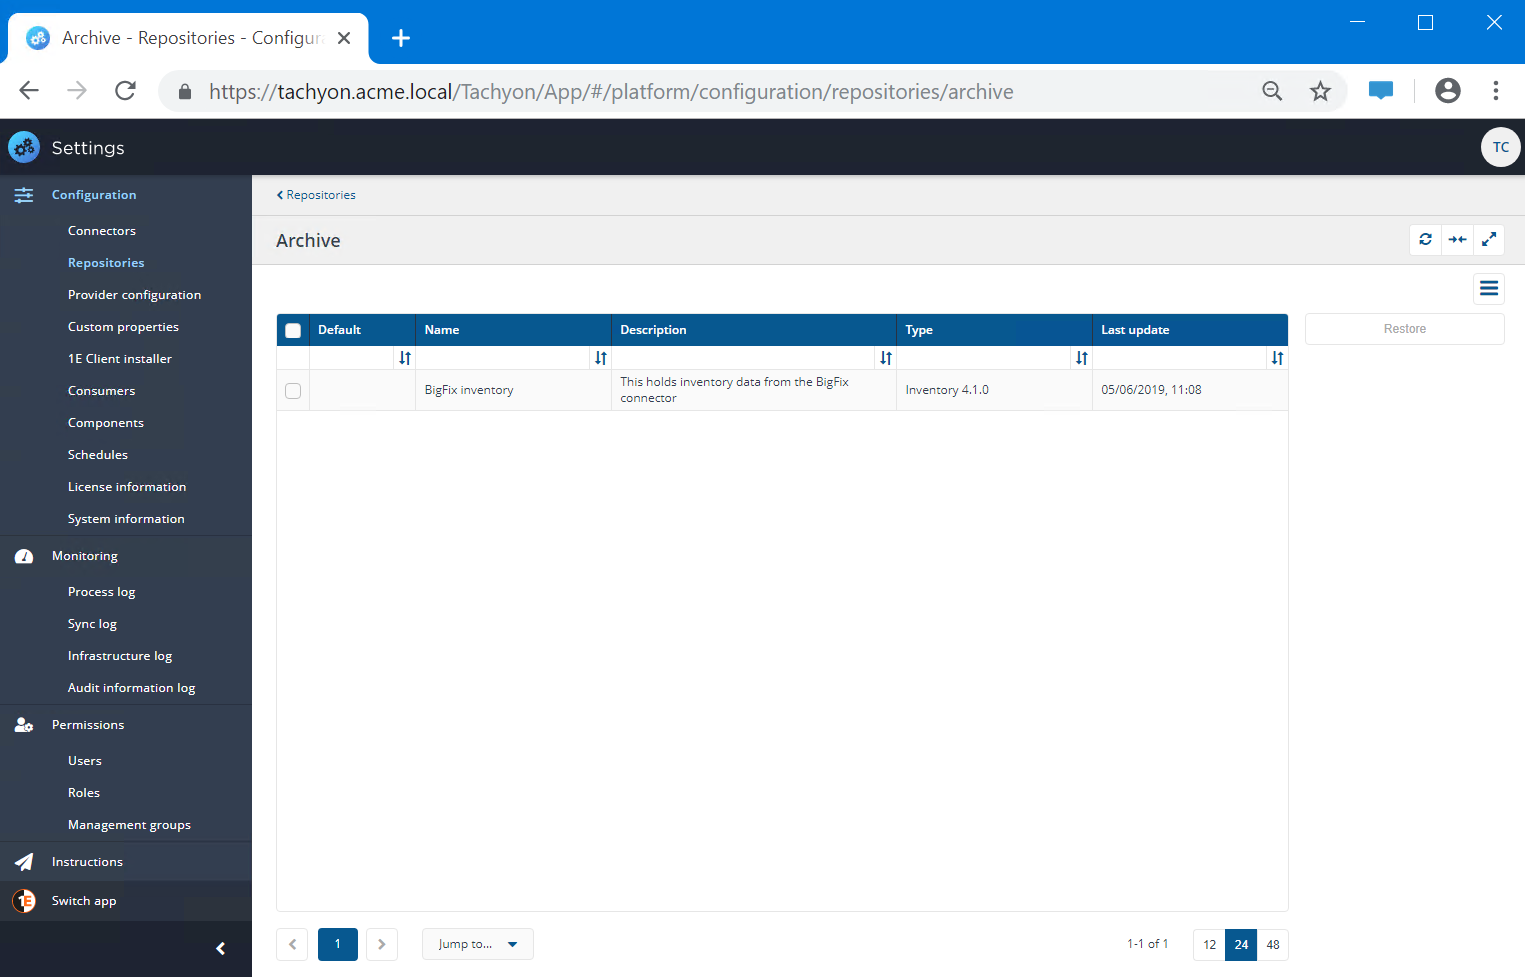
Viewing the archived repositories
To view the archived repositories:
Click the View archive button.
The page will change to the Archive showing any repositories that have been archived.
To navigate back to the default Repositories page click on the <Repositories link at the top of the page.
Restoring archived repositories
To restore a previously archived repository:
From the Archive page locate the archived repository you want to restore.
Check the box at the left-hand end of the repository's row.
Click the Restore button.
In the Restore repository popup you will be asked if you want to proceed to restore the selected repository.
Click the Yes, restore repository button to restore it.