Deploying software in large networks
Scenarios for deploying software in large networks, introducing FanOut and Single-Site Download (SSD).
Our environment is configured to represent two distinct locations (a datacenter and a remote office), with the servers all located in the datacenter and the computers are all located in the remote office. It just so happens that the remote office has two subnets.
In our example, we'll use Single Site Download, which enables a 1E Client to obtain content from a peer in an adjacent subnet (within the same defined location) if that content is not available on a peer in its own local subnet.
We'll then enable FanOut and watch when this feature is enabled to allow multiple 1E Clients to serve content simultaneously within the same subnet instead of relying on a single elected master. In our example computers with a name ending in an odd number are in subnet 10.0.1.0, while those with a name ending in an even number are in subnet 10.0.2.0.
Note
Not only is Nomad aware of the file level differences between different versions of a package so that only changed files are downloaded, it is also aware of the differences within individual files.
This is sometimes known as binary differential replication or binary deltas but is more commonly known as remote differential compression (RDC) integration, for details refer to https://docs.microsoft.com/en-us/previous-versions/windows/desktop/rdc/about-remote-differential-compression.
Note
You can use the Nomad app, powered by the Tachyon Platform to get a visual snapshot of download activity in your environment. The Nomad app will be available after you install the Tachyon Platform and can be accessed using the Tachyon DNS Alias FQDN, for example https://tachyon.acme.local/Tachyon
The section Monitoring Nomad on this page provides an overview of how you can use the app to view download progress for large and small scale deployments.
Using Single-Site downloads to deal with multi-subnet sites
Nomad's Single Site Download (SSD) feature ensures a download across the WAN only happens once per site. It does this by maintaining information about which subnets are neighbors of each other (accessible on LAN rather than WAN), so that when an elected master considers a download from a DP rather than a peer in its subnet, it can discover which other local subnets already has the package. These subnets are typically at a single customer site, specifically a single geographical location.
Nomad SSD uses Content Distribution. When a Nomad client downloads a package, it registers this information with Content Distribution, enabling a profile to be created on which Nomad clients hold particular packages.
Before enabling Nomad clients to use SSD, you need to ensure the following:
Tachyon Platform 5.2 or later is installed and running successfully
The Content Distribution database is populated with information about sites and their associated subnets
High-level overview of how to enable SSD
The following information applies to both new and existing installations of Nomad:
Make sure that Tachyon Platform is installed in your environment and is used as a content location metadata repository, for more information refer to Introducing Tachyon
Within Content Distribution, populate the SSD sites and subnet information. A sample PowerShell script called PostADSitesandSubnets.ps1 is included in the Nomad installation files, which reads sites and subnets from AD
Nomad captures a list of background channels from the 1E Client in the BackgroundChannelUrl and uses the first working URL as the PlatformURL by appending /Proxy/ContentDistribution/ if this PlatformURL is unreachable it attempts to connect to the next BackgroundChannelUrl, for details about BackgroundChannelUrl refer to Nomad architecture
Enable SSD on all Nomad agents, by modifying HKLM\Software\1E\NomadBranch\SSDEnabled to 3, this enables SSD for both "Provide" and "Consume" modes, specifically Nomad will provide content to other peers and consume content from other peers
If you already have Nomad installed and are only now enabling SSD, then ensure HKLM\Software\1E\NomadBranch\Platform\ContentRegistration is set to 1, in other words, Nomad will register downloaded content with Content Distribution, this is automatically enabled for new installations of Nomad and SSD.
Tip
If you have clients on networks where broadcasts are disabled (for example wireless) then enable local SSD by setting SSDEnabled=7. Also set ContentProviderOnWifi=1.
Building a subnet profile in Content Distribution
Example PowerShell scripts
You can get information about sites and subnets from AD, or by other means. Example PowerShell scripts can be used for retrieving information about sites and their associated subnets from the AD and updating the Content Distribution database.
Example Active Directory Single Site script — Sample script that scans the Active Directory (AD) environment for all sites and subnets and stores the information in the Content Distribution locations table.
Example Single Site script — Sample script that provides two functions to update sites and subnets in the Content Distribution locations table: DeleteAllLocations and AddLocation().
Example Location Discovery script — Sample script to enable and disable the location discovery feature, along with the option to run it and load site, subnet and information in Content Distribution.
Content Distribution purge configuration script — Sample script to view or update Purge Configuration in the Content Distribution Service defined in the ContentDistribution PurgeSettings table if it is configured.
Enabling a Nomad package for Single-Site downloads
Nomad is enabled or disabled for each Configuration Manager package inConfiguration Manager, Software Library workspace, Packages node. In our example we will enable Nomad for legacy package and see how Nomad takes part in the download process and shares the content.
Note
If you enable Single Site Download when you install the 1E Client, you only need to define the SSDENABLED and PLATFORMURL installer properties. However, if you enable the feature after installation through modification of the registry, you must also explicitly set the ContentRegistration value to 1.
In this example, we will configure a legacy package to use Nomad and then deploy it to our example Workstations Collection.
Before deploying our package, we are going to amend the Work Rate for our deployment. The Work Rate determines the percentage of available bandwidth to use for the download.
In this example we have changed this from the default 80% of available bandwidth to 10% to slow down the deployment and so making it easier to monitor.
For more details about the Nomad tab, and how you can use Work Rates, refer to Distributing software with Nomad and Configuration Manager - Nomad taband Design Considerations: Setting intra-day work rates.
In our example in Configuration Manager:
We select the Software Library workspace and choose the Packages node.
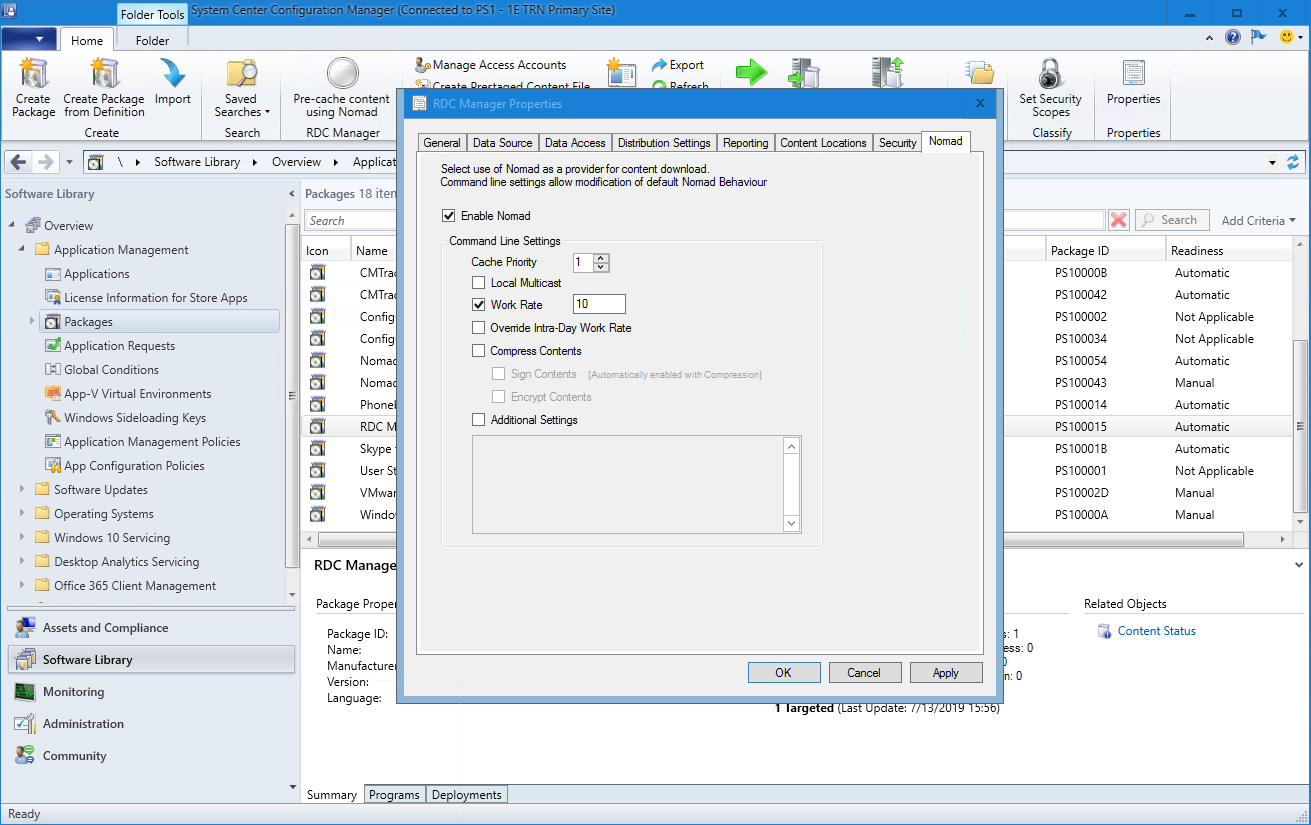
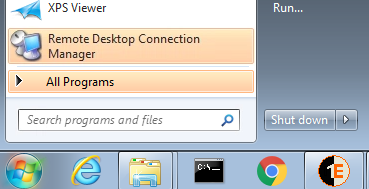
Then right-click the Remote Desktop Connection Manager (RDCMan) package in the right-hand pane and select the Nomad tab.
In the Nomad Properties dialog box, we check:
Enable Nomad
Work Rate (%)and set the value to10.
Once this is done, we force a policy update on the collection containing our workstations called Workstations.
Deploying a legacy package with Nomad
We then deploy the updates to our workstations using the following Deploy Software Wizard page settings:
Deploy Software Wizard Page | Setting |
|---|---|
General | Selected the Workstations Collection |
Content | Made sure the content is present on the DP |
Deployment Settings | Set the Purpose to Required. |
Scheduling | Created a new assignment schedule to run at the current time |
User Experience | Checked Allow users to run the program independently of assignments |
Distribution Points | Selected both Deployment Options to Download content from distribution point and run locally |
Our elected master is 1ETRNW102 in subnet 10.0.1.0 in the C:\Windows\CCM\Logs\NomadBranch.log we can see the normal election process. This is followed by a request for content for the RDCMan package but there is no content available.
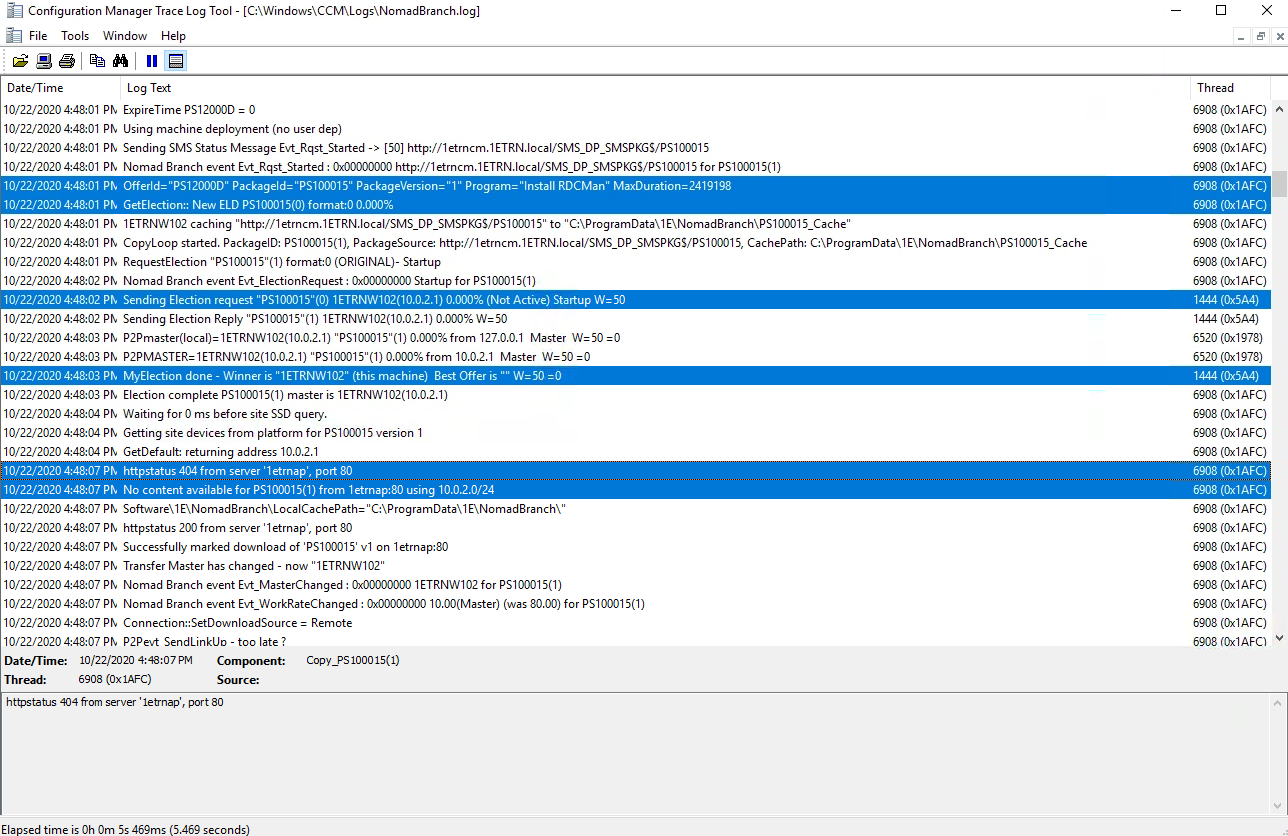
From this point onwards 1ETRNW102 will be returned by the Content Distribution Consumer as a content source for other clients in its subnet within the same location.
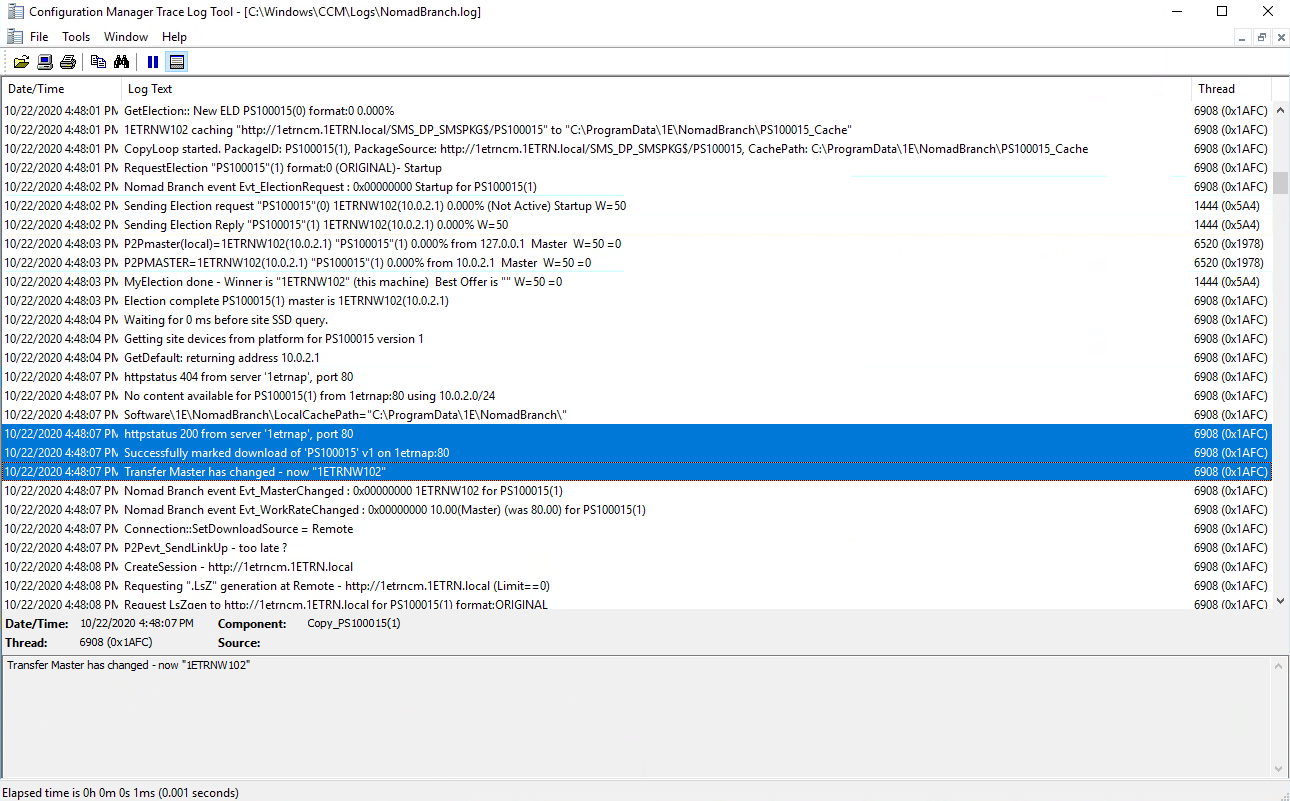
We can see 1ETRNW102 downloading the .LsZ file from the DP and updates the Content Distribution Consumer to indicate the download has started.
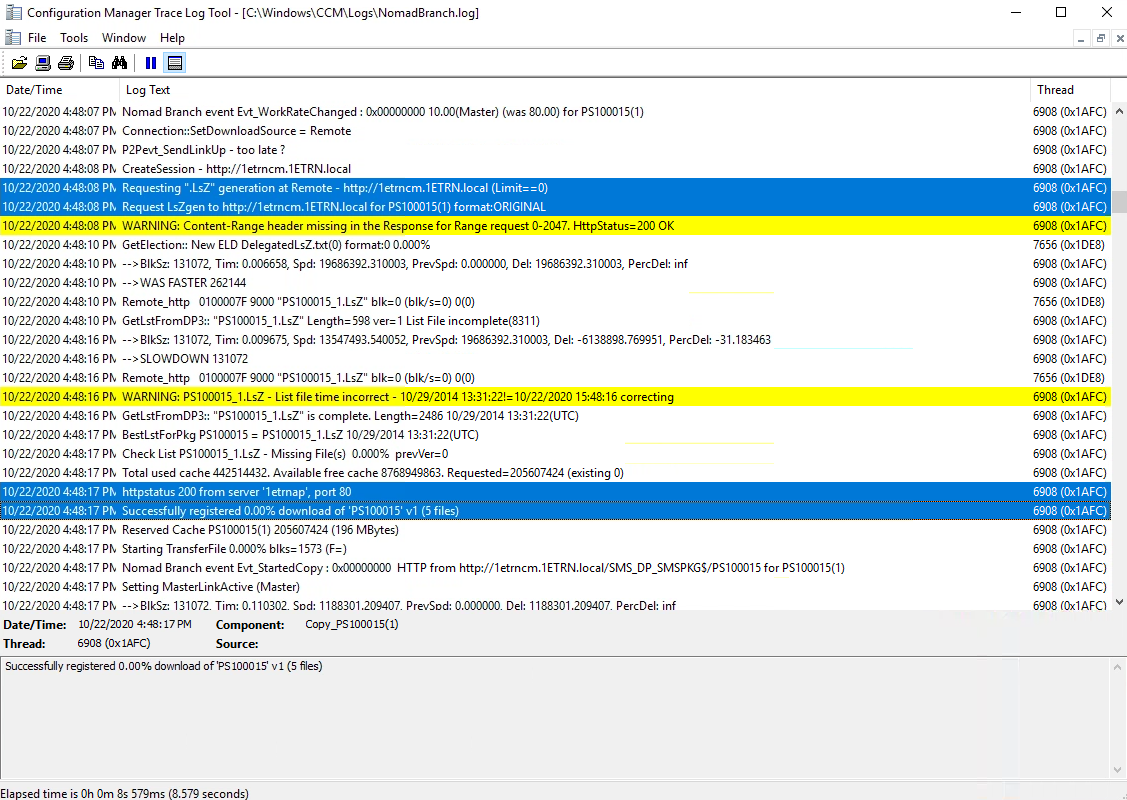
If we now look at the other subnet in our example, 10.0.2.0 and identify the first election request from this subnet which is from 1ETRNW71.
In the NomadBranch.log we see the normal activity where 1ETRNW71 is elected as the master.
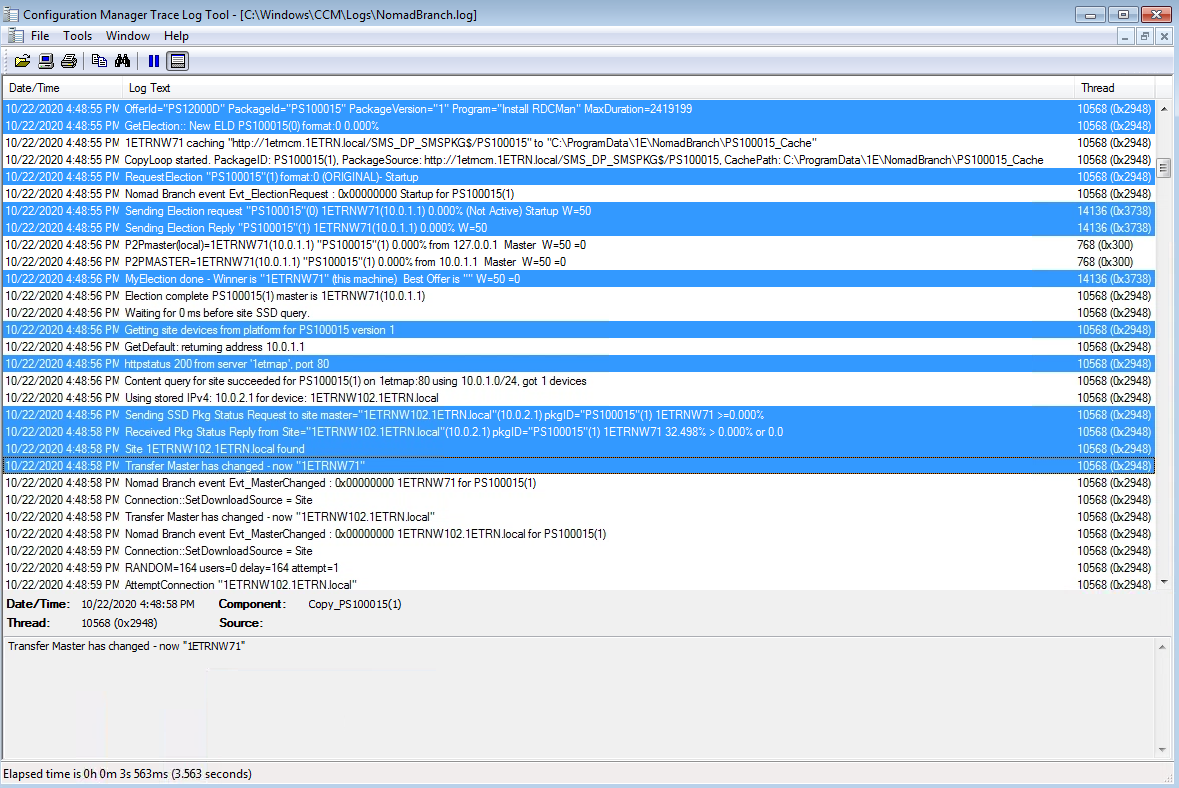
Following this 1ETRNW71 queries the Content Distribution Consumer to see if the content is available on and adjacent subnet. The query returns 1ETRNW102 as a potential candidate, Nomad then sends a Package Status Request to the returned client and selects it.
Note
If more than one client had been returned, the client with the most content already cached becomes the Site Master.
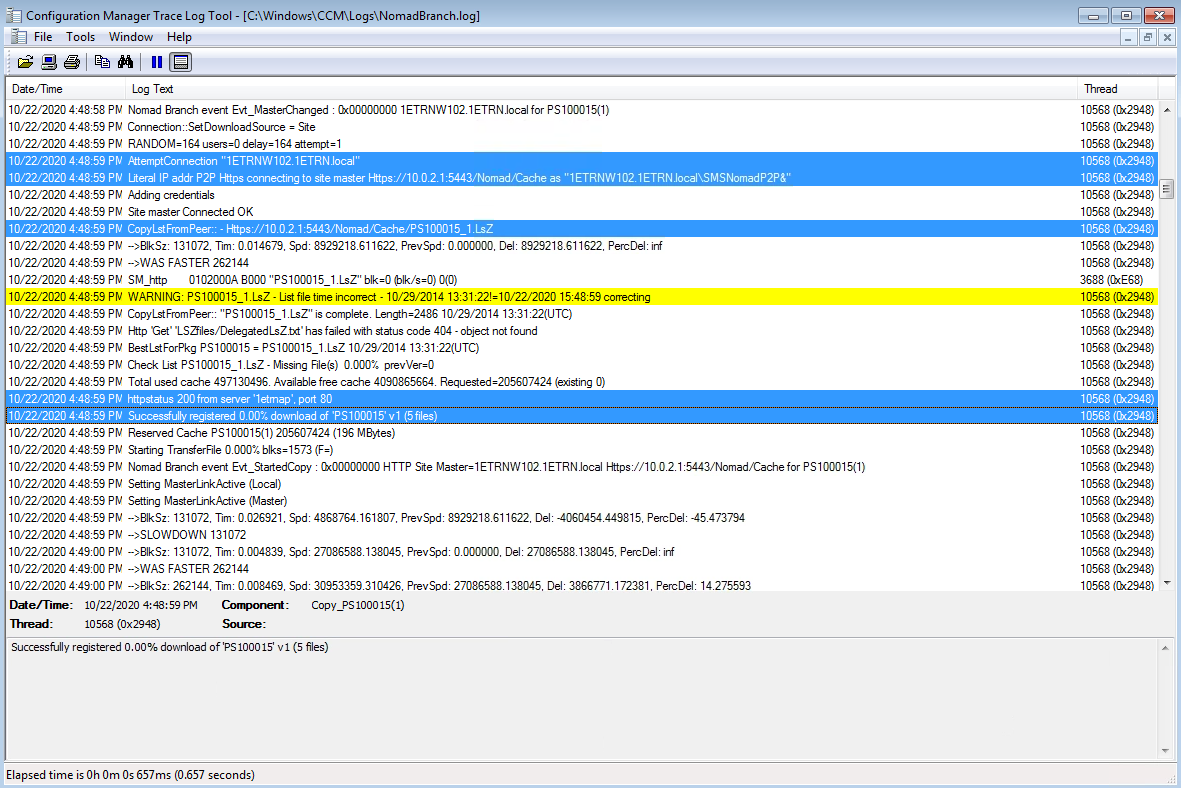
The elected subnet master starts to download content starting with the .LsZ file and the agent registers with the Content Distribution Consumer that it's now started the download. Every client with ContentRegistration enabled will update the Content Distribution Consumer in this way whenever it starts to download content.
The Remote Desktop Connection Manager (RDCMan) package is then installed on our computers.
We have seen that Single Site Download allows you to deploy content to a large network, for example where you have a datacenter and a remote office and the computers are located in the remote office on two different subnets. Using Single Site Download allowed the 1E Client to obtain content from a peer in an adjacent subnet (within the same defined location) when that content was not available on a peer in its own local subnet.
Using FanOut for large subnets
Windows imposes a limit on the number of concurrent connections on the Nomad share. The FanOut featurecompensates for this limitation by enabling any peer that has more content than the requester to respond to the FanOut request. It is not limited to peers that have an active connection to the master.
The Nomad cache share (NomadSHR$) is created with a connection limit of six, this also applies for HTTP(S) transfers. This means that up to six Nomad peers can get content from the master at a time. If a 1E Client tries to connect to the master and all six connections are in use on the master, that agent would back off and retry later. The Fanout feature enables the 'rejected' agent to ask for an alternative peer in the same subnet that has the content it needs. Any other peer on the subnet can respond to this request, but will only do so if it has:
More content than the agent requesting it
Available connections and is not already be connected to a Fanout peer.
To find out more about how FanOut works refer to Nomad FanOut - How FanOut Works.
Enabling FanOut
To use FanOut, the NomadSpecialNetShareregistry value must be updated to include bit 6 (0x40or 64 decimal) on all computers hosting Nomad. To do this in our example, we imported a Configuration item and used Configuration Manager Settings Management to update our 1E Clients using a configuration baseline.
Note
The Nomad Baseline wizard is used to create a Configuration Manager (CM) Baseline from the Configuration Manager console for settings related to Nomad. Refer to Nomad Baseline wizard for more information.
In our example, we'll reinstall the RDC Manager package we installed in Using Single-Site downloads to deal with multi-subnet sitesusing two computers, 1ETRNW71 and 1ETRNW73 in our 10.0.1.0 subnet to prompt Nomad to re-download the content when the NomadSHR connection limit (1) is reached on the elected master which should be 1ETRNW101 as it has the content in its cache. For the purpose of this example we have reduced the connection limit to 1 to demonstrate FanOut behavior with a couple of clients. This is not something we recommend you do in a production environment.
Note
In our computers with a name ending in an odd number are in subnet 10.0.1.0, while those with a name ending in an even number are in subnet 10.0.2.0.
On both 1ETRNW71 and 1ETRNW73 we reinstalled RDC Manager using Software Center.
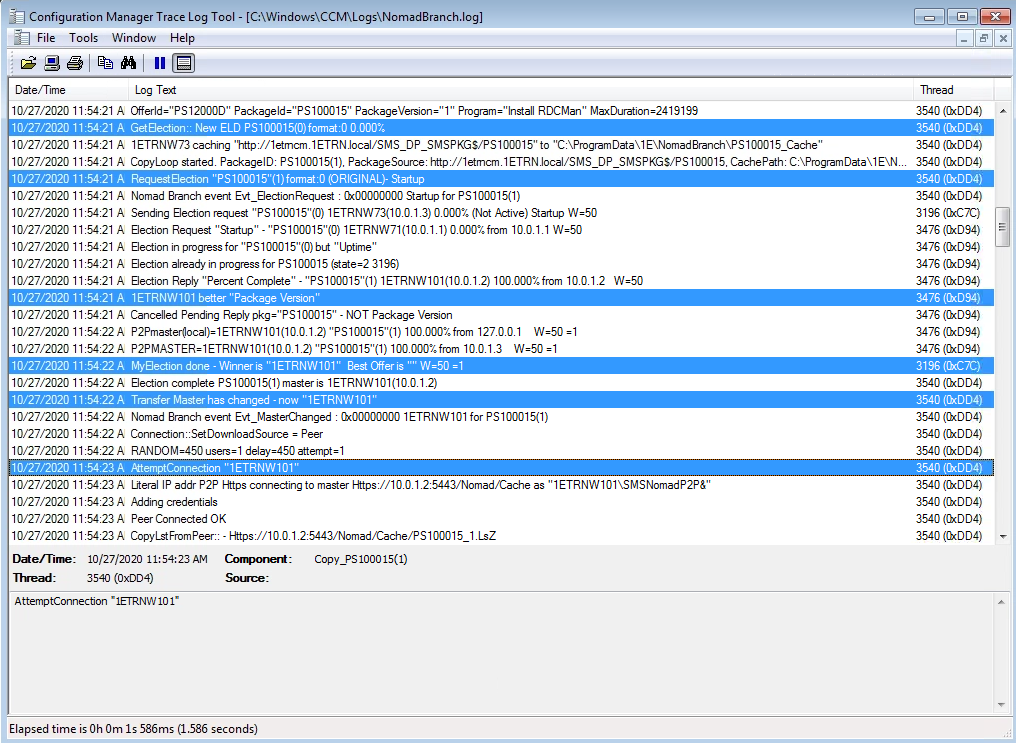
When we open NomadBranch.log on 1ETRNW73 there's an election where 1ETRNW101 wins as it has 100% of the content in its cache.
The elected master does not change for 1ETRNW71, but as there is only one connection available on NomadSHR which is being used by 1ETRNW73, 1ETRNW71 would fail to connect to the master. 1ETRNW71 then polls for a FanOut and receives a reply from 1ETRNW73 and then starts downloading the content from 1ETRNW73.
In this example we saw how FanOut can be enabled to allow multiple peers within a subnet to serve content to others in the situation where there are insufficient connections available on the elected master. This feature will typically enable faster distribution of content in larger subnets compared to the behavior seen in Using Single-Site downloads to deal with multi-subnet , where a maximum of six clients (in addition to the master) can be simultaneously obtaining content within the subnet.
Note
We recommend using Configuration Baselines as the best way to manage the configuration of your 1E Clients in a production environment. Refer to Nomad Baseline wizard for more information.