Reporting and successfully patching a management group for a single KB - tutorial
A worked example of using Patch Success.
In this tutorial
In this tutorial an emergency patch has been deployed using Configuration Manager, but the Security team have concerns that some devices have not received that patch and could become vulnerable to an exploit.
In this tutorial we will demonstrate:
Checking the performance of the specific KB against a management group
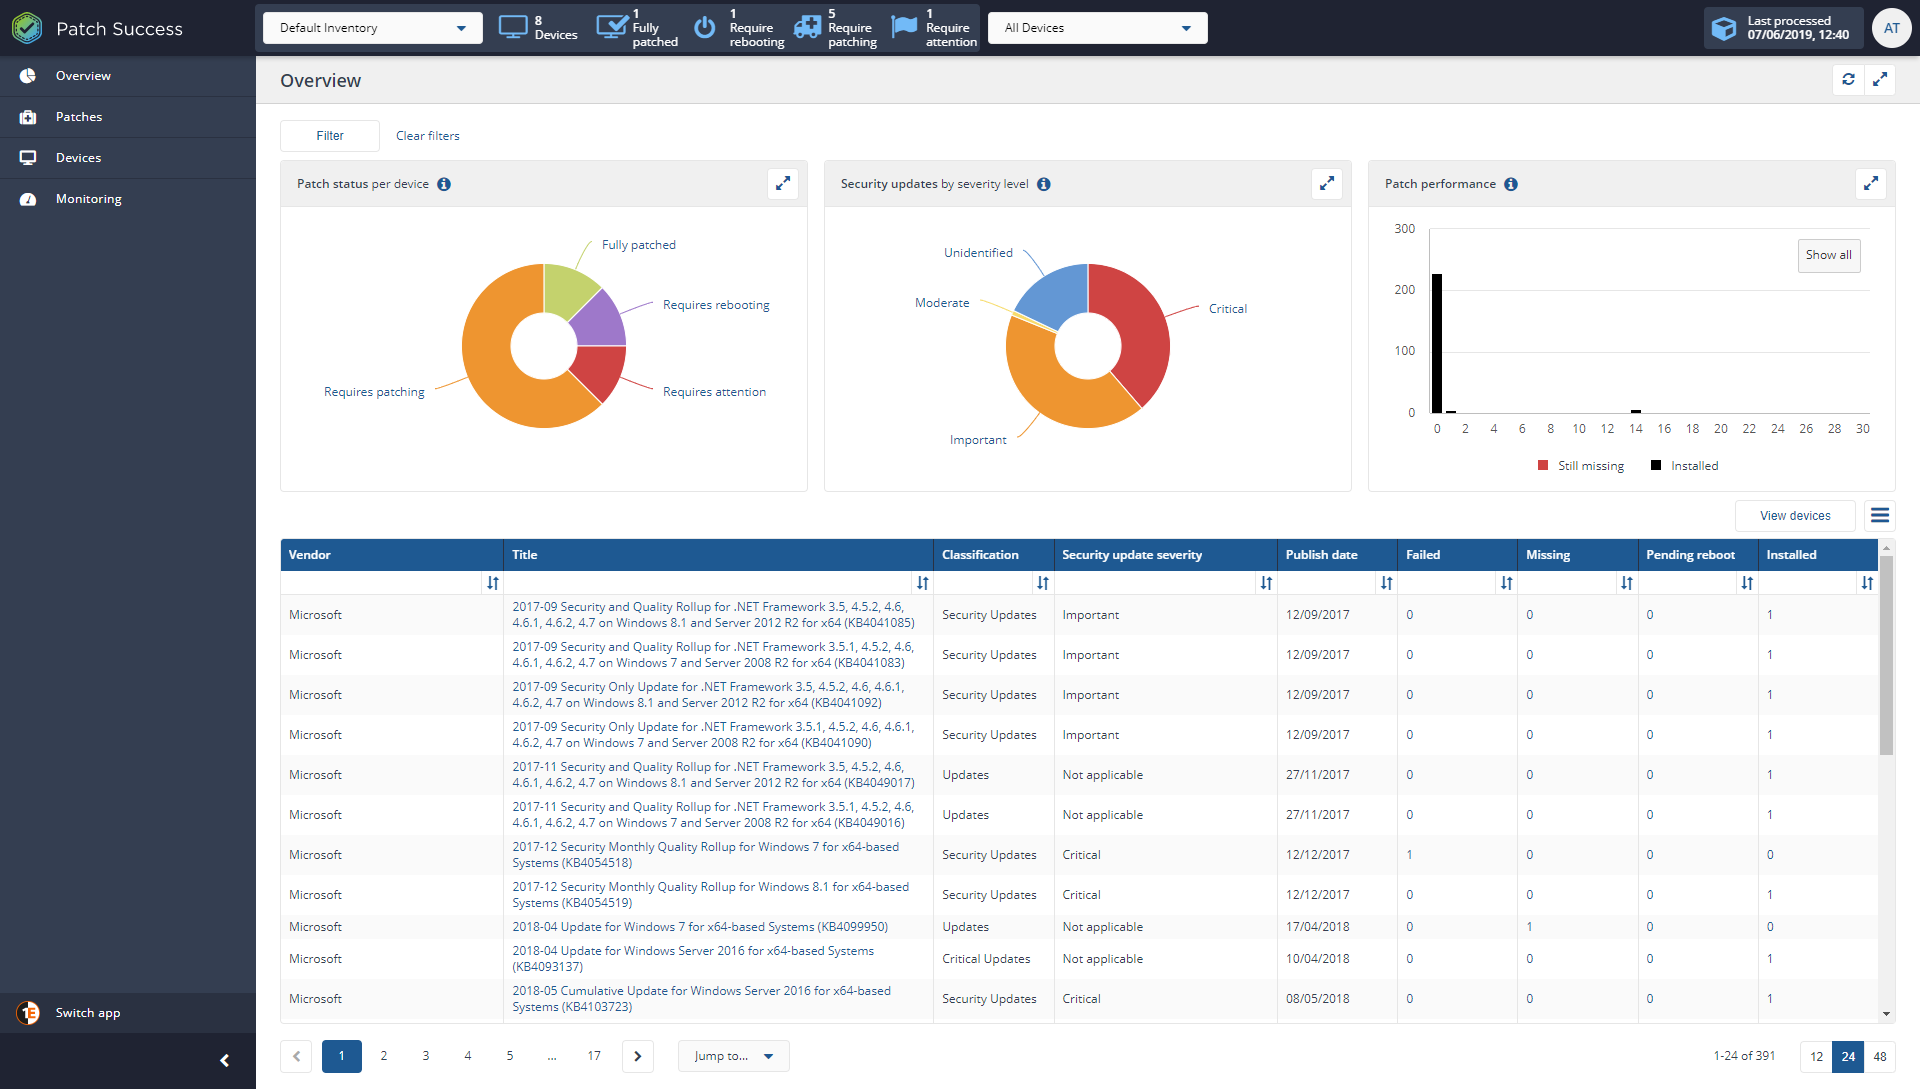
Navigate to Patch Success→Overview
In the title bar, click on the management group drop-down list. By default this will show All Devices. If you change the selection, notice the name of the selected management group is added to the filter bar. You can select only one management group using this method. In our example we will select the All Devices management group.
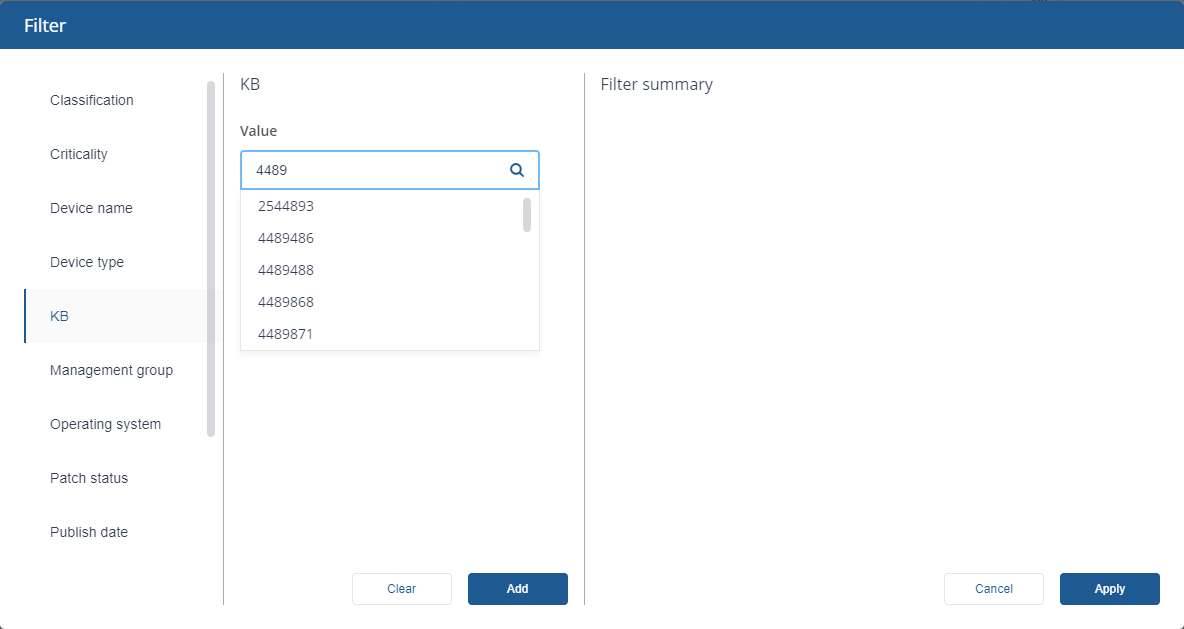
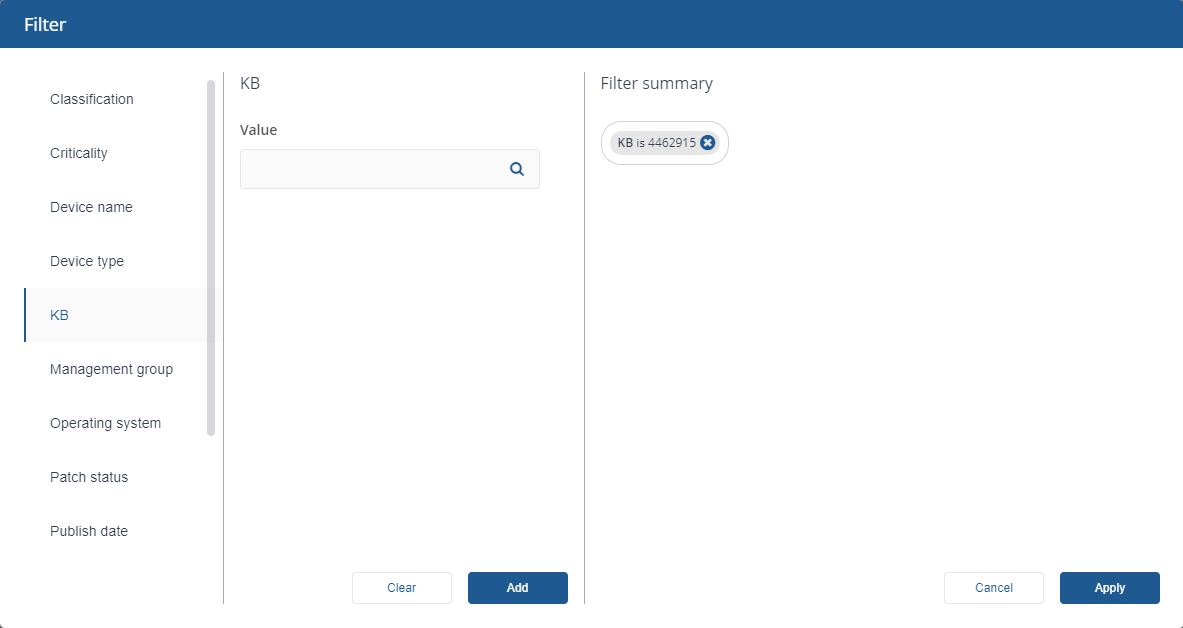
Click on the Filter button and the Filter popup appears.
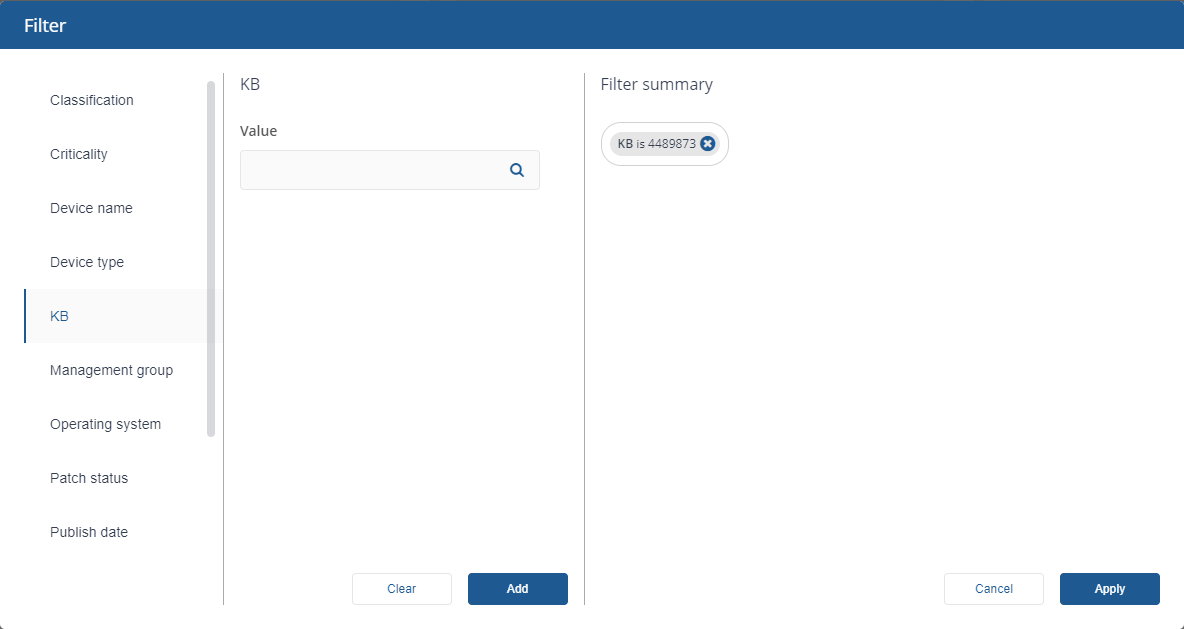
Select the KB filter and enter a value for the KB and a drop-down auto-fills a list of KBs, select the chosen KB, and click Add.
Select the Management group filter and select a management group from the value drop-down list, and click Add. You can select more than one Management group using this method. Remove all selected groups, because we are using All Devices in this tutorial.
In the Filter popup, click the Apply button.
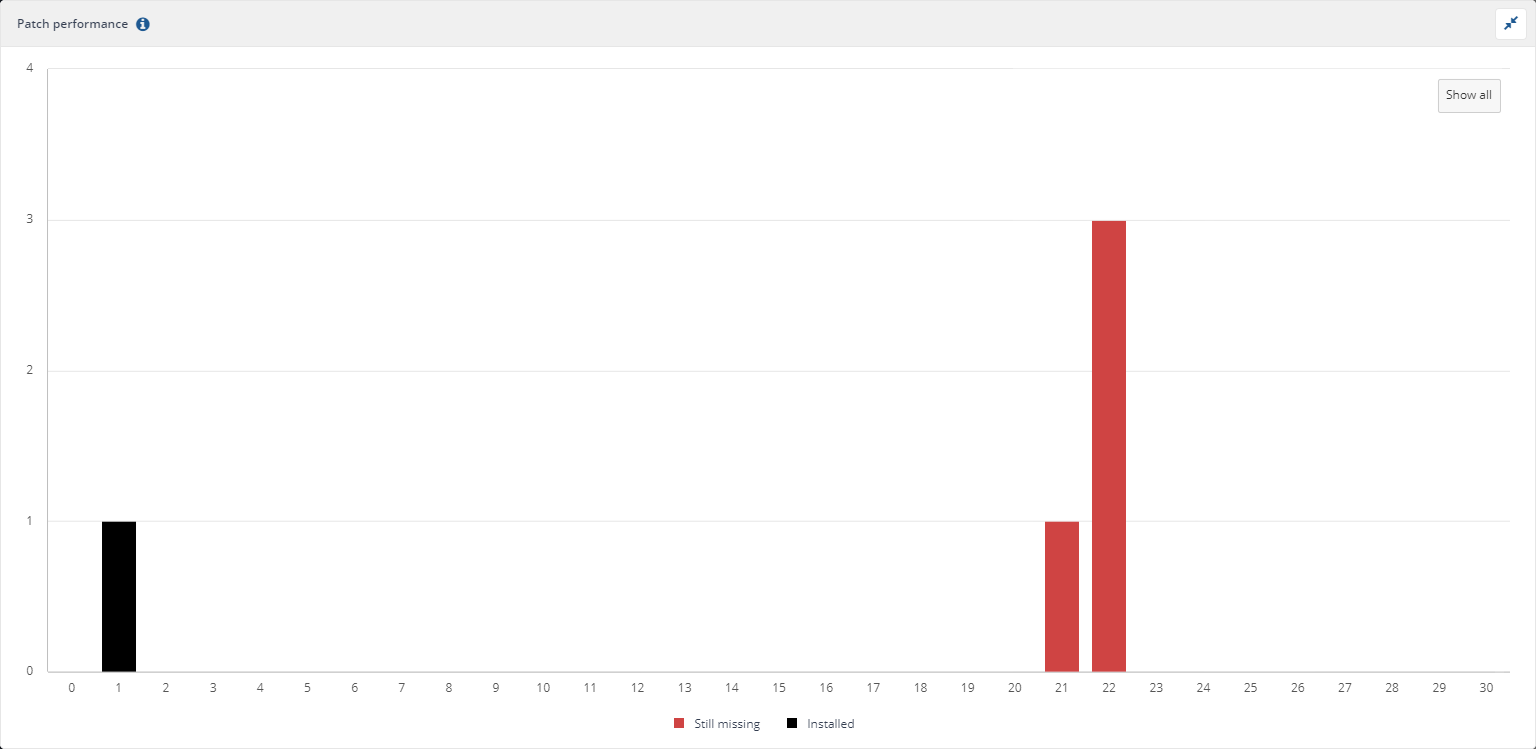
This chart displays the Performance in the last 30 Days by default, but by clicking "Show all" will show the period where the patch is missing.
The black column shows the Installed trend over time for that patch in the management group
The red column indicates the number of devices missing patches and when the patches should have been installed.
The diagram shows that the patch is still missing on 1 device in the last 21 days and 3 devices in the last 22 days in the management group. It also shows that 1 device had the patch installed 1 day after the release date.
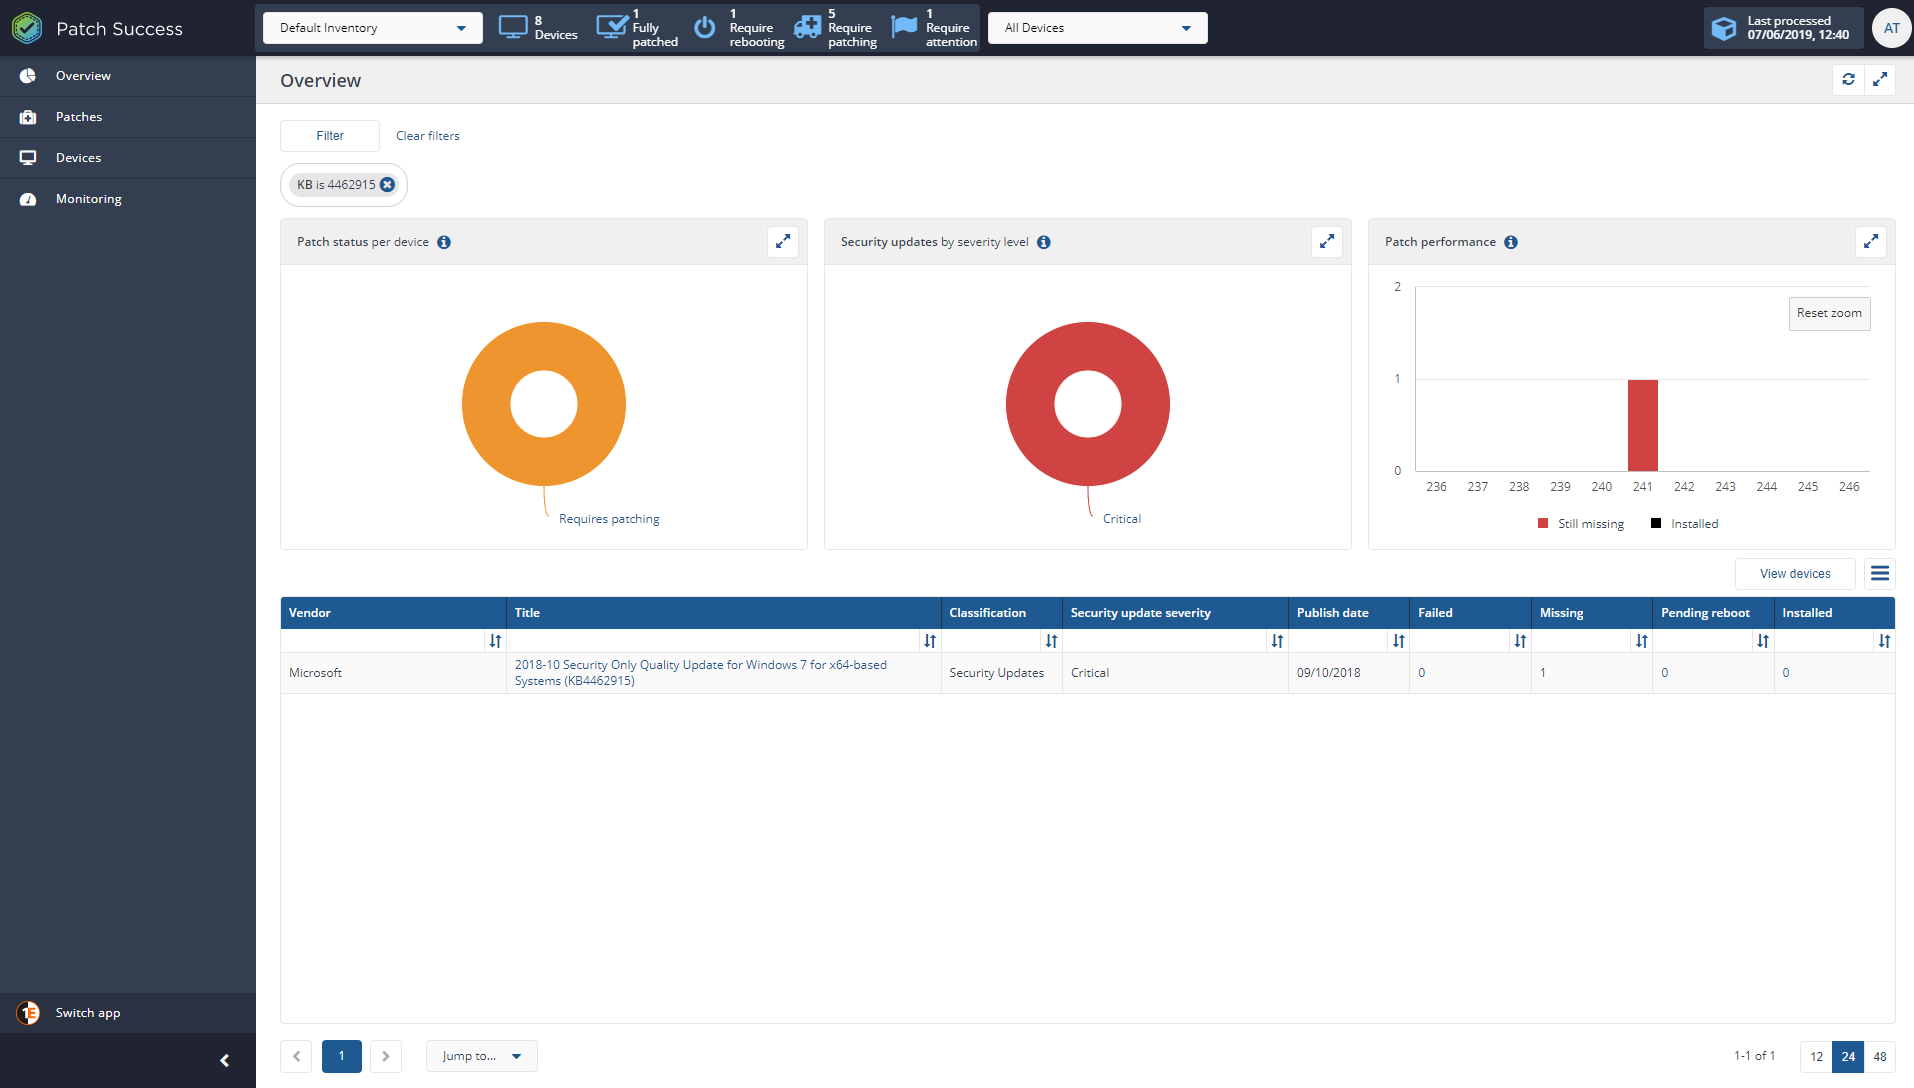
In the Overview page, expand the Patch performance chart which has been filtered based on the selected KB.
Patching immediately any device or devices in the management group which haven't received it
Navigate to Patch Success→Overview
Click on the Filter button and the Filter popup appears.
Select the KB filter and enter a value for the KB and a drop-down auto-fills a list of KBs, click Add.
In the Filter popup, click the Apply button.
In the Overview page, the filter has been applied to the all the charts, showing the overall status of the KB.
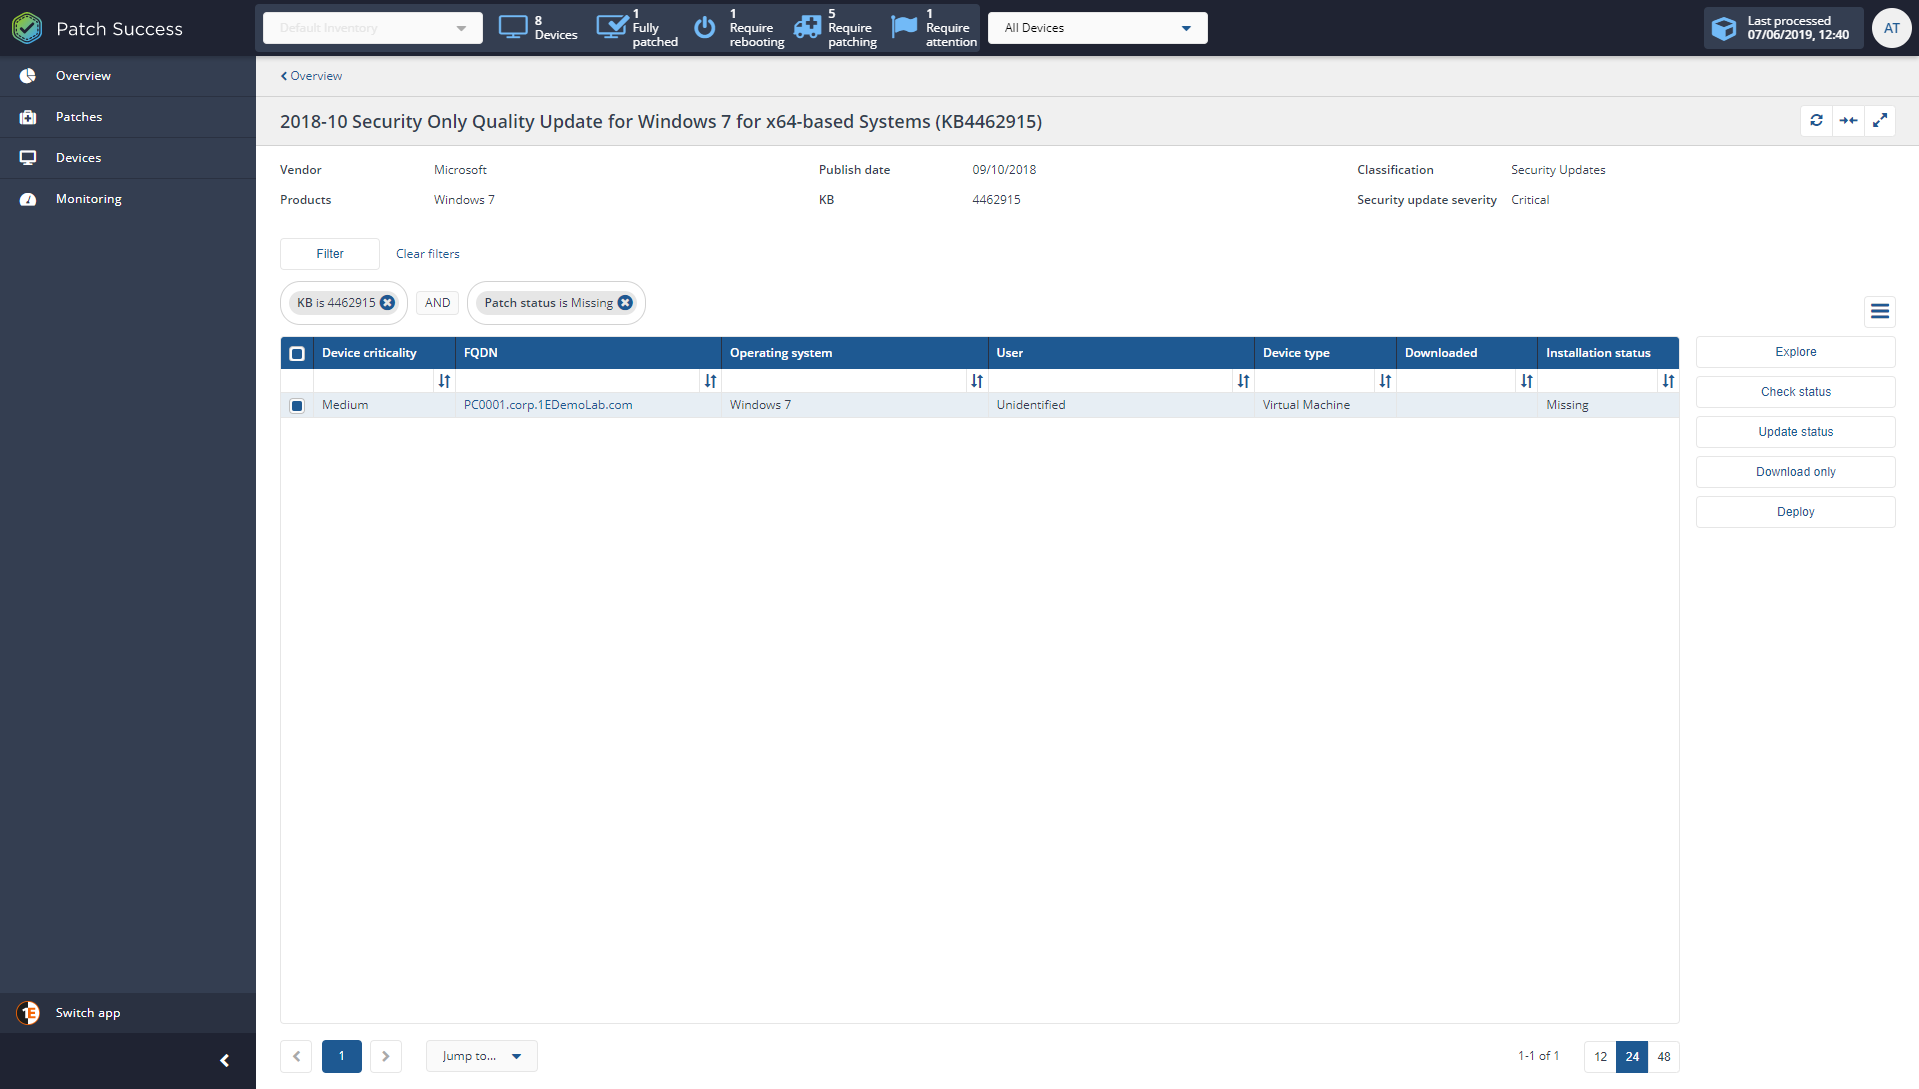
Click on the number in the Missing column. This opens a page for the specific device.
Device criticality - is criticality of a device
FQDN - is the fully qualified domain name of a device
Operating system - is the operating system of a device
User - is primary device user
Device type - is type of device
Downloaded - is the patch already downloaded on the device
Installation status - is the status of the currently selected patch per device
On the displays patch with filter of the KB and Missing , and the List of devices shows a full list of devices where selected patch is applicable. Where:
Click the Deploy button. This will start an instruction to deploy the currently selected patch on the selected devices and switch to the History page to show the progress of the deploy instruction.
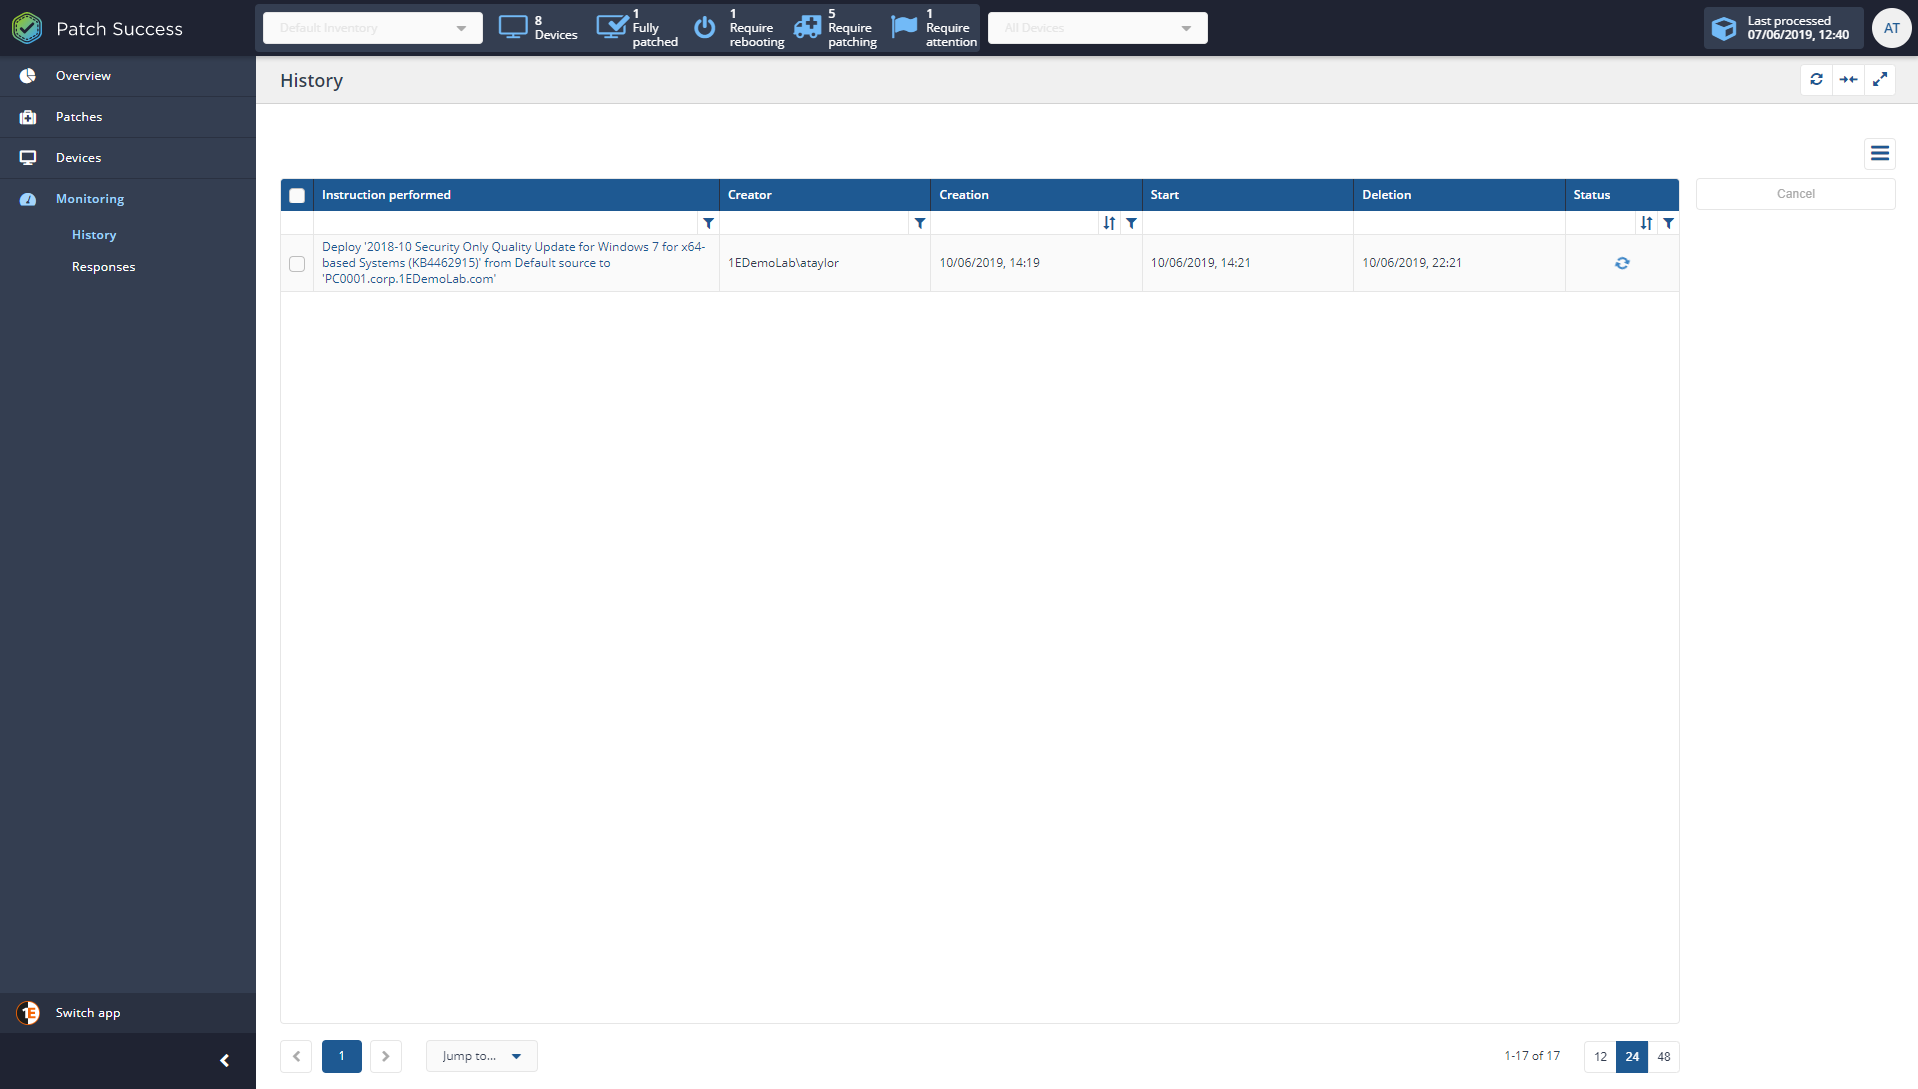
In Monitoring→History page. This shows the list of all the instructions issued by Patch Success with following details:
Instruction performed - a description of the instruction.
Creator - user that has created the instruction
Creation- creation time
Start - time at which the instruction was started
Deletion - time at which the instruction has ended
Status - current status of the instruction
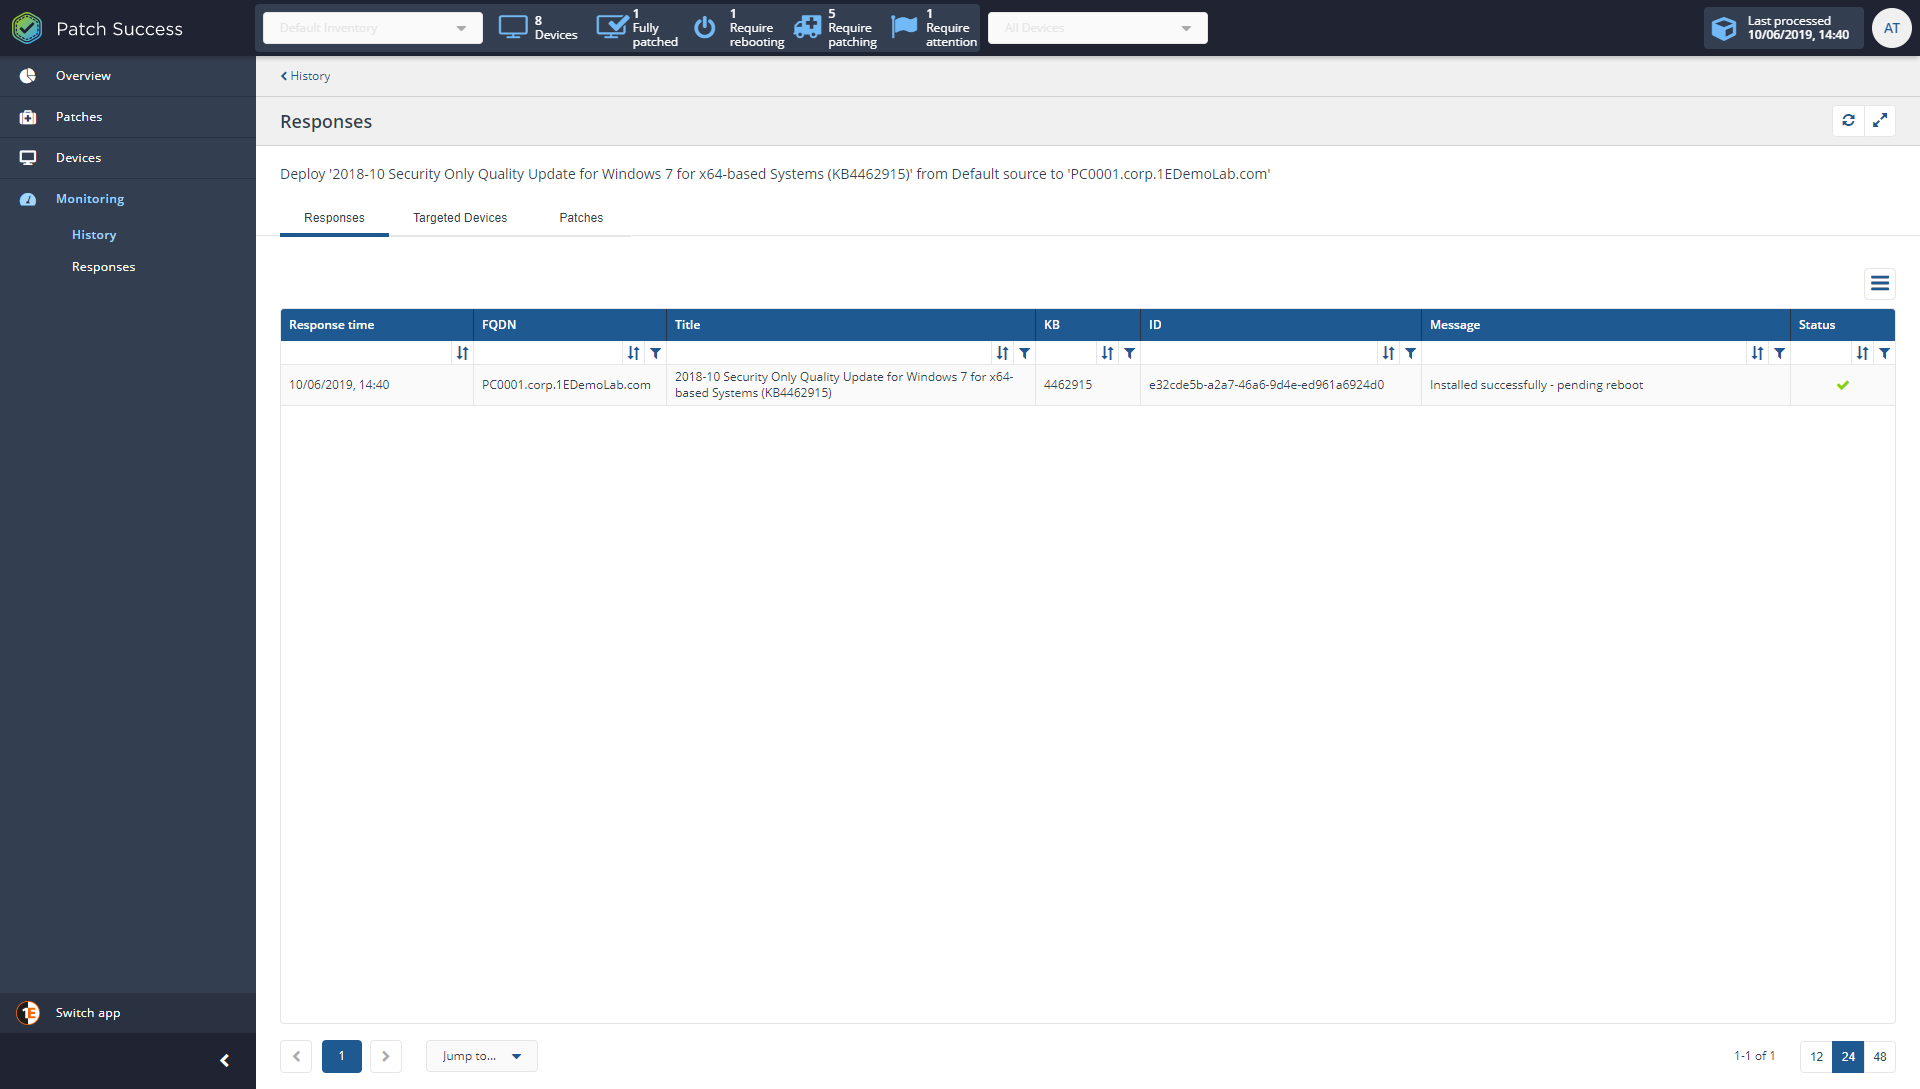
In Instruction Responses page. This shows the list of all the responses received by Patch Success from the issued instruction, with following details;
Response time - time at which the response was received
FQDN - fully qualified name of the device that has responded
Title - title of the targeted patch.
KB - knowledge base number for the corresponding patch.
ID - identifier for the corresponding patch.
Message - the result of the instruction.
Status - the status of the response.
Once the response is completed, navigate back to Overview. If you have remained in session then your previous filter will still be current. The missing patch will no longer display and will now show as installed. Furthermore, when you look at the Device Patch Status chart the device no longer reports as requiring attention, but rather as Fully patched.