Post-install configuration
Steps to configure Tachyon platform after installation of Application Migration.
Application Migration roles
Assign users to roles as described in Requirements: Accounts needed to install Application Migration.
The Application Migration Administrators role does not exist in the platform until Application Migration is installed. Add this role to all users that need to configure and operate Application Migration.
Platform administrator roles are required to perform the tasks described on this page.
Enable Auto Install for Configuration Manager Applications and Packages
Application Migration uses the Install Application and Install Package steps in a Task Sequence to install migrated applications and packages. These Task Sequence steps are dependent on the relevant checkbox (auto install flag) being enabled for each application and package:
Allow this application to be installed from the Install Application task sequence action without being deployed
Allow this program to be installed from the Install Package task sequence action without being deployed.
If a checkbox is not enabled, the software installation will fail for that application or package. An administrator can enable this checkbox for each application and package by using either of the following methods:
in Configuration Manager during or after creating each application and package.
using the Auto Install feature in Application Migration when creating application associations, rules or Role Based Application sets.
For information about where to manually enable the checkbox for applications and packages in Configuration Manager, please refer to Using Application Migration in a Task Sequence: Auto Install for Configuration Manager Applications and Packages.
Auto install configuration
To use the Auto Install feature, you'll first need to configure the following providers in the Settings application of Tachyon platform:
Set Auto-Install option in SCCM
SCCM WMI Server
First grant the user account you want to use to configure provider related details with the role Provider Configuration Administrators. This role allows you to Update, delete and view provider configurations.
Once you have granted the Provider Configuration Administrators role, login to Tachyon platform with the user account and enable the providers.
Note
Before you can enable the provider configuration, make sure you have configured a System Center Configuration Manager connector. If you do not have a System Center Configuration Manager connector the SCCM providers will not be visible. Refer to System Center Configuration Manager connector.
Warning
If these providers are not configured correctly, the Auto Install status icon in the Migration Rules page may remain spinning, if the appliaction or program has not had its auto install flag already enabled manually outside of Application Migration.
The Set Auto-Install option in SCCM provider
The Set Auto-Install option in SCCM provider is used by the Auto Install feature, and must be enabled to allow Application Migration to enable relevant checkboxes (flags) in Configuration Manager applications or packages.
To set the provider configuration:
Navigate to Settings→Provider configuration.
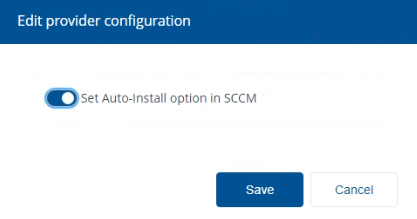
Select the provider with the name Set Auto-Install option in SCCM and click Edit.
In the Edit provider configuration popup, toggle this control to on (to the right) to enable Set Auto-Install option in SCCM.
Click Save.
Enabling SCCM WMI Server
The WMI provider holds the connection details of the Configuration Manager server.
To set the provider configuration:
Navigate to Settings→Provider configuration.
Select SCCM WMI Server and click Edit.
In the Edit provider configuration popup, slide the SCCM WMI Server toggle to on and complete the displayed form using the following information as guidance:
Field
Description
SCCM WMI Server
Toggle this control to on (to the right) to enable the SCCM WMI Server.
SCCM Server
Enter the name of the Configuration Manager server. In our example this is ACME-CM01.
In a Microsoft Endpoint Configuration Manager hierarchy, this would be the CAS.
SCCM User
The credentials for provider SCCM WMI Server may differ from those used for your System Center Configuration Manager (SCCM) connector. Make sure the credentials used here have SCCM administrator rights.
SCCM Uninstall must be run under an account that's a member of the dbcreator server role on the database server where the SCCM database is hosted, in our example this would be CM_CM1 on ACME-SQL01.
The SCCM User account in our example is ACME\Administrator.
SCCM Password
The password for the SCCM User account.
When you have entered the correct information, click Save.

Testing SCCM WMI Server
As the SCCM WMI Server provider defines how all the SCCM providers access Configuration Manager - you should test the details and credentials you have entered as soon as the provider has been saved.
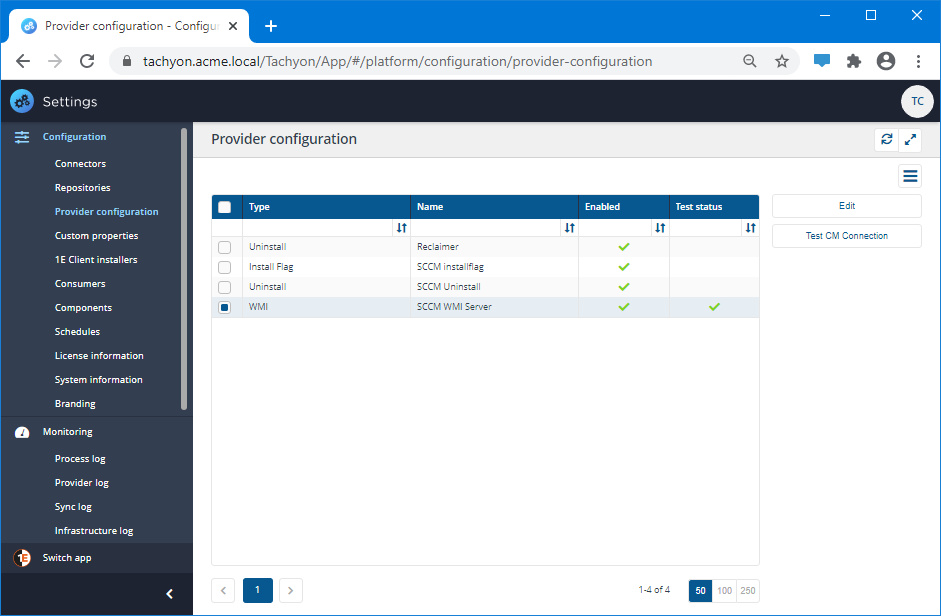
Navigate to Settings→Provider configuration.
Select the provider with the name SCCM WMI Server.
Click on the Test CM Connection button, this button is enabled when only the SCCM WMI Server provider has been selected.
A test will be scheduled to run. When the test has completed successfully a green checkmark appears in the Test status column for the SCCM WMI Server row in the table, as shown in the picture opposite.
If the test fails you will need to recheck the details and credentials you have provided, making sure that the selected account has necessary permissions as described in Enabling SCCM WMI Server.
Configure a System Center Configuration Manager inventory connector
Application Migration requires software inventory and application configuration data from Configuration Manager. To get this data, Application Migration uses the Tachyon platform System Center Configuration Manager Connector to populate an Inventory repository. By default, Application Migration uses the Default Inventory repository.
To perform this task you will need to be logged into the platform as a user with the Connector Administrator role. Connectors are configured from the Settings app. Refer to System Center Configuration Manager connector.
Note
The platform can collect inventory data from other data sources using different connectors. However, Application Migration requires the Configuration Manager connector to be used as this connector also collects details of Configuration Manager Applications, Packages and Programs that are used to install migrated applications when the Configuration Manager Task Sequence is executed.
When setting up the connector you should check the Run Consolidation Reports option in the Edit connector popup. Doing this ensures that every report needed to display data in Application Migration will be run when the inventory connector is executed. If you do not do this, you can always run the consolidation actions independently of the connectors, as described in Executing the consolidation actions independently.

Execute the System Center Configuration Manager inventory connector
Once the System Center Configuration Manager inventory connector has been added it needs to be executed to synchronize the data from Configuration Manager into Application Migration. To do this you'll need to be logged into Tachyon platform as a user with the Application Migration Administrator role, or any other role that includes permission to execute a connector.
Note
Connectors can be executed in the Settings app from either the Configuration→Connectors page or the Monitoring→Process Log page. The steps below use the Process Log page as Application Migration Administrators have access to this page but not the Connectors page.
To execute the connector:
From the Settings app, go to the Monitoring→Process Log page.
Click on the Execute button on the top right of the page.
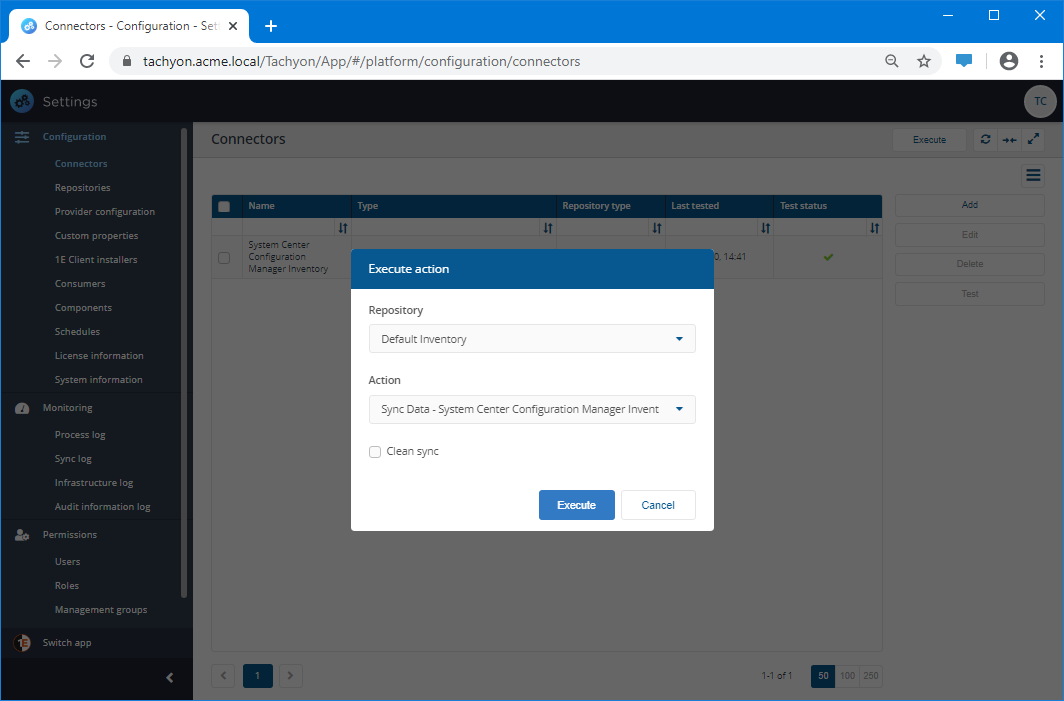
Select the inventory repository in the Execute action popup. Typically, this will be the Default Inventory repository, unless other Inventory repositories have been created specifically for use by Application Migration.
Select the Sync Data action for the System Center Configuration Manager connector.
Click on the Execute button in the Execute action popup.
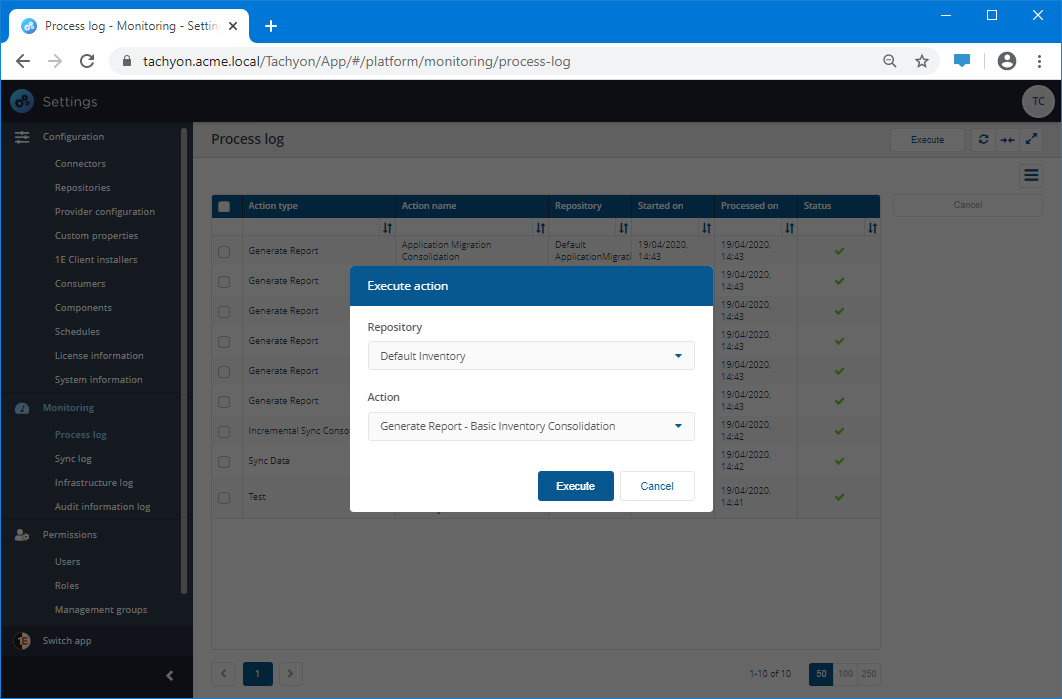
The picture shows the Execute action popup with the Default Inventory selected and the Sync Data - System Center Configuration Manager Inventory action selected.
View the Process log
When the connector is executed, the progress of the synchronization can be checked in the Settings app from the Monitoring→Process log page. To perform this task you will need to be logged into the platform as a user with the Application Migration Administrator role, or any other role that includes permission to view the Process Log.
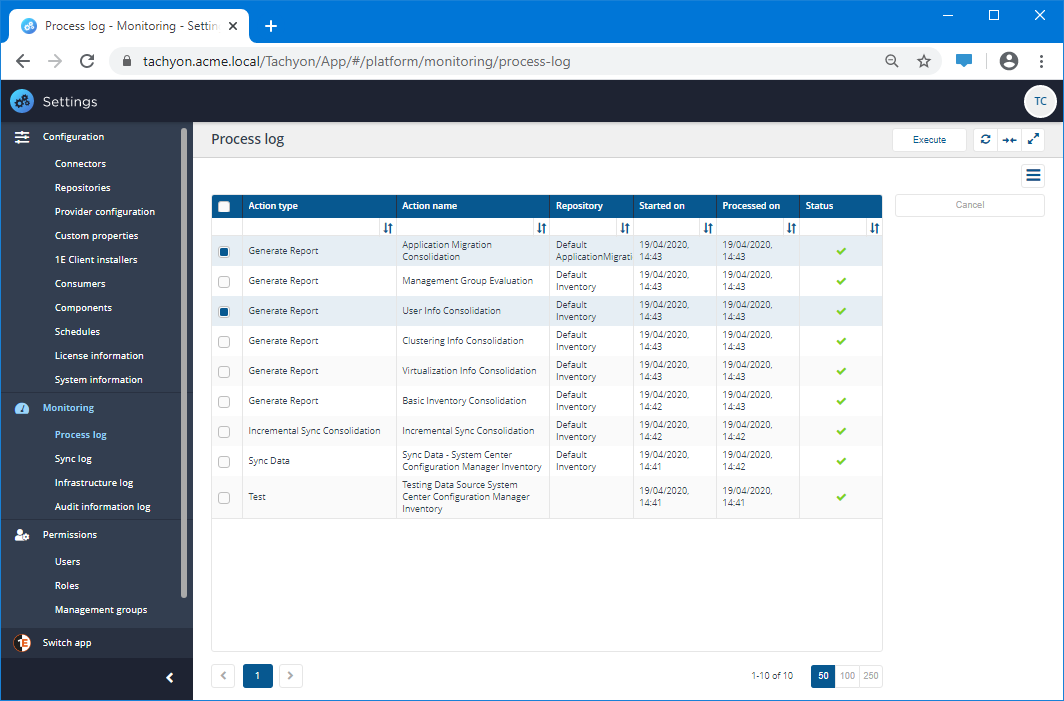
The picture shows the Monitoring→Process log page where the data sync using the System Center Configuration Manager Inventory connector was executed.
Note
A number of other steps follow the initial sync, including the Basic Inventory Consolidation report and the Application Migration Consolidation report, as highlighted. These reports were run automatically after the data sync as the option to Run Consolidation Reports was checked when the connector was added. The Application Migration Consolidation report is the last step in getting the data ready for Application Migration.
View data on the Application Migration Installations page
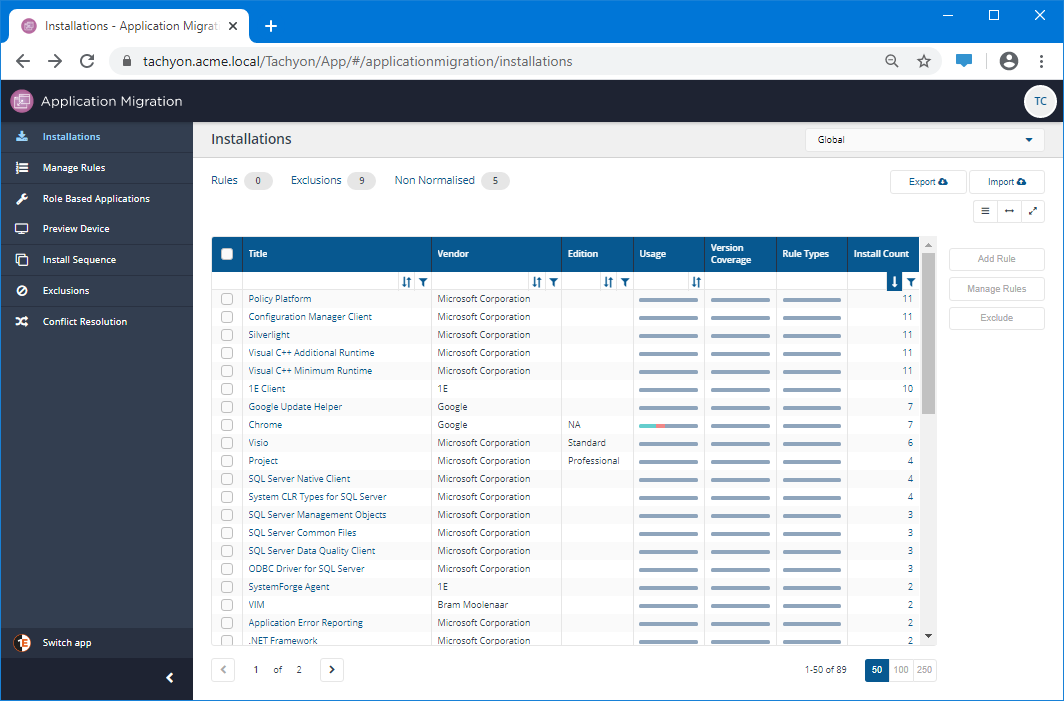
Once the reports have been run you will be able to see data in the Application Migration app on the Installations page, as shown.
Scheduling the connector to keep data synchronized
The process above executes a single, on-demand synchronization of data from Configuration Manager into Application Migration. You should schedule the connector to execute regularly to keep the data in Application Migration up to date, ensuring new devices, new software installations and software removals are correctly reported.
To perform this task you will need to be logged into Tachyon platform as a user with the Schedule Administrator role. The Application Migration Administrator role does not have the required permissions to schedule connectors. Refer to Schedules page.
Executing the consolidation actions independently
There are scenarios where you would want to execute the consolidation reports separately from an inventory synchronization, for example you may have a number of inventory connectors connecting into different data sources. In this case you would want to perform all the synchronizations before executing the consolidation actions.
There are two consolidation actions you need to execute for Application Migration:
Basic Inventory Consolidation.
Application Migration Consolidation.
Executing the Basic Inventory Consolidation action
The Basic Inventory Consolidation report can be run independently of the Settings app:
Clicking the Execute button in either the Configuration→Connectors or Monitoring→Process log pages.
Note
Users assigned the Application Migration Administrator role will only be able to run the Basic Inventory Consolidation report from the Process Log page.
Selecting an Inventory repository.
Selecting the Generate Report - Basic Inventory Consolidation action.
Clicking the Execute button in the Execute action popup.
Note
Running the Basic Inventory Consolidation report will also run the Application Migration Consolidation report.
Executing the Application Migration Consolidation action
You may want to run the Application Migration Consolidation report independently after deleting a Management Group or fixing an orphaned Application Migration rule to update the data in the Application Migration UI.
The Application Migration Consolidation report can be run independently of the Settings app:
Clicking the Execute button in either the Configuration→Connectors or Monitoring→Process log pages.
Note
Users assigned the Application Migration Administrator role will only be able to run the Basic Inventory Consolidation report from the Process Log page.
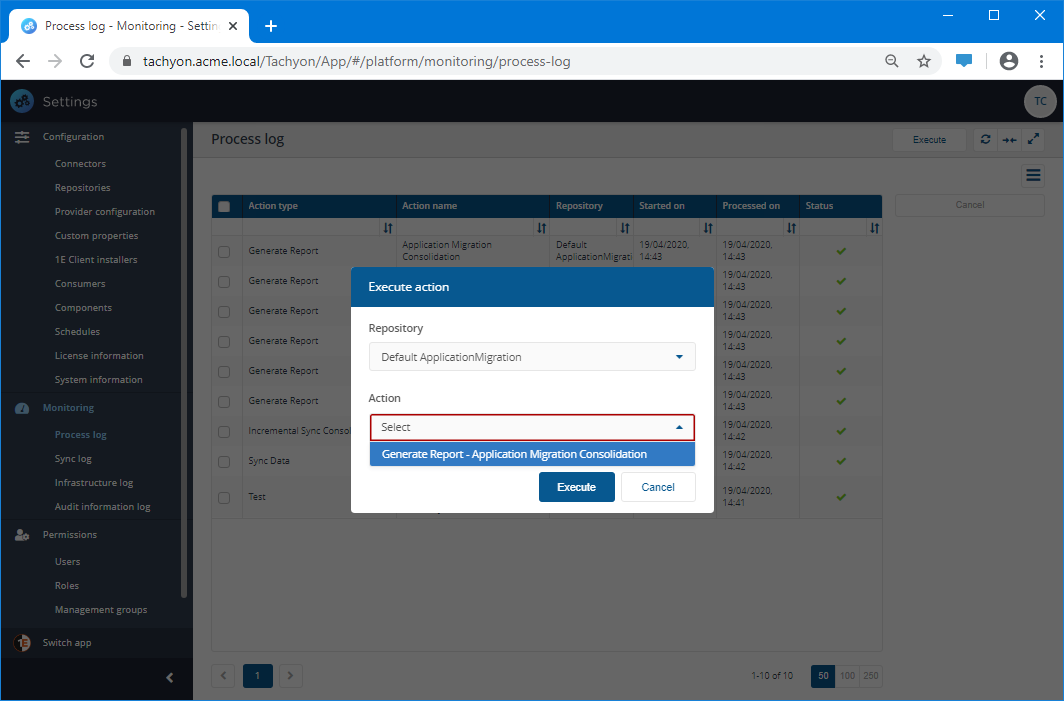
Selecting an Application Migration repository.
Selecting the Generate Report - Application Migration Consolidation action.
Clicking the Execute button in the Execute action popup.