Rebuilding the 1E Catalog
Resynchronize the 1E Catalog using admin access. You can rebuild your Catalog data by running a resynchronization event if you have admin privileges. By default, no one has admin access – you'll need to create an Azure Active Directory group to manage who runs resynchronization events and accesses the admin menu item in the Catalog UI.
Typical reasons for running a re-synchronization event are if you:
Think your Catalog data is corrupted or incomplete as a result of normally scheduled synchronization cycles
Have not updated your Catalog data over a long period - it's quicker to run a resynchronization event instead of executing a normal synchronization cycle
Migrate your Catalog to a newer version – to deduplicate any Catalog entries
Have upgraded to a newer version of Catalog.
Granting administrative privileges
The only feature available on the Admin screen is Resynchronize Catalog. It's only accessible to users who are members of an AD account or an AD security group present in the Admins key for the Catalog Web. By default, the 1E Catalog is installed with Admins = Catalogue Admin.
You can create and populate this group in Azure Active Directory, or you can change the configuration of the website to include a comma-separated list of alternative Azure Active Directory groups and user accounts.
Note
If you choose to have additional groups, make sure there are no spaces between the list values. If there are, the additional groups will not have admin privileges as intended.
How to reconfigure the website to grant admin access
Changing the website configuration needs an account with local admin rights, like the Catalog installation account. See Preparation.
To modify the Admins key, use one of the following methods:
IIS Manager
Edit web.config
IIS Manager
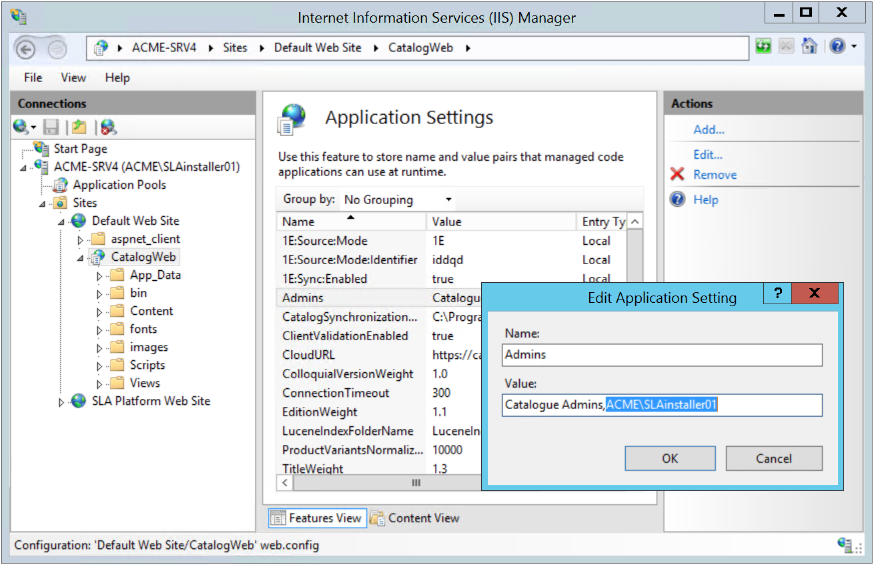
Modify the Admins key using IIS Manager, navigate to the CatalogWeb web application, and select Application Settings.
You'll need to do an IIS reset after the change.
Edit web.config
Edit the
web.configfile, located by default in%PROGRAMFILES%\1E\Catalog\CatalogWebUI\web.configIn the following example, under <
appSettings>, locate the<add key="Admins" value="Catalog Admin" />element (line 18).Note
If you choose to have additional groups, make sure there's no space between the values in the list, otherwise, additional groups will not have the admin privileges you intended.
<appSettings>
        <add key="webpages:Version" value="3.0.0.0 />
        <add key="webpages:Enabled" value="false" />
        <add key="ClientValidationEnabled" value="true" />
        <add key="UnobtrusiveJavaScriptEnabled" value="true" />
        <add key="1E:Sync:Enabled" value="true" />
        <add key="1E:Source:Mode" value="1E" />
        <add key="1E:Source:Mode:Identifier" value="iddqd" />
        <add key="VendorWeight" value="1.4" />
        <add key="TitleWeight" value="1.3" />
        <add key="VersionWeight" value="1.2" />
        <add key="EditionWeight" value="1.1" />
        <add key="ColloquialVersionWeight" value="1.0" />
        <add key="ConnetionTimeout" value="300" />
        <add key="LuceneIndexFolderName" value="LuceneIndex" />
        <add key="ProductValiantsNormalizeBatchSize" value="10000" />
        <add key="CatalogSynchronizationDirectory" value="C:\ProgramData\1E\Catalog\CatalogSynchronization\" />
        <add key="Admins" value="Catalog Admin" />
        <add key="CloudURL" value="https://catalog.1e.com" />
</appSettings>
Modify the value parameters by adding your Catalog Azure Active Directory group or individual users. For example, if your Catalog Azure Active Directory groups are called Catalog Curators, modify the value parameter by updating the default Catalog Admin to the name of your Azure Active Directory group. To add individual users, modify the value parameter to include their user names, in the format domain\user name, separating each parameter with a comma.
<add key="Admins" value="Catalog Curators, ACME\SLAinstaller01" />
Save the file.
Restart IIS.
Rebuilding your Catalog data
Only users with admin privileges can rebuild your Catalog data.
When you run the resynchronization event with site-defined Catalog entries:
user - site-defined entries are optionally kept or deleted
auto-curated - site-defined entries are kept.
We recommend keeping any user site-defined entries. If you choose not to keep your user site-defined entries, they will be deleted and you will have to recreate them again.
To rebuild your Catalog data:
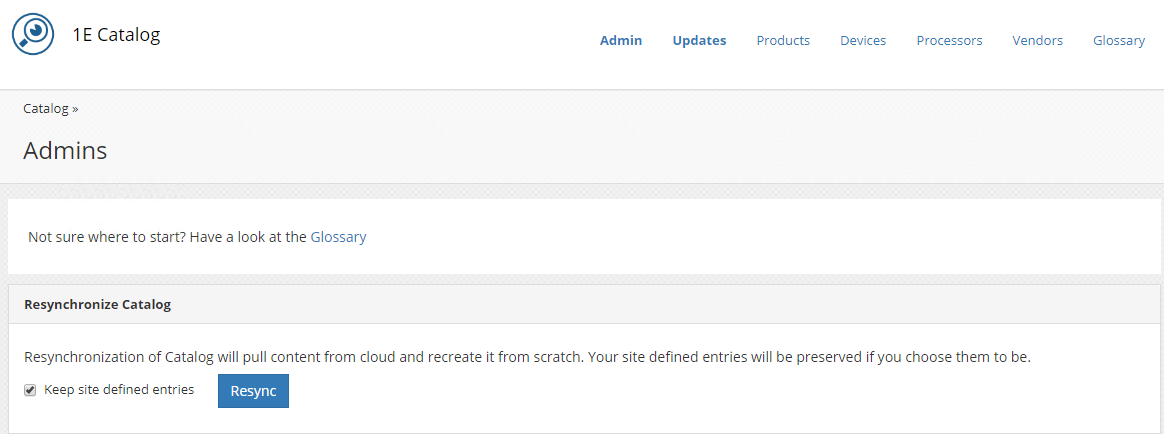
On the Catalog UI, click Admin.
On the Admin screen under Resynchronize Catalog, click Resync.
Note
Ensure that the Keep site defined entries checkbox is ticked to preserve your existing site-defined Catalog entries. If not, you will have to recreate all your site-defined entries again.
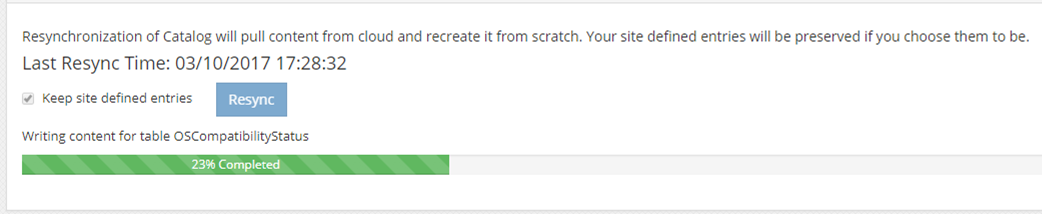
A progress bar displays synchronization progress.
Modifying the resynchronization schedule
You can modify the default resynchronization schedule (the default is 7 days) to a time suited to your environment.
Edit the CatalogUpdateService.exe.config file, located in %PROGRAMFILES%\1E\Catalog\ CatalogUpdateService.
Under
<appSettings>look for the<add key="ResyncFrequency" value="7" />element (line 12).<appSettings> <add key="ConnectionRetryInterval" value="00:01" /> <add key="InitializationDelay" value="00:01" /> <add key="CircuitBreakerTimeout" value="00:15:00" /> <add key="MaxFailureTimeSpan" value="14.00:00" /> <add key="PeriodicSubscriptionFrequency" value="23:59" /> <add key="CatalogSynchronizationDirectory" value="C:\ProgramData\1E\Catalog\CatalogSynchronization\" /> <add key="CloudURL" value="https://catalog.1e.com" /> <add key="ApplySiteDefinedDeltaFrequency" value="00:10:00"/> <add key="ApplyDeltaBatchSize" value="5000"/> <add key="IndexRefreshFrequency" value="05:07:00" /> <add key="ResyncFrequency" value="7" /> <add key="RetryResyncOnClash" value="02:00:00" /> </appSettings>
Update the frequency for the resynchronization event (the default is 7 days). If you want this event to trigger at a particular interval and time, use the time span format
d:HH:mm:ss.If you want to disable the resynchronization event, update the value for
ResyncFrequencyto0:<add key="ResyncFrequency" value="0" />
Update the value for
RetryResyncOnClash(line 13) to one suited to your environment so the resynchronization event will retry after this duration if a conflict exists with the normal synchronization event. The default is 2 hours.Restart the catalog update service.
Reviewing the log file
The process of rebuilding the Catalog is logged in Catalog.Integration.UI.log. You should see the following significant entries:
Starting Resync with keepSiteDefined=True indicates that a 1E Cloud Catalog synchronization has started and the connection to the Catalog Update service has been successful.

Data Copy Success and Indxes created successfully after Resync, these indicate the data synchronization with the cloud is a success and the indexes have been rebuilt, this means the catalog is now up-to-date and ready to use.
