Configuring Access Rights - tutorial
A quick tutorial on configuring access rights for Tachyon. Using a scenario where access to Tachyon will be managed through Active Directory groups, the tutorial illustrates the general setup required and the particular steps needed to add users.
In this tutorial
In this tutorial we demonstrate a process for creating Active Directory (AD) managed permissions to the Tachyon portal. We use specifically created AD groups for each of the Tachyon system roles and create users for each one, we then define a custom role for a specific Instruction Set and create a user with an existing AD group that provides access to running actions in the Instruction Set.
Example AD group a Tachyon system role
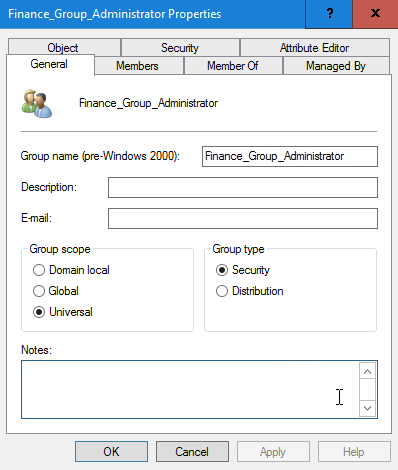
As mentioned in Users and Groups page, we recommend that the AD security groups used for defining access to the Tachyon portal features are defined as Universal groups. The picture shows an example AD Finance_Group_Administrator security group intended for a Group administrator role. In our example, the Finance_Group_Administrator AD group is for workstation administrators of an AD OU called Finance.
1E roles
In this tutorial we will create an example 1E Azure Active Directory group user based on the possible roles given in the following 1E system and custom roles.
Tip
On the Roles page, you can see at a glance which 1E roles are system or custom roles, by using the icon in the Name column:
System roles are indicated by an icon with a padlock

Custom roles are indicated by an icon with a cog wheel

System and custom roles
Refer to Roles and Securables for a complete reference for the following:
Platform system roles.
The custom roles used by 1E applications.
For customers upgrading from Tachyon Platform 5.2 or earlier, a list of role names that are automatically renamed.
Creating 1E users or groups
The general steps for creating a new user or group are as follows:
Adding 1E users
Log on to the 1E portal using a 1E user account with the Full Administrator, or the Installer role if it is a new 1E installation.
Navigate to the Settings→Permissions→Users and Groups page.
Click on the Add button, doing this displays the Add user popup.
In the Select user or group field, type the name, or part of the name, for the user or group that you want to add, then click the search icon.
Select the user or group from the list of matching names displayed in the drop-down list and click Add.
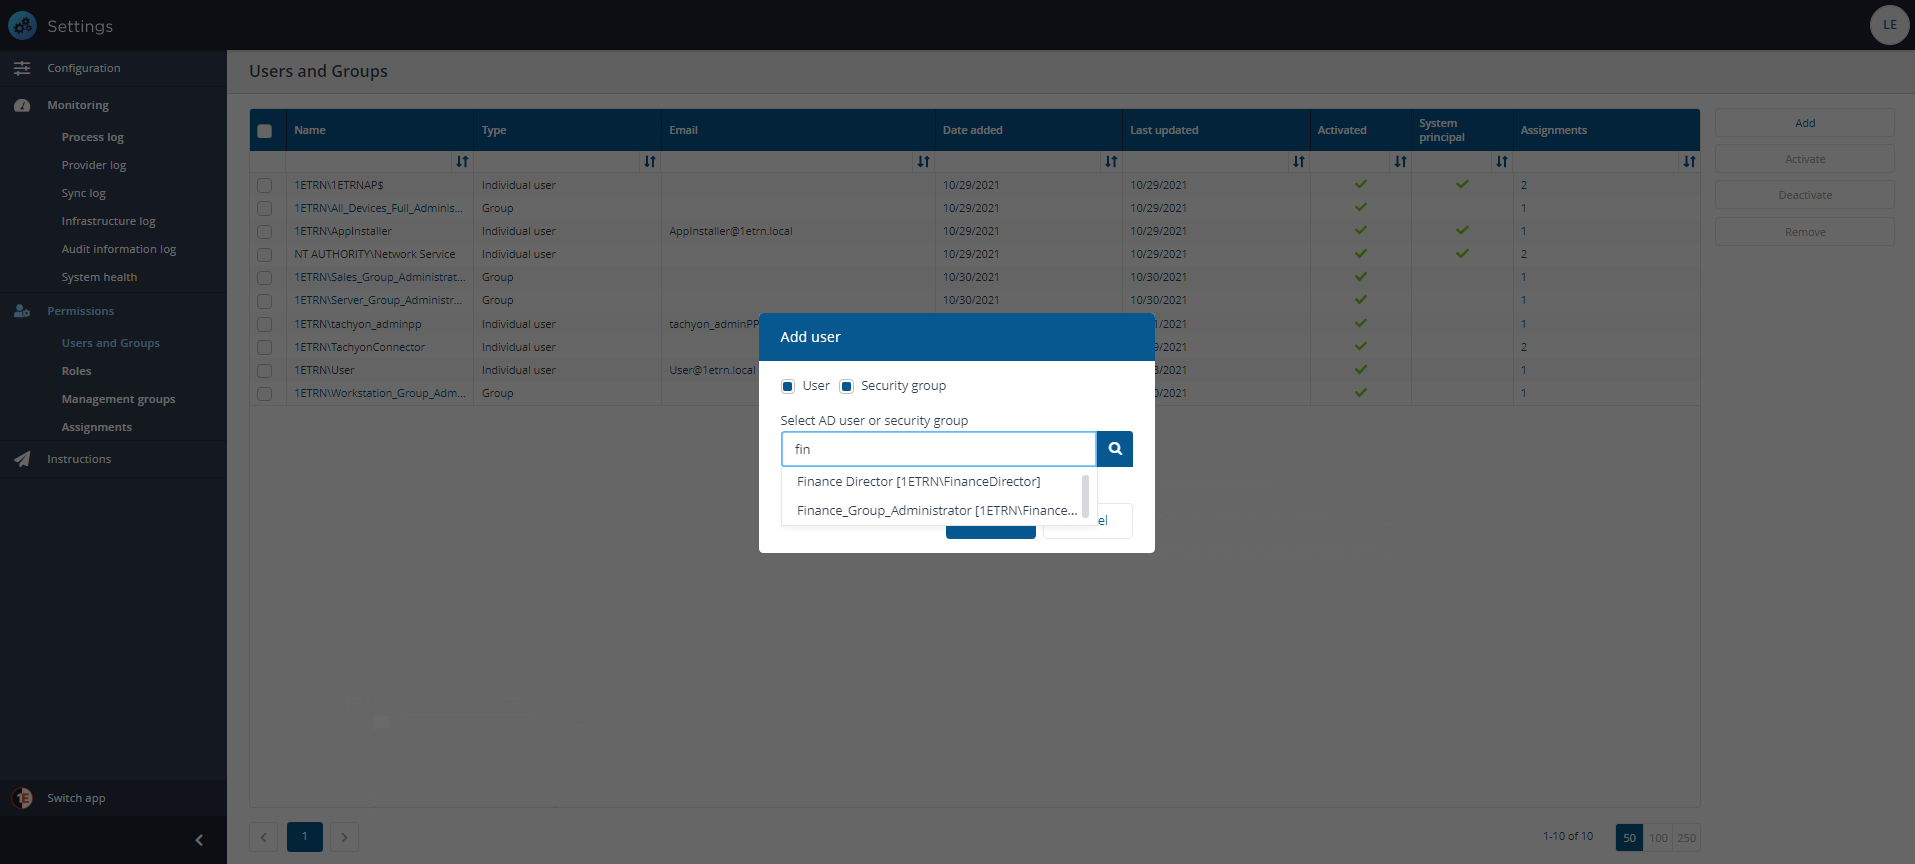
On the Settings→Permissions→Users and Groups page, after clicking the Add button, the Add user popup is displayed.
In the Select user edit field we type FIN because it is the first few characters of our group in our environment.
We then select the Finance_Group_Administrator group from the list. Once the group has been selected we click Add to create the new 1E user.
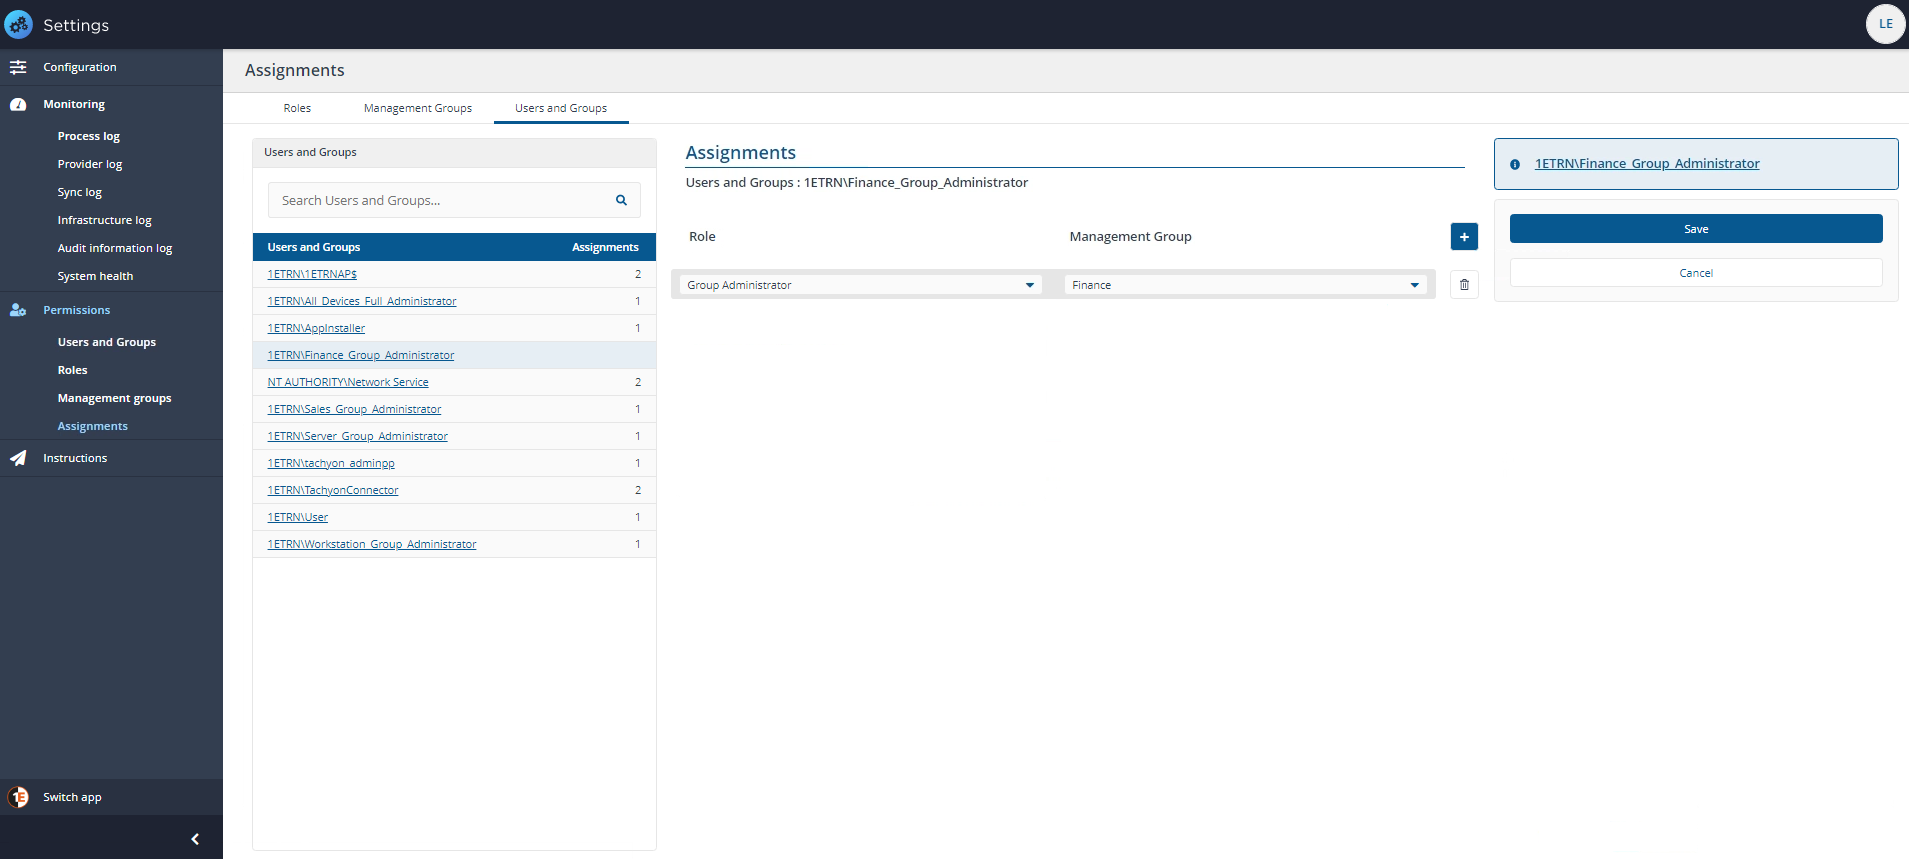
We then click the new Finance_Group_Administrator account's Assignments link to display the details for that group on the Assignments page.
Tip
Clicking the name of the group displays any AD accounts you have added to the Universal group using Active Directory Users and Computers.
From here we can add assignments to our group account and the Management Group they will apply to.
In this case we choose the Group Administrator role for our Finance Management Group. We do not want our administrators for the Finance division to work on servers, or on devices belonging to other departments who have their own administrators, once we are satisfied with the changes, we click Save.
Note
Refer to the Roles page for details about creating custom roles and a list of all built-in custom roles used by Tachyon Applications.
After the new user or group has just been added, 1E will display notifications for a short while showing the actions that have just been successfully performed.
In the tutorial we then repeat the process of finding groups, adding 1E roles and saving for each of the 1E system roles. The purpose of this is that subsequently, specific user access to 1E can be managed through your Identity Provider using membership of selected groups and avoiding the necessity of managing the users through 1E.
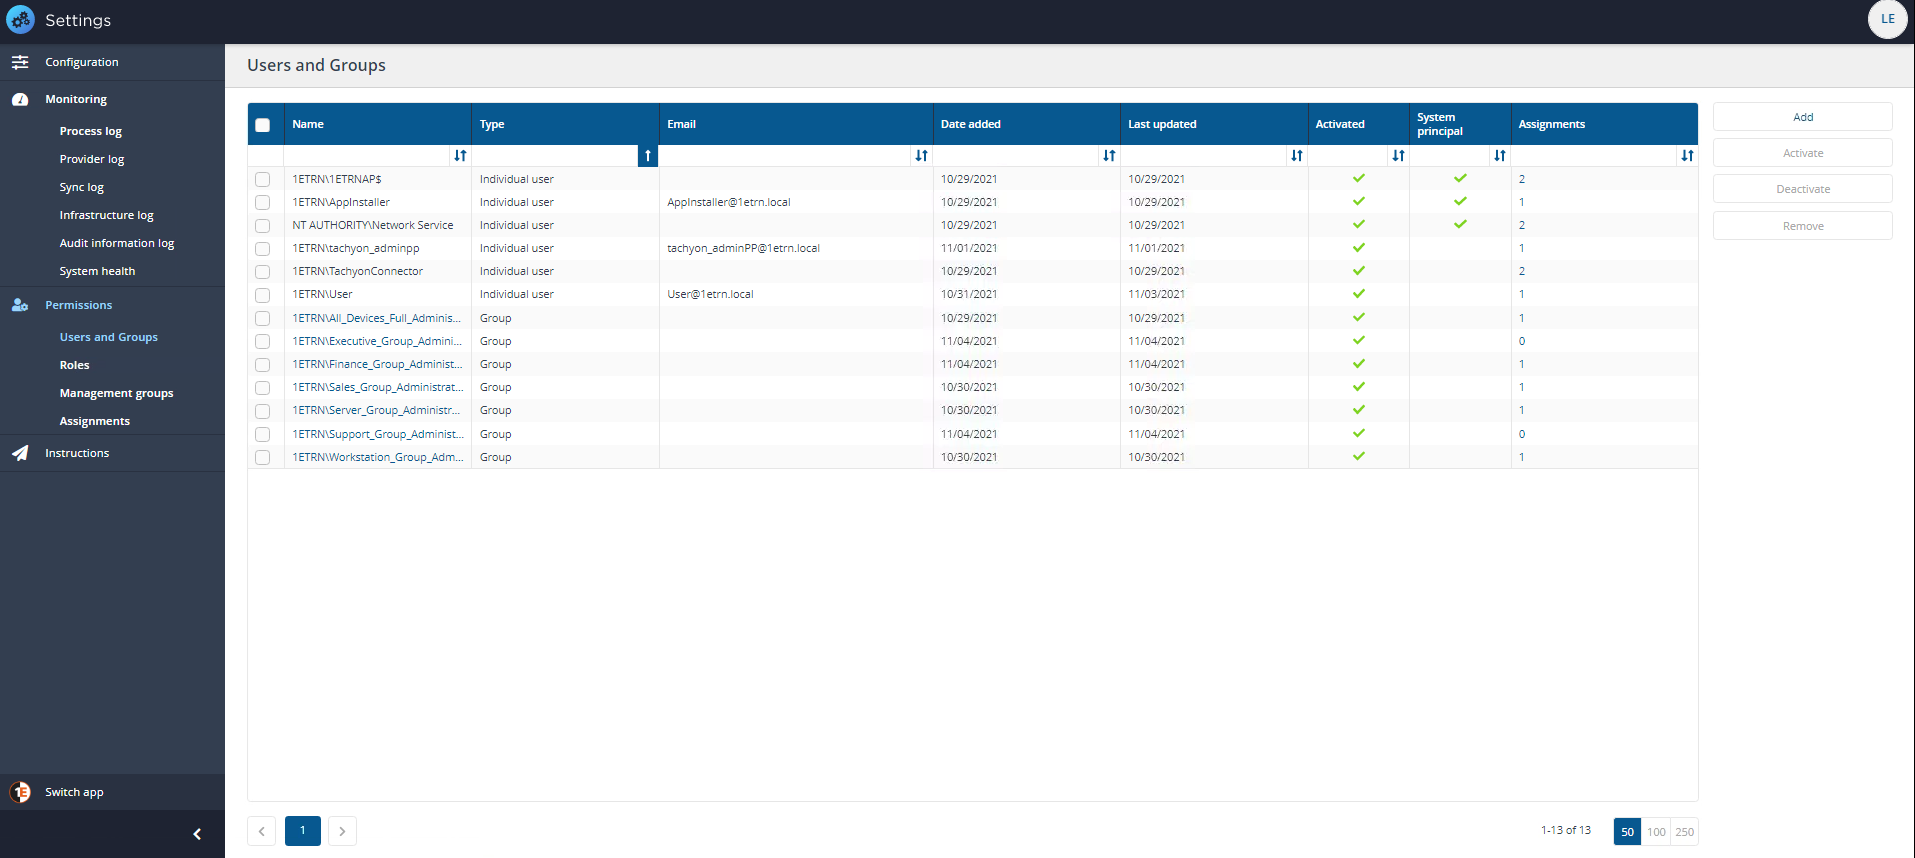
The result of adding the groups can be seen in the picture.