Creating an agreement entitlement
Agreement entitlements provide a way of grouping and organizing entitlements together to model the agreement structures in place between your organization and a vendor of a specific software title. Agreements can act as containers for license, maintenance, and even other agreement entitlements.
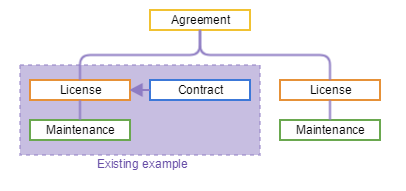
In this example
In this example we will extend the Microsoft Visio license and associated maintenance and contract created in Creating a license entitlement and Creating and linking a maintenance entitlement.
By the end of this example you will have created a new Microsoft Product agreement entitlement and linked the existing Visio license to it. You will also have created a new Microsoft Project license and associated 36 month maintenance and then linked that to the new agreement.
Check we have a deficit
To the right we have navigated to AppClarity→Compliance→License Position page and filtered the Title on Project which shows that we have an installation for Microsoft Project and that has a total license deficiency of -19.
Note
You can choose which columns are displayed in Inventory and AppClarity detail tables to increase readability. On pages where you can pick the displayed columns you'll see a new control like the one highlighted below:

To find out more about this feature refer to Running your first Compliance License Summary: Choosing the columns to display in reports.

Selecting any of the displayed products and then Compliance Details opens the License Summary page, this display can also be accessed directly and filtered, but you should know there are multiple ways to access the page.

Add a New Agreement
To add a new Microsoft Products agreement entitlement, navigate to the Entitlements→Agreements page and click on New Agreement, located just to the right.
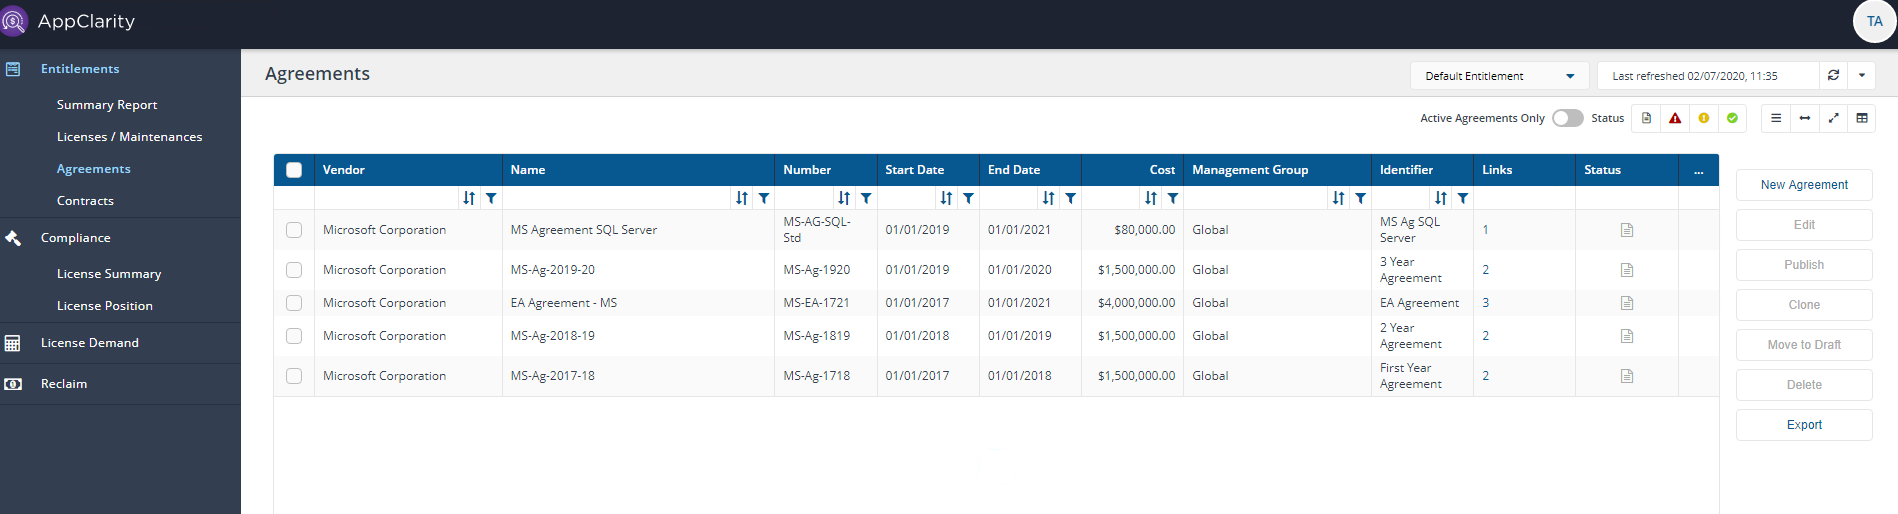
To add a new Microsoft Products agreement entitlement:
Navigate to the Entitlements → Agreements screen and click New Agreement, located just to the right.
In the New Agreement page we will choose a specific set of options to show how this page works. For more details on all the fields in this page please refer to New Agreement page.
There are lots of fields on the page but a few are mandatory. The mandatory fields have an * next to their name.
The page is split into a number of sections, we will start in the Basic Information section.
The Management Group is the first mandatory field, it is set by default to Global, but it can be changed to any of your existing Management Groups, in this example we will leave it at Global.
The next mandatory item is the Vendor field. We know that the vendoris Microsoft Corporation.
Now we set the following fields and click Publish. We could have clicked Save draft, if we were in the middle of making changes and didn't want to make the agreement active, the draft agreement would then be saved.
Name to Microsoft Product Agreement - this should be the name of your agreement
Number to Ag123456 - this is not mandatory, but should be the Agreement Number
Entitlement Term Start Date defaults to today's date, but should be set to the date your agreement starts, in the example we will use today's date
Duration to 36
Total Cost to $8000
Note
You can change the default currency (USD) along with the appropriate currency symbol and name from USD to a currency of your choice, for more details refer to Creating a license entitlement: Changing the default currency in AppClarity
The Agreements page will update and the new agreement will be listed, with the Status column having a green tick to show it is published.
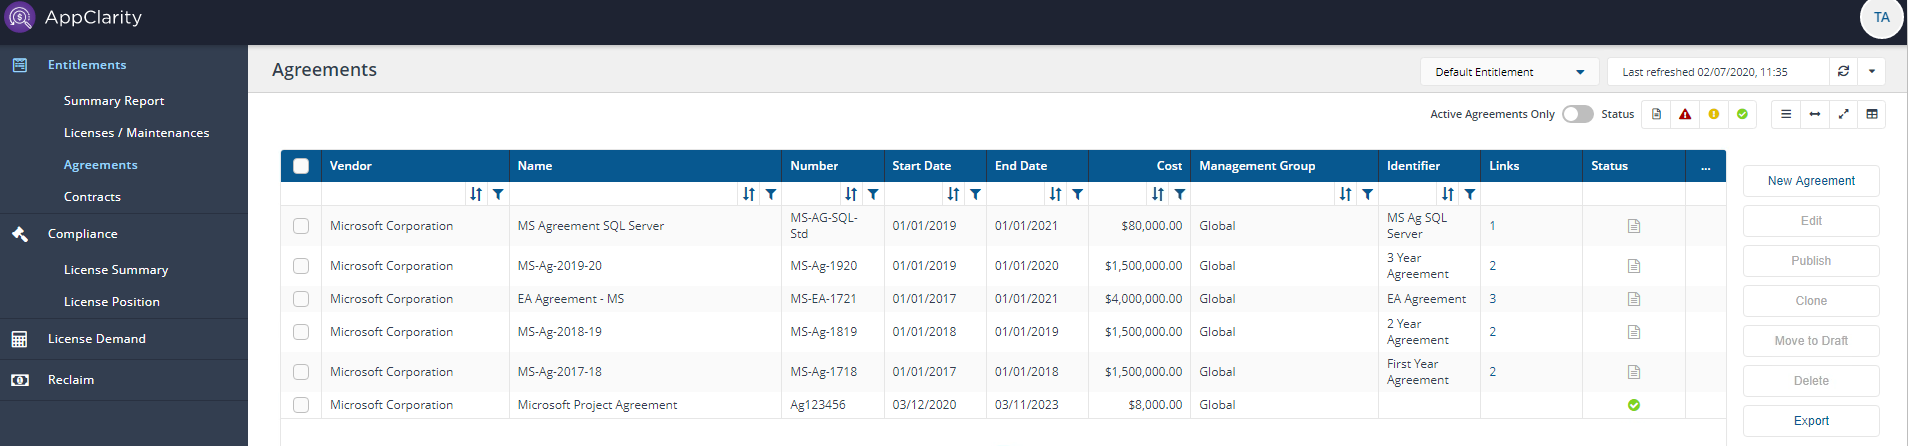
We will now link the new Agreement to our existing License for Microsoft Visio.
After the actions above, we are returned to the Entitlements - Agreements screen.
Select the Agreement just created and click Edit.
Scroll to the Entitlements Links section and click + Add link in the Children section.
Scroll to find the Visio Professional License, and then click on this and the green tick we have previously seen will appear.
Click Add.
Click Publish.
Now we'll add a new license for Microsoft Project (refer to Creating a license entitlement for the steps to achieve this, not forgetting to Publish once added):
Enter the following details for the license:
Vendor: Microsoft Corporation
Title: Project
Version Type: Colloquial
Version: 2016
Edition: Professional
Metric Type: Device (this is the default)
Quantity: 20
Entitlement Type: Perpetual
Start date: to the date the license started, or is due to start on. In our example it's set to the default of the current date
Costs $200
Adding a new maintenance entitlement for Microsoft Project:
Return to the Licenses / Maintenances screen. Click the New Maintenance button.
We then set the details for the Maintenance click Publish when entered:
Vendor: Microsoft Corporation
Title: Project
Edition: Professional
Quantity: 20
Entitlement Type: Subscription (default for maintenance)
Duration: 36
Unit Cost: 50
We will now link the Microsoft Product Agreement to our new License for Microsoft Project.
Navigate to Entitlements → Agreements screen.
Select the Microsoft Product Agreement and click Edit.
Scroll to the Entitlements Links section and Click + Add link in the Children section.
Scroll to find the Project Professional License click on this and the green tick we have previously seen will appear.
Click Add.
Click Publish.
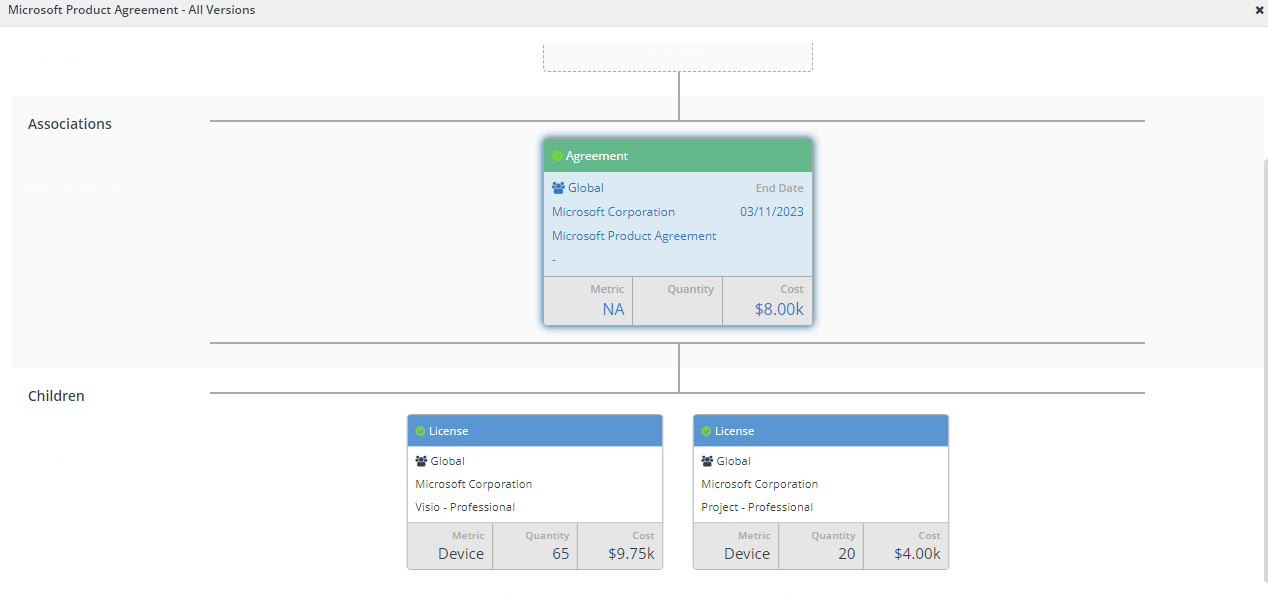
That has created the structure for our agreement. To see this click on the 2 in the Links column for the Microsoft Product Agreement, this will display the screen:
To make a published license entitlement take effect, you have to run the Compliance report:
Switch to the Settings→Configuration→Connectors page and click on the Execute button.
The Execute action popup is displayed, enter the following:
Repository: Default Compliance
Action: Generate Report - Compliance.
Navigate to Monitoring→Process Log and wait for the action to complete, this will be Compliance and will have a green tick in the Status column when complete.
Now that the compliance report has been run, to see the impact of implementing the entitlements:
Switch to the AppClarity→Compliance→License Position page.
In our example you can see thatVisio with Edition of Professional now has a License Position of 5. This indicates that the installations of the software title are now licensed and there are 5 spare licenses for Visio. And the License Position for Project is 1.
