Manage associations
Applications and Packages in Configuration Manager are identified by a name and optionally publisher and version arbitrarily determined by the Configuration Manager administrator that created them. The Inventory platform uses a standard format of Vendor, Title, Version, and Edition to identify applications.
The Manage Associations section of Inventory enables an administrator to effectively normalize the Applications and Packages imported from Configuration Manager by associating them with a Vendor, Title, Version, and Edition defined in the 1E Catalog. These associations are then used to define migration rules in Introducing Application Migration and reclaim rules in Introducing AppClarity.
To manage associations, the Inventory repository used by your application must be populated by a System Center Configuration Manager connector that collects details of Applications and Packages defined in Configuration Manager.
The Manage Associations section
The Manage Associations section allows you to associate Applications and Packages in CM with a Vendor, Title, Version and Edition from the 1E catalog. It provides two views of the data.
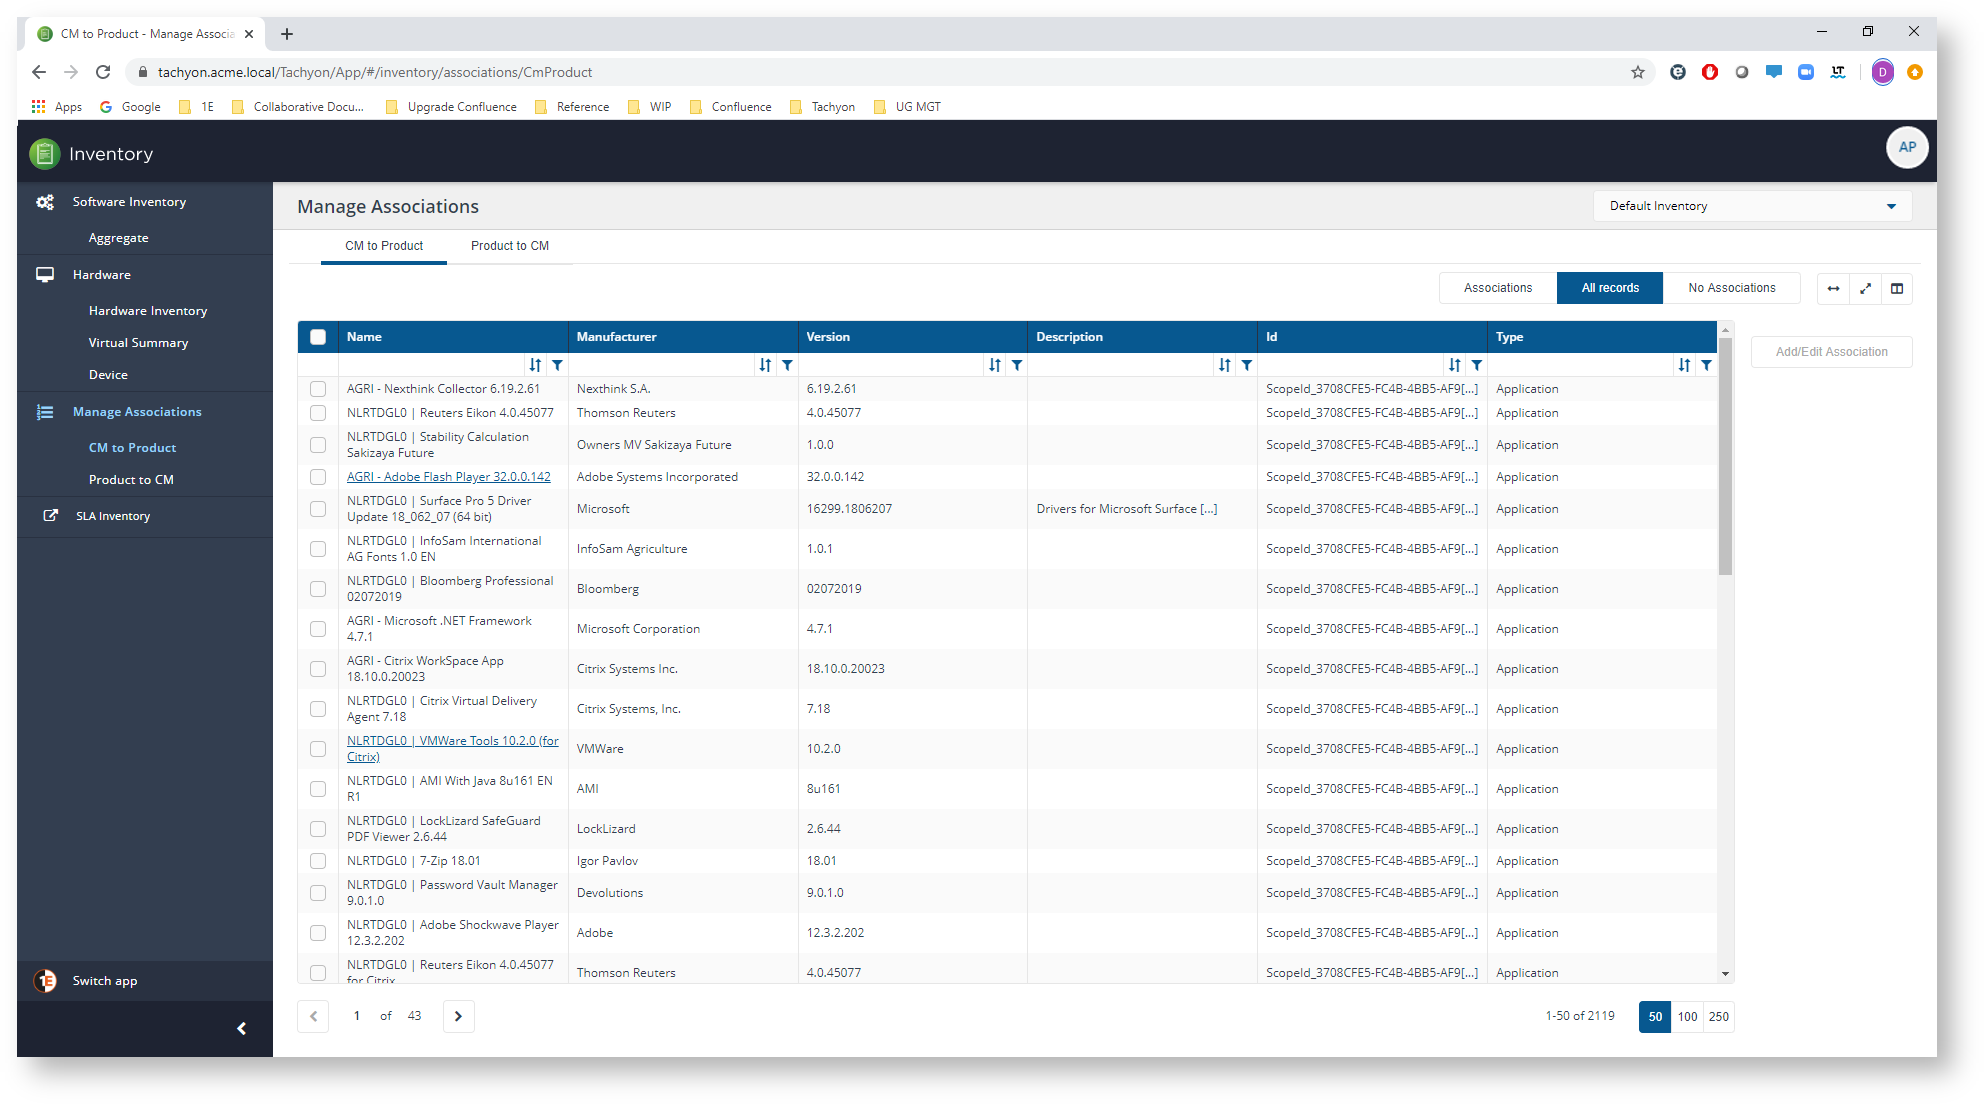
The CM to Product view lists all Applications and Packages that were imported from CM during the last Inventory sync. You typically use this view when initially setting up Application Migration, as it allows you to work through each Application and Package available for deployment and associate them with a suitable Vendor, Title, Version and Edition.
You would also use this view after new Applications or Packages have been added in CM. Once you've created the associations you can then create migration rules that refer to the products without having to refer back to the CM Application or Package that installs them.
The Product to CM view lists all products (by Vendor, Title, Version and Edition) installed in your environment, indicating the products that have been associated with an Application or Package in CM and can therefore be installed through Application Migration or removed using AppClarity reclaim.
This view is ideal for identifying the products installed in your environment that are not currently set up for automated installation or removal using Application Migration and AppClarity.
Associating a Configuration Manager application or package with a product (Vendor, Title, Version, and Edition)
After syncing a connector with Configuration Manager, the Inventory→Manage Associations->CM to Product tab on the Manage Associations page lists the applications and packages found in Configuration Manager.
Note
You can choose which columns are displayed in some detail tables to increase readability. On pages where you can pick the displayed columns you'll see a new control like the one below:

To find out more about this feature refer to Choosing the columns displayed in reports.
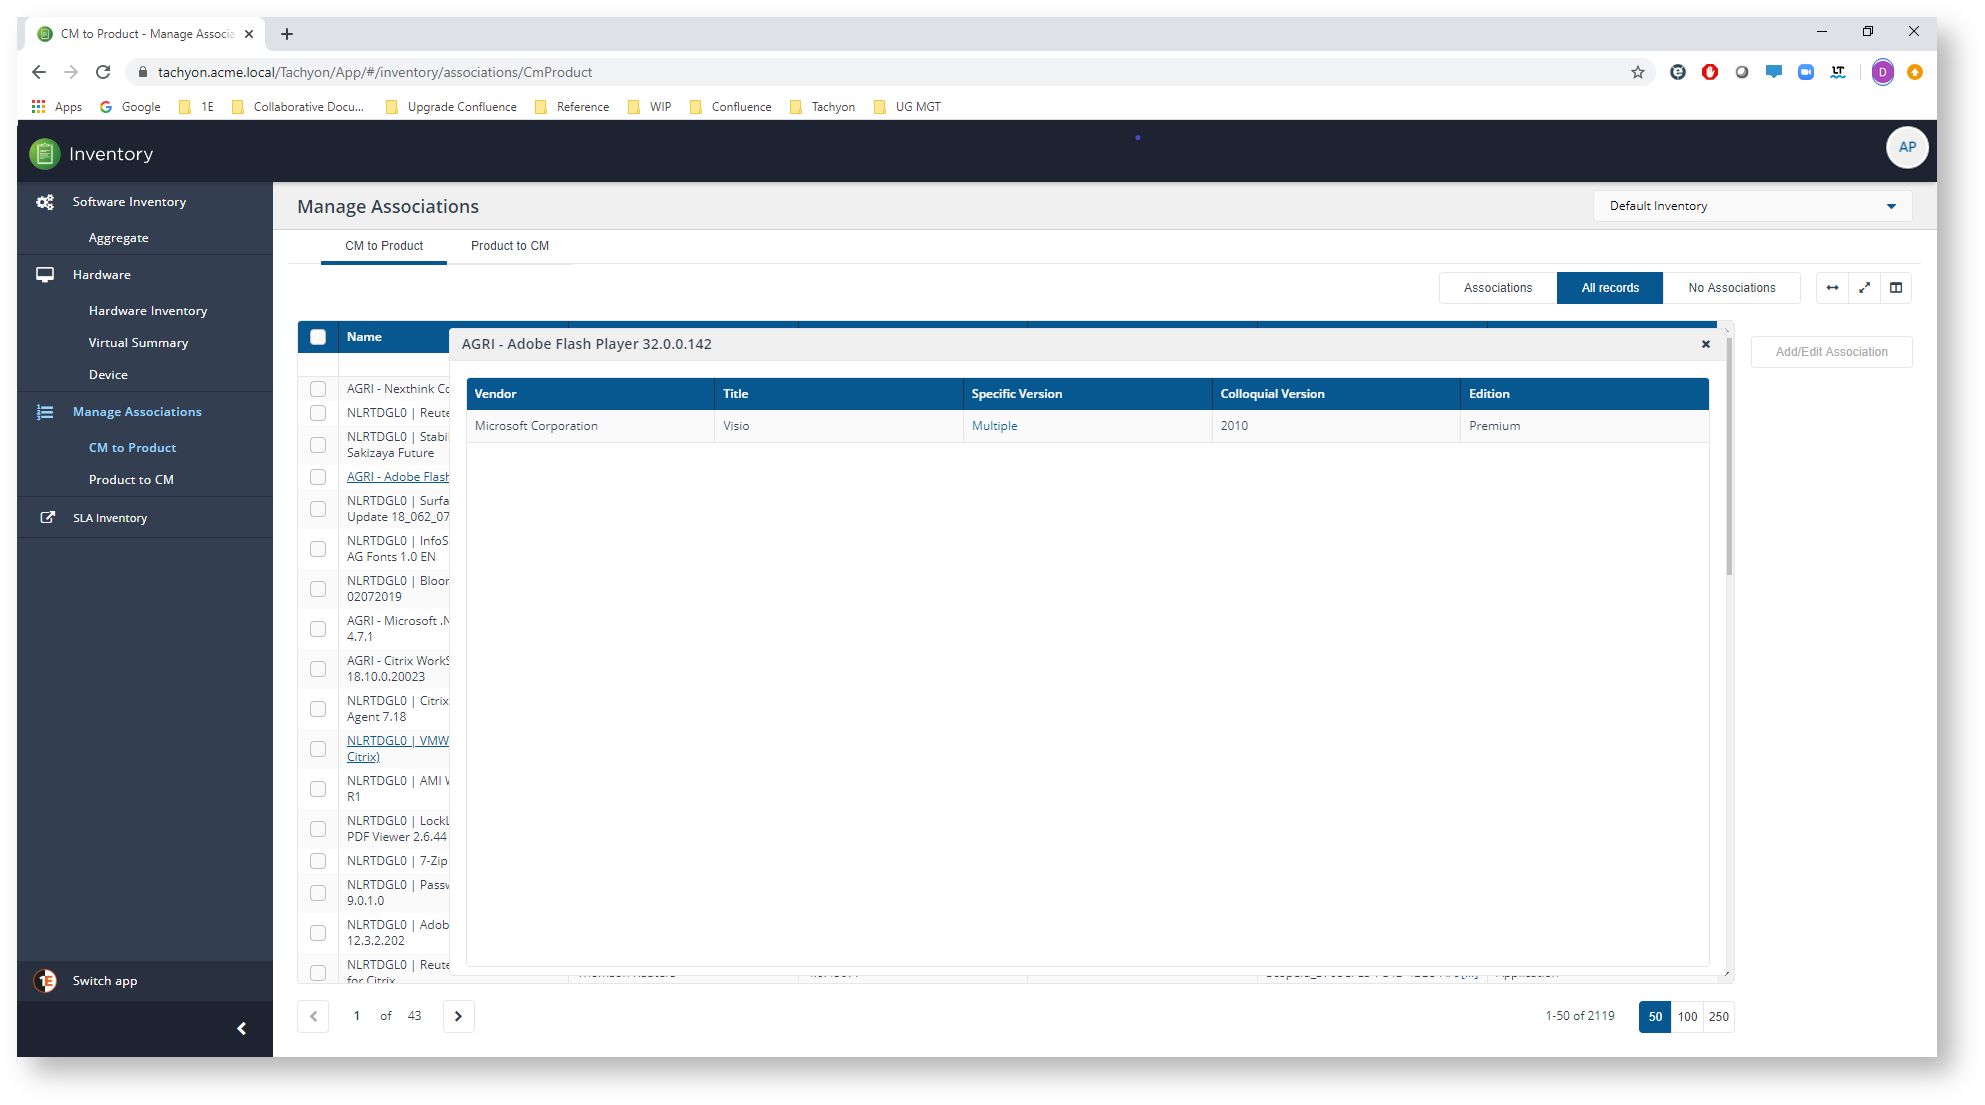
For any Configuration Manager applications/packages, where there are any product associations present, the application/package name in the Name column is a link that displays a pop-up that shows the existing association.
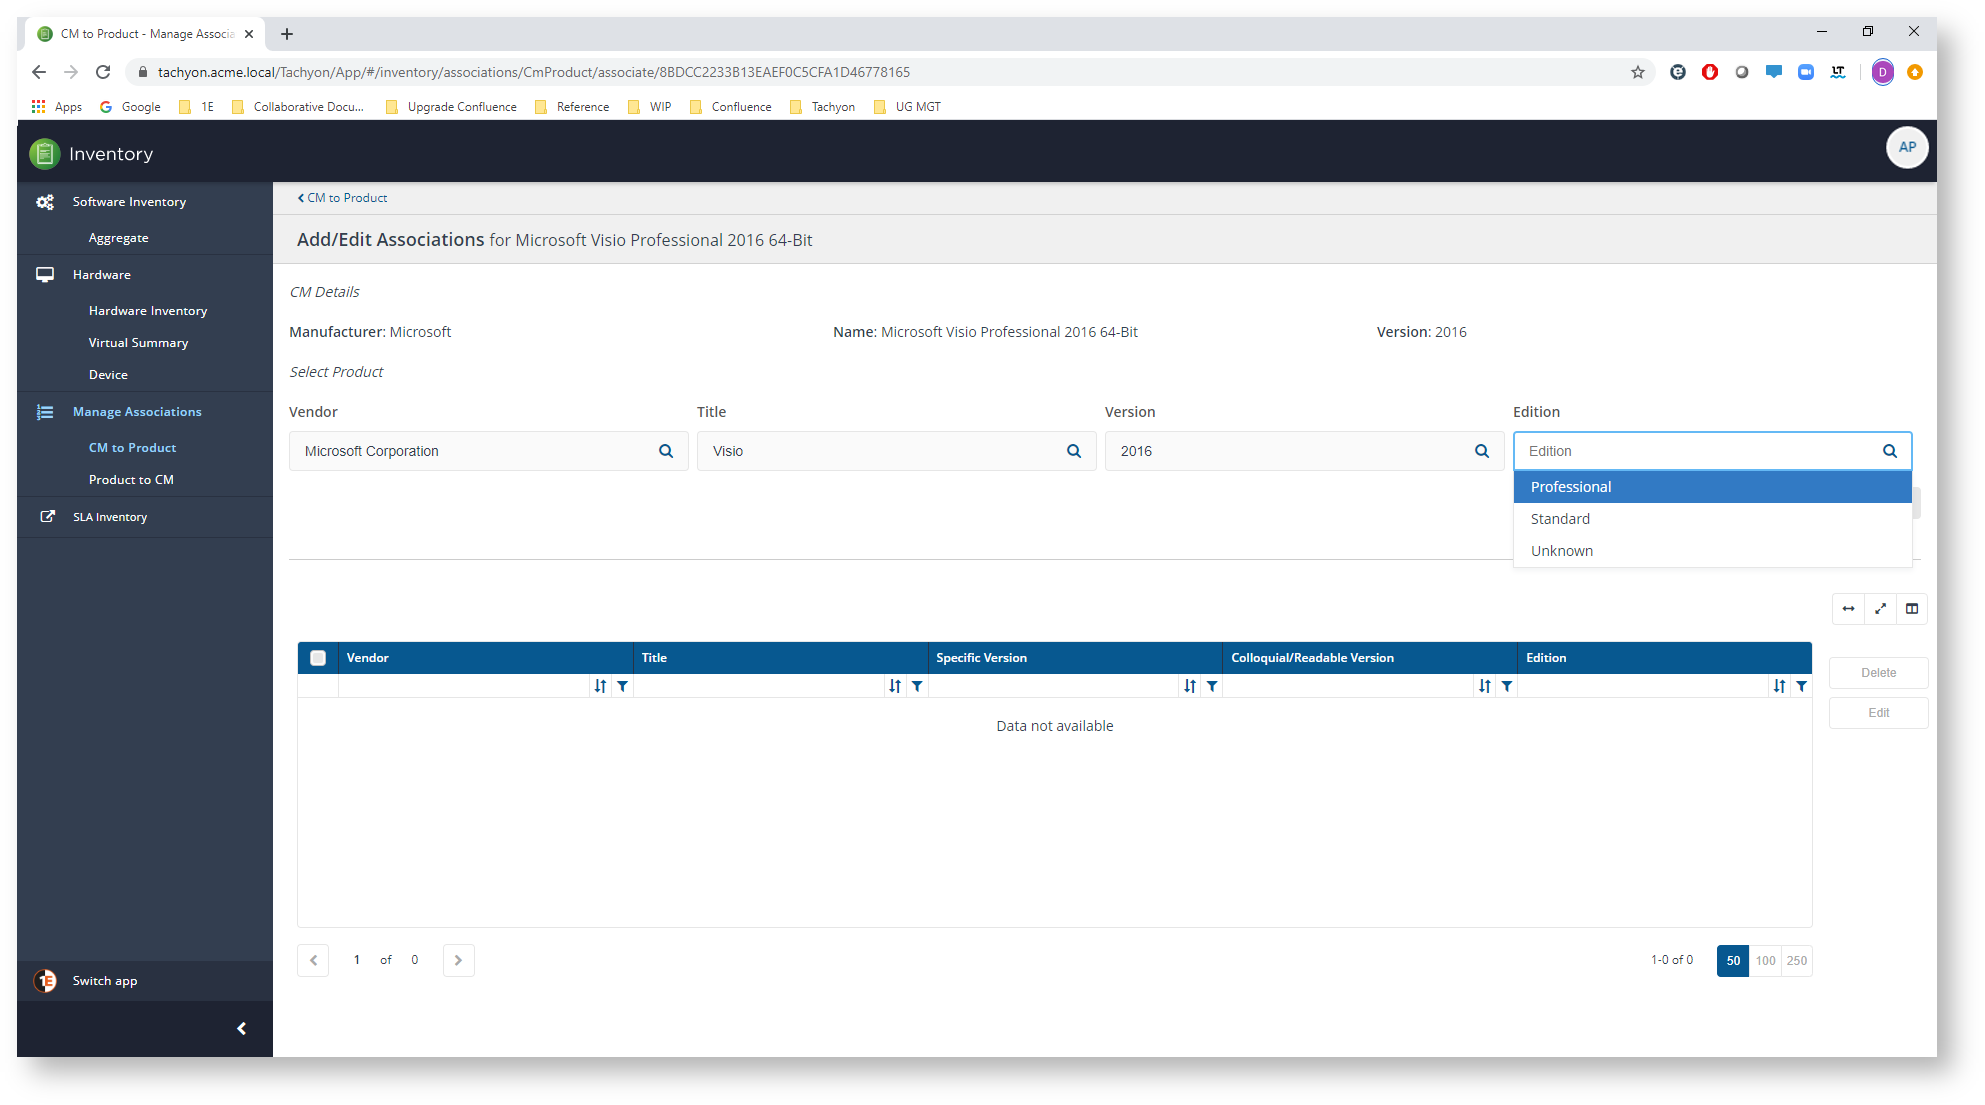
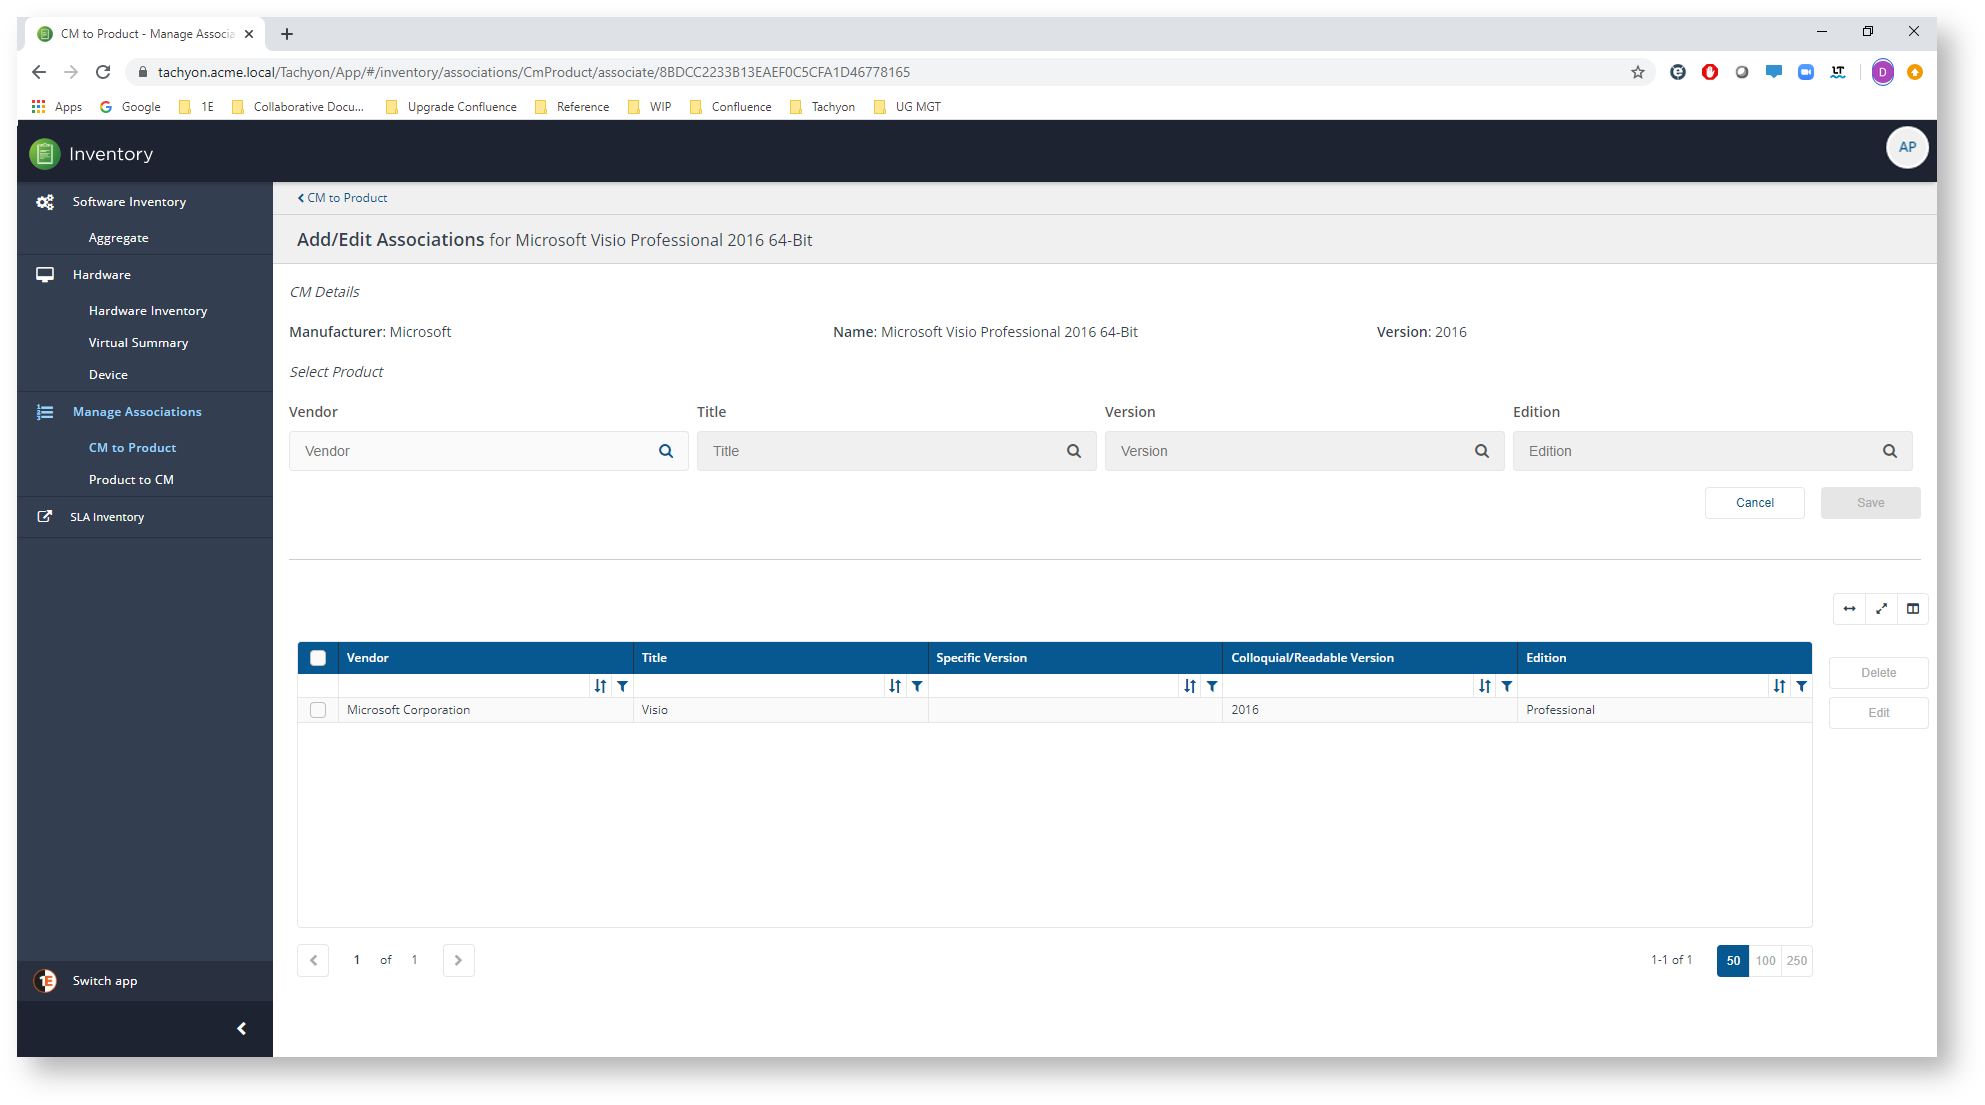
After selecting a single application/package from the table the Add/Edit Associations button is enabled. If the application/package already has an association you get to edit the association, if any other application/package is selected you get to create a new association for it.
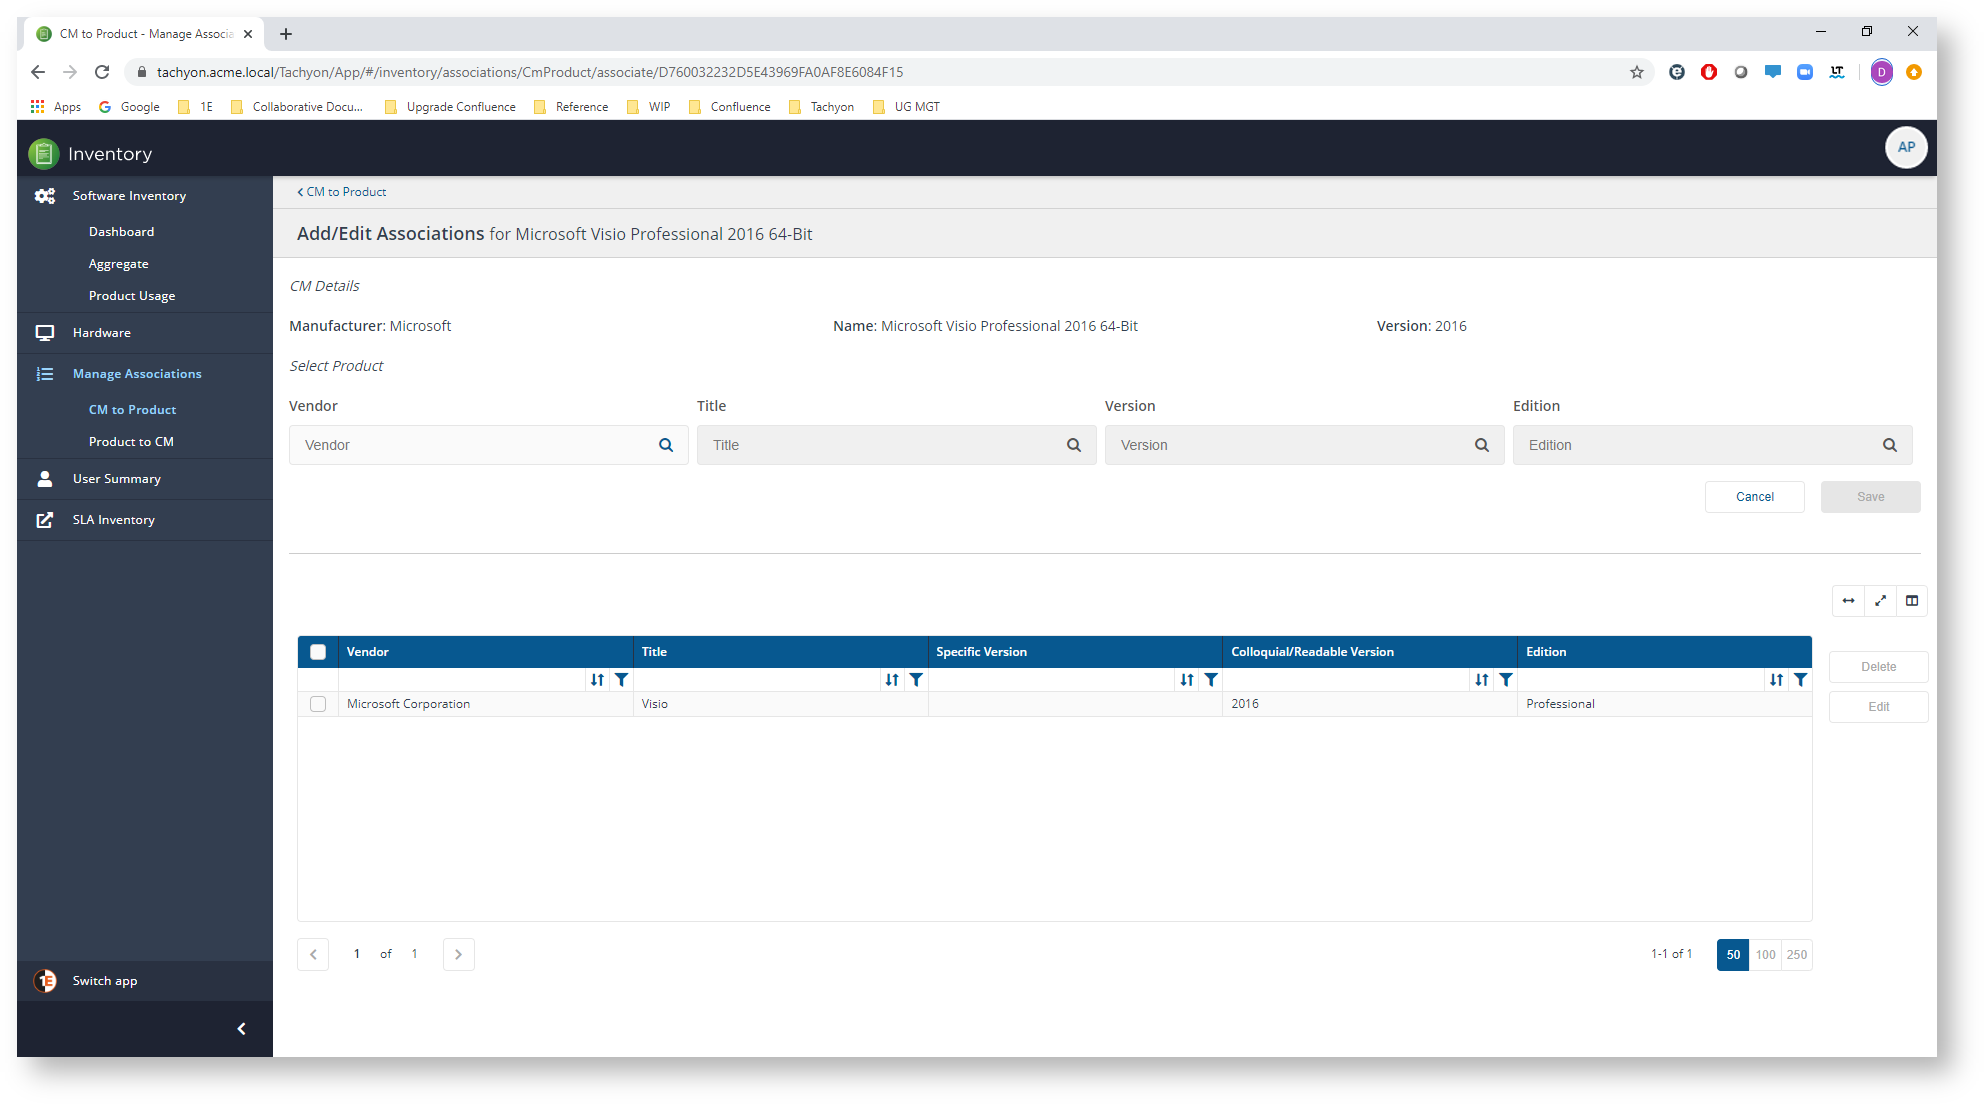
The picture shows an unassociated application/package for Microsoft Visio.

To set a new association you must specify the VTVE in the top Vendor, Title, Version and Edition drop downs to search for a product.
After clicking the Save button, just below the VTVE fields, the association is saved.
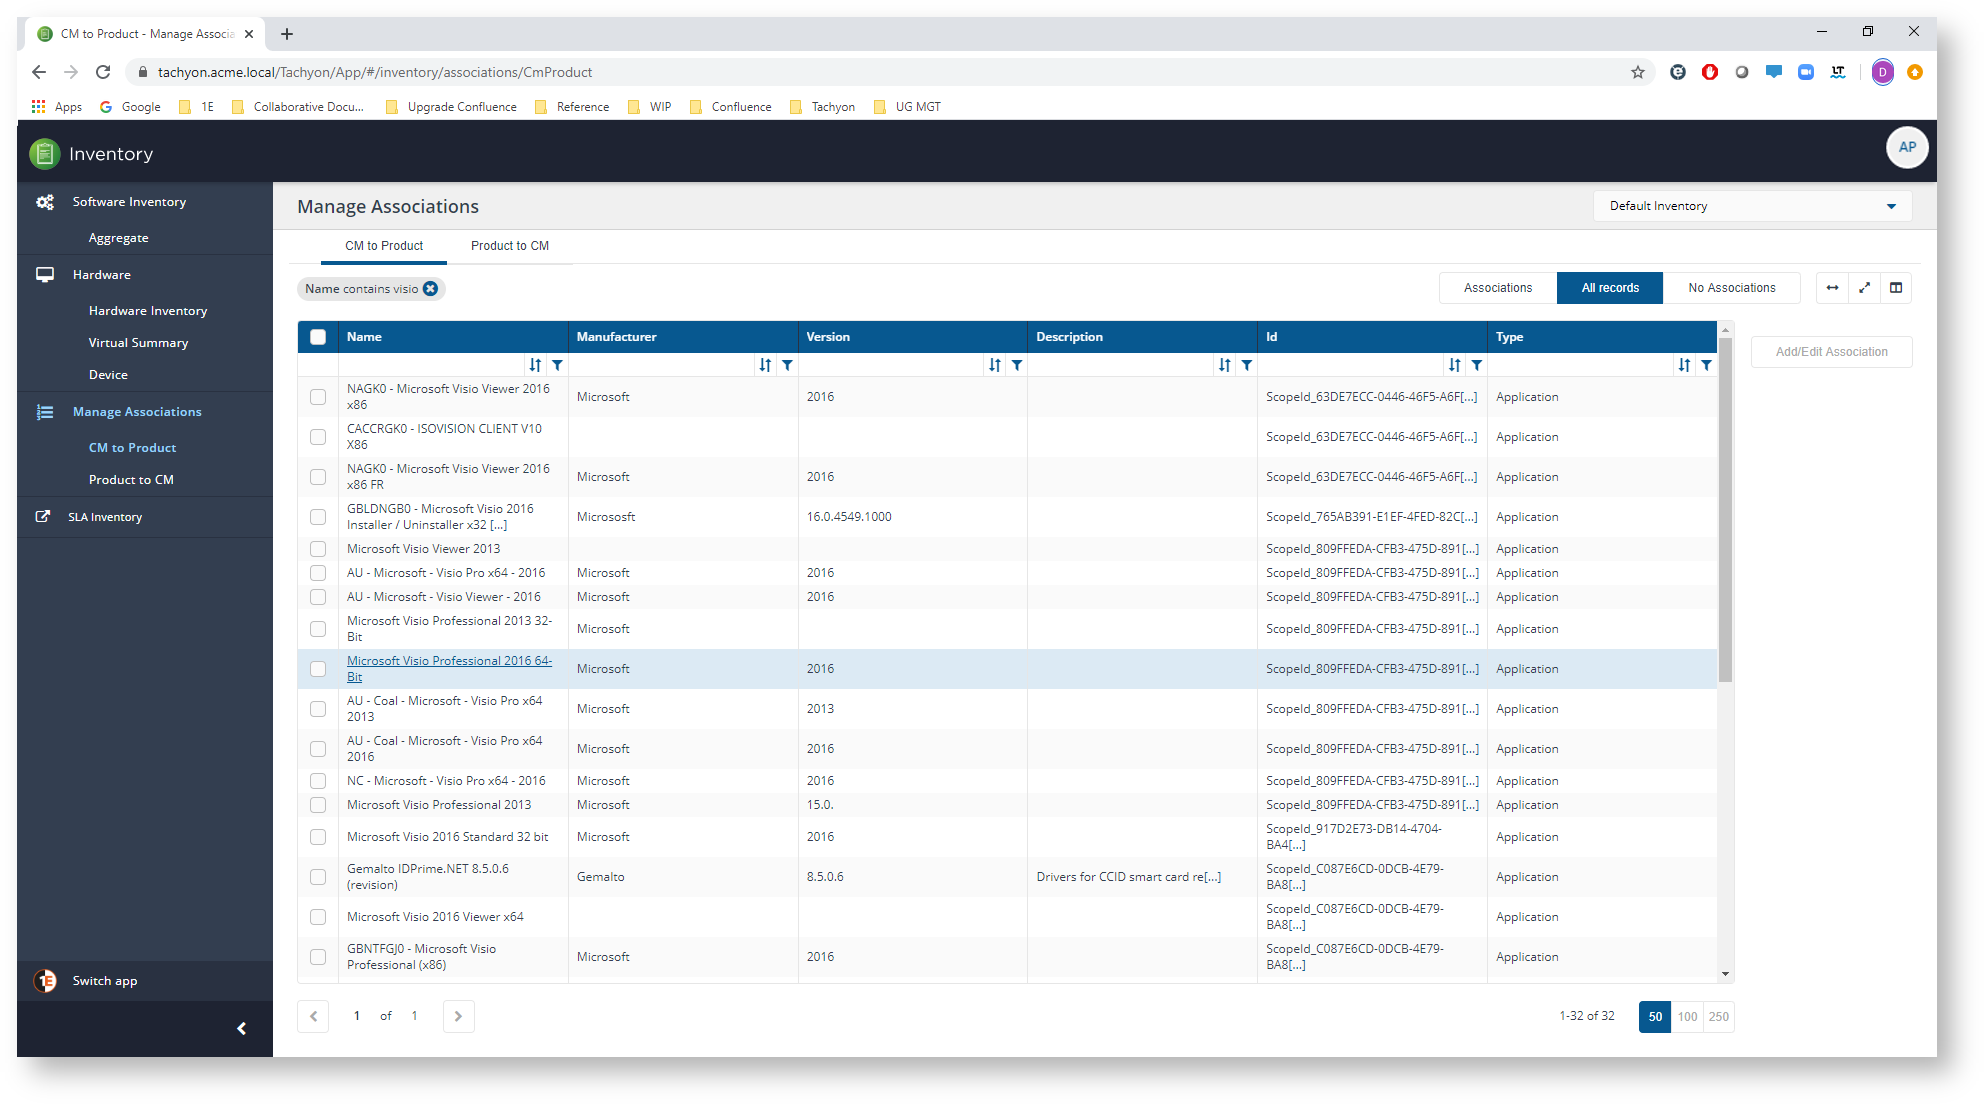
Now when you navigate back to the CM to Product screen, the Visio application/package name is a link indicating that it has an association.
Associating one or more products (Vendor, Title, Version and Edition) with a Configuration Manager application or package
Navigate to the Inventory->Manage Associations→Product to CM page.
The products which are installed in the selected inventory are listed in the table.
For any product, where there are any associations present, the version number in the Specific Version column is a link that displays a pop-up that shows the existing association.
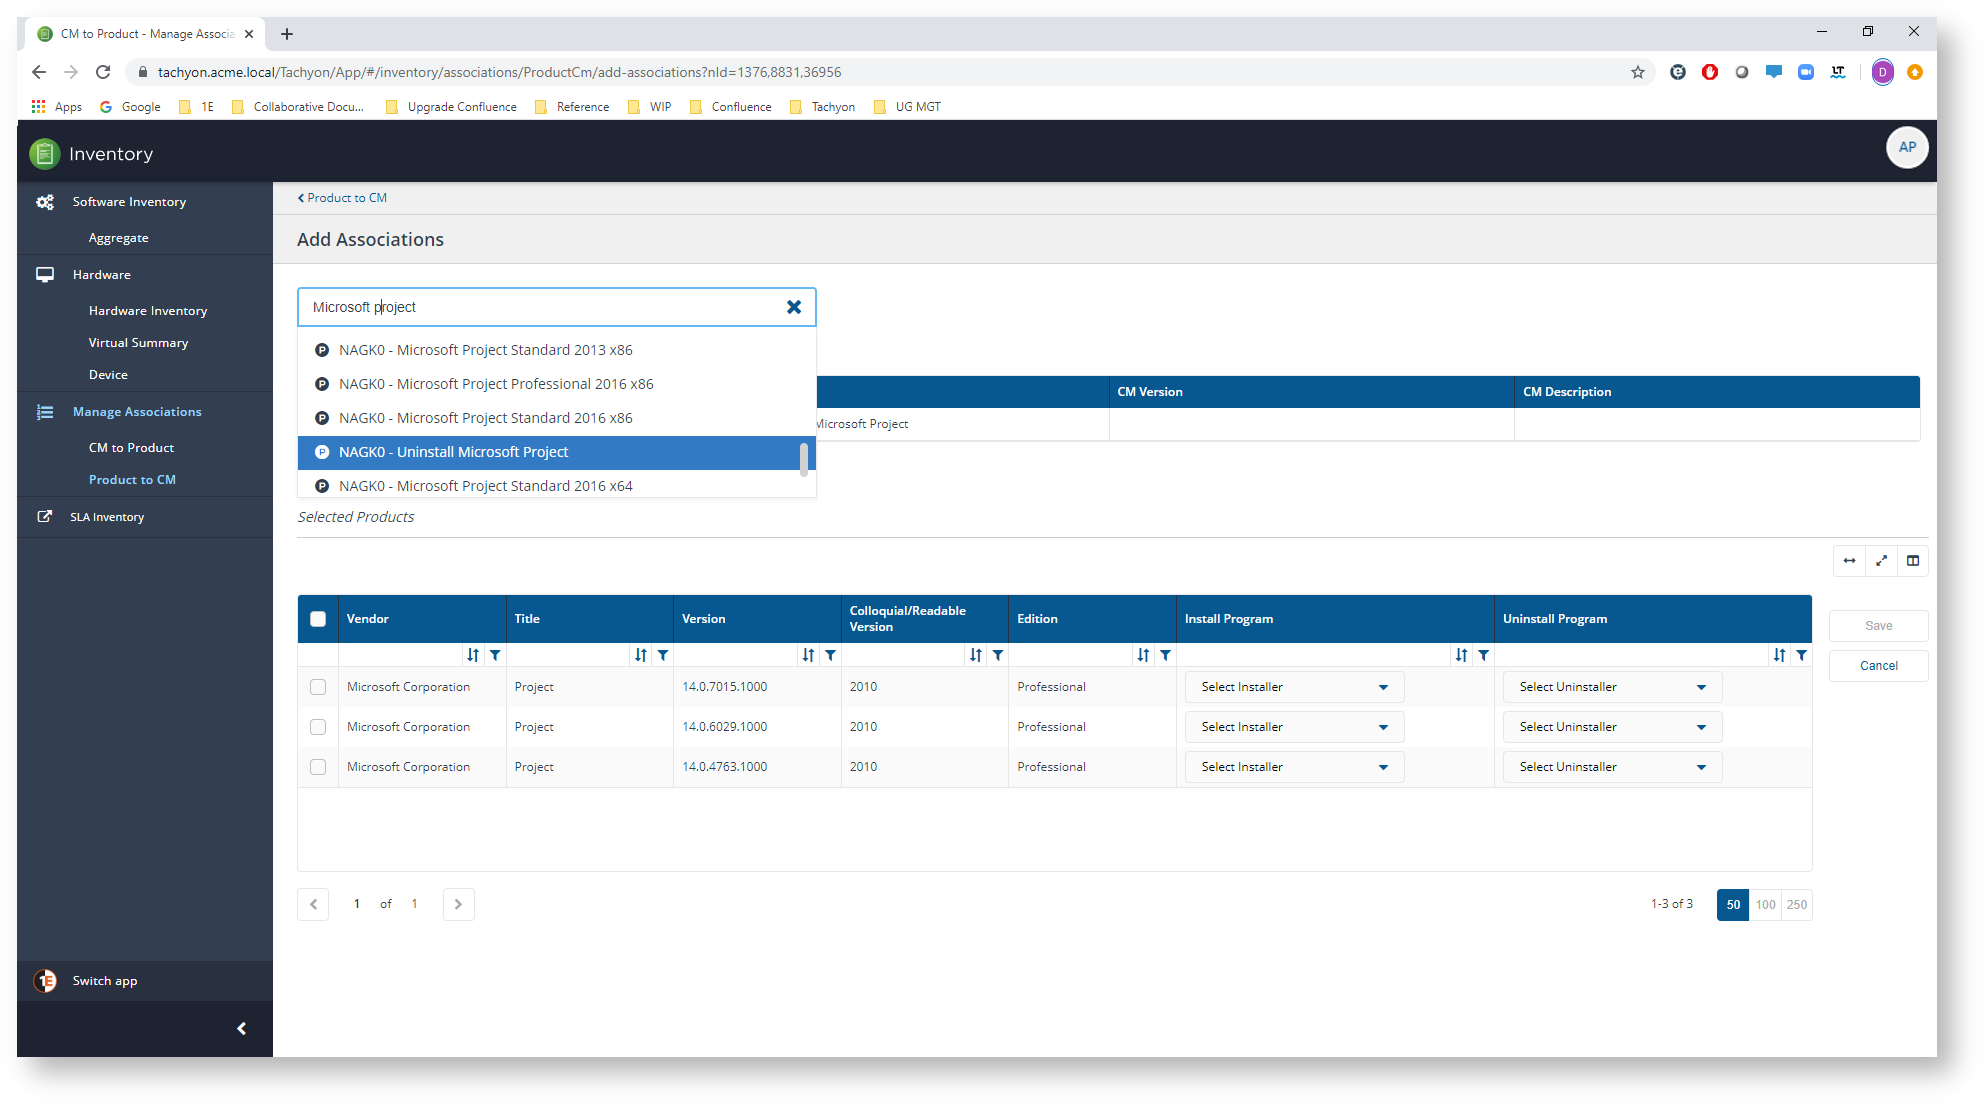
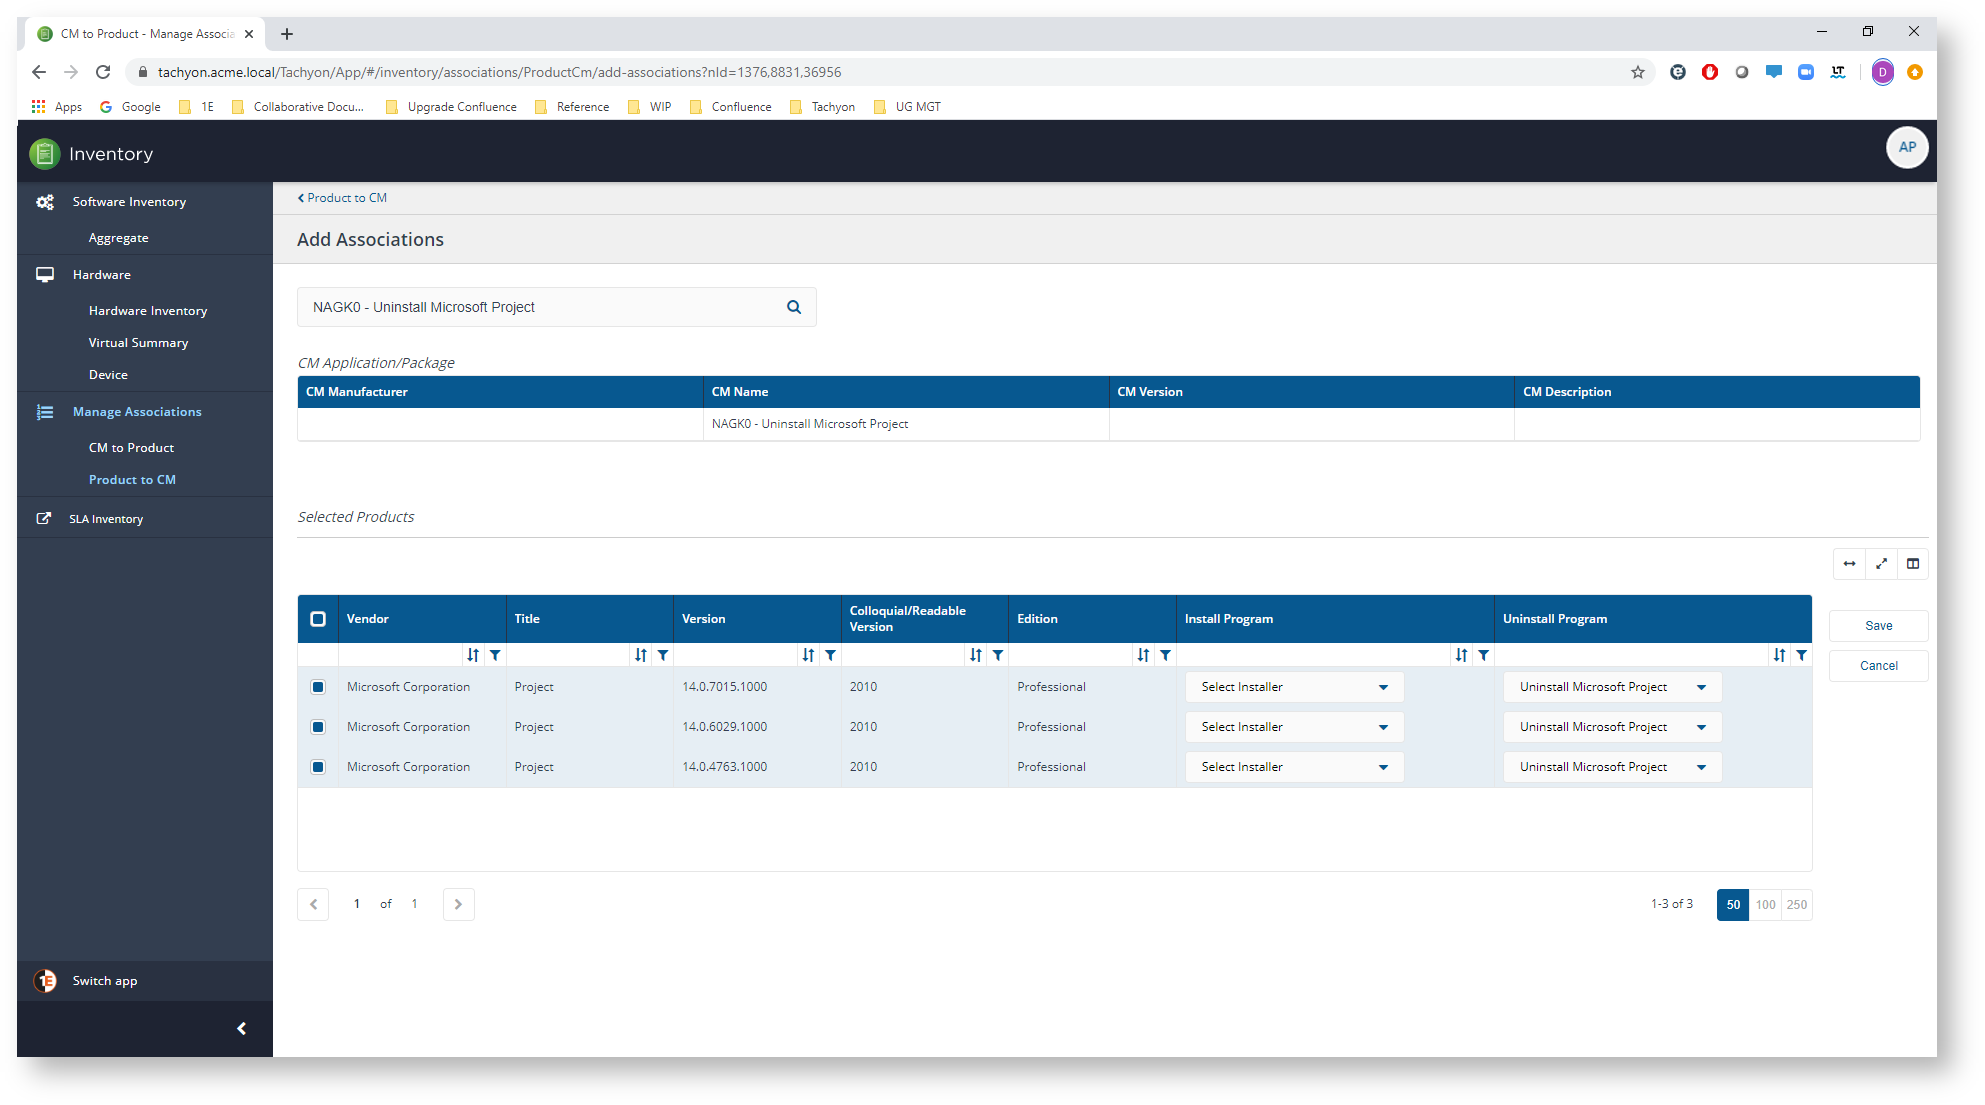
You can set associations for more than one version of a product at a time. The picture shows three versions of the Microsoft Project selected.

Clicking the Add Association button displays the Add Associations page with the selected products added, as shown in the picture.

You can search Configuration Manager for a specific application or legacy package by typing into the search field at the top of the page. The picture shows a search for Microsoft Project and the selection of a specific legacy package option called NAGK0 - Uninstall Microsoft Project.
If you select a legacy package the listed selected products change appearance slightly to allow you to select any associated install and uninstall programs, as shown in the picture.
If you select an application there is no option to select the Install/Uninstall Program as that is not necessary for applications.
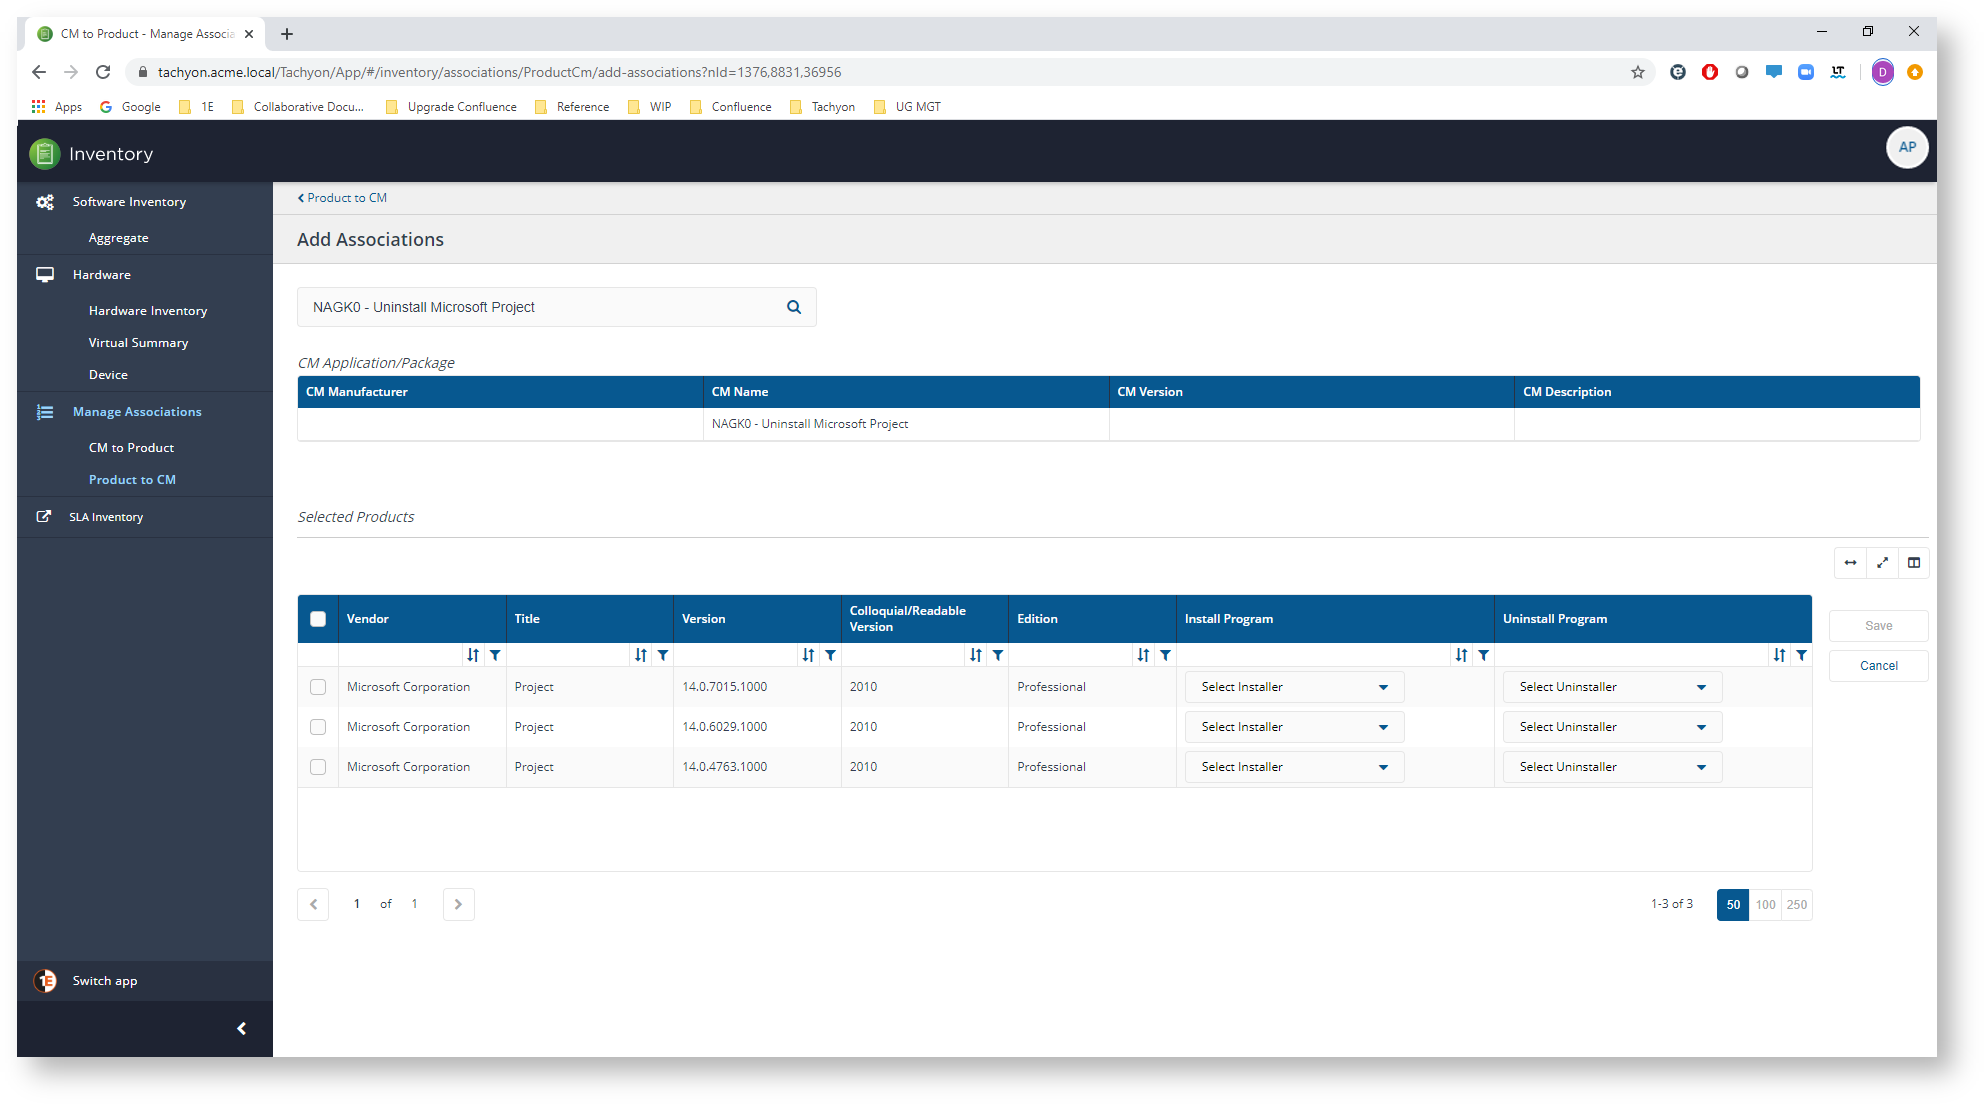
In our example, we will apply the selected CM Application/Package to all the selected products and then set their Uninstall Program items to Uninstall Microsoft Project, as shown in the picture.
Click the Save button to save the associations.
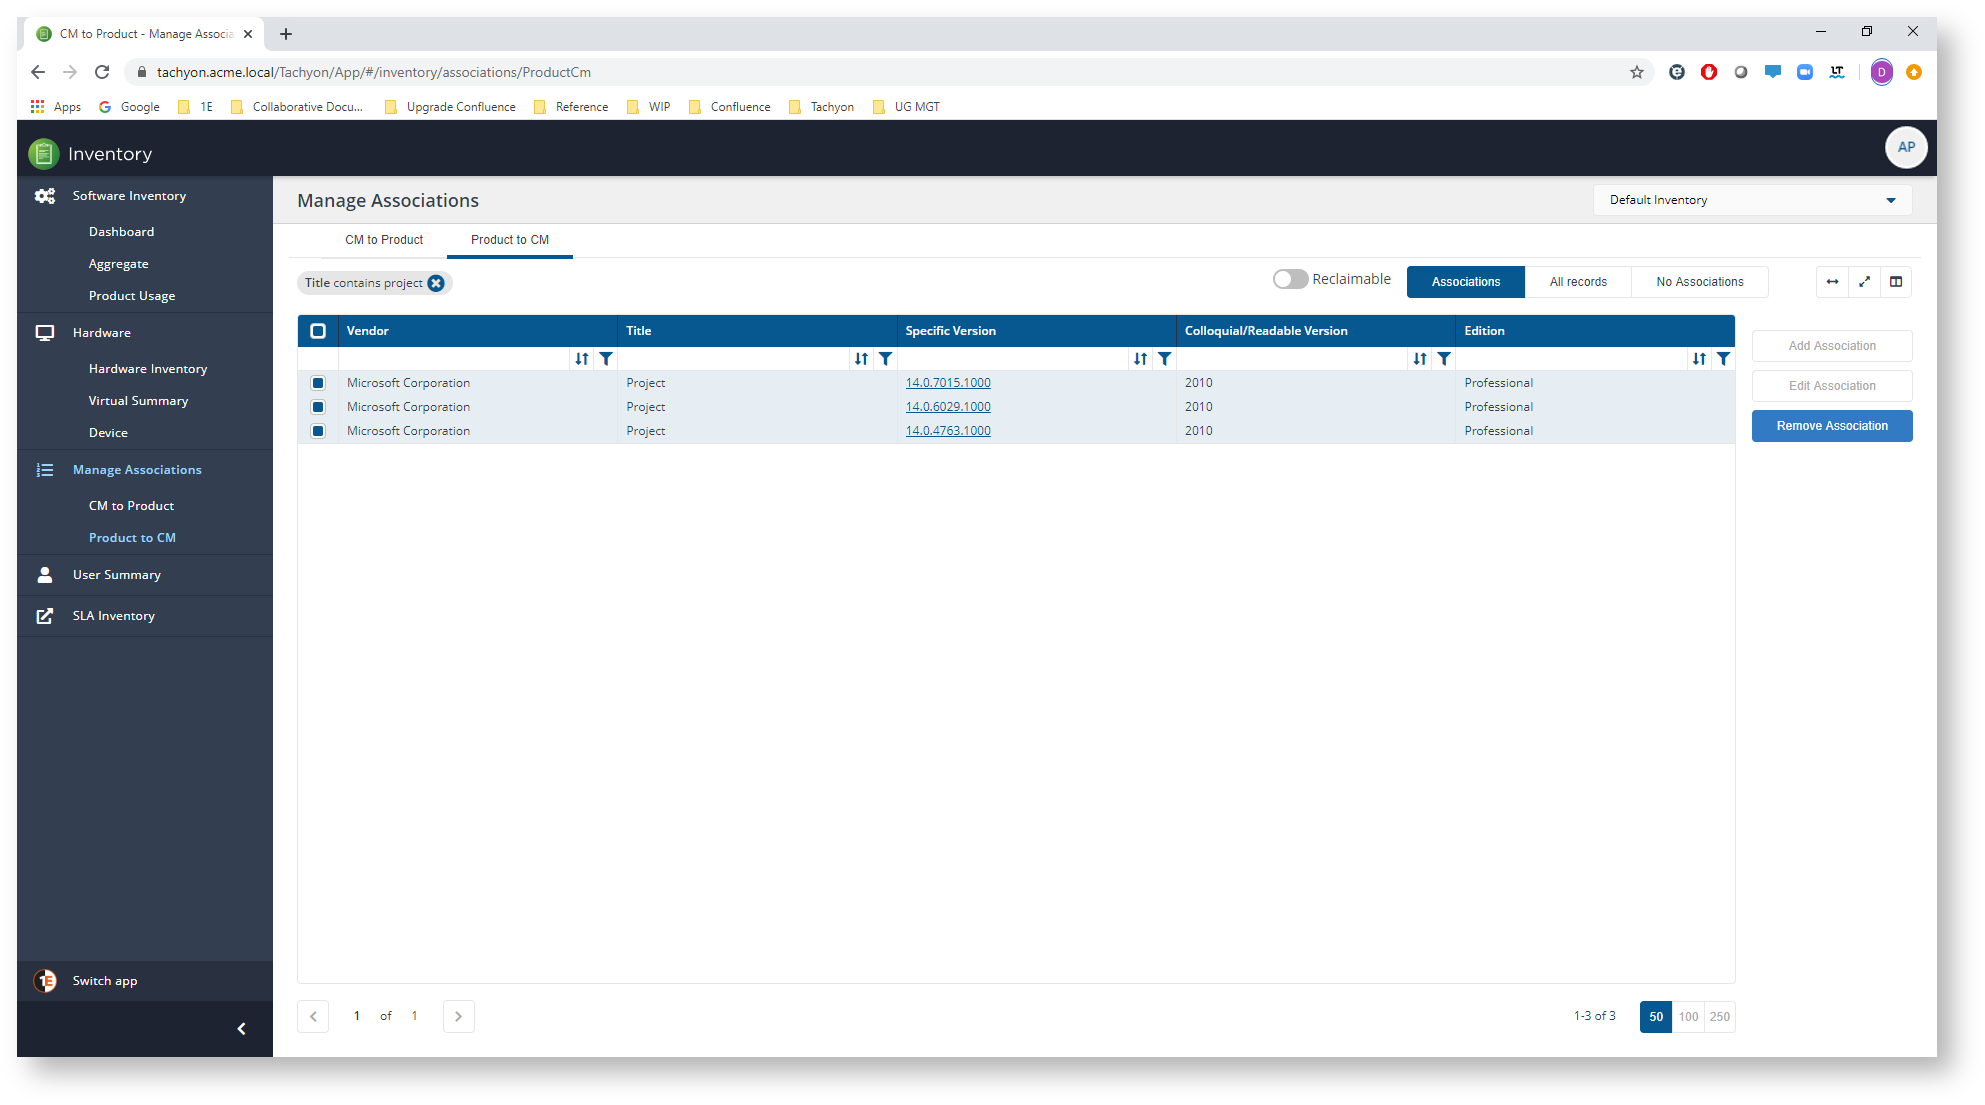
Now when you navigate back to the Product to CM page you'll see that your selected products now have associations added. You can see this in the picture where the three Microsoft Project versions now have links.
The Reclaimable toggle
You will also notice that there is a toggle button just above the table on the Product to CM tab. When this is turned on the table will be filtered to only display the products that have a reclaim policy associated with them in AppClarity. This can be useful after having defined reclaim policies for installed products in AppClarity to then easily associate them with Configuration Manager applications or programs.

Editing associations
The steps for editing associations are different depending on which page the association was created.
Editing CM to Product associations
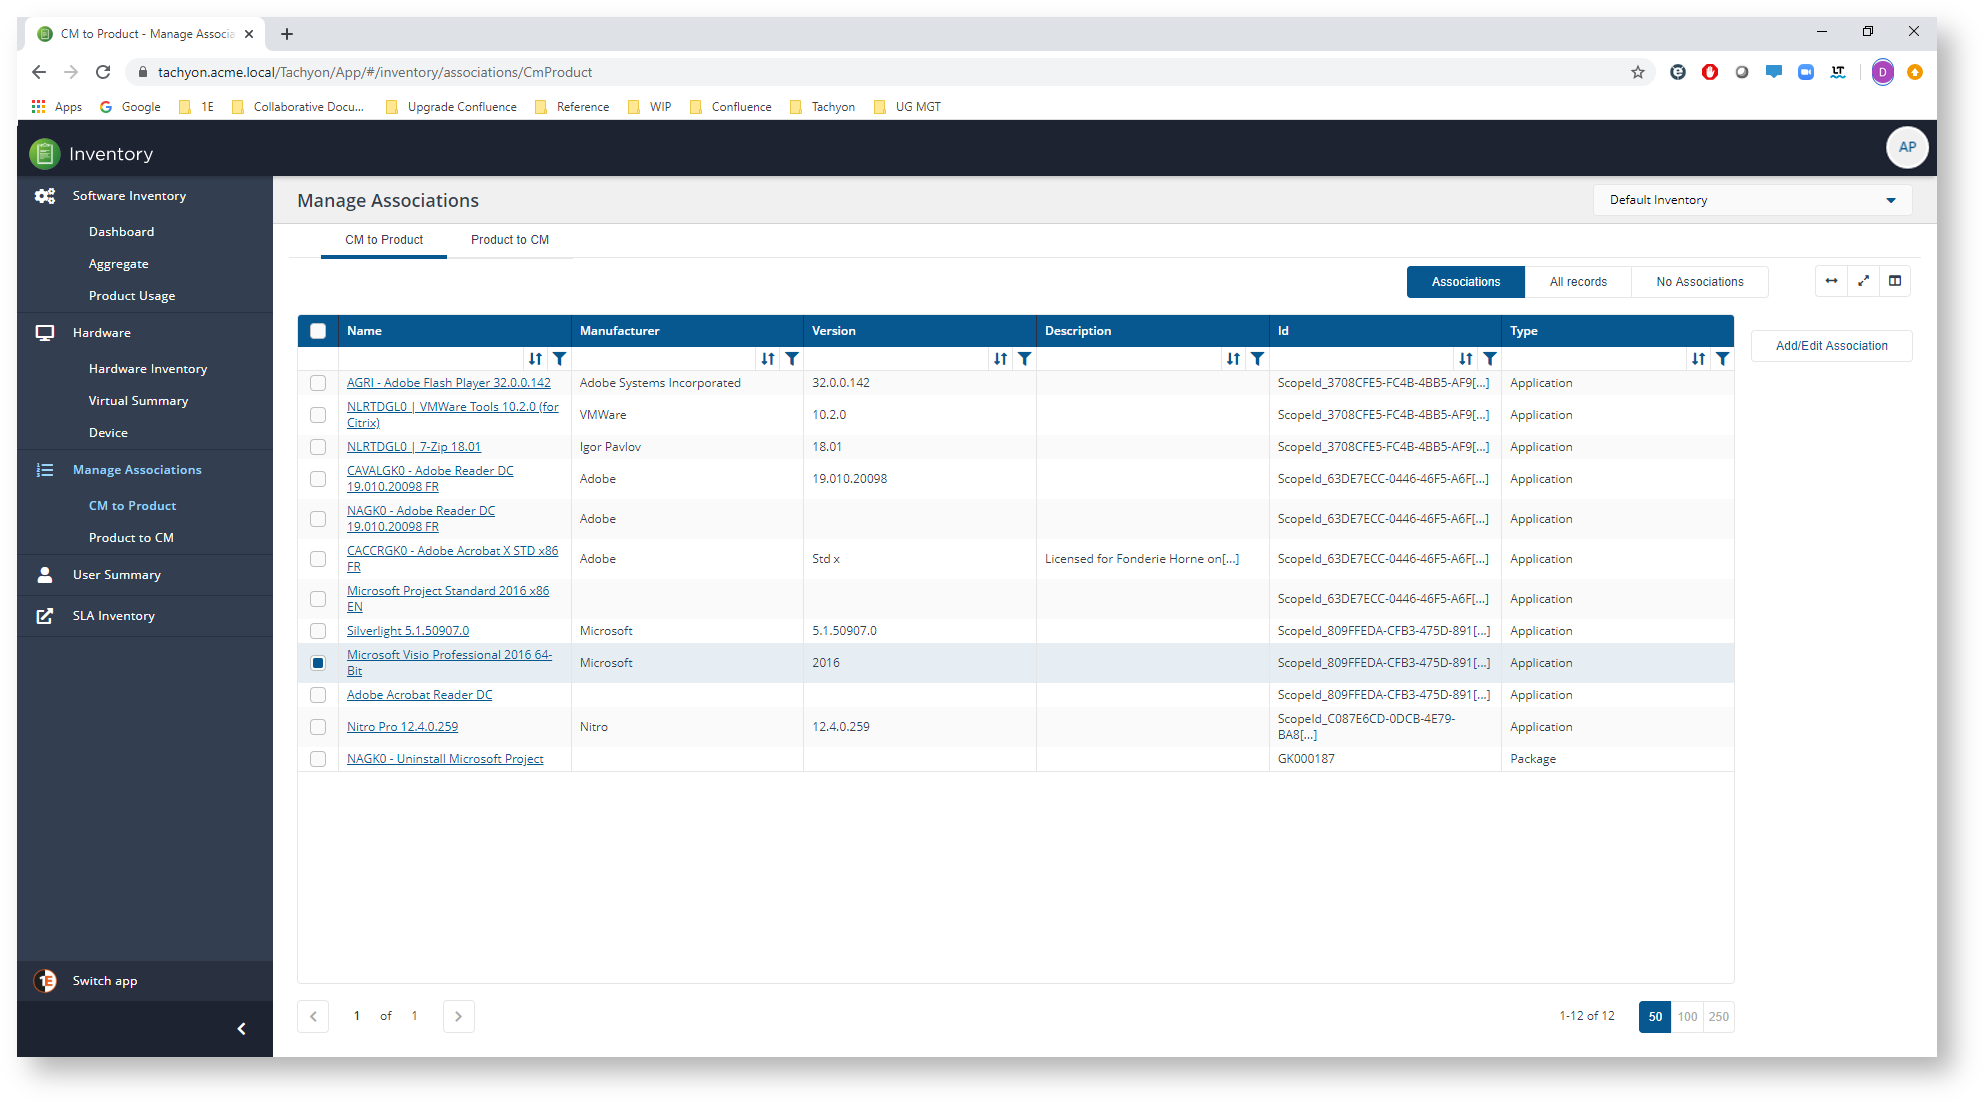
You can edit an existing CM to Product association by selecting it from the CM to Product associations list and then clicking on the Add/Edit Association button. The picture shows the previously created Microsoft Visio association selected.
Note
You can only select one association to edit at a time. If you make multiple selections the Add/Edit Association button will be disabled.

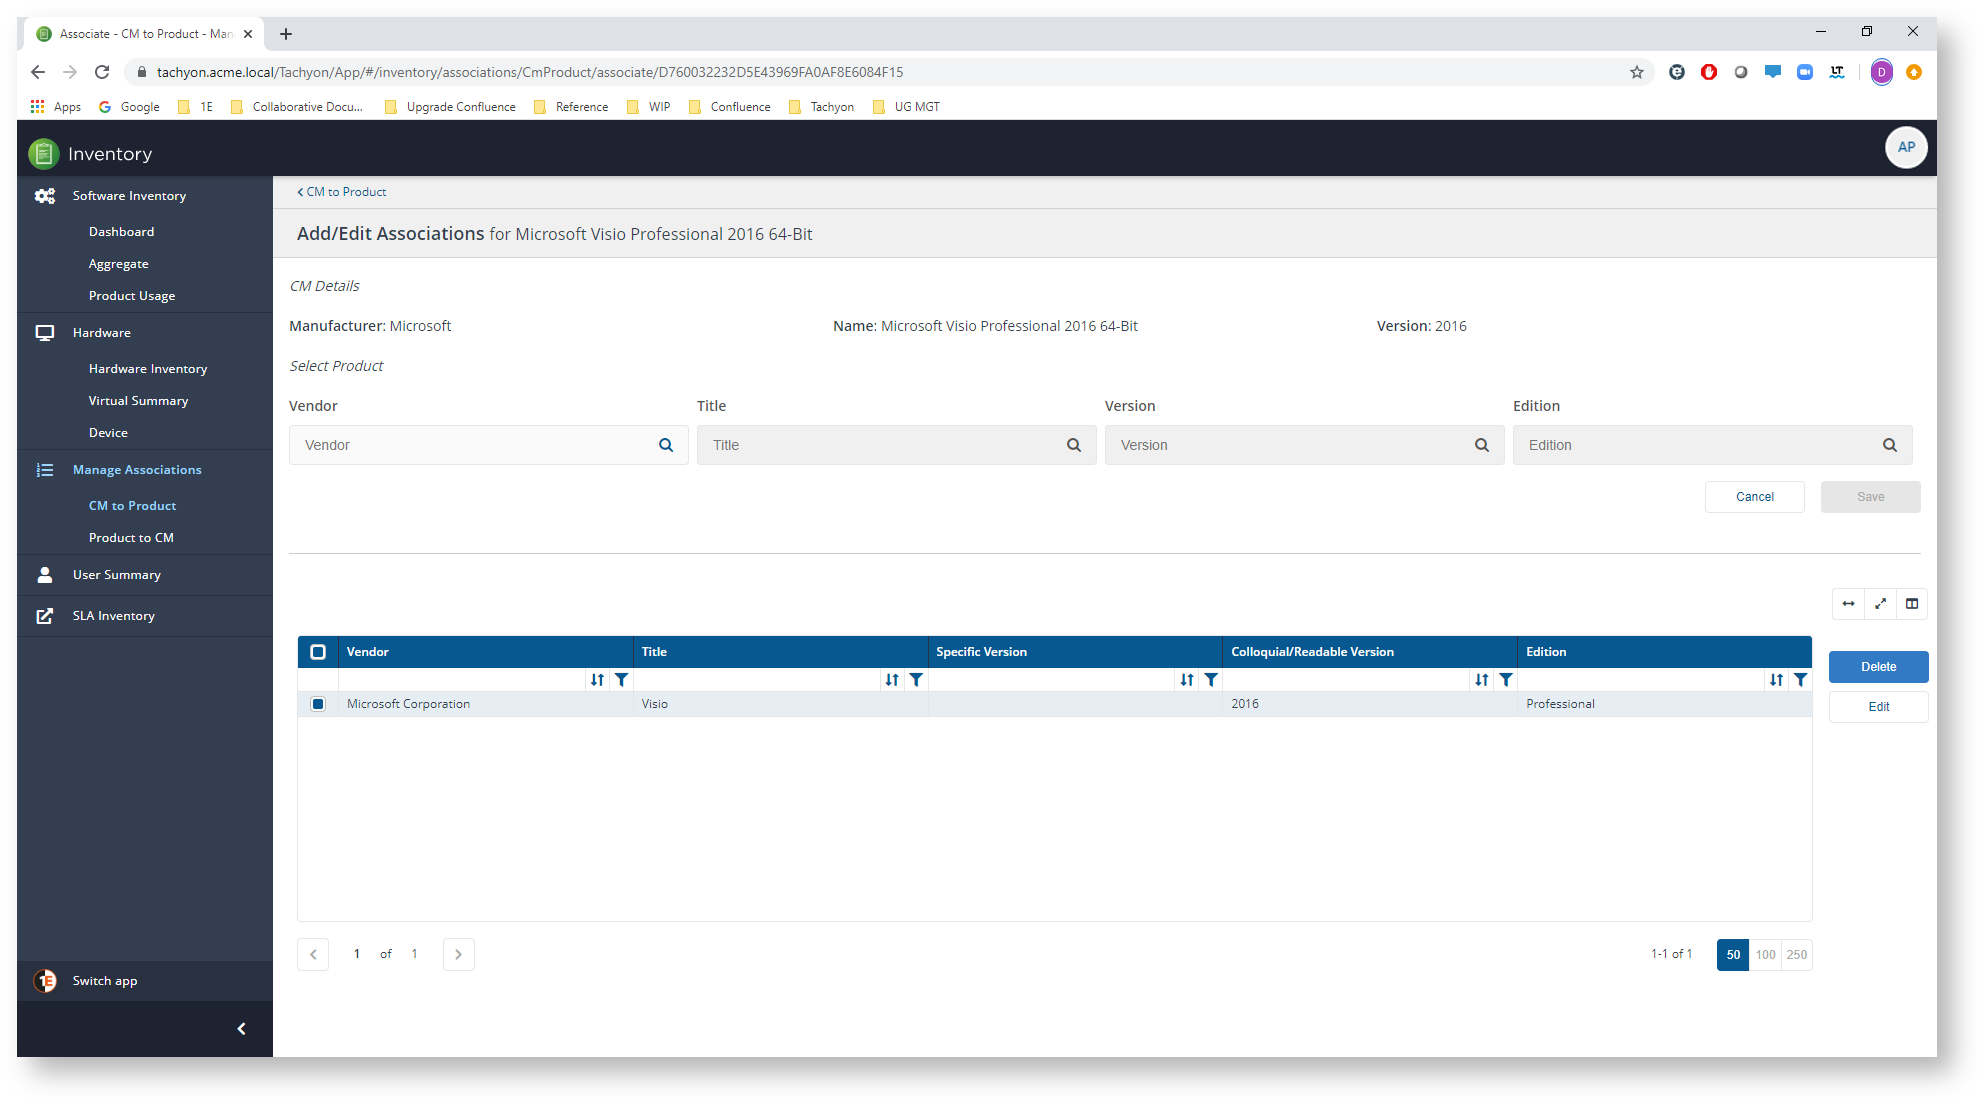
On the Add/Edit Associations page subsequently displayed you can save new associations in the top part of the page and edit or delete existing ones on the lower part. The picture shows the previously added Microsoft Visio association being edited.
Modifications are stored whenever you click on Save or Delete. Once you've finished making the changes you need you can navigate back to the main CM to Product page by clicking on the < CM to Product link at the top of the page or using the navigation tree on the left.
Editing Product to CM associations
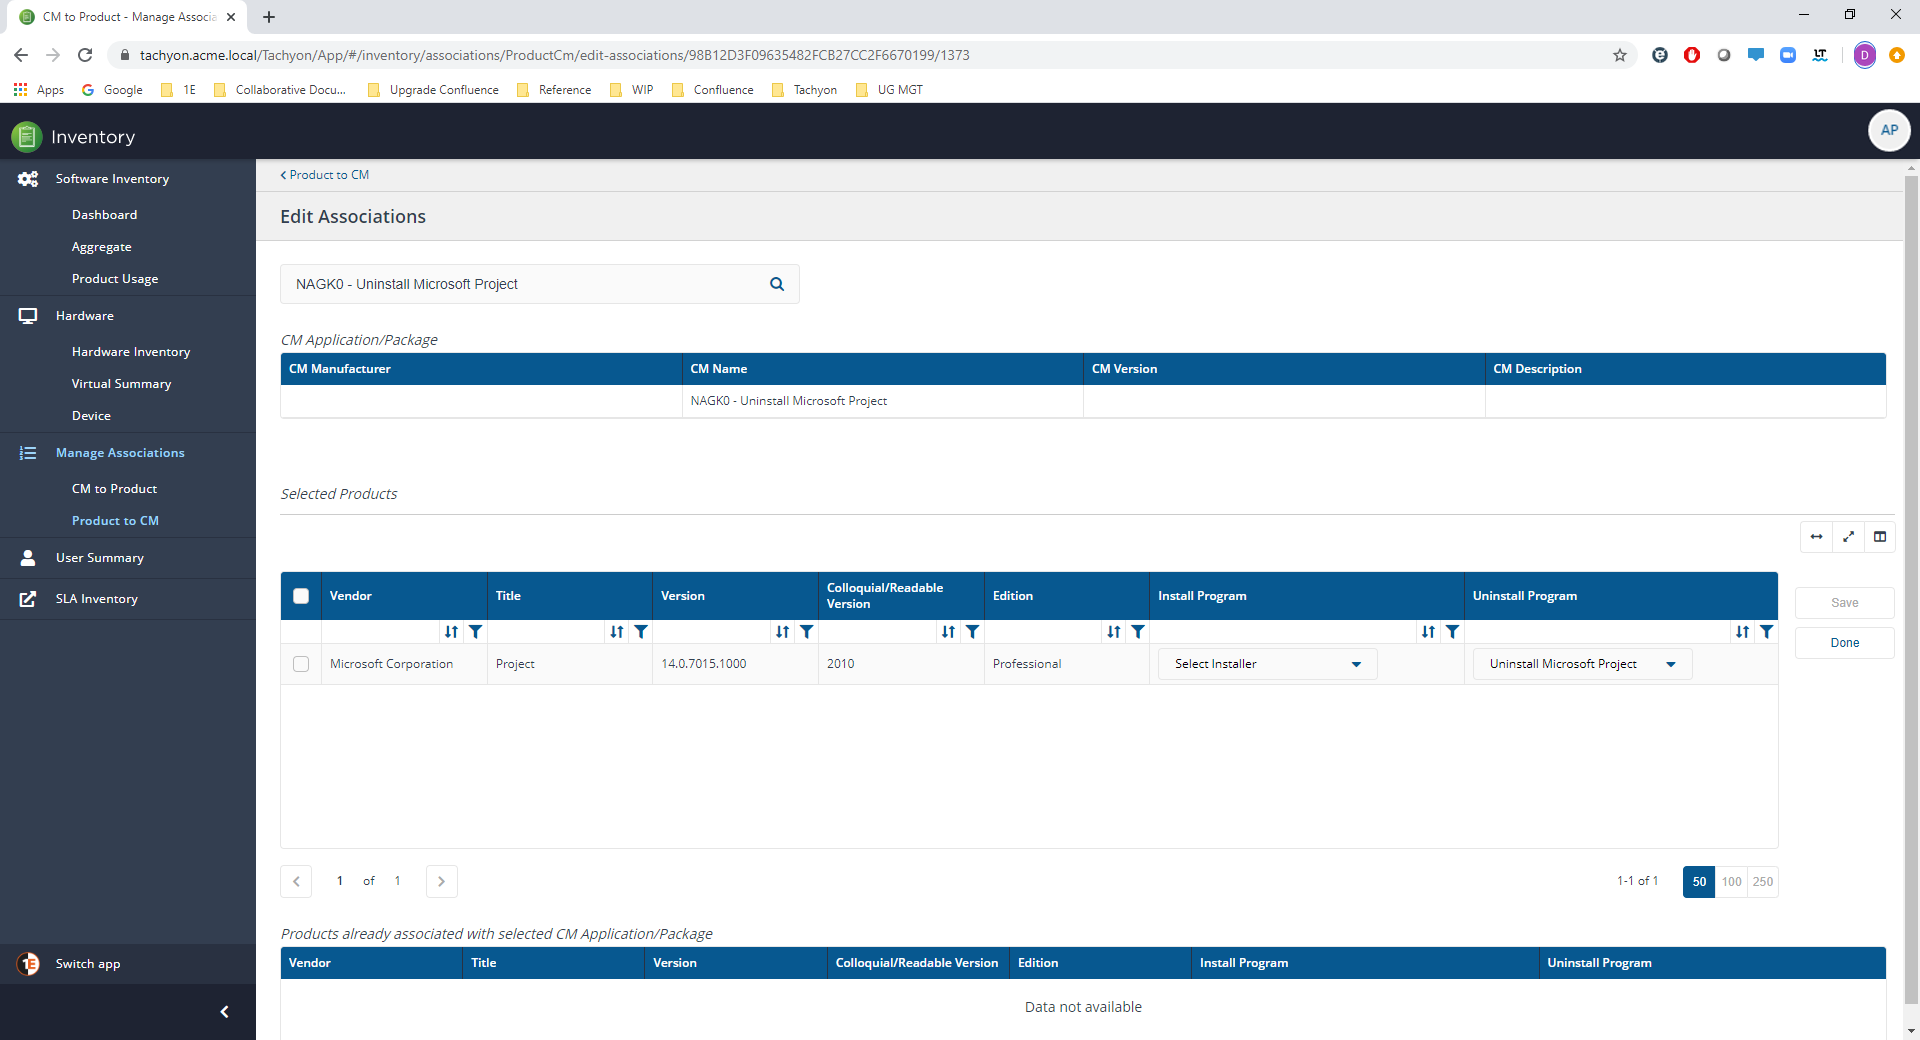
You can edit an existing CM to Product association by selecting it from the Product to CM associations list and then clicking on the Edit Association button. The picture shows one of the previously created Microsoft Project associations selected.
Note
You can only select one association to edit at a time. If you make multiple selections the Edit Association button will be disabled.

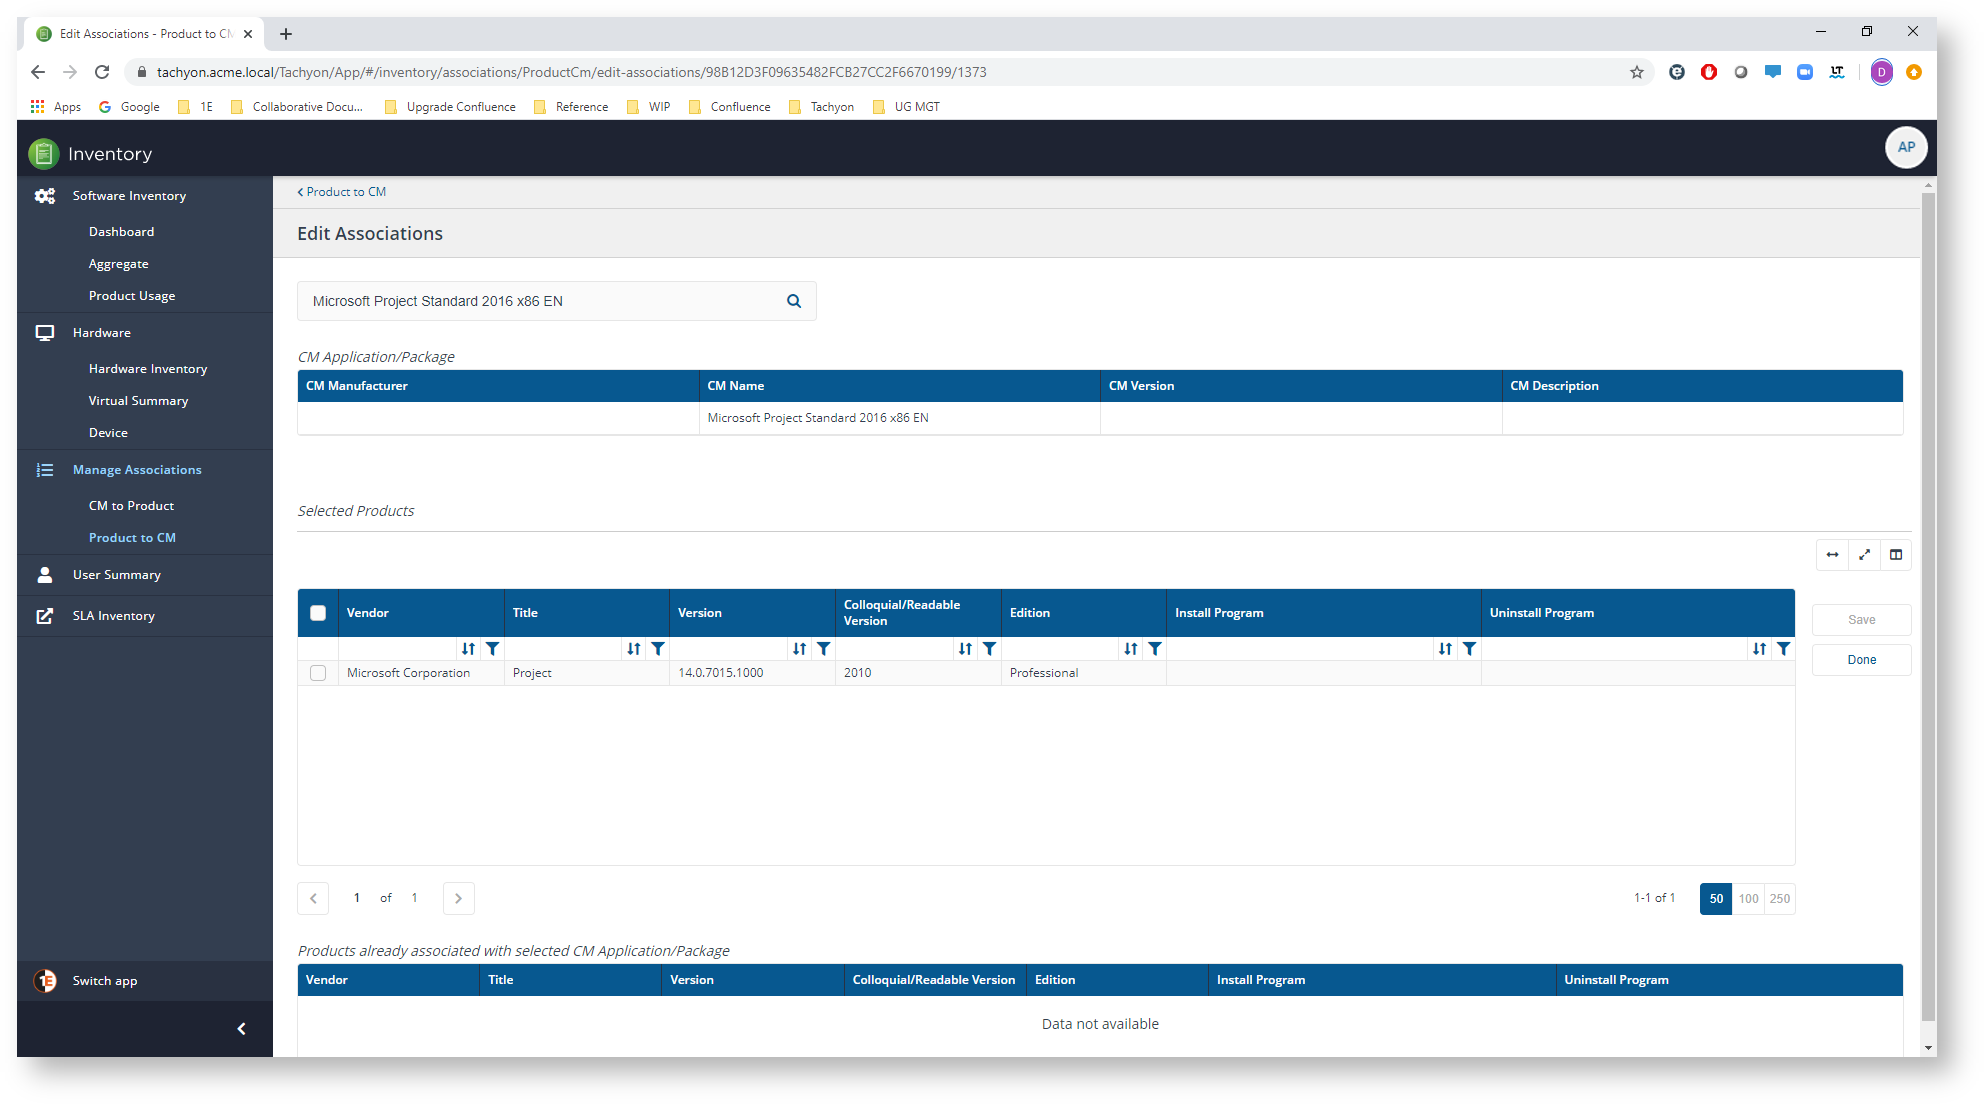
On the Edit Associations page subsequently displayed you can select a new Configuration Manager application or legacy package in the top part of the page and edit the specific product association on the lower part, including setting the Install Program and Uninstall Program for legacy packages. The picture shows the previously added Microsoft Project association being edited.
To select another Configuration Manager application or legacy package you search for it using the search field at the top of the page, in the same way as you would if you were creating a completely new product for CM association. In the picture we've changed the original NAGK0 - Uninstall Microsoft Project CM legacy package to the Microsoft Project Standard 2016 x86 EN application.
Once you've made this change you'll need to select the product in the Selected Products list and then click on Save to commit any changes made to the listed product.
Click Done to close the Edit Associations page without saving, a notification popup will be displayed. You can also navigate back to the main Product to CM page by clicking on the < Product to CM link at the top of the page or using the navigation tree on the left.
Deleting associations
The steps for deleting associations are different depending on which page the association was created.
Deleting CM to Product associations
You delete a CM to Product association by deleting all the product associations it holds. This is done via the Add/Edit Associations page. First, select the association you want to delete from the CM to Product associations list and then click on the Add/Edit Association button. The picture shows the previously created Microsoft Visio association selected.
Note
You can only select one association to edit at a time. If you make multiple selections the Add/Edit Association button will be disabled.
When the Add/Edit Associations page is displayed select all the associations by clicking on the selection field at the left-hand end of the products table. Then click on the Delete button, as shown in the picture.
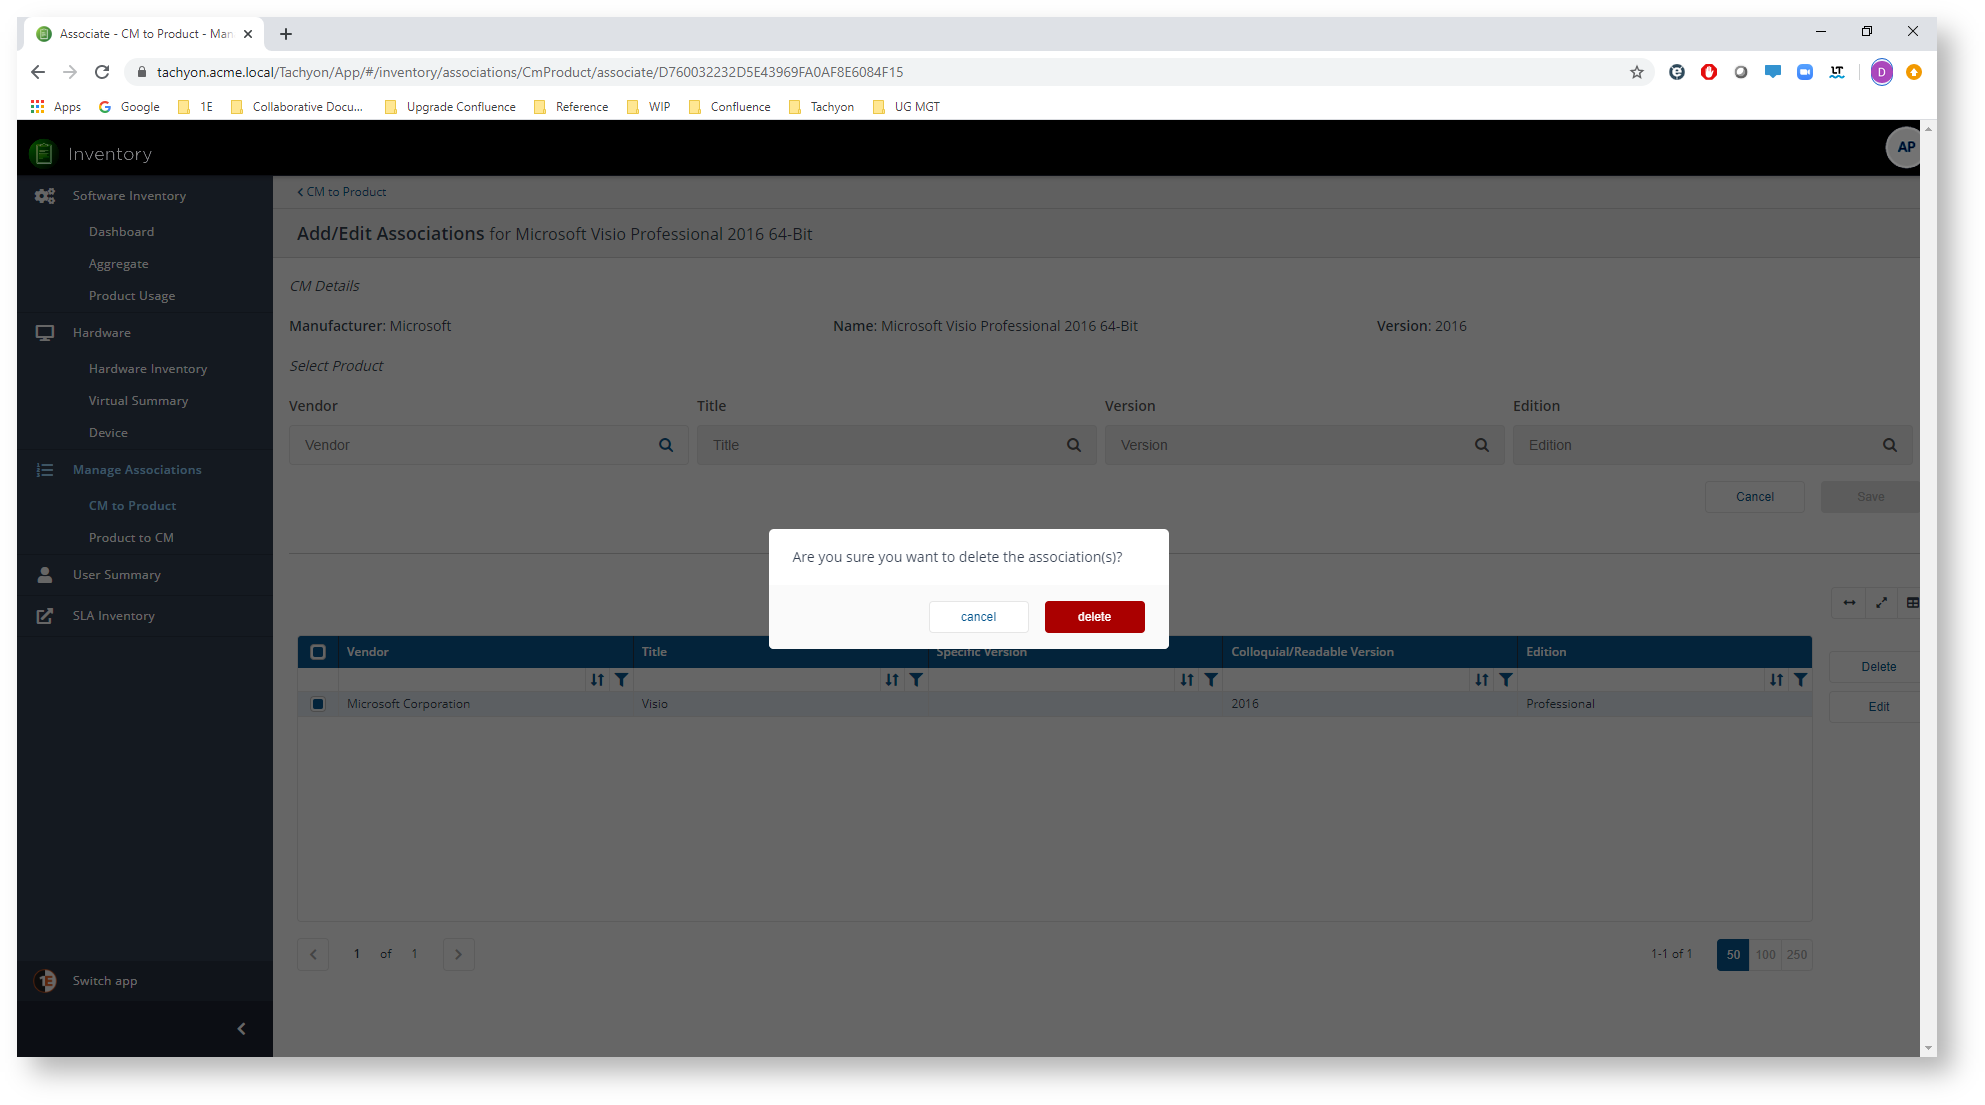
A popup will be displayed asking whether you want to delete the association(s). Click on delete to remove all the products from the association.
Subsequently, when you navigate back to the CM to Product page you will see that the association has been deleted as a result of all the products having been deleted from the association.
Removing Product to CM associations
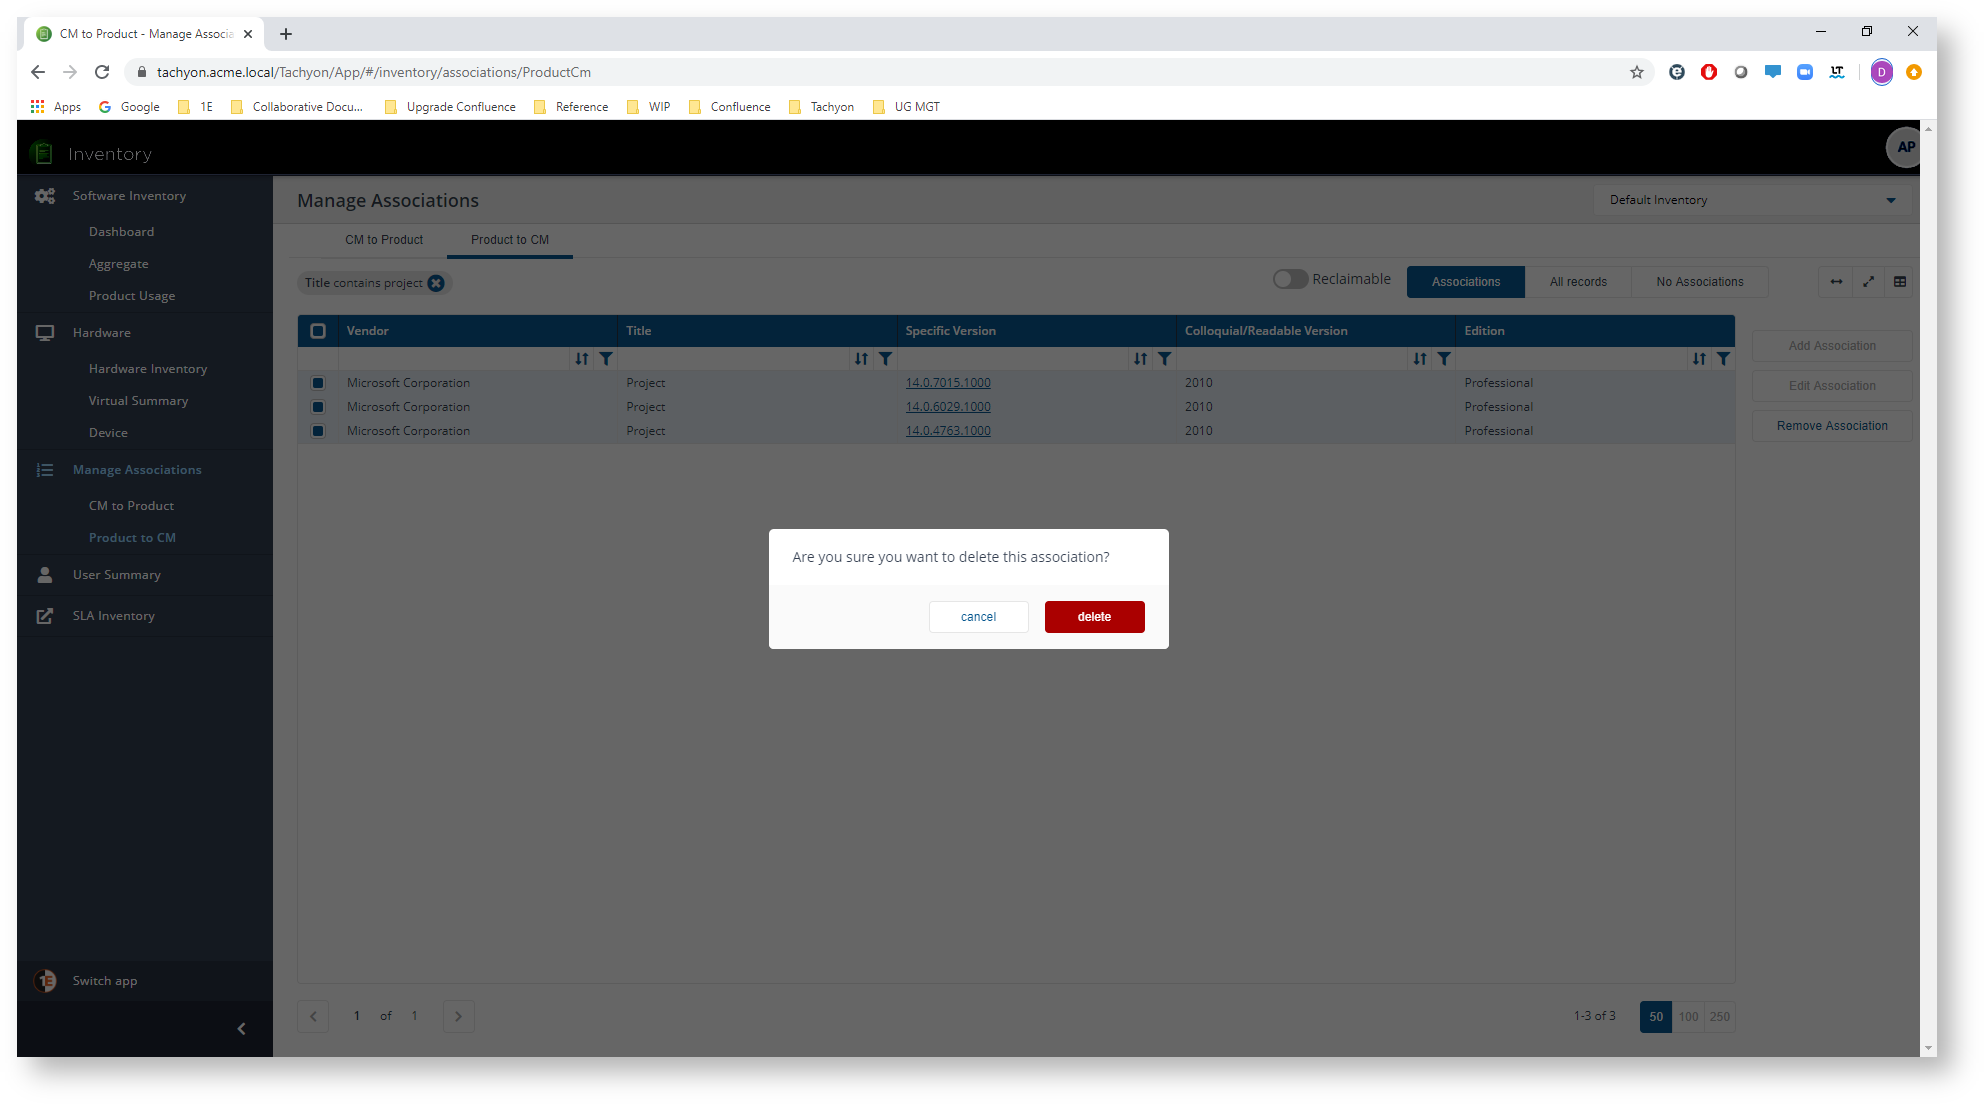
You can remove one or more Product to CM associations in a single operation on the Product to CM page. To do this you select all the associations you want to remove and then click on the Remove Association button. The picture shows the Microsoft Project associations selected that we created earlier, with the Remove Association button highlighted.
Clicking on the button displays a notification popup asking if you want to continue with the process of removing the selected associations, as shown in the picture. Click delete to continue and remove all the selected associations. At this point, the associations will be removed and no longer appear in the console.