Running your first Compliance License Summary
The first time you start AppClarity it's advisable and helpful to start with viewing the License Summary for the situation where you have no entitlements defined in the selected compliance repository, refer to the Repositories page for more information.
This gives you an established baseline to work with, where you can see what AppClarity is reporting to you without involving entitlements. It also lets you get familiar with the way that the information gets into the License Summary for a particular compliance repository.
Default repositories and permissions needed
The compliance screens in AppClarity rely on selecting a compliance repository that has been associated to both entitlement and inventory repositories. When you installed AppClarity, this created two new default repositories in Settings→Configuration→Repositories to add to the existing default inventory making three:
Default Inventory.
Default Entitlement.
Default Compliance.
To run a Compliance Report, an AppClarity user must have any of the following roles:
Full Administrator
AppClarity Administrator
Compliance Administrator.
Logged-in users with any of the following roles can view the AppClarity→Compliance→License Summary screen:
Full Administrator
AppClarity Administrator
Compliance Administrator
Compliance Viewer.
Associating the default repositories
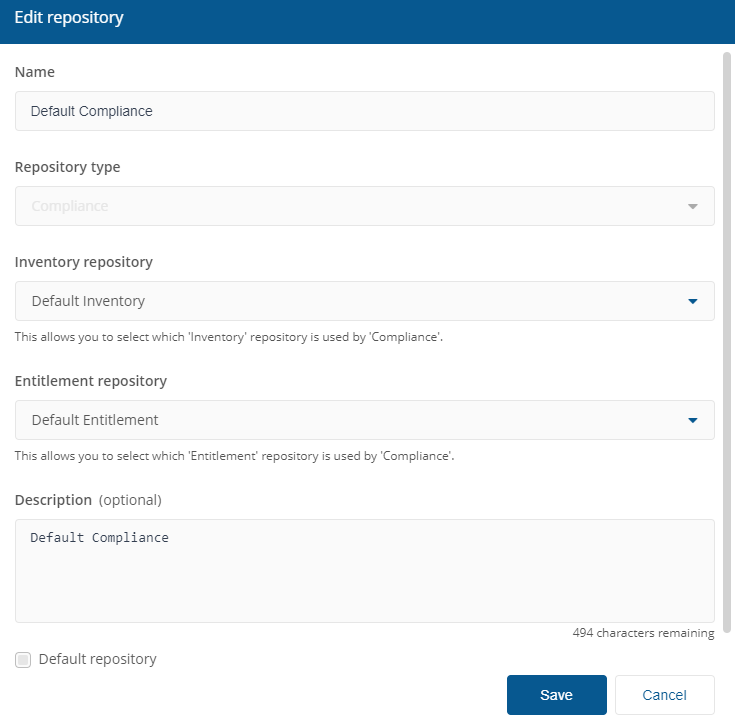
The first time you browse to the AppClarity pages the only repositories available are the default ones. To run the AppClarity→ Compliance→License Summary you will use the Default Compliance repository, it will already be associated with the Default Inventory but you'll also need to associate it with the Default Entitlement repository. Switch to Settings→Configuration→Repositories:
Check the checkbox for the Default Compliance repository, and click Edit.
Once the Default Compliance repository opens in edit mode, select the Default Inventory and Default Entitlement repositories.
Optionally enter a description.
Click Save.
Viewing the Compliance License Position
Before viewing the Compliance License Position, ensure License Demand Compliance (LDC) reports for Microsoft Core, Oracle Processor, IBM PVU and RedHat Socket have been refreshed.
To run and view License Demand Compliance (LDC) reports :
Switch to AppClarity→License Demand.
On the License Demand Calculation Report screen, select your compliance repository from the dropdown list.
Click Refresh for each report.
Once the report refresh shows as complete, click View Report.
When you have refreshed the LDC reports, refresh the Compliance Report and view License Position for Compliance using the Refresh reports icon on the top right of the page.
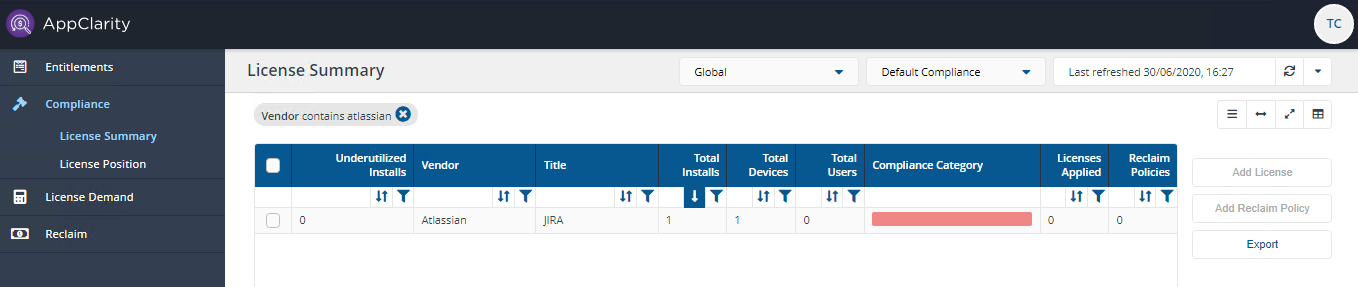
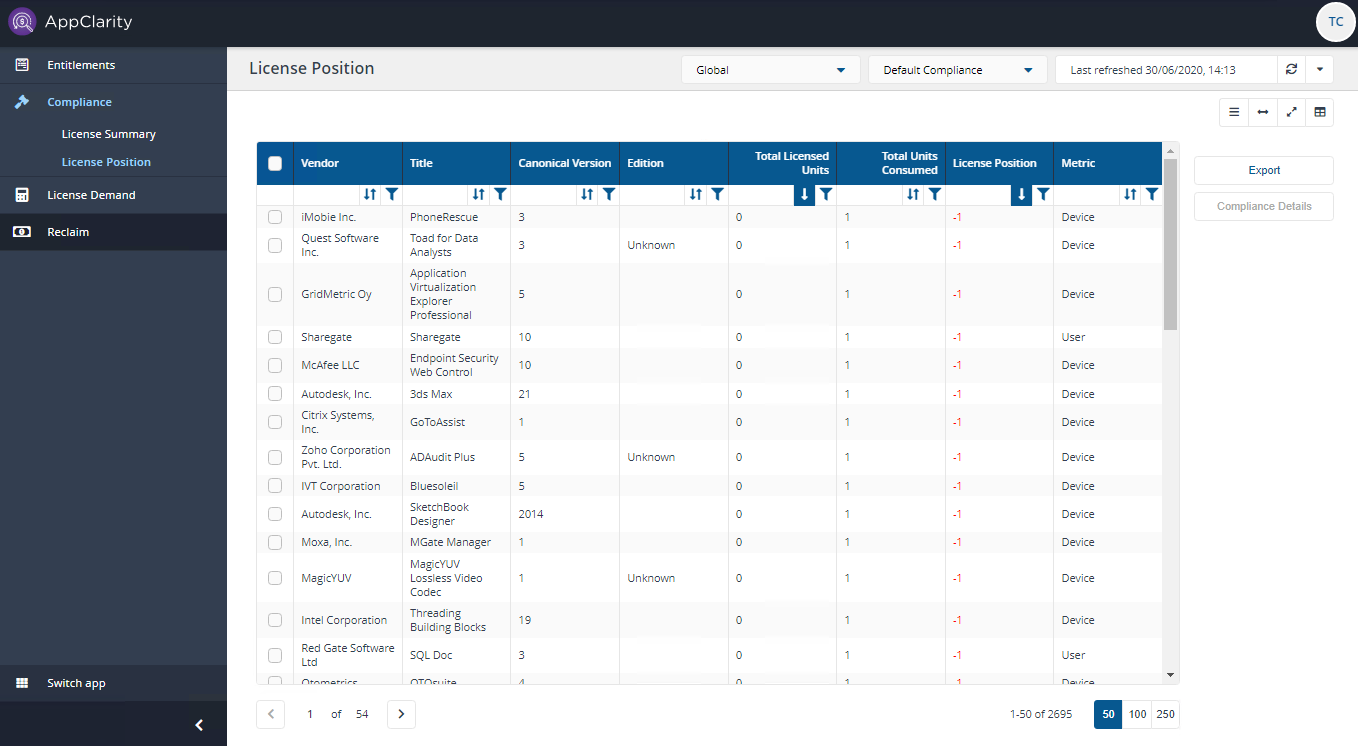
The screen should now display the information derived from the reports we just refreshed. Here we can see entries for each product, including the Vendor, Title and Edition and the most significant value, which is in the License Position column.
This shows the status of the licenses for each of those products, as there are no entitlements defined, they'll show negative values. The numbers indicate how many licenses are needed in order to make that product compliant. The License Metric column at the end of the row shows how the licenses are calculated, either by Device, User, Core or by Processor.
Viewing Compliance License details
To view the Compliance Details for any of the products displayed:
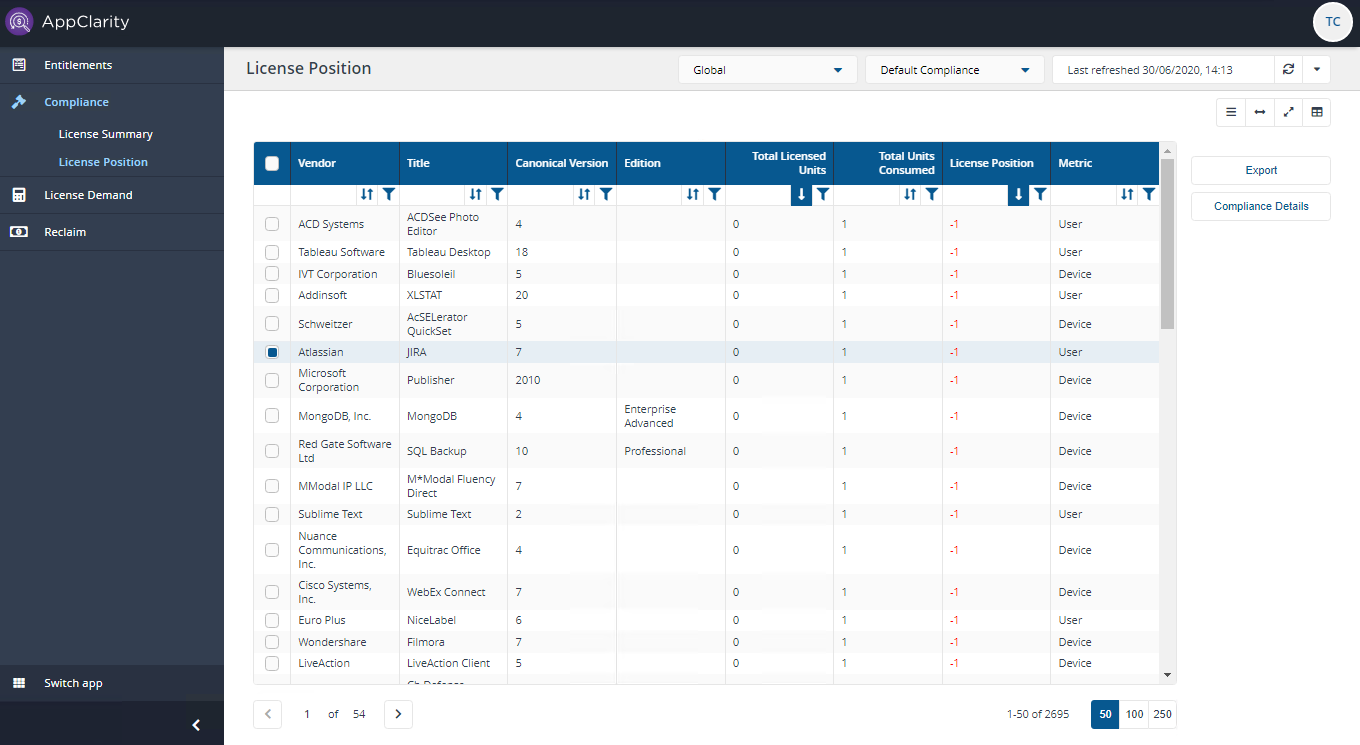
On the License Postion page check the checkbox one or more products and click Compliance Details.
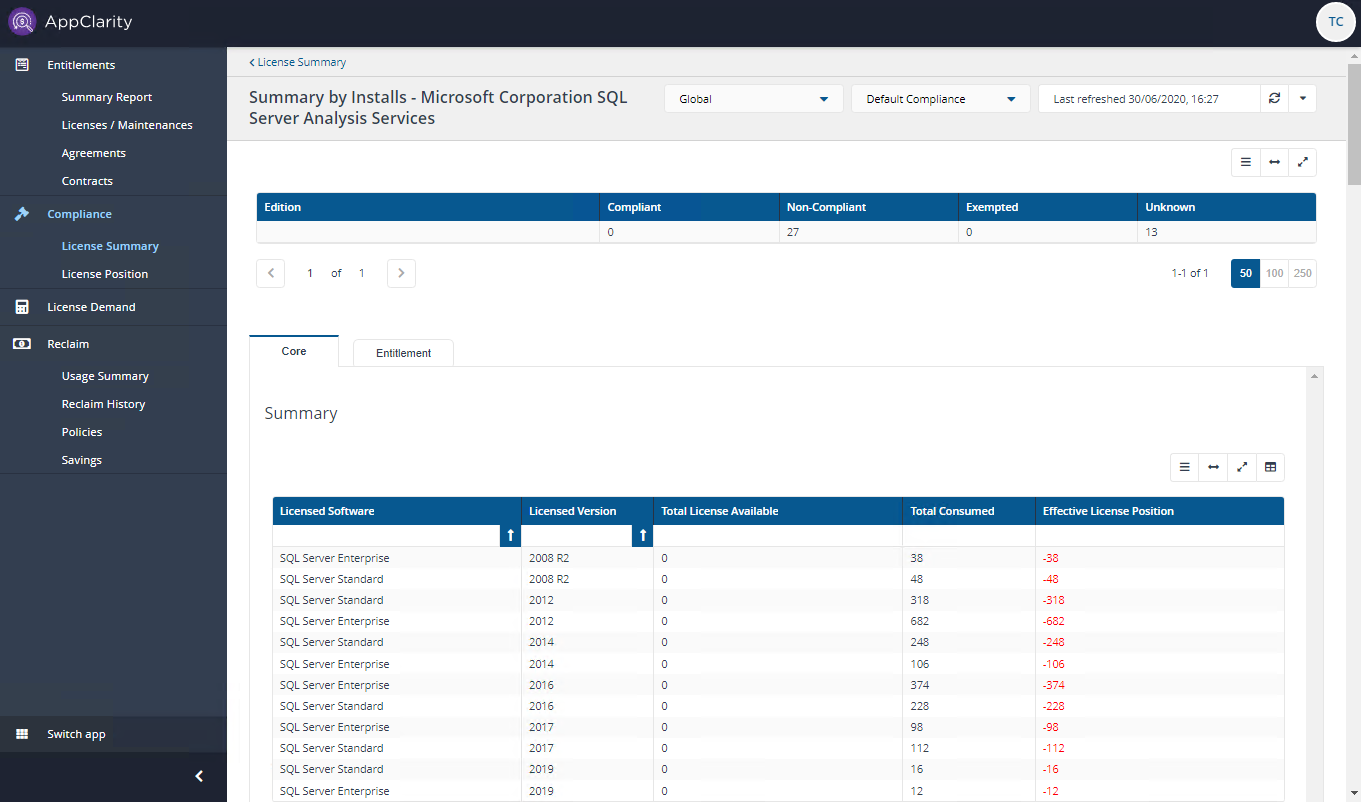
The License Summary for the selected product or products. From here you can further explore the Compliance Category for a particular product by clicking on the colored Compliance Category bar.
In the License Summary by Installs, you can review the license position for that software and filter a detailed table, for example by Status, Machine Name or by Primary User.
You've just created your first report in AppClarity and had a quick glance at your compliance position, without any entitlements set, showing what types of software are installed in your network and how many licenses must be created in order to make that software compliant.

Note
The Effective License Position (ELP) shows details for the installation title for product titles where they differ, for example:
SQL Server Master Data Services, SQL Server Data Quality Services, SQL Server Integration Services etc. - mapping with the demand for SQL Server
RedHat Linux Server installation on VMs - mapped with demand of RedHat Enterprise Linux for Virtual Datacenters.
In the example shown, the License Summary page has been filtered to show results with the title, SQL Server Analysis Services (SSAS), then clicking on Compliance Category color bar for SSASshows the ELP for this product. SSAS is now matched with mapped with SQL Server, this means the complete ELP position is shown for SQL Server.
In addition, the ELP for the licensed and mapped titles remain the same for a given Management Group, for example:
If there are 100 installs of SSAS in the Global Management Group and 10 in Management Group 1
100 installs of SQL Server in Global and 70 in Management Group 1.
A selection of either SSAS or SQL Server would show a license position of SQL Server for Management Group 1 based on the combined 70 installs of SQL Server and 10 of SSAS.
Refreshing reports for your repositories
You can refresh reports from individual AppClarity screens, as well as using the Settings App, by using the refresh icon next to the Last Refreshed box:

Clicking the dropdown icon next to the refresh icon shows you the last report that was run, a link to the Settings→Monitoring→Process Log and a Status:
Green tick - indicates a successful refresh
Triangle exclamation - indicates a failed refresh.

You can refresh reports from the following pages:
Title page | Sub-Page | Report |
|---|---|---|
Entitlements | Entitlement Summary | Entitlement Consolidation |
License / Maintenance | Entitlement Consolidation | |
Agreement | Entitlement Consolidation | |
Contract | Entitlement Consolidation | |
Compliance | License Summary | Compliance |
Compliance Summary by Installs | Compliance | |
License Position | Compliance | |
License Demand | License Demand Calculation Summary report - first page | License Demand Calculation report |
License Demand - Detailed Report | License Demand Calculation report | |
Reclaim | Usage Summary | Reclaim Product Usage |
Reclaim History | Reclaim Reporting | |
Policies | Reclaim Consolidation | |
Savings | Reclaim Reporting |
Refresh reports using Settings
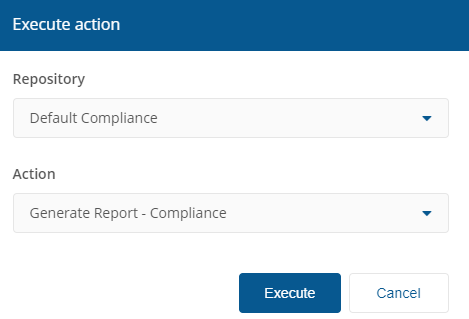
You can also refresh reports using the Settings app, for example:
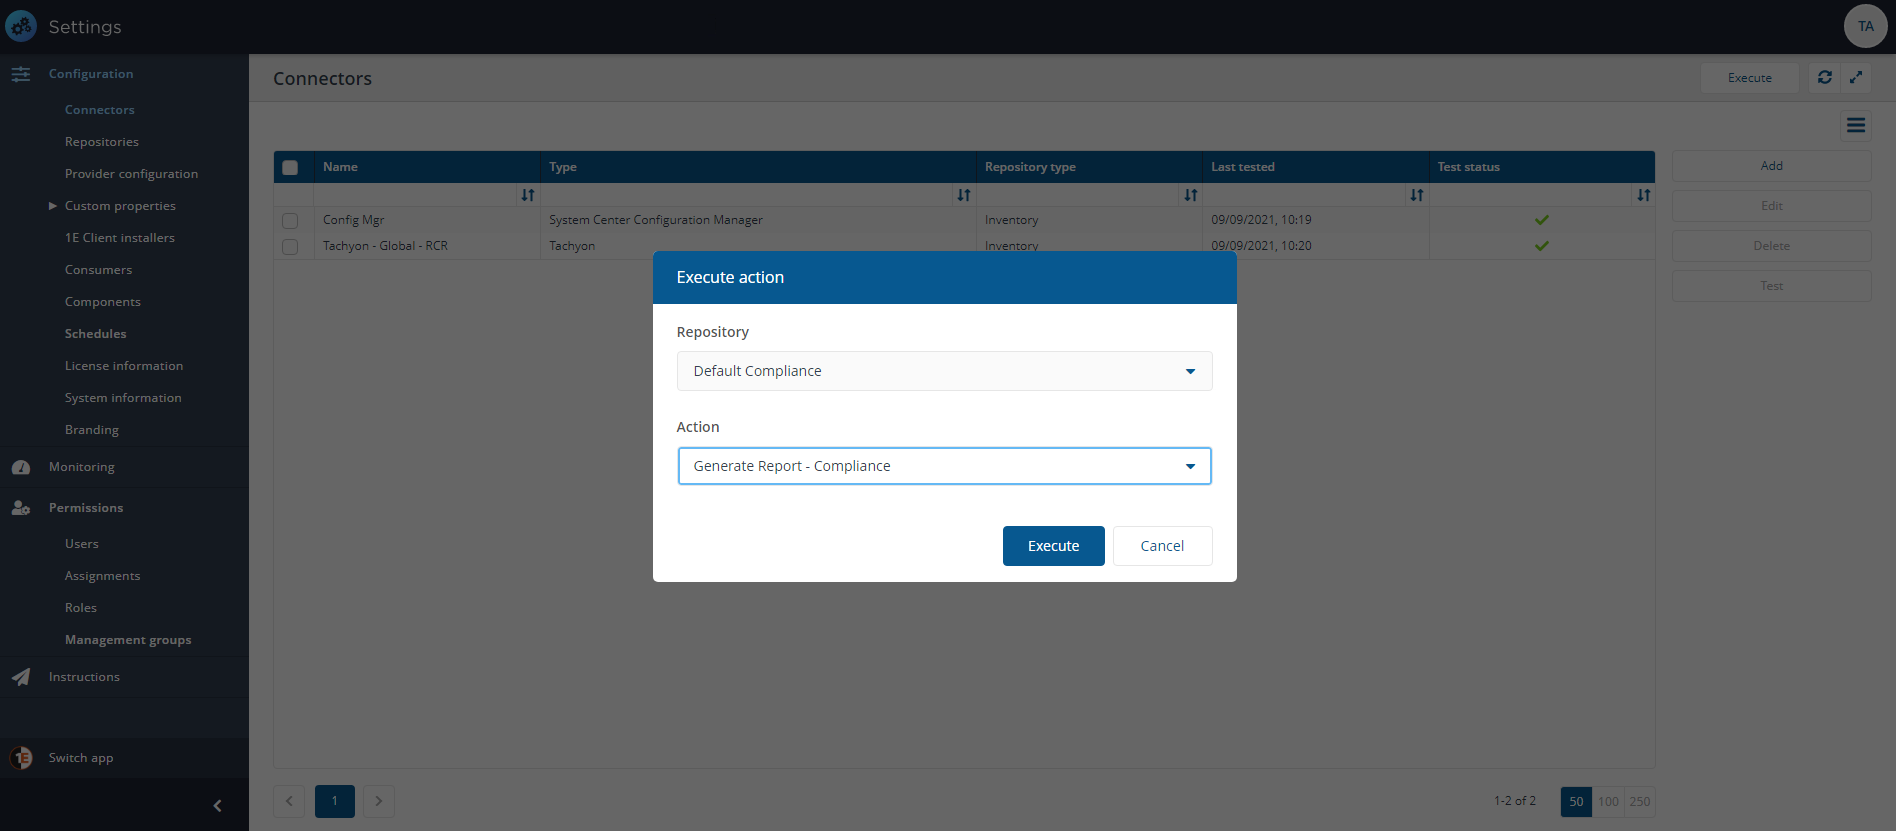
Switch to Settings→Configuration→Connectors and click Execute.
In the Execute action popup from Repository select Default Compliance and Action as Generate Report - Compliance, and click Execute.
To monitor the progress of the new action navigate to Settings→Monitoring→Process log to view the Generate Report action running.
When the Generate Report action has completed, switch app to AppClarity→Compliance→License Position.
Scheduling a report refresh for a repository
Toautomaticallyrefresh a report for a repository you can set up a schedule:
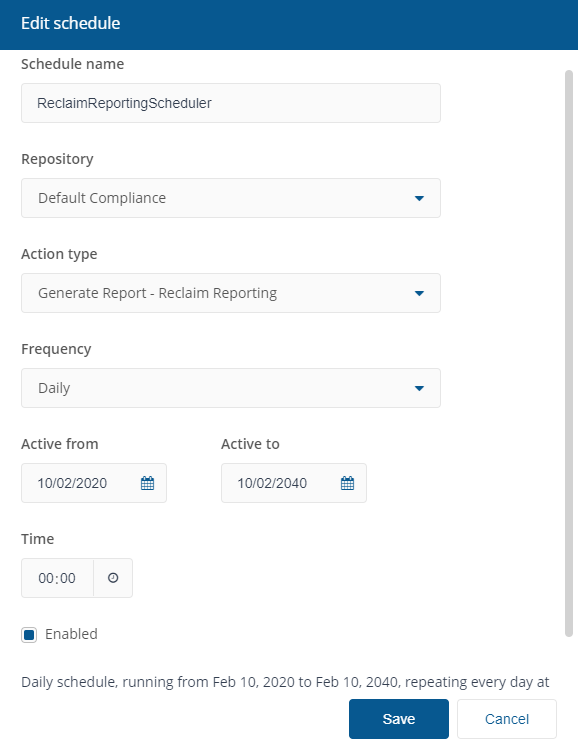
Under the Settings→Configuration→Schedules and click Add.
In the Add schedule screen for:
Schedule name - enter a logical name for the new schedule.
Repository - select your repository from the dropdown menu.
Action type - select the associated action type you want to schedule.
Frequency - select the frequency.
Note
For any entitlement repository, when a new entitlement is created (which triggers an entitlement consolidation) a Schedule called EntitlementConsolidationScheduler is created for this repository by default, it's set to run on a 24 hrs frequency (daily basis).
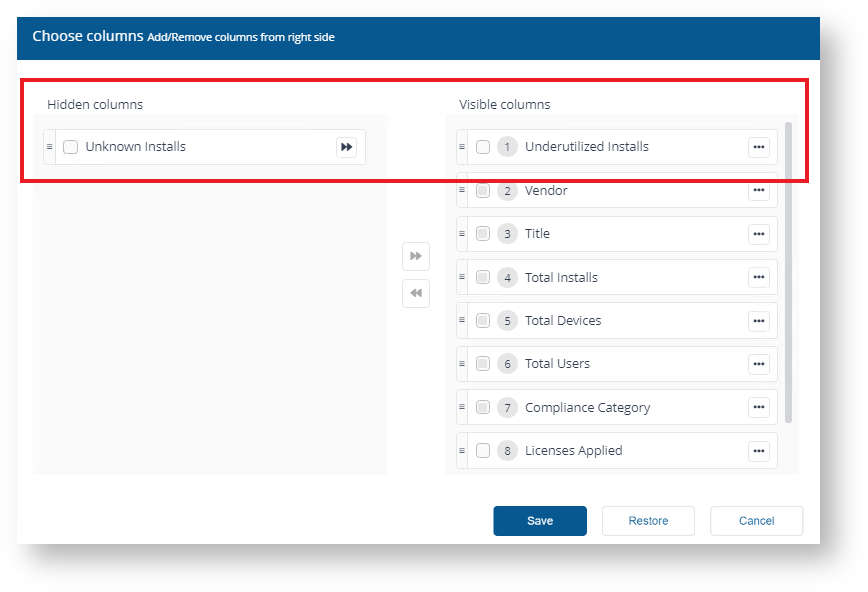
Choosing the columns displayed in reports
You can choose which columns are displayed in AppClarity detail tables to increase readability. On the pages where you can pick the displayed columns you'll see the control highlighted in the example.

When you click on the Choose columns control it opens a popup displaying every column on the current screen, the controls are:
Control | Explanation |
|---|---|
Available Columns | Columns which are by default hidden from display on screen. You can still include any of them to display on screen. |
Visible Columns | Displays the list of columns displayed on screen. Mandatory Columns cannot be excluded, the selection controls for these items are disabled. They can still be moved up or down. TipSome pages have mandatory columns and a set of default hidden columns. |
Arrow buttons | To move up or move down, exclude or include any column, clicking on the ellipsis displays these additional controls. 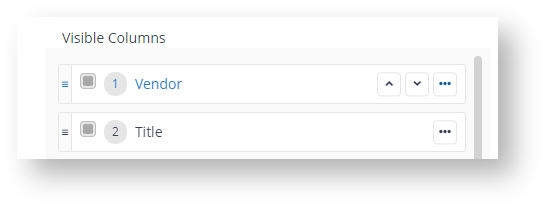 |
Drag and drop | You can drag and drop columns to change how they are displayed. |
Exclude columns | Exclude column button allows you to select columns to exclude from the current display. |
For example, in Viewing License Compliance Details we viewed theLicense Summary, using the Choose columns control you can pick which columns are displayed in the table. On this page, the default columns are:
Vendor
Title
Total Installs
Total Devices
Total Users
Compliance Category
Unknown Installs
Underutilized Installs
Licenses Applied
Reclaim Policies.
Each page also has some mandatory columns which cannot be excluded from display. When you click the Choose columns icon the excluded columns are greyed out and cannot be removed.
For example, in License Summary you cannot remove these columns:
Vendor
Title
Total Installs
Total Devices
Total Users
Compliance Category
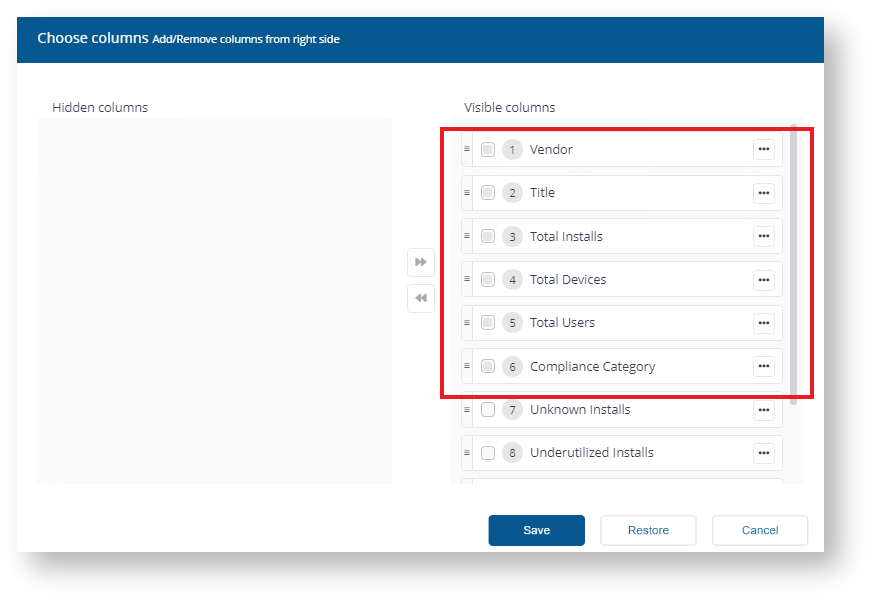
From this screen we chose to exclude Unknown Installs and move Underutilized Installs to the top of the list.
To apply this view to the current report, click Save.
You can also choose Restore to reset the column chooser UI or Cancel to cancel your changes and exit the Choose columns control.
Note
When you refresh reports on a page where you have amended the displayed columns, the report view will reset back to its default view once the refresh completes and the page reloads.