Management Groups - tutorial
In this tutorial
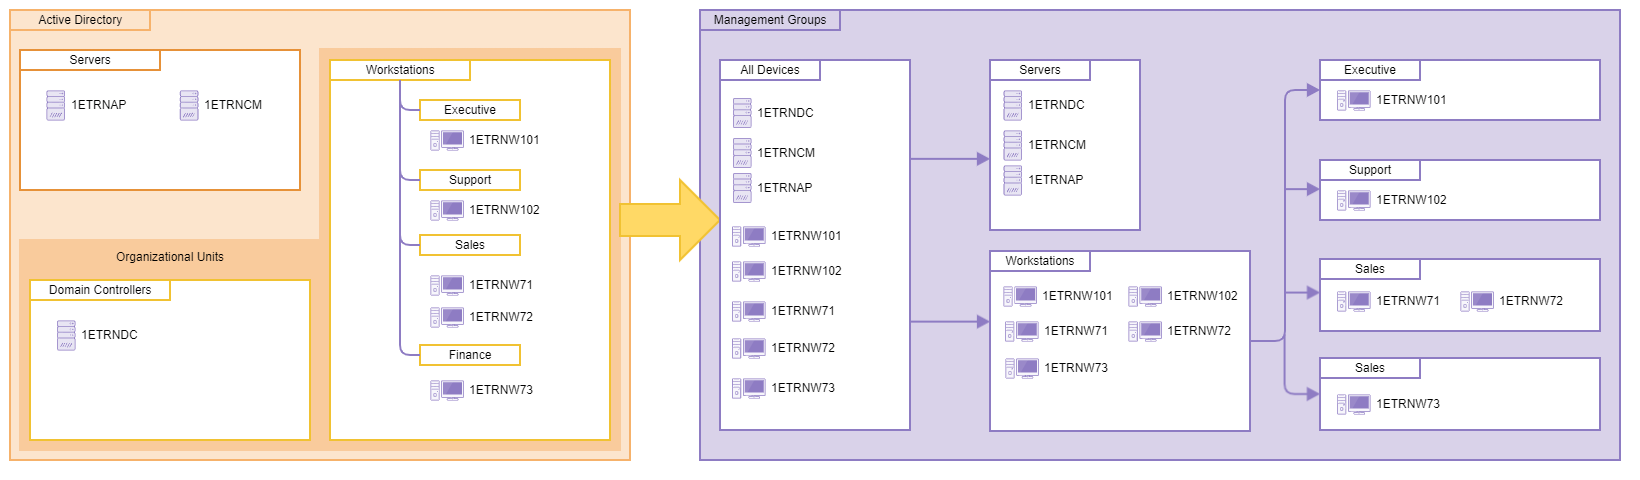
In this tutorial, we add a number of Management Groups for the ACME organization: one that uses the name of the devices and several that use the Organizational Unit (OU) the devices belong to. The following picture shows what we have in our example Active Directory and how this will appear as Management Groups in Tachyon. Here you can see there are two servers in the AD Computers group, an additional Domain Controller server and five workstations in the OU.
By the end of this example, you will have added six Management Groups in addition to the default All Devices Management Group:
All Devices - this Management Group brings all devices into a single Management Group
Servers, Workstations, Executive, Support, Sales and Finance - these Management Groups will use an OU rule to separate the devices according to the OU they belong to.
Note
If you want to take advantage of your Configuration Manager database, and pull in its inventory and usage data, so that you can mirror your Active Directory OU structure in your Management Groups, then you'll need to configure a System Center Configuration Manager connectorin your Tachyon system.
Without Management Groups
Before describing the process for creating the Management Groups, let's take a look at the Explorer application to see how things look without any Management Groups defined. The easiest way is to use the Devices table in Explorer:
Navigate to the Explorer→Devices→Table page.
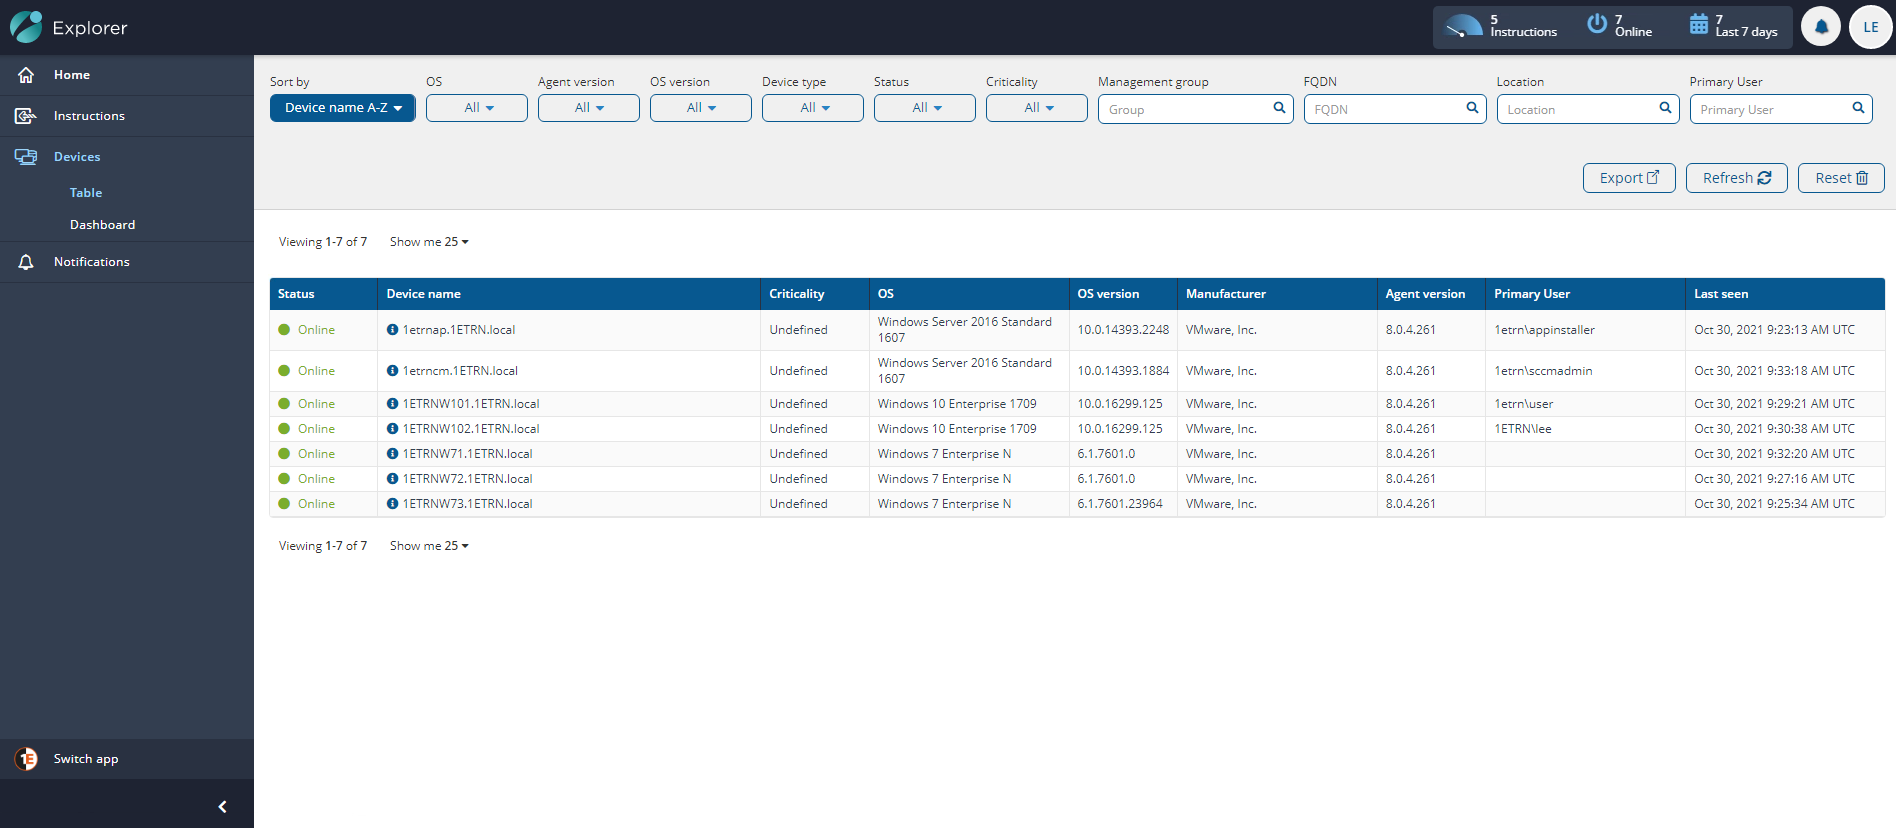
On this page you will see all the devices with the Tachyon client installed. In our example, there are 7 connected devices.
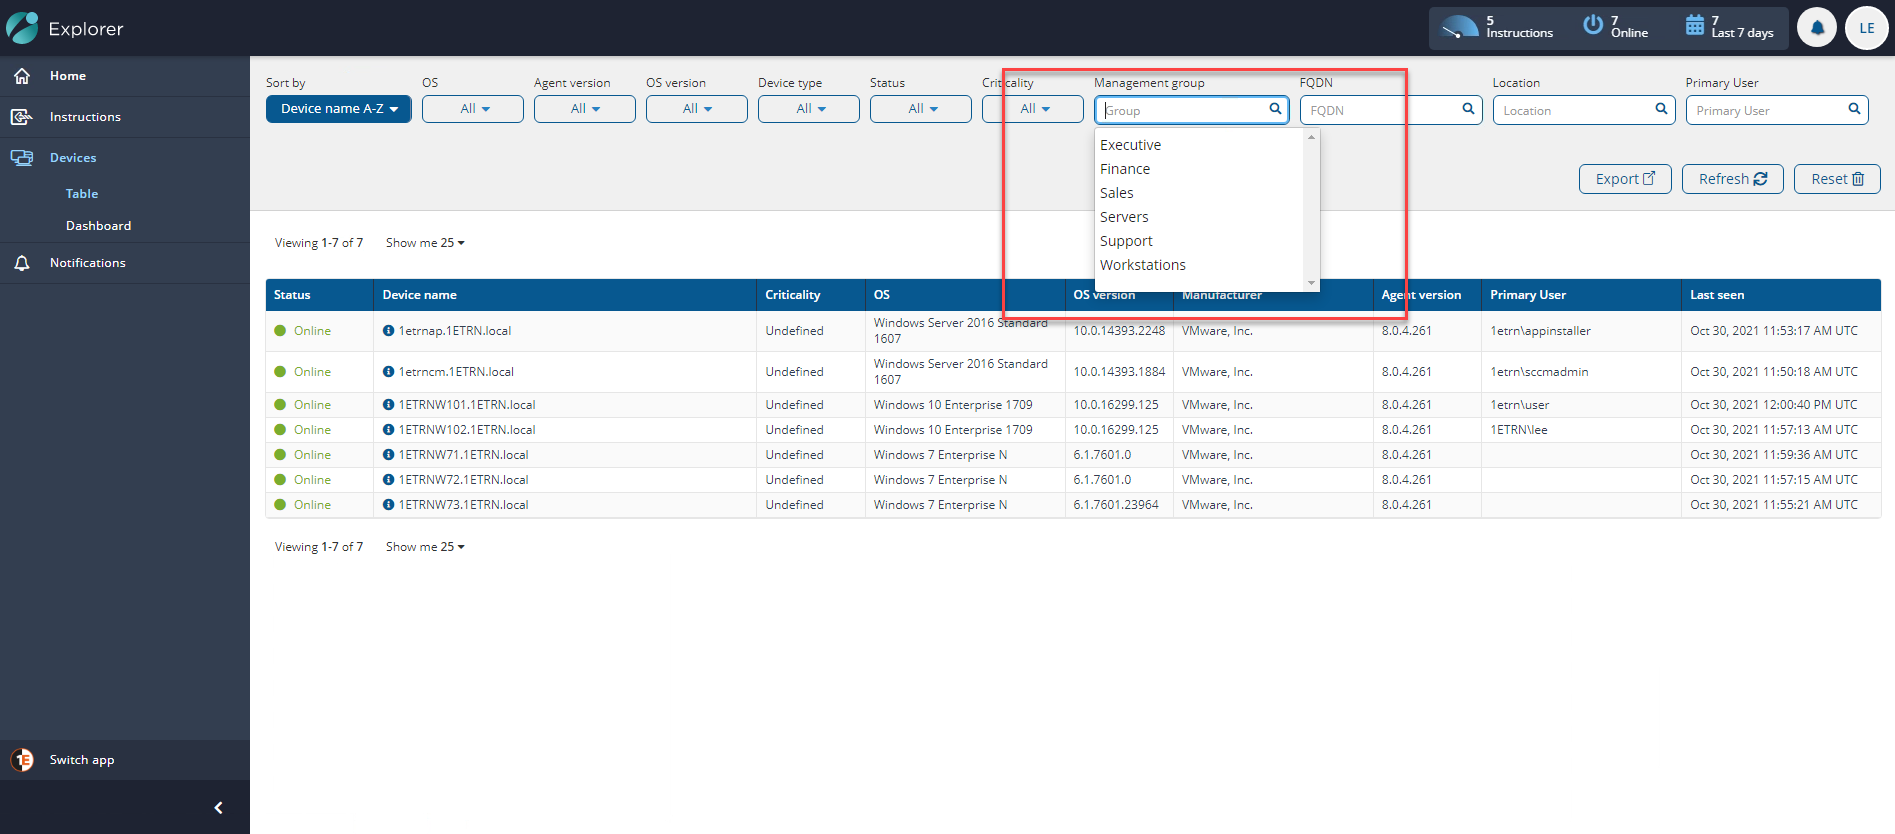
Clicking on the Management Group filter edit field, you can see that no Management Groups are present.
Now switch to the Settings application using the Switch app menu.
Navigate to the Settings→Configuration→Connectors page.
Here you can check that a Tachyon connector has been added and tested.
If you have configured a connector, you can start adding Management Groups.
Adding example Management Groups
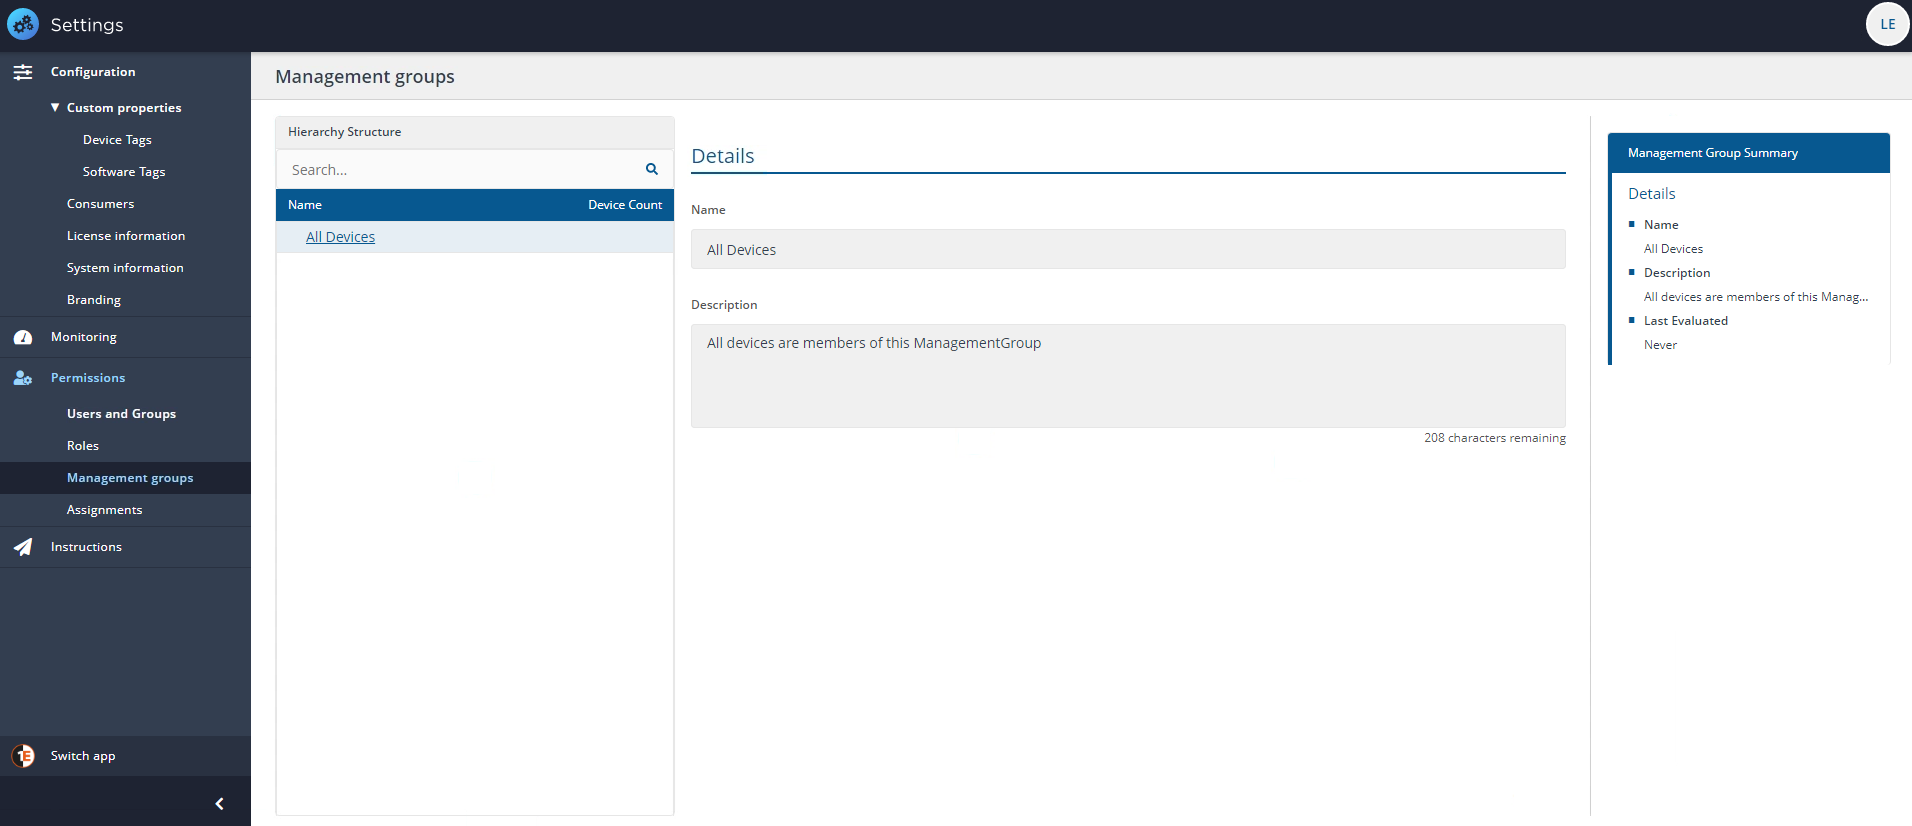
By default, in a new installation of Tachyon, all devices are members of the All Devices group. If you have upgraded from a previous version of Tachyon, your previously created Management Group will be preserved and will become a child Management Group of All Devices Management Group.
You can create Child Management Groups and nest them into a Hierarchy Structure where child Management Groups inherit rules from their parent groups.
Using child Management Groups you could create by hand a Management Group structure which mirrors your Configuration Manager collections, or divide your Management Groups by device type, for example into servers and workstations. You can use the delegation feature to create Management Groups that mirror your organizational structure with associated delegated roles.
To find out how to use scripts to import a Management Group structure from a file or from Configuration Manager collection, refer to Creating direct-based Management Groups.
Refer to the Roles page section for details about how you can use the delegation feature.
To add our Management Groups:
Navigate to the Settings→Permissions→Management Groups page.
To start creating groups click on the Add Child button to display the Details screen.
Add Child lets you set the following parameters for the Management Group:
Name - the name you will identify the group by
Description - the description for the group, use this to briefly describe the rules used to populate the Management Group
Rules - the rules that define the contents of the Management Group.
In our first Management Group, which will contain all the servers in the network, we set the following as shown in the first row of the table opposite :
Name to Servers.
Description to All servers.
Rules: we set the first parameter to Device OS, the comparison operator to Contains and then the value to Server.
Having made all the settings we then click on Save to save the Management Group.
The last thing we could do is click Evalute. We don't do this immediately because we are going to create another 5 Management Groups, and we want to go straight onto doing that without waiting for the reports to run.
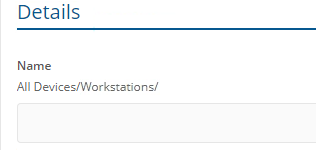
Our second group will contain all the devices in the Workstations OU and below. We make sure we select the All Devices level in our Hierarchy Structure as we want this OU to be a child of All Devices. We click on Add to start the process.
Set the following information for the second Management Group, as shown in the second row of the table opposite:
Name to Workstations
Description to All workstations
Rules: this time we set the first parameter to OU Path, the comparison operator to Contains and the value to Workstations
Having made all the settings we then click on Add to save the Management Group.
Repeat the steps outlined in step 6 for the remaining Management Groups but using the settings in the table opposite:
Note
The remaining four Management Groups are similar to our second Management Group in that they all use the OU Path property. The remaining Management Groups represent different departments in the organization and contain end user devices. These groups will be child Management Groups to the parent workstations Management Group, by creating a hierarchy in this way we can later delegate management responsibilities by assigning Tachyon users, groups and roles to them.
When creating Child Management Groups, check that you are creating that group in the correct part of your hierarchy. When you create a new group, it's place in the hierarchy is shown above the Name field.
Note
The OU Path rule was introduced in an accumulated hotfix to replace OU Name which was then deprecated (will be removed sometime in the future).
This tutorial uses OU Path in the same way as OU Name. However, OU Path also allows you to filter on any text in the OU path, using the pipe symbol | as a delimiter of different strings to search for, which must all be true to get a match. For example Workstations|Sales. OU Path allows you to be more explicit if you have OUs with the same name in different parts of your OU structure.
Child Management Group | Parameter | Value |
|---|---|---|
Servers (steps 3 and 4) | Name | Devices |
Description | All servers | |
Rules | Device OS contains server | |
Workstations (steps 5 and 6) | Name | Workstations |
Description | OU Workstations | |
Rules | OU Path Contains Workstations | |
Executive | Name | Executive Devices |
Description | OU Executive | |
Rules | OU Path Contains Executive | |
Support | Name | Support |
Description | OU Support | |
Rules | OU Path Contains Support | |
Finance | Name | Finance |
Description | OU Finance | |
Rules | OU Path Contains Finance | |
Sales | Name | Sales |
Description | OU Sales | |
Rules | OU Path Contains Sales |
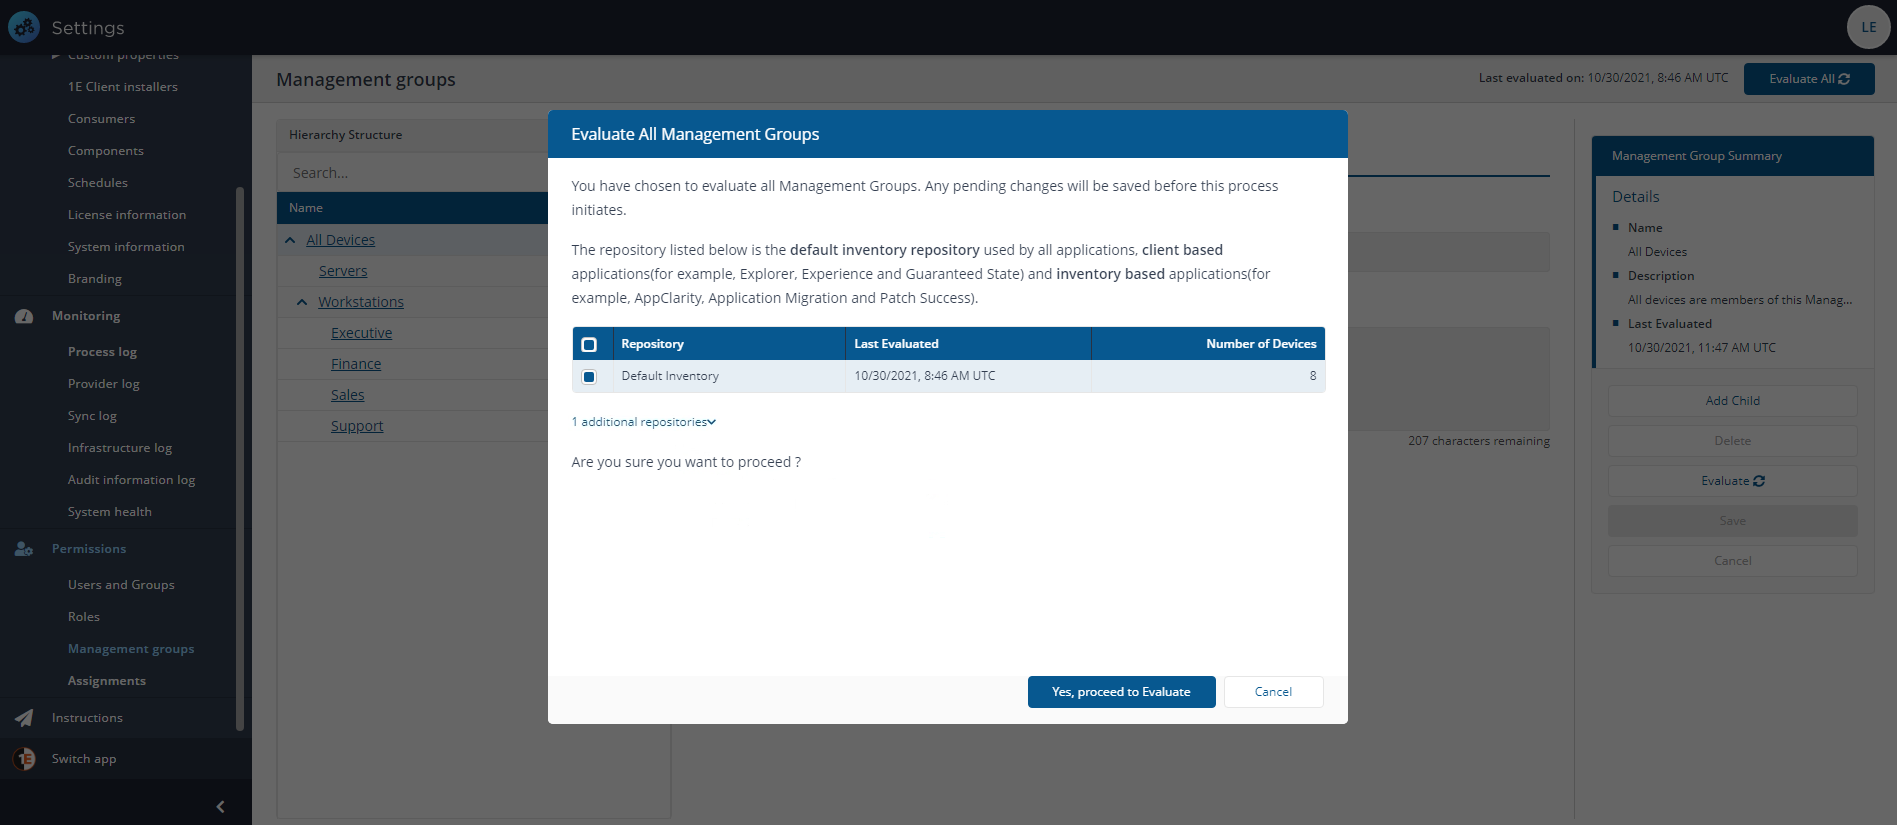
Having defined all the Management Groups we now need to evaluate all the rules.
Click on the Evaluate All button in the top right corner of the page, if you have more than one inventory in your Tachyon configuration you will be prompted to choose which repository you wish run evaluate your Management Groups against. Then click Yes, proceed to Evaluate.
To check the progress of the Management Group Evaluation action, navigate to the Settings→Monitoring→Process log page.
After a few seconds the Status column for the Management Group Evaluation action changes to display a green tick.
Checking the Management Groups in Explorer
The Management Group rules have now been evaluated and populated the Management Groups, it's now time to check how this has affected the Devices page in Explorer.
Navigate to Explorer using the Switch app menu.
Tachyonremembers that we were on the Devices page the last time we were in the Explorerapplication.
Click on the Management Group filter. A menu pops up displaying all 6 of the new Management Groups.
Selecting a Management Group from the menu filters the devices to show just the ones that belong to that Management Group.
Clicking on the Sales Management Group shows that it contains just 1 device.
Clicking on the Workstations Management Group shows that it contains 5 devices.
Clicking on Executive shows that it contains 2 devices.
The example is now complete. We've created 6 new Management Groups, one of those with a rule that uses the OS type name and the other 5 using the OU the device belongs to. We've then evaluated the rules to populate the Management Groups with matching devices. At the same time, this has synchronized the information with the Explorer application, so we can now filter the devices displayed on the Devices table.