Schedules page
The Schedules page lets you add schedules for executing actions on repositories, and select the categories of data you wish to collect.
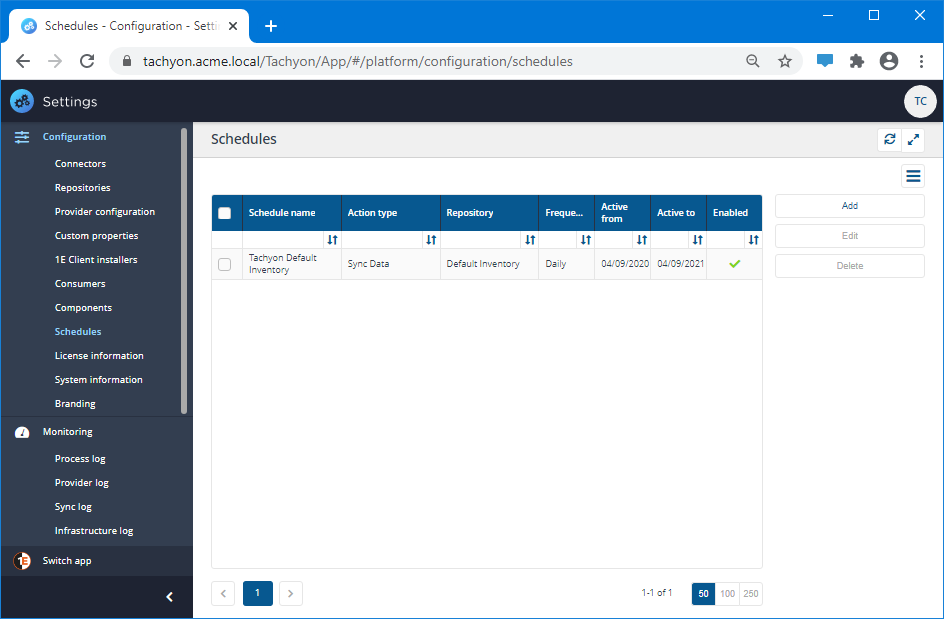
Schedules table
The Schedules table lists each schedule that has been created and displays the following information:
Column | Description | ||||||
|---|---|---|---|---|---|---|---|
Schedule name | The name set for the schedule. This can be used to identify the schedule in the Process log. | ||||||
Action type | The type of action selected for the schedule. The available action types are dependent on the selected repository type.
| ||||||
Repository | The repository the action will be run on. | ||||||
Frequency | The frequency for the schedule. | ||||||
Active from | The date the schedule will be active from. | ||||||
Active to | The date when the schedule will stop being active. | ||||||
Enabled | A green tick in this cell indicates that the schedule is enabled. If the cell is empty the schedule is not enabled. |
Adding a new Schedule
On the Schedules page you can create a new schedule by clicking the Add button.
Note
All schedules are defined in UTC time.
To add a new schedule:
Navigate to the Settings→Configuration→Schedules page.
Click the Add button.
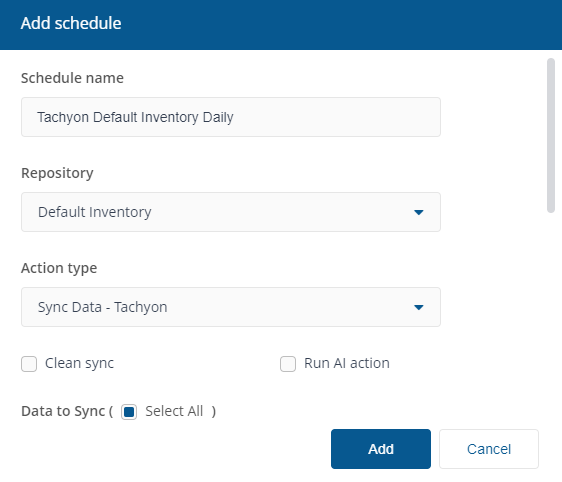
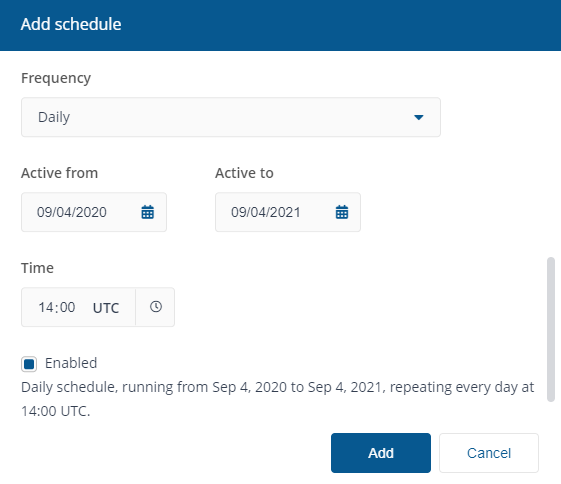
In the Add schedule popup enter a Schedule name.
Tip
You should use a naming convention for schedule names:
<action type> <repository name> <schedule>
For example:
SCCM Demo Inventory 11pm (only need to say Demo once)
SCCM Demo Default Inventory 3am (demo connector but default inventory)
SCCM with RCR Default Inventory Friday 2am
Select the Repository from the drop-down list. For example, Default Inventory.
Select the Action type from the drop-down list. For example, Sync Data - Tachyon action for a Tachyon connector created previously.
For inventory Sync data actions you can perform a Clean sync, which deletes the data in the selected inventory repository before performing the new sync.
If AI Powered Auto-curation has been enabled, then inventory Sync data and Basic Inventory Consolidation actions allow you to select Run AI action, which performs additional processing to normalize software product names that are not in the 1E Catalog.
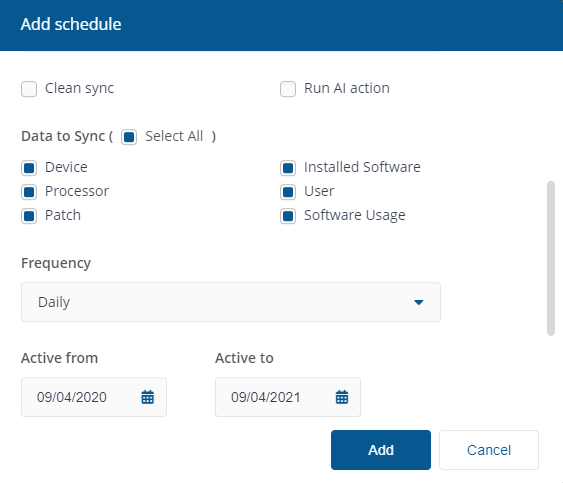
For inventory Sync data type actions you also get to select the categories of data that you want to sync. In the Data to Sync heading there is aSelect All checkbox that lets you select or deselect all the following data categories, you can also select or deselect these individually:
Note
The categories displayed are dependent on the type of connector.
AD Organizational Unit
CM Application & Package
Device
Installed Software
Patch
Processor
Software Usage
User
Select a Frequency for the schedule. For example, you can create a Daily schedule. Doing this adds the relevant controls to the Add schedule popup.
Note
Repeat Minutes
Daily
Weekly
First week of month
Second week of month
Third week of month
Last week of month
Day of the month
Select the Active from date. For example, the current date.
Select the Active to date. For example the same day in the following year.
Select other settings according to the Frequency you selected. For example, you can set the Time to 00:01, so that the schedule runs at 1 minute past midnight in UTC time.
Ensure that the Enabled checkbox is checked to make the schedule immediately active.
When all the schedule fields are set click Add to add the active schedule.
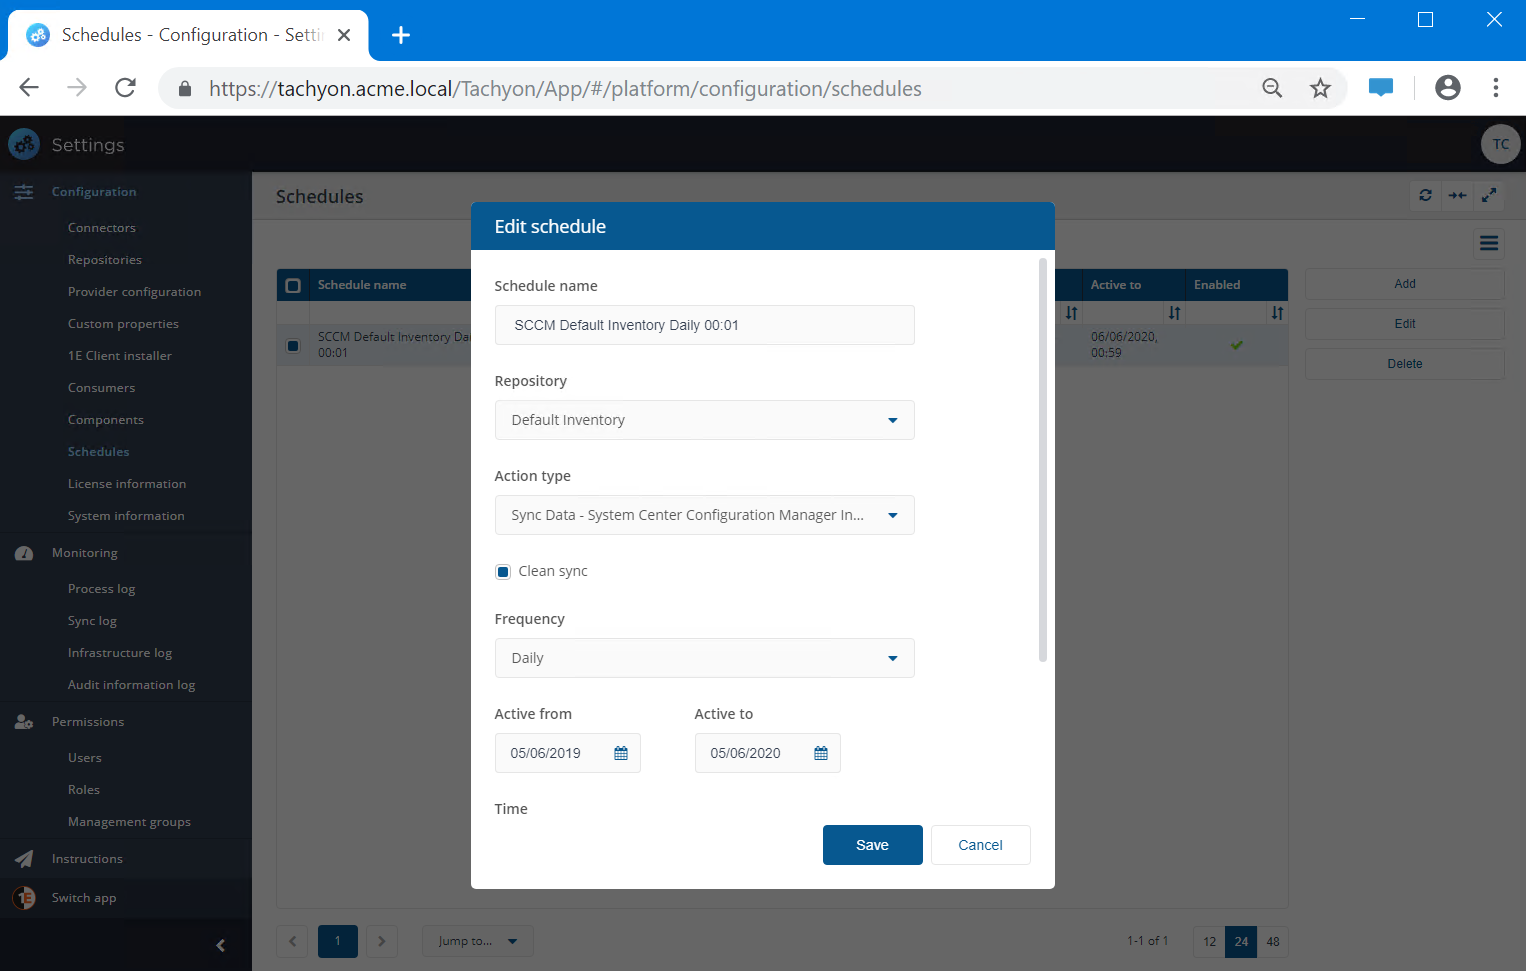
Editing an existing Schedule
You can edit a particular schedule to change any of its parameters. To do this:
Navigate to the Settings→Configuration→Schedules page.
Check the checkbox next to the one schedule you want to edit.
Click the Edit button.
In the Edit schedule popup make any changes you need to the schedule.
When you are finished, click Save to commit the changes.
Enabling and disabling a Schedule
A primary reason to edit an existing schedule is to temporarily disable it so that it can be edited and re-enabled at a later date. For example if you know you have a planned maintenance task you might want to temporarily disable the schedules during the maintenance and then re-enable them once the maintenance has finished.
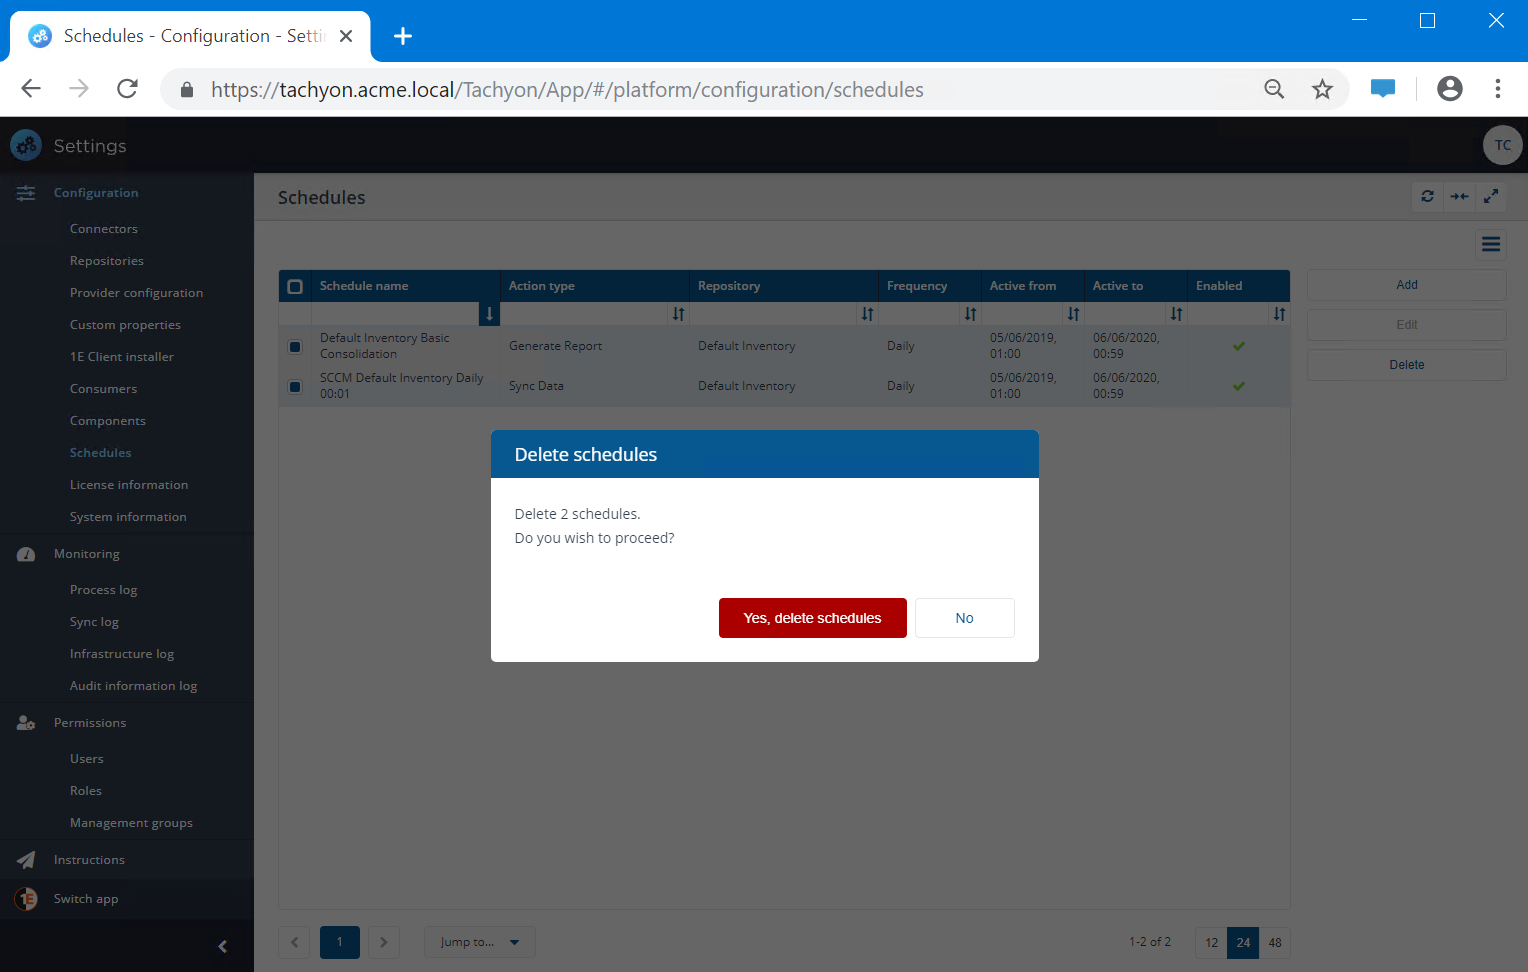
Deleting a Schedule
You can delete a particular schedule when it is no longer needed. To do this:
Navigate to the Settings→Configuration→Schedules page.
Check the checkbox next to the one schedule you want to delete (you can delete multiple schedules in a single action by checking multiple schedules).
Click the Delete button.
In the Delete schedule(s) popup you will be asked if you want to proceed.
To proceed and delete the selected schedule(s) click the Yes, delete schedule(s) button.