Creating an entitlement using a SKU
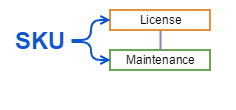
Stock Keeping Unit (SKU) codes can be used in some cases to help quickly fill out the details for an entitlement, they can even automatically create and link additional entitlements to model associated maintenance details. AppClarity will retrieve the information for a SKU from 1E Catalog.
Note
A SKU (pronounced 'skue') is an identification, usually alphanumeric, of a particular product that allows it to be tracked for inventory purposes. In AppClarity, via the 1E Catalog, a SKU is associated with the license metrics and use rights associated with a particular software product purchase.
SKUs are in widespread use throughout the software industry, where publishers refer to their software using a SKU. The SKU gets added to most purchase orders to indicate the software or package being bought. Even small differences between two software titles are indicated by different SKUs. The SKU also indicates the license metrics and maintenance terms associated with the purchase and any additional use rights covered by the purchased license.
AppClarity uses the SKU data to automatically:
Prefill the settings in an entitlement with the product details, license metrics, and basic maintenance terms that are indicated by the SKU
Set the additional use rights that are part of the license indicated by the SKU
In this example
In this example, we show how the previous example of a license and maintenance entitlement for Microsoft Visio can be done in a single operation using a SKU number to fetch the details from 1E Catalog.
By the end of this example, you will have created a license entitlement in AppClarity and used a SKU to populate its fields for a Microsoft Visio license and automatically create and link an associated 36 month maintenance for Microsoft Visio.
Let's take a step back now and look at the entitlements we've created so far. The first simple license entitlement covered installations for the Microsoft Visio product, and we had to add the details for the Vendor, License Type, Metric details, Product title, Version Type, Version and Edition. Along the way we also created a contract and attached this to the license. We then created a maintenance entitlement that defined a 3-year subscription and attached that to the license and effectively extended the perpetual license to cover any new versions released during those 3 years.
This example shows how the first and last parts of that sequence can be created in a single step, assuming you know the SKU for Microsoft Visio with a 3-year maintenance. When you use a SKU it must be known by the 1E Catalog, new SKUs from different Vendors are added on a regular basis.
To create an entitlement using a SKU we know the following information in advance:
The vendor of the product, in this case Microsoft Corporation
The SKU for the product, in this case for the Standard edition of Visio this is D86-03848
The cost per unit for the license, in this case $150
This example assumes that instead of manually creating the two parts of the license and maintenance separately, we start from scratch and instead create and publish a license and maintenance entitlement using a SKU.
Note
You can change the default currency (USD) along with the appropriate currency symbol and name from USD to a currency of your choice, for more details refer to Creating a license entitlement: Changing the default currency in AppClarity
Creating the maintenance entitlement from the SKU
To create and publish a license entitlement:
Navigate to the AppClarity→Entitlements→Licenses / Maintenances page and click on New License.
In the New License page we will choose a specific set of options to show how this page works. For more details on all the fields in this page please refer to New License page.
There are lots of fields on the page, but a few are mandatory. The mandatory fields have an * next to their name.
The page is split into a number of sections, we will start in the Basic Information section.
The Management Group is the first mandatory field, it is set by default to Global, but it can be changed to any of your existing Management Groups, in this example we will leave it at Global.
The next mandatory item is the Vendor field. We know that the vendor for Visio is Microsoft Corporation, so we start by typing Micros into the field and select Microsoft Corporation from the dropdown list of suggestions.
This time the Product SKU field is the next one we have to fill out. So we start typing the SKU, after entering the first few characters matching SKUs are displayed. We select the matching D86-03848 from the dropdown list of suggestions.
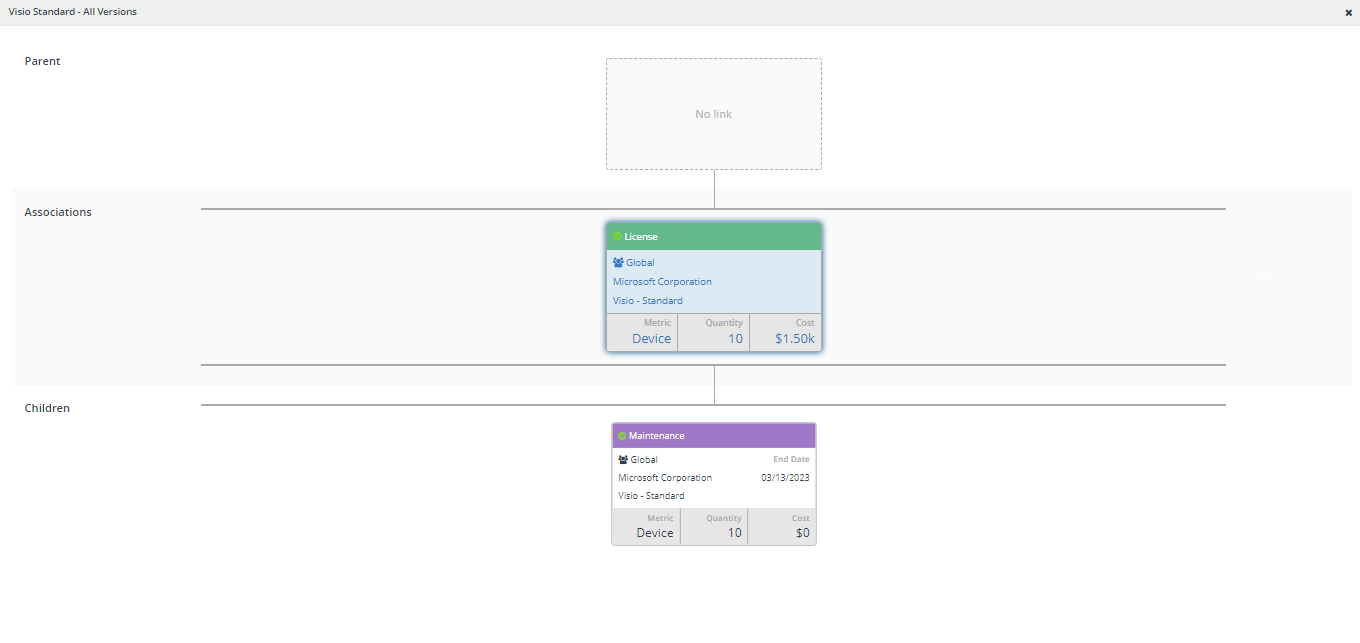
Note, the page title has now changed to Edit LicensePlusMaintenance
Notice how after selecting the SKU the License Type, Metric Type, Duration, End date, Product title and Edition fields are now filled out.
Now we set the following fields and click Publish, we could have clicked Save draft, if we were in the middle of making changes and didn't want to make the license active and the license would have been saved:
Quantity: 10
Units: 1
Unit Costs: 150
Currency: is already set to USD by default. AppClarity then calculates the total cost of the 10 licenses as $1500.00
Confirm the Entitlement is created:
Having published the license entitlement an entry now appears in the Licenses / Maintenances page. For Visio Standard Edition, with the Product SKU populated with the previously entered values.
To check this further click on the 1 in the Links column for the Entitlement.
In the popup you'll see the entitlement linked to the Children Maintenance.
To make a published license entitlement take effect you have to run the Compliance report:
Navigate to the Settings→Connector page and click Execute.
The Execute action popup is displayed, enter the following:
Repository: Default Compliance
Action: Generate Report - Compliance.
Navigate to Monitoring→Process Log and wait for the Action to complete, this will be Compliance and will have a green tick in the Status column when complete.
Navigate to the AppClarity→Compliance→License Position page.
In our example you can see thatVisio with Edition of Standard now has a License Position of 10. This indicates that the installations of the software title are now licensed and there are 10 spare licenses for Visio.