Preparing and deploying 1E PXE Everywhere boot images
Steps for creating and staging 1E PXE Everywhere boot images.
All PXE Everywhere Agents require a x64 boot image at least, and another for x86 if you are also serving x86 platforms. These 1E boot images will be referenced in your OS Deployment Task Sequences, and are based on Configuration Manager boot images.
The following example process is for x64 but also applies to x86. Each boot image requires its own Task Sequence to stage it on all PXE Everywhere Agents. While 1E Client with PXE Everywhere Agent enabled has installers for x64 and x86, both platforms must be staged with both boot images, to serve both types of PXE client platform. You would only ignore x86 if you are sure you are not serving x86 platforms.
There are two main steps to configure a 1E PXE Everywhere boot image:
Prerequisites
A computer with the Configuration Manager console and the PXE Everywhere Admin Tools installed.
Configuration Manager requires its Windows PE boot images to present a client authentication certificate. Configuration Manager automatically adds the certificate when deploying images to native Configuration Manager PXE servers, but you need to manually add the certificate to each 1E PXE Everywhere boot image before deployment to PXE Everywhere Agents.
1E tool | Where to find it | What it does |
|---|---|---|
UpdateBootImage | Included in the PXE Everywhere Admin Tools. The PXE Everywhere Admin tools can be installed using the PXE Everywhere Central installer, on any computer that has the Configuration Manager Admin Console. Please refer to Installing PXE Everywhere Central. The PXE Everywhere Central installer is provided in the PXE Everywhere download zip available from the Nomad download area of the 1E Support Portal. | This tool is used to update Windows PE boot images for use with PXE Everywhere. It uses the native Configuration Manager API to add a certificate, and update the variables.dat file included in the image. When the PXE client loads the boot image, the Configuration Manager executables load the encrypted variables file and attempt to connect to the specified Management Point.The tool takes advantage of a boot image reload feature introduced in Configuration Manager 1706 CB, which enables you reload the latest version of Windows PE (from the Windows ADK installation directory) into the boot image when you run the Update Distribution Points wizard. NoteWhenever you reload the boot image while running the Update Distribution Points wizard, for example to replace a certificate that is about to expire, you must then re-run UpdateBootImage.exe to ensure the 1E components and settings are installed in the reloaded boot image. NoteTo include a client certificate, it must be provided as a PFX file in a Public Key Certificate Standard (PKCS #12) format, with private key exportable, and a known password. For details of CM certificates please refer to Boot images for deploying operating systems in PKI certificate requirements for System Center Configuration Manager ( https://docs.microsoft.com/en-us/mem/configmgr/core/plan-design/network/pki-certificate-requirements. |
UpdateBootImageGUI | Included in the PXE Everywhere download zip with the installers for PXE Everywhere Central and Responder. NoteUse v1.0.0.6 with PXE Everywhere 4.0 | This tool provides a GUI where a user defines the parameters required by the UpdateBootImage tool. When executed it copies a command-line to the clipboard, which you then copy into an elevated command prompt and execute it. The tool is provided to reduce the chance of errors when typing in the long command-line required by the UpdateBootImage tool. The executable name is 1E.PS.UpdateBootImageGUI.exe and requires .NET Framework 4.5 or later. |
CreateBCD | Included in the installation of 1E Client with PXE Everywhere enabled. | This tool is run by a Stage boot image Task Sequence on PXE Everywhere Agents to copy the 1E PXE Everywhere boot image referenced by the Task Sequence to the Images folder in the Agent's TFTPTOOT, configure a suitable TFTP Block Size, and create a boot configuration database on the Agent. CreateBCD only works within the context of a Configuration Manager task sequence. It will run outside a Task Sequence but have no effect. WarningCreateBCD does not validate the boot image - it will not detect a corrupt .wim file. |
For full details of available command-line parameters for UpdateBootImage.exe, and CreateBCD.exe please refer to PXE Everywhere tools.
Creating the 1E PXE Everywhere boot images
The 1E PXE Everywhere boot image is copied from an existing Configuration Manager boot image, and then modified using UpdateBootImage to add the required certificate, and configure other settings.
Note
In most environments only a x64 boot image will be required. If you are managing x86 devices you will also need to prepare a PXE Everywhere boot image for x86, by repeating all the steps for x86.
Copy an existing boot image
Use the following process to copy your existing production boot image ready for modification.
On the Configuration Manager site server, open the Configuration Manager Admin Console and from the Software Library workspace expand Operating Systems > Boot Images.
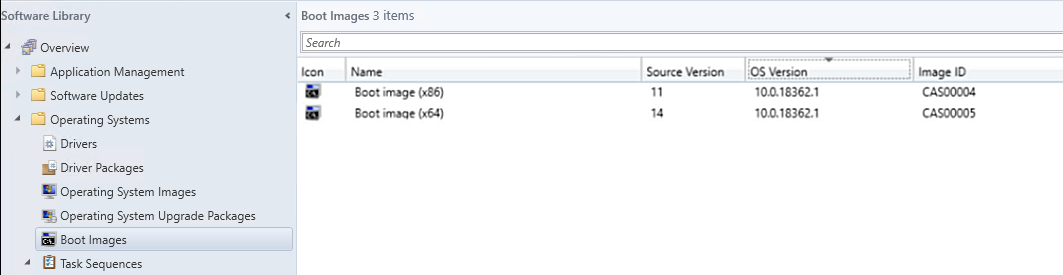
Right-click the current Boot image (x64) and select Properties, then select the Data Source tab to identify the location of the current boot image.
Open that location in Windows explorer and copy the boot.wim file to a folder in a shared location accessible to the CM site server (the location must be accessible using a UNC path and the folder should only contain the boot.wim file). If you have a content source share already created on the site server, that would be an ideal location to create the new folder and copy the boot.wim to.
Note
PXE Everywhere requires that the boot image is called boot.wim so you should ensure that your copy has this name.
In the Configuration Manager console, right-click the Boot Images node and select Add Boot Image.
In the Add Boot Image Wizard on the Data Source screen enter the UNC path to the copied boot image and click Next.
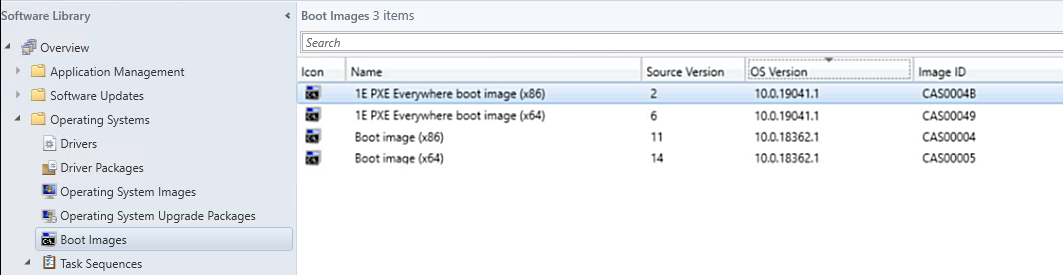
On the General screen, add the Name - for example 1E PXE Everywhere boot image (x64) - version and any relevant comments you want to include and click Next.
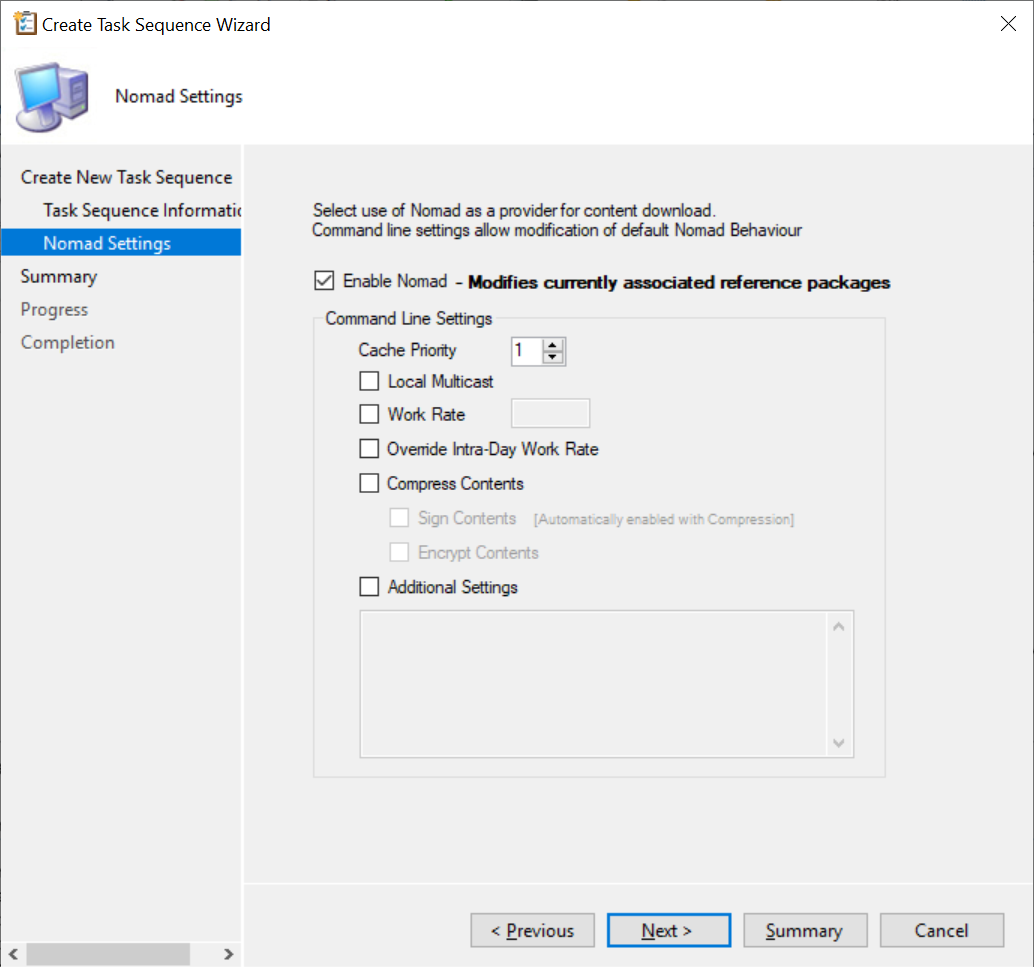
On the Nomad Settings screen (if Nomad Branch Admin UI Extensions have been installed), select Enable Nomad and click Next.
Click Next on the following screens to complete the wizard.
Right-click the new boot image and select Properties.
Select the Drivers tab and add any required network or storage drivers required to support your production systems, then click OK.
Right-click the new boot image and select Distribute Content to start the Distribute Content Wizard. Add the boot image to a local Distribution Point.
Note
This step is required before you can update the boot image with a certificate.
If you are serving x86 platforms, repeat the above steps to create boot image 1E PXE Everywhere boot image (x86).
Note
To inject a certificate into each boot image proceed with the steps under the heading Update a 1E PXE Everywhere boot image.
Later you will create a deployment to Stage a 1E PXE Everywhere boot image on the PXE Everywhere Agents, so they can serve the PXE clients on their local subnets.
Update a 1E PXE Everywhere boot image
These update steps must be done on a computer that has the Configuration Manager console and the PXE Everywhere Admin Tools installed. The command-line uses UpdateBootImage.exe (installed with the PXE Everywhere Central Admin Tools) to mount the boot image, inject the client authentication certificate and unmount the boot image.
You will also need the certificate used for boot images, provided as a PFX file, and its password.
Extract the UpdateBootImageGUI tool and its supporting files from the download ZIP.
Open a command prompt (Run as Administrator), change the current directory to the ZIP extract folder, and run1E.PS.UpdateBootImageGUI.exe
Field
Details
SMSProvider Server
Enter the FQDN of the Configuration Manager Provider and hit the Tab key. Note that the Site Code field will now be populated with the site code.
Boot Image ID
Using the drop-down, select 1E PXE Everywhere boot image (x64) created earlier. Note the WMI File Path\Name field is automatically populated with the path to the boot.wim file.
Distribution Points
Select one of the Distribution Points that the boot image was previously added to.
Management Points
Select an available Management Point.
Certificate Expiry
Select an expiry date. This defaults to one year from today. This may be changed as required in a production environment.
Note
When the certificate is about to expire, this process will need to be repeated using a new certificate, and the updated boot images staged to all PXE Everywhere Agents.
PXEBoot Password
You can optionally set a boot password that would need to be entered by the user on the PXE client in order to load the Windows PE boot image and start any OS Deployment Task Sequence
Certificate Path
Enter the path to the PFX file that you exported earlier. This optional field is mandatory for injecting the certificate into the boot image.
Certificate Password
Enter the password for the specified PFX file. This optional field is mandatory!
Click the Execute button. The tool will display a dialog box similar to the following, indicating that the constructed UpdateBootImage.exe command line has been copied to the clipboard.
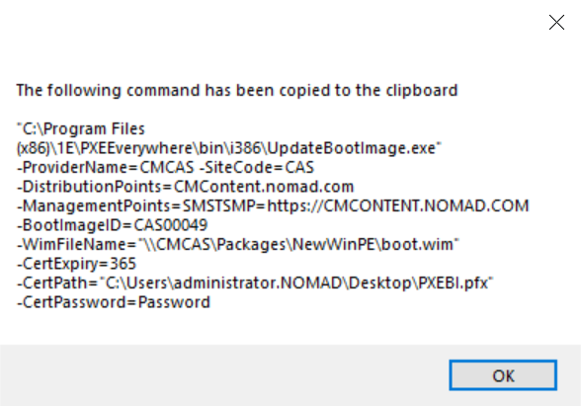
Start a command prompt (run as administrator)
paste the command line from the clipboard and execute
the process should complete within a couple of minutes and finish with CreateBootMedia returns OK.
Close the UpdateBootImageGUI program.
Return to the Configuration Manager console, right-click the new boot image and select Update Distribution Points. This will cause the boot image to be ‘regenerated’ and copied to the Distribution Point(s) that it was originally copied to.
If you are serving x86 platforms, repeat the above steps to update boot image 1E PXE Everywhere boot image (x86).
The 1E PXE Everywhere boot images are now ready to use in Task Sequences.
Stage a 1E PXE Everywhere boot image
Each PXE Everywhere boot image needs to be distributed to the PXE Everywhere Agents before they can be served to PXE clients. This is done using a custom Task Sequence that downloads the boot images then stages them in the TFTP folder structure from where the PXE client will download the relevant x64 or x86 boot image. Staging the boot images in the TFTP folder structure is done using CreateBCD.exe, which is installed on all PXE Everywhere Agents. CreateBCD.exe copies the deployed PXE Boot Image to the PXE Everywhere TFTP\Images folder and creates a boot configuration database (BCD file).
Create a Task Sequence to stage a 1E PXE Everywhere boot image
To distribute the boot image(s) to the correct locations on PXE Everywhere Agent computers, create a custom task sequence that will be deployed to the computers.
In the Configuration Manager console, from the Software Library work space, expand Operating Systems, right-click Task Sequences and from the context menu, choose Create Task Sequence.
On the first page of the Create Task Sequence Wizard, select Create a new custom task sequence and click Next.
Tip
Nomad Settings is only displayed when Nomad Admin Console Extensions is already installed on the Configuration Manager administration console computer you are using. If this is not present, then close the Configuration Manager Admin Console and install the Nomad Admin Console Extensions, and then create/edit the Task Sequence.
If Nomad is installed on the Agent computers on which you'll be staging the boot image, then you should use Nomad to stage the boot images.
On the Task Sequence Information page, enter a suitable name for the Task Sequence, for example:
Stage 1E PXE Everywhere boot image (x64)
Stage 1E PXE Everywhere boot image (x86) - if you are serving x86 platforms
Click the Browse button and choose the boot image which you created earlier.
Click Next.
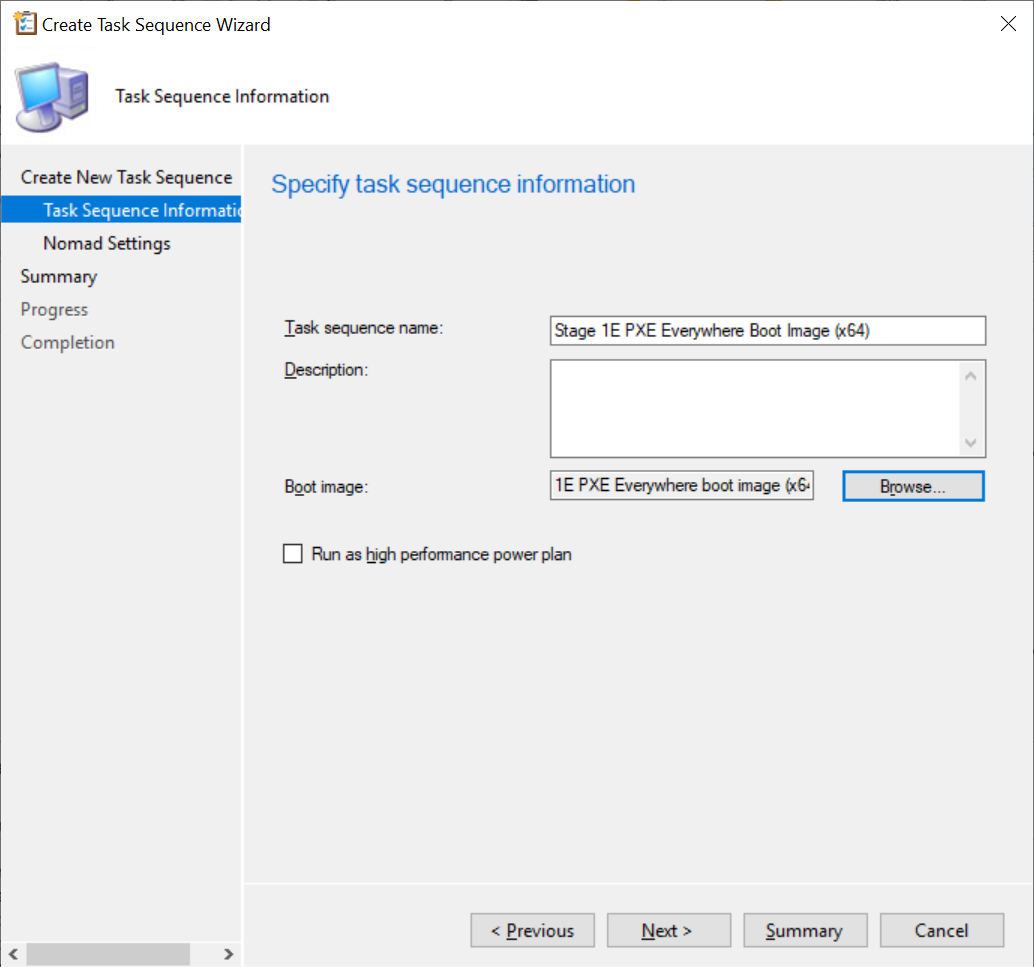
On the Nomad Settings page, select Enable Nomad.
You may want to increase the Cache Priority from the default 1 to ensure the boot image remains in the cache if the cache is cleared to make space for other content.
Click Next.
Tip
Skip this step if you are not using Nomad.
On the Summary page click Next.
On the Completion page click Close.
Right-click the Task Sequence and select Edit to add tasks to the Task Sequence.
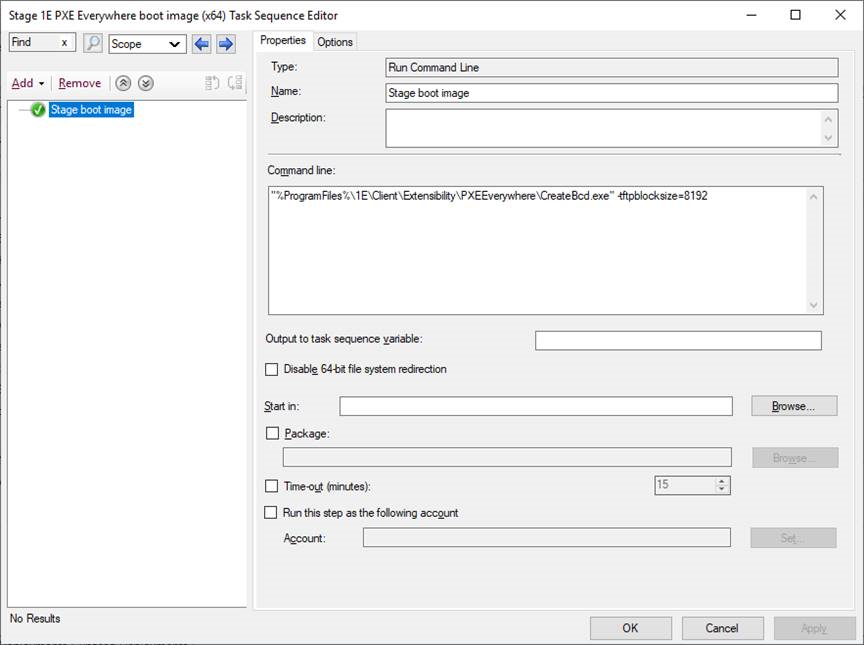
Add a task step to run CreateBCD.exe as follows.
From the Task Sequence editor, add a Run Command Line option with the following properties.
Property
Value
Name
Stage boot image
Command line
"%ProgramFiles%\1E\Client\Extensibility\PXEEverywhere\CreateBcd.exe" -tftpblocksize=8192
Tip
This command-line will work on x64 and x86 platforms, therefore you do not need to configure conditions.
If you are upgrading PXE Everywhere, you must remove the existing conditions - click Options tab and Remove All.
Legacy versions of PXE Everywhere Agent were x86 only, and required different command-lines for Agents on x64 and x86 platforms.
TFTP Block Size
Some hardware may not support block size values higher than 16384 bytes and hence may fail to PXE boot. We recommend you use a TFTP block size of 8192 bytes for best results.
An known issue has been observed on some Cisco switches when DHCP Snooping is enabled and a block size greater than 1471 is used. The issue is referenced in the following two Cisco bug reports. If you are affected by this Cisco issue, change the tftpBlockSize to 1471 or lower.
https://quickview.cloudapps.cisco.com/quickview/bug/CSCvk53444.
https://quickview.cloudapps.cisco.com/quickview/bug/CSCtw63707
The issue may also be present in TP-Link switches.
The actual block size used for the tftp protocol is the lesser value of the tftpBlockSize and the MaxBlockSize registry values. Effectively, MaxBlockSize limits the tftpBlockSize specified in the CreateBCD.exe utility.
There is only one command-line switch for CreateBCD.exe which is used to set the tftpBlockSize for the RAMDisk (boot image). The notation for this is
CreateBCD.exe -tftpBlocksize=blocksizewhere blocksize is measured in bytes.
Click OK to save the Task Sequence. The Task Sequence should now look like the picture opposite.
If you are serving x86 platforms, repeat the above steps to create Task Sequence Stage 1E PXE Everywhere boot image (x86).
Deploy the Task Sequence to stage a boot image
Each Staging Task Sequence must be deployed to all PXE Everywhere Agents. You will need to create a target Collection that includes all systems that have the 1E Client with PXE Everywhere enabled. You can use the same Collection that you used to deploy the 1E Client, such as the one created by 1E Client Deployment Assistant (CDA). Or you can create a new Collection limited on the 1E Client Collection, or a query-based Collection.
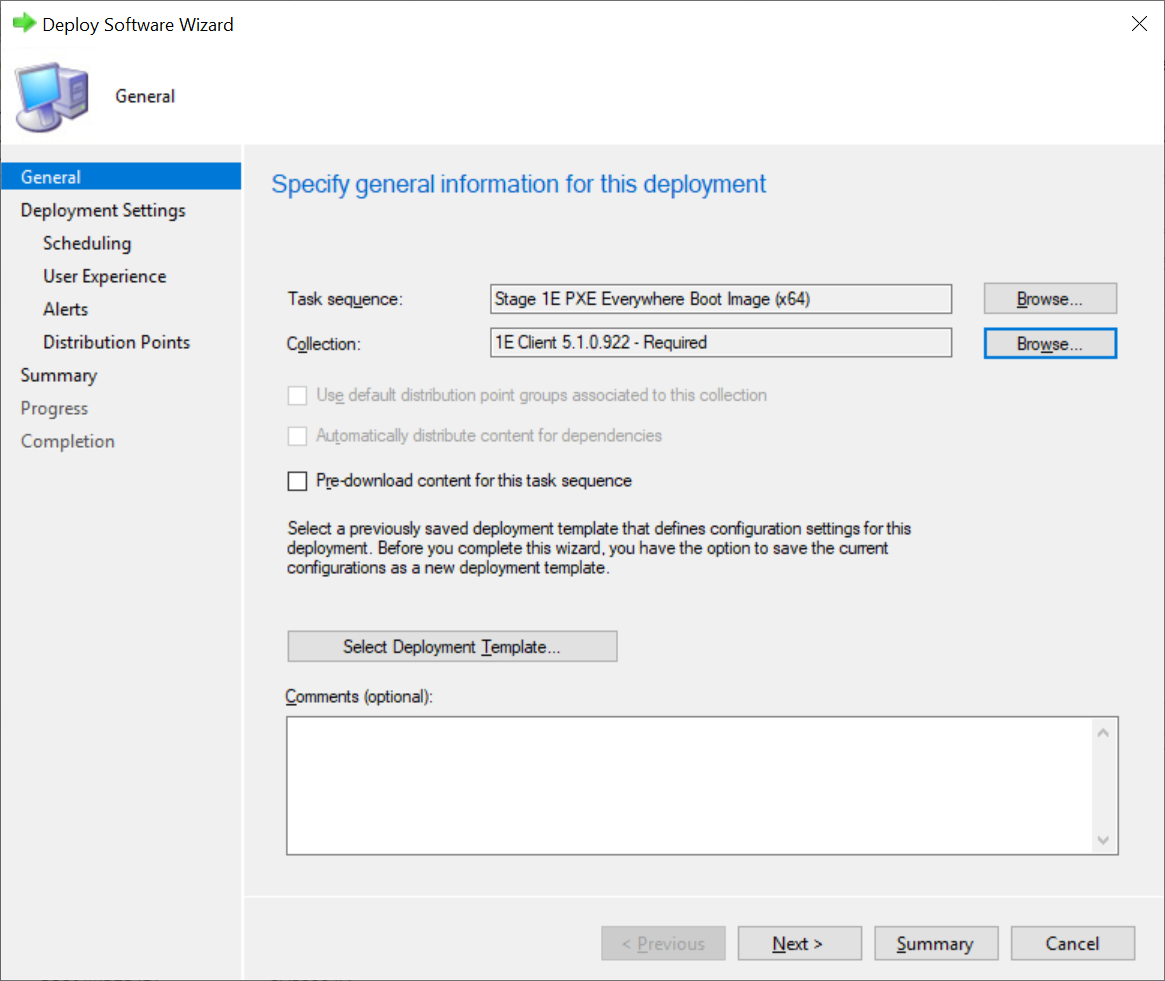
From the Configuration Manager console, right-click the boot image staging Task Sequence and select Deploy to start the Deploy Software Wizard.
Browse for the target Collection - devices that already have 1E Client with PXE Everywhere enabled.
Click Next .
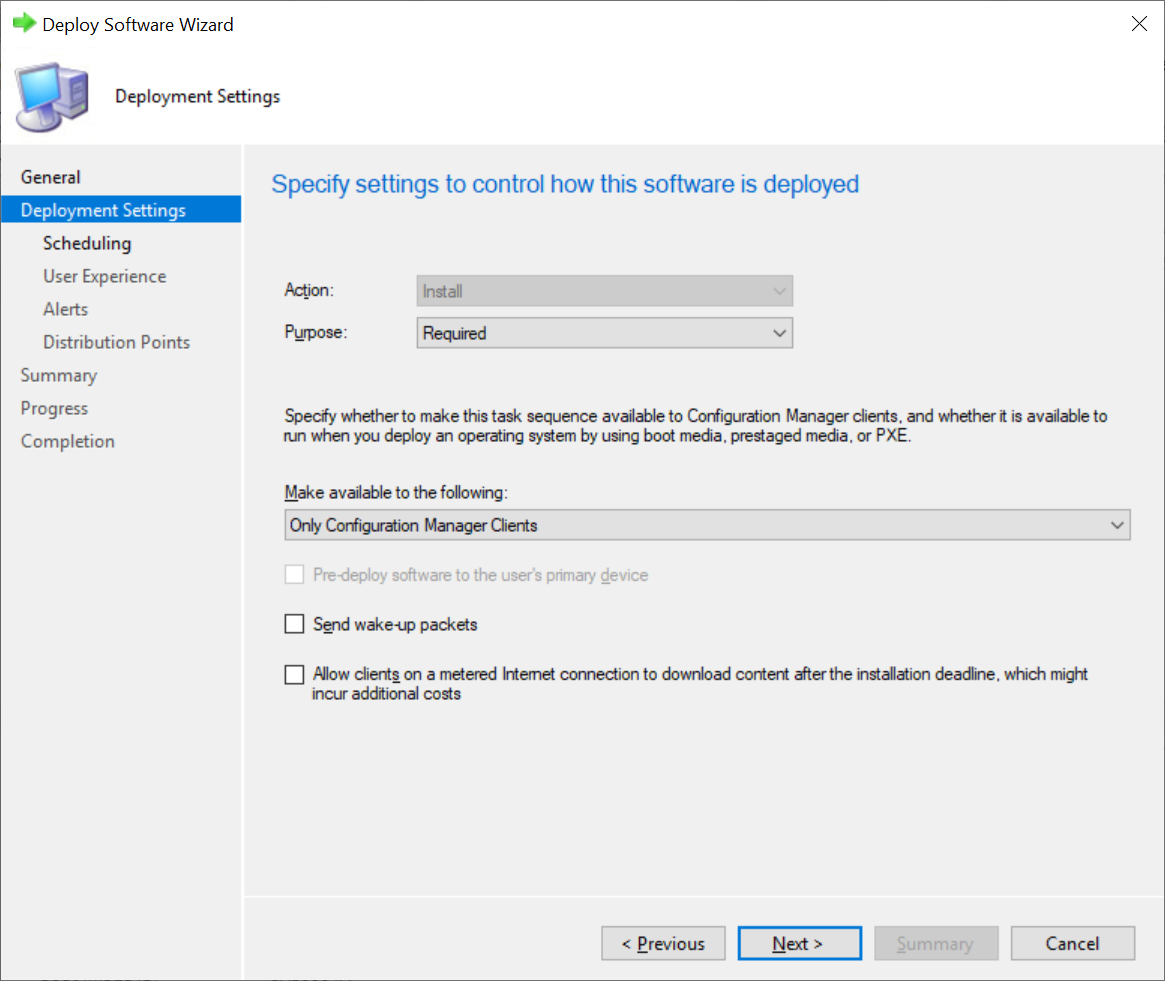
On the Deployment Settings page, change the purpose to Required and click Next.
On the Scheduling page, configure the assignment schedule according to your requirements and click Next.
On the User Experience page, uncheck Show Task Sequence progress and click Next.
On the Alerts page, click Next.
On the Distribution Points page under Deployment options, change the option to Download all content locally before starting task sequence is selected.
This ensures that Nomad will download the PXE Everywhere boot image associated with the Task Sequence before executing the command lines to stage it in the TFTP folder.
Check the options:
Allow clients to use distribution points from the neighbor boundary group
Allow clients to use distribution points from the default site boundary group
Click Next.
On the Summary page, click Next. When the wizard completes, click Close.
If you are serving x86 platforms, repeat the above steps to deploy Stage 1E PXE Everywhere boot image (x86).

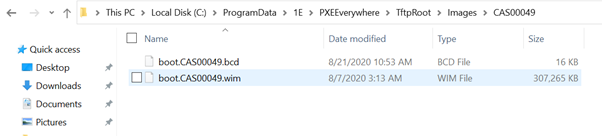
When Configuration Manager processes the Task Sequence on Agent computers, the associated boot image will be downloaded to the Nomad and CCM Client caches. The CreateBCD.exe utility copies the cached boot image file to the C:\ProgramData\1E\PXEEverywhere\TFTPROOT\images directory on the computer.
The picture opposite shows our example of the x64 image.
This PXE Everywhere Agent is now ready to serve the boot image to PXE clients.
Note
When PXE booting a UEFI device in a non-mandatory deployment scenario, you may be presented with an option to Press Enter to continue and Press F8 for Advanced boot menu. However, the advanced boot menu options will not work for WinPE.
Please refer to Verifying for guidance on testing PXE Everywhere.