Running the wizard
Steps for running the CDA wizard interactively, with details of common deployment and configuration options for each client agent.
1E Client Deployment Assistant creates objects for the following 1E products:
1E Client 8.1.2.62 (includes modules for Nomad , PXE Everywhere, Shopping/WSA, WakeUp )
1E NightWatchman Agent 7.3.0.774
Before you run the CDA wizard, ensure you have reviewed the requirements and completed the preparation steps listed on the Preparation page.
Running the wizard in interactive mode
Start
Start the wizard using Run as administrator.
In the folder where you unzipped the 1E Client Deployment Assistant, right-click 1EClientDeploymentAssistant.exe and from the context menu, choose Run as administrator.
If you do not already have .NET Framework v4.8 Runtime installed on the device before the Welcome screen is displayed, a popup is displayed prompting you to install the .NET Framework. This takes you to the https://dotnet.microsoft.com/en-us/download/dotnet-framework/net48?cid=getdotnetframework page where you should download and run the .Net Framework v4.8 Runtime. You must reboot after after installation, after which you can restart the 1E Client Deployment Assistant.
.NET Framework v4.8 is required by:
1E Client Deployment Assistant
1E Client.

Note
The pictures on this page may not show the latest versions of 1E products.
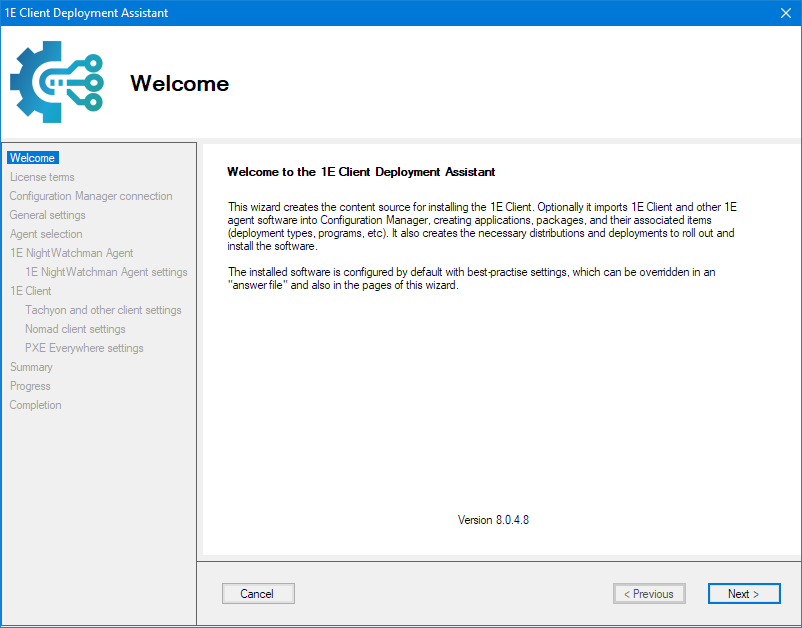
Welcome
On the Welcome screen click Next.
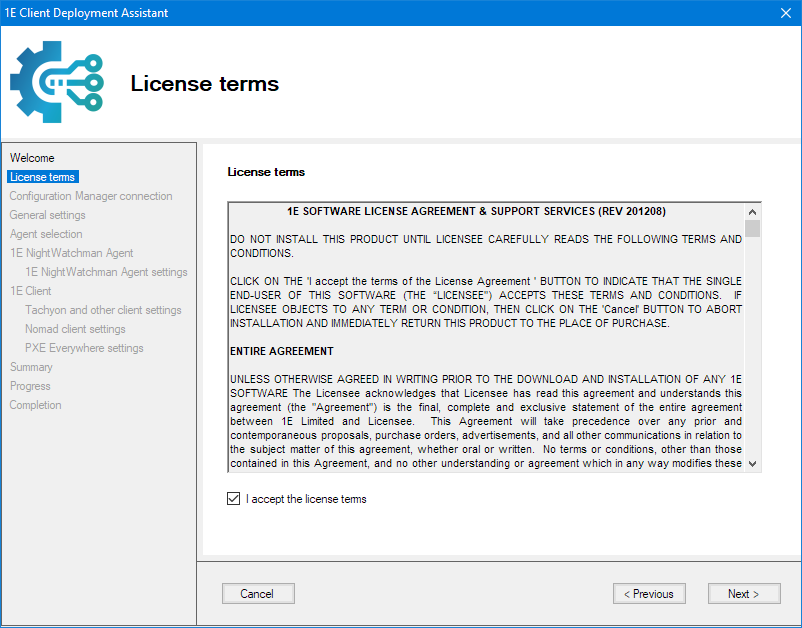
License terms
Check I accept the license terms and click Next.
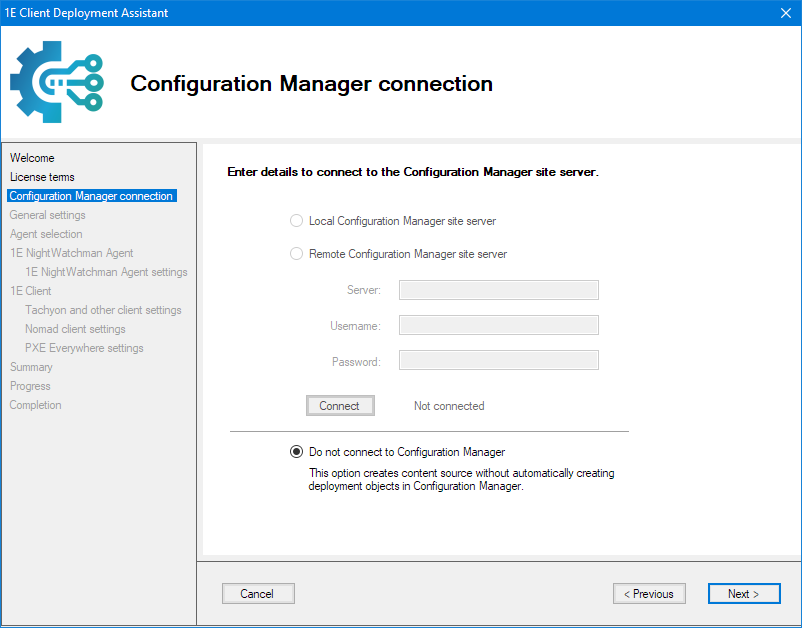
Configuration Manager connection
Choose the Configuration Manager site server to connect to:
Local Configuration Manager Site Server – use this if the CDA wizard is being run on a Configuration Manager site server
Remote Configuration Manager Site Server – use this option to specify the location of a remote site server and the account used to authenticate the user
Note
If you have selected either of the above Configuration Manager options, click Connect and confirm Connected.
To automatically create applications or packages in Configuration Manager, you must run CDA on site server or another computer that has the Configuration Manager console installed.
Do not connect to Configuration Manager- this option allows you to create content source without automatically creating deployment objects in Configuration Manager.
Click Next.
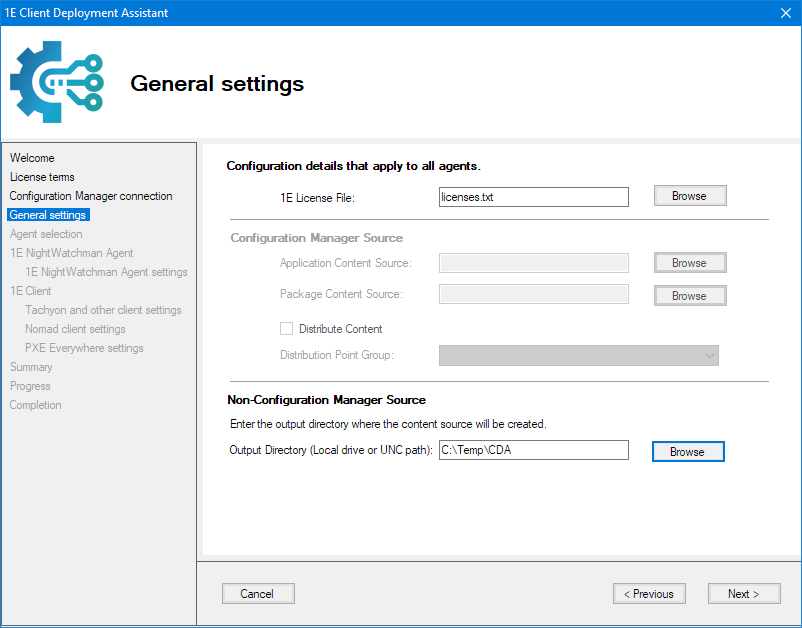
General settings
Review the following and click Next when completed.
1E License File | Mandatory | If you wish to use a license file other than the default A license file is required to run CDA, even if it has incorrect license keys. A default file is supplied in the release root folder which can be modified to include your own license key(s), which is useful if you don't want to type them manually each time you run CDA. At this time a license key is only required for 1E NightWatchman Agent, therefore if you are not using the Agent then please use the default file. For guidance on how to add a license to the file, please see Licenses.txt file. WarningAfter you have moved to the Agent selection screen and the license keys have been validated, you cannot return to this screen and choose a different license file. You can either restart the CDA wizard and select the correct file, or manually enter new keys. The license file is ignored if the AppImport.xml answer file is pre-populated with license keys. |
Application Content Source | Mandatory if using Configuration Manager | Enter the UNC of the Configuration Manager Application Content Source share where the wizard saves content source for use by Configuration Manager applications. The wizard will create 1E folders below it. For example, your applications UNC may be: |
Package Content Source | Mandatory if using Configuration Manager | Enter the UNC of the Configuration Manager Package Content Source share where the wizard saves content source for use by Configuration Manager packages. The wizard will create 1E folders below it. For example, your packages UNC may be: |
Distribute Content | Optional | Check this option if you want Configuration Manager to distribute application and package source to the distribution points after the wizard has been run. WarningDo not use this option if you need to add additional files to the application and/or package content, for example MST transform files based on the files created by the wizard as described in Advanced configuration. You will need to update the content and then manually instruct Configuration Manager to distribute. When enabled, a warning is displayed indicating Distribution is enabled, which can be helpful if this option had been enabled in the AppImport.xml answer file. |
Distribution Point Group | Mandatory if Distribute Content is enabled. | Select a Distribution Point Group. |
Output directory | Mandatory if not using Configuration Manager. | You can enter a local drive, or a UNC path of a network share, where the wizard will save the content source that will be created by the Wizard. |
Note
In the previous version of CDA, this screen included a URL for the ActiveEfficiency Server, which was only used by Nomad. In this release instead, it uses Content Distribution, a component of the Tachyon platform. Therefore, ActiveEfficiency Server is no longer required, except as an optional component of a 1E Shopping solution, and there is no requirement to provide a URL.
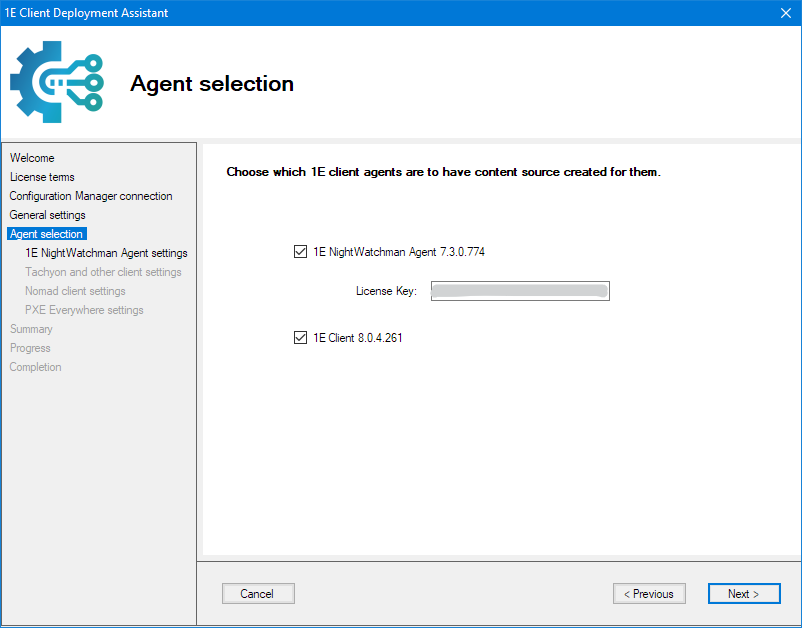
Agent selection
Check each of the clients and agents you want to deploy and then click Next.
If you have not already added your NightWatchman Agent license key to the Licenses.txt file, or AppImport.xml file, then you can type a license key. You can override the license key displayed. Only the format of the license key is validated.
Note
1E license keys have the format: <name>-<4Chars>-<4Chars>-<4Chars>-<4Chars>
A license key may be reported as invalid if hyphens or other characters have been converted into symbols or Unicode, which can happen if copy+pasted.
Note
1E Client (1E Client, Shopping, WakeUp, Nomad, and PXE Everywhere) does not require a license key.
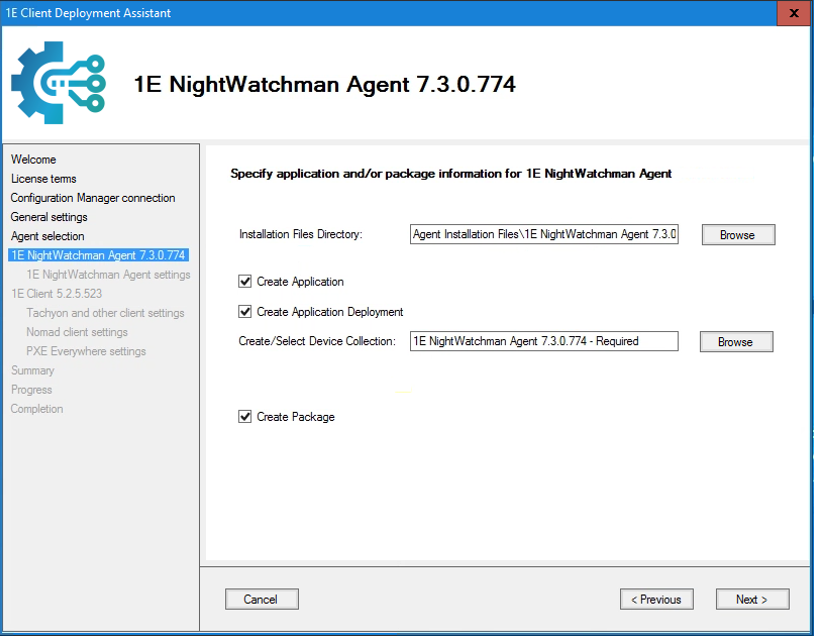
1E NightWatchman Agent application and package information
Review the following and click Next when completed.
Installation Files Directory | Mandatory | Tells the CDA wizard where to locate the 1E Client source files that you extracted when you unzipped the 1E Client Deployment Assistant (CDA) files. These are used to create Configuration Manager applications and packages. |
Create Application | Optional | Determines if an application for the client is created in Configuration Manager. You must check Create Application and/or Create Package option to enable and click on the Next button. If this option is not checked, then the CDA Wizard will not copy files and create an MST transform in the Application Content Source specified in the General settings screen. |
Create Application Deployment | Optional | Only enabled if you choose Create Application and determines whether a required deployment type for the application is created in Configuration Manager. |
Create/Select Device Collection | Mandatory if Create Application Deployment is enabled | The device collection used to deploy the application. If specified, then the CDA wizard will also create a deployment for the application's deployment types and the specified collection. A default name is suggested, which you can change. If the name you entered for Create/Select Device Collection does not exist, one is created. You must manually populate the created device collection after running the CDA wizard. You can click Browse to choose from a list of existing collections which you have access to using Configuration Manager RBAC. If you do this, you will not have the option to associate the device collection with a Limiting Collection. |
Limiting Collection | Mandatory if Create Application Deployment is enabled | If you are creating a new device collection, you must also choose an associated Limiting Collection. This limits administrators to populating the new device collection with devices only from the selected Limiting Collection. By default, this is All Systems, but you can click Browse to choose from a list of existing collections which you have access to using Configuration Manager RBAC. |
Create Package | Optional | Determines if a legacy package and associated install and uninstall programs for the client are created in Configuration Manager. You must check Create Application and/or Create Package options to enable and click on the Next button. If this option is not checked, then the CDA wizard will not copy files and create an MST transform in the Package Content Source specified in the General settings screen. NotePackages are created primarily for use in Task Sequences, therefore the CDA wizard sets the Allow this program to be installed from the Install Package task sequence without being deployed property, and does not create collections or deployments. Do not use this option unless you require a package to be created. You can re-run CDA wizard later to create one if required. |
Note
In previous versions the 1E Agent included WakeUp and NightWatchman. WakeUp is now included in the 1E Client, and NightWatchman is a separate client agent.
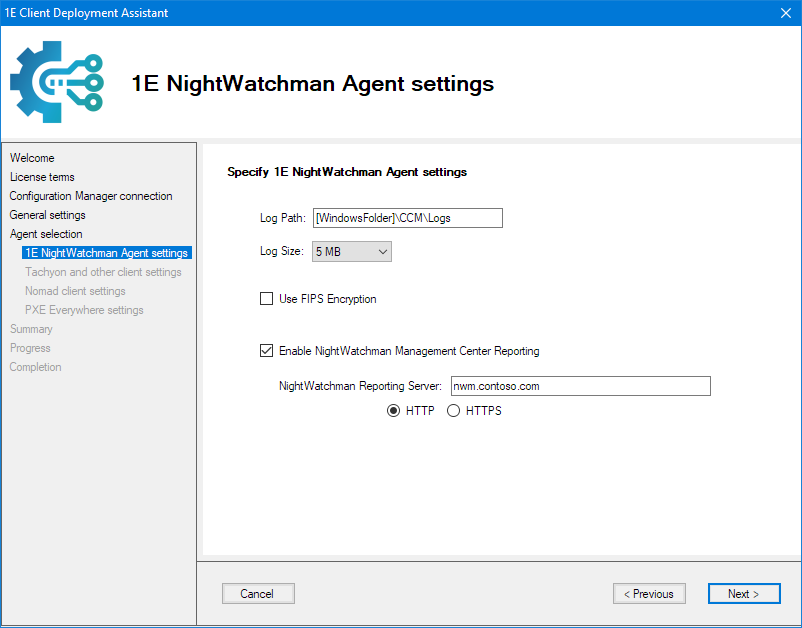
1E NightWatchman Agent settings
Review the following and click Next when completed.
Log Path | Mandatory | The path to the 1E NightWatchman Agent logs. The default path keeps the log files together with the Configuration Manager client logs. It uses |
Log Size | Mandatory | The size of for the NightWatchman Agent log files. We recommend 5 MB. |
Use FIPS Encryption | Optional | Check this option to enable the FIPS Encryption for NightWatchman and WakeUp. WarningYou must use the same FIPS setting on all WakeUp clients, all WakeUp Servers, and on the NightWatchman Management Center server(s). Please ensure you use the same setting if you have previously deployed NightWatchman or 1E Agent, unless you are sure you want to change it. |
Enable NightWatchman Management Center Reporting | Optional | Check this option if you have a NightWatchman Management Center server installed, and want NightWatchman to report power state changes and retrieve policy settings. |
NightWatchman Reporting Server | Mandatory if NightWatchman reporting is enabled | Enter the name of the NightWatchman Management Center server in the format: Where serverFQDN is normally a DNS alias. The installer uses this name in the ServiceURL registry value for the WakeUp client, and references the AFWebService. WarningPlease ensure you use the same setting if you have previously deployed NightWatchman or 1E Agent, unless you are sure you want to change it. Select either the HTTP or HTTPS protocol. |
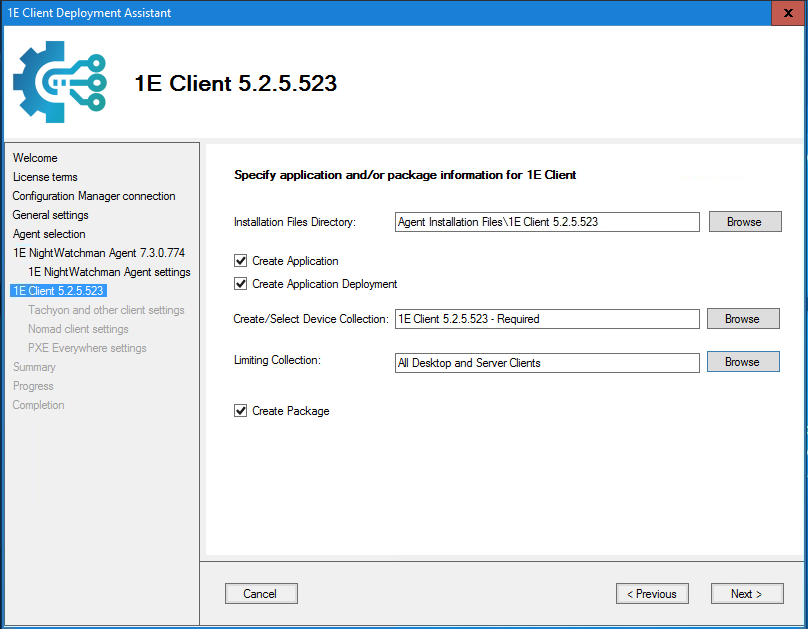
1E Client application and package information
Review the following and click Next when completed.
Installation Files Directory | Mandatory | Tells the CDA wizard where to locate the 1E Client source files that you extracted when you unzipped the CDA files. These are used to create Configuration Manager applications and packages. |
Create Application | Optional | Determines if an application for the client is created in Configuration Manager. You must check Create Application and/or Create Package option to enable and click on the Next button. If this option is not checked, then the CDA Wizard will not copy files and create an MST transform in the Application Content Source specified in the General settings screen. |
Create Application Deployment | Optional | Only enabled if you choose Create Application and determines whether a required deployment type for the application is created in Configuration Manager. |
Create/Select Device Collection | Mandatory if Create Application Deployment is enabled | The device collection used to deploy the application. If specified, then the CDA wizard will also create a deployment for the application's deployment types and the specified collection. A default name is suggested, which you can change. If the name you entered for Create/Select Device Collection does not exist, one is created. You must manually populate the created device collection after running the CDA wizard. You can click Browse to choose from a list of existing collections which you have access to using Configuration Manager RBAC. If you do this, you will not have the option to associate the device collection with a Limiting Collection. |
Limiting Collection | Mandatory if Create Application Deployment is enabled | If you are creating a new device collection, you must also choose an associated Limiting Collection. This limits administrators to populating the new device collection with devices only from the selected Limiting Collection. By default, this is All Systems, but you can click Browse to choose from a list of existing collections which you have access to using Configuration Manager RBAC. |
Create Package | Optional | Determines if a legacy package and associated install and uninstall programs for the client are created in Configuration Manager. You must check Create Application and/or Create Package options to enable and click on the Next button. If this option is not checked, then the CDA wizard will not copy files and create an MST transform in the Package Content Source specified in the General settings screen. NotePackages are created primarily for use in Task Sequences, therefore the CDA wizard sets the Allow this program to be installed from the Install Package task sequence without being deployed property, and does not create collections or deployments. Do not use this option unless you require a package to be created. You can re-run CDA wizard later to create one if required. |
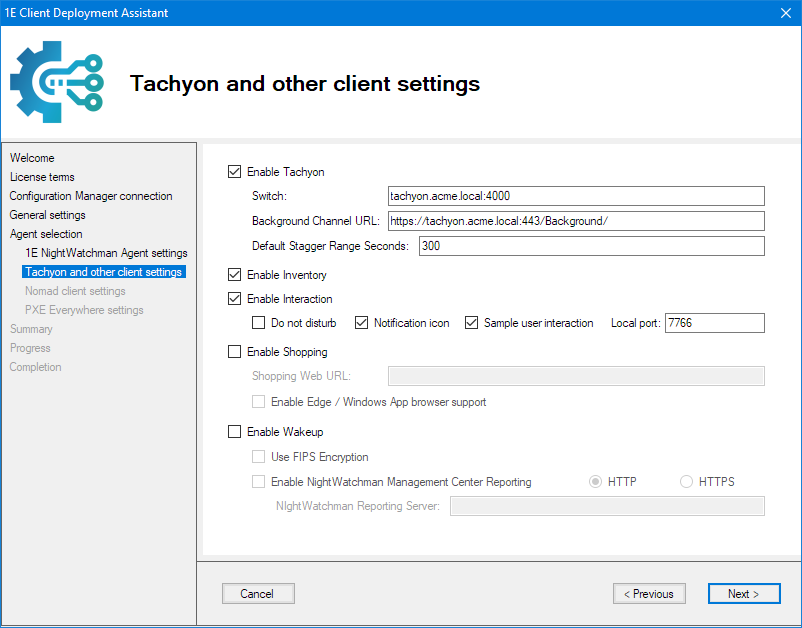
Tachyon and other client settings
Review the following and click Next when completed.
Enable 1E | Optional | Check this option to enable Tachyon real-time client features of 1E Client to be used. |
Switch | Mandatory if Tachyon is enabled | Enter the connection details for the Tachyon Switch in the format:
Where DNSnameFQDN is normally a DNS alias, as used in the Tachyon Switch certificate, which is normally the same as the Tachyon Web Server certificate. Port is normally 4000. WarningPlease ensure you use the same setting if you have previously deployed 1E Client with Tachyon platform client features enabled. |
Background Channel URL | Mandatory if Tachyon is enabled | Enter the URL list containing one or more 1E Client Deployment Assistant Background Channel URL in the format:
Where DNSnameFQDN is normally a DNS alias, as used in the Tachyon Web Server certificate. WarningPlease ensure you use the same setting if you have previously deployed 1E Client with Tachyon platform client features enabled. |
Default Stagger Range Seconds | Mandatory if Tachyon is enabled | Enter the Default Stagger Range Seconds. The default is 300 (5 minutes). |
Enable Inventory Insights | Optional | Uncheck this option to disable the Inventory module of 1E Client. Inventory supports the Tachyon Activity Record feature (also known as Inventory, and Historical Data Capture) which is required when using the Tachyon Connector for AppClarity or Application Migration. You can enable this separately from Tachyon, but the captured data cannot be used unless it is enabled. |
Enable Interaction | Optional | Uncheck this option to disable the Interaction module of 1E Client. This feature was introduced in Tachyon 5.1. The Interaction module supports the User Surveys and Notifications feature (also known as 1E Client UI) which is required when using the Survey feature of Experience, and user-centric sampling features. You can enable this separately from Tachyon, but the captured data cannot be used unless the Tachyon is enabled. |
Do not disturb | Optional | Uncheck this option to disable Do not disturb mode and allow the Client UI to show notifications from startup. Check this option to enable Do not disturb mode and stop the Client UI showing notifications, causing any surveys sent to this device to time out. If Notification icon is enabled, users will be able to enable or disable notifications by using the Do not disturb option. However, each time the user signs in, the Do not disturb mode will be reset. |
Notification icon | Optional | Uncheck this option to disable the 1E Client UI notification icon. If enabled, the icon appears shortly after the user signs in. |
Sample user interaction | Optional | Uncheck this option to disable Experience sampling the performance of user interactions with application windows in user sessions. |
Local port | Mandatory if Interaction is enabled | The port number used for local communication between the 1E Client service and the 1E Client UI. Port is configurable between 100 and 65535. The default is 7766. |
Enable Shopping | Optional | Check this option to enable the Shopping client module of 1E Client, which includes Windows Servicing Assistant (WSA). |
Shopping Web URL | Mandatory if Shopping is enabled | Enter the Shopping Web URL in the format:
where serverFQDN is normally a DNS alias. This option is available only if Shopping is enabled. WarningPlease ensure you use the same setting if you have previously deployed 1E Client with Shopping client module enabled, unless you are sure you want to change it. |
Enable Edge / Windows App browser support | Optional | Check this option to enable support for Microsoft Edge/Windows App browsers. This option is available only if Shopping is enabled. |
Enable WakeUp | Optional | Check this option to enable the WakeUp client module of 1E Client. |
Use FIPS Encryption | Optional | Check this option to enable the FIPS Encryption for WakeUp. This option is available only if WakeUp is enabled. WarningYou must use the same Encryption setting on all WakeUp clients, all WakeUp Servers, and on the NightWatchman Management Center server(s). Please ensure you use the same setting if you have previously deployed 1E Client or 1E Agent, unless you are sure you want to change it. NoteEnabling FIPS Encryption will override the EncryptionLevel used by WakeUp, which is disabled by default. If you want to have FIPS Encryption disabled and WakeUp Encryption enabled then you must manually edit the EncryptionLevel setting in the MST. Please refer to Advanced configuration for how to edit an MST. |
Enable NightWatchman Management Center Reporting | Optional | Check this option if you have a NightWatchman Management Center server installed, and want WakeUp to report subnet changes. Select either the HTTP or HTTPS protocol. These options are available only if WakeUp is enabled. This option is especially useful for computer which change location frequently. WakeUp reports subnet changes immediately, whereas NightWatchman reports changes according to its inventory reporting schedule. WakeUp only supports Wake-on-LAN for wired connections and not for wireless, therefore a laptop reporting a subnet change from wired (docked) to wireless helps the WakeUp Server avoid wakeup attempts on the wired connection, and a wakeup failure will be attributed to the wireless subnet. |
NightWatchman Reporting Server | Mandatory if NightWatchman Reporting is enabled | Enter the name of the NightWatchman Management Center server in the format:
Where serverFQDN is normally a DNS alias. This option is available only if WakeUp is enabled. The installer uses this name in the ServiceURL registry value for the WakeUp client, and references the AFWebService. WarningPlease ensure you use the same setting if you have previously deployed 1E Agent or 1E Client with WakeUp client module enabled, unless you are sure you want to change it. |
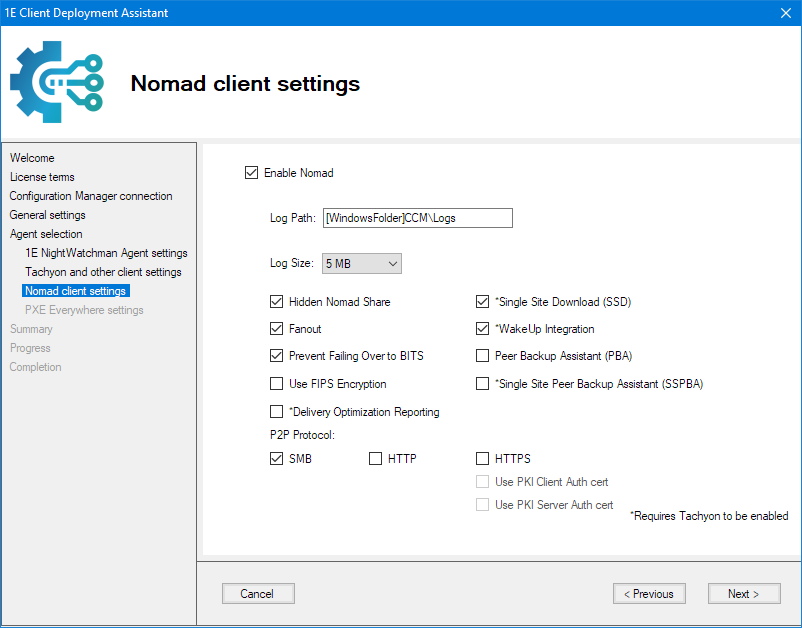
Nomad client settings
Review the following and click Next when completed.
Enable Nomad | Optional | Check this option to enable the Nomad client module of 1E Client. |
Log Path | Mandatory if Nomad is enabled. | Enter the path to the logs. The default path keeps the log files together with the Configuration Manager client logs. It uses This default is useful for client OS. For location may be different for CM servers. For example CM logs on a Management Point server may be located in C:\Program Files\SMS_CCM\Logs if the MP roles was installed prior to the CM client. |
Log Size | Mandatory if Nomad is enabled. | Select the size of for the log files. We recommend 5 MB. |
Hidden Content Distribution Share | Optional | Check this to enable the hidden share feature and to prevents end-users from accidentally accessing the share. WarningIf you tick this box, you must ensure that all Nomad installations are configured to use this feature. Please ensure you use the same setting if you have previously deployed Nomad Branch or 1E Client with Nomad client module enabled, unless you are sure you want to change it. NoteBest practice is to use a Hidden Nomad Share. The default for this setting in the NomadMSI is disabled to be consistent with previous versions of installers and avoid issues for customers who deploy Nomad by other means. |
Fanout | Optional | Check this to enable the Fanout feature. This feature is especially useful in large organizations with many networks. |
Prevent Failing Over to BITS | Optional | Check this to prevent downloads from reverting to using BITS if an error occurs. It ensures that any download errors are reported back effectively with minimum impact on remote sites. |
Use FIPS Encryption (v6 onwards) | Optional | Check this to ensure that Nomad is FIPS compliant in its communications. WarningYou must use the same FIPS setting on all Nomad clients. Please ensure you use the same setting if you have previously deployed Nomad Branch or 1E Client with Nomad client module enabled, unless you are sure you want to change it. |
Delivery Optimization Reporting | Optional | Check this to enable Nomad to monitor and report on Delivery Optimization (DO) downloads. Delivery Optimization monitoring and reporting is only supported in full versions (OS with UI) of Windows Server 2016 and Windows 10 Version 1909 onwards. You must have Tachyon enabled and Tachyon Platform installed for this feature to work. |
Single Site Download (SSD) | Optional | Check this to enable Nomad single-site download feature where Nomad master caches can service an entire local site not just the local subnet. You must have Tachyon enabled and Tachyon Platform installed for this feature to work. See also SSPBA below. |
WakeUp Integration | Optional | Check this to enable WakeUp integration so that machines where the Nomad cache contains a particular package can be used by the Nomad master even if the machine with the cache is currently switched off. You must have Tachyon enabled and Tachyon Platform installed for this feature to work. You will also need NightWatchman and WakeUp system. |
Peer Backup Assistant (PBA) | Optional | Check this to enable Nomad PBA feature. See also SSPBA below, and SDD above. This OS deployment feature enables Nomad to be used as a data store for USMT data to migrate user settings from the old OS to the new one. It removes the necessity for specifically provisioning state migration points or servers to hold the backup data. |
Single Site Peer Backup Assistant (SSPBA) | Optional | Check this to enable Nomad SSPBA feature (only enabled if Peer Backup Assistant is checked). You must have Tachyon enabled and Tachyon Platform installed for this feature to work. See also SSD above. |
P2P Protocol | Optional | Check one or more of the following:
When selecting HTTPS you can also check one or both of the following:
|
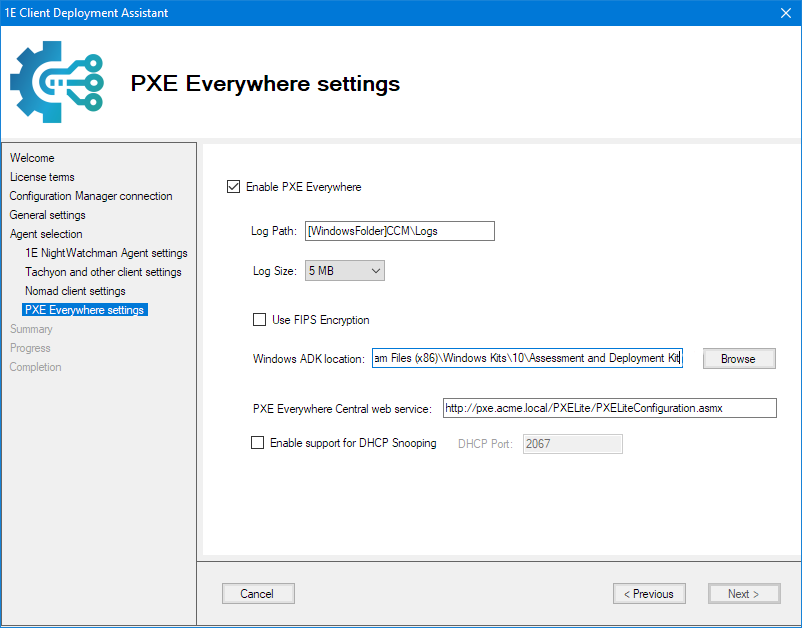
PXE Everywhere settings
Review the following and click Next when completed.
Enable PXE Everywhere | Optional | Check this option to enable the PXE Everywhere client module of 1E Client. |
Log Path | Mandatory | The path to the PXE Everywhere logs. The default path keeps the PXE Everywhere log files together with the Configuration Manager client logs. It uses |
Log Size | Mandatory | The size of for the PXE Everywhere log files. We recommend 5 MB. |
Use FIPS Encryption | Optional | Check this to ensure that PXE Everywhere is FIPS compliant in its communications. This is only available from PXE Everywhere 3.0 and later. WarningYou must use the same FIPS setting on all PXE Everywhere Agents and PXE Everywhere Static Responders. Please ensure you use the same setting if you have previously deployed PXE Everywhere, unless you are sure you want to change it. |
Windows ADK location | Mandatory | The location of the Windows ADK. If this has been installed on a Configuration Manager site server, the location should be:
PXE Everywhere requires that certain files are in its TftpRoot folder in order to be able to service PXE requests. These files mostly come from the winpe.wim file in the WinPE addon for the Assessment and Deployment Kit (ADK). 1E cannot bundle these files with PXE Everywhere because Microsoft does not allow their redistribution. The wizard automates this process by creating a CAB file and MST data so that the boot files are put in place as PXE Everywhere is installed. So you must locate the Windows ADK that will be used as the source. |
PXE Everywhere Central web service | Mandatory | The full URL of the PXE Everywhere Central web service which the agent uses:
You must have PXE Everywhere Central installed for this feature to work. WarningPlease ensure you use the same setting if you have previously deployed PXE Everywhere, unless you are sure you want to change it. |
Enable support for DHCP Snooping | Optional | Check this to enable support for DHCP Snooping. This feature requires you have at least one PXE Everywhere Responder installed, and configured your network to forward PXE requests to the Responder(s) on the specified DHCP port, and authorize them to receive and respond to requests. When you enable this option, you can also specify the DHCP port that the PXE Everywhere Agents listen for responses from the Responder. If you change this then you must configure Responders to use the same port. By default, this is port 2067. If you do not check the DHCP Snooping option, then you do not need Responders and PXE Everywhere Agents listen for responses on port 67. |
Note
In order to service PXE requests, certain files from the winpe.wim file in the ADK must be present in PXE Everywhere's TftpRoot folder on each client. Without using CDA, this process must be carried out after PXE Everywhere is installed, for example using a Task Sequence. However the CDA wizard automates this process during installation of PXE Everywhere. CDA uses DISM to extract files from the ADK's winpe.wim file and creates a PXELiteLocal-xxxx.cab, and adds custom actions to the MST transform file to do the following during installation of PXE Everywhere:
Place the boot file in the right location as PXE Everywhere is installed
Run
CreateBCD.exeto copy an advertised PXE boot image to the PXE Everywhere cache thereby creating a boot configuration database that is useful when using task sequences.
The host computer used to run the CDA wizard can be the Configuration Manager site server or another computer that has the following installed:
Configuration Manager console
Microsoft ADK with WinPE addon - only if the CDA wizard is used to create PXE Everywhere applications
It will need to have .Net Framework v4.8 Runtime installed, a check when the wizard runs checks for this being installed, and will if not already installed, provide a link to https://dotnet.microsoft.com/en-us/download/dotnet-framework/net48?cid=getdotnetframework where you will need to download and run the .Net Framework v4.8 Runtime. The link is provided should you wish to install this prior to running the wizard. The install does require a reboot to complete.
If you are installing PXE Everywhere you must install the Deployment Tools feature from the Microsoft Assessment and Deployment Kit (ADK), and the WinPE addon. The user running the CDA wizard must have local administrator privileges because the CDA wizard uses dism.exe to mount a PXE .wim file in order to extract boot image files. Start the wizard using Run as Administrator.
Note
To download and install the Windows ADK go to https://docs.microsoft.com/en-us/windows-hardware/get-started/adk-install. Starting with Windows 10, version 1809, WinPE is an add-on to the ADK, previously it was included in the ADK. First install the ADK, and then install the WinPE addon. Approximately 7GB disk space is required.
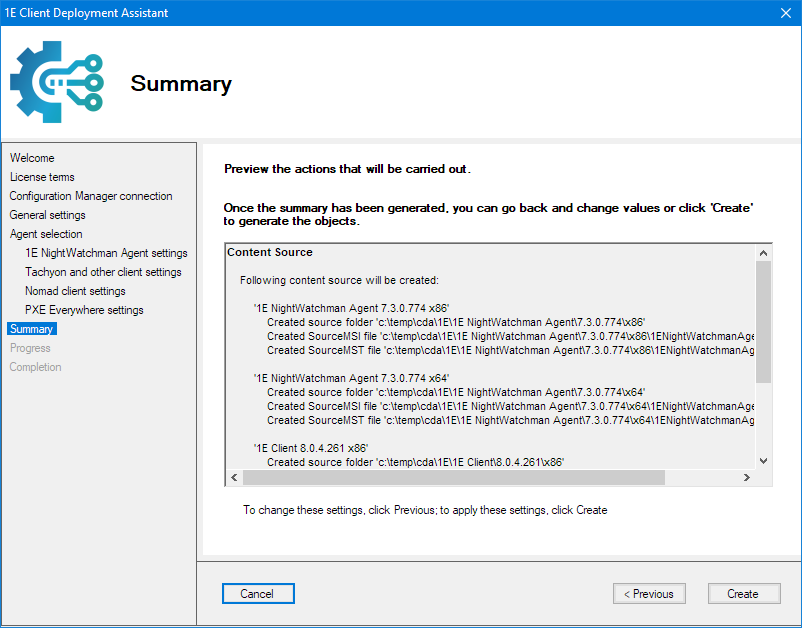
Summary
When you have defined the attributes for all the agents you intend to use, a summary screen is displayed. If you are happy with the settings for the agents, click Create, otherwise click Previous to return to review the issues and correct them.
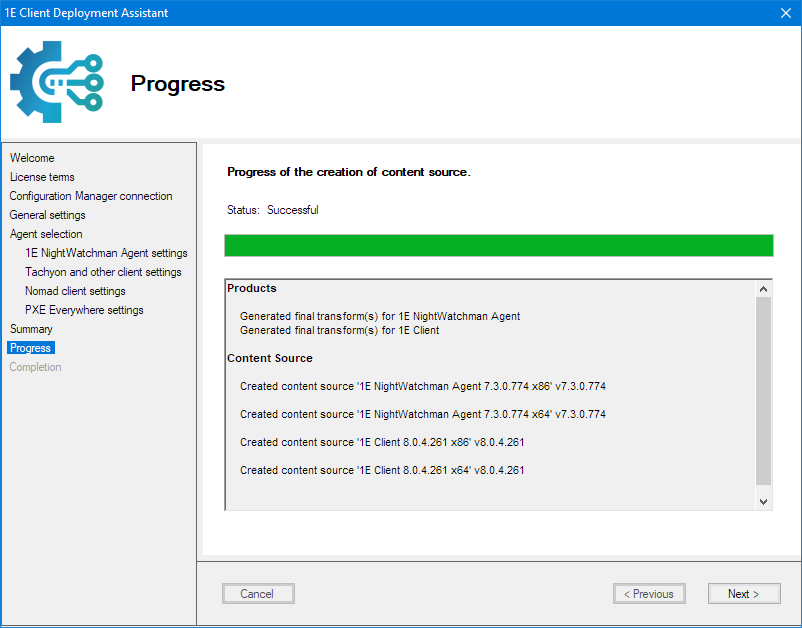
Progress
A screen is displayed to show the progress – there may be a slight delay before the progress bar starts as there's some background processing taking place.
Click Next when all the actions have been done.
Note
If PXE Everywhere has been selected the CDA wizard can take a several minutes to load and extract files from the ADK winpe.wim file. You can use Task Manager to observe DISM in progress.
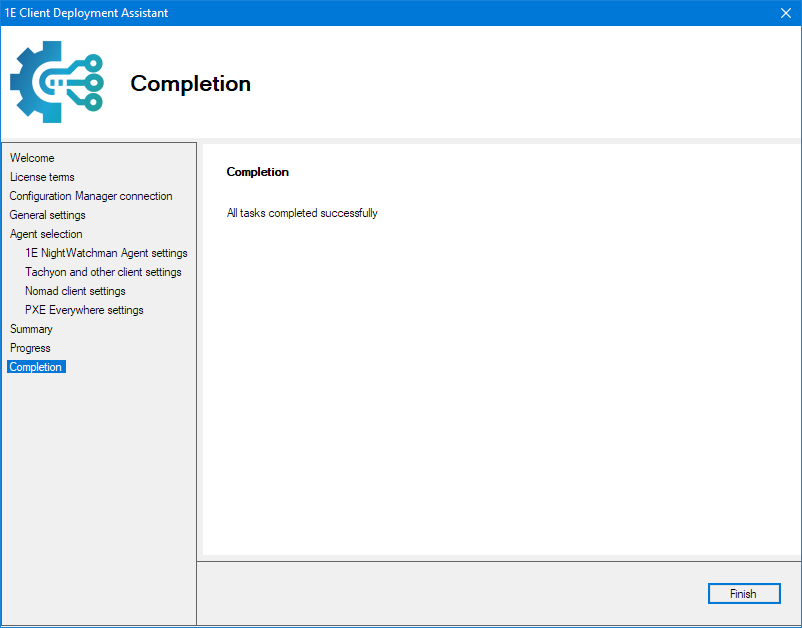
Completion
The screen will show details of any errors that were detected.
Click Finish.