Client issues
Troubleshooting common issues that you may be having with the installation and configuration of the Nomad.
If for any reason you are unable to install it, then please review the Planning for 1E Client.
When installing interactively, please confirm you are logged on using an account that has local Administrator rights.
You can troubleshoot installation issues by reviewing the installation log file. On Windows, start an Administrative command prompt and use a msiexec command line including a log file as described in Installing the 1E Client by command-line.
If your problem is not identified on this page, then please review the relevant client section on the Known issues page.
Please ensure you have run through the verification steps on the relevant pages:
Tachyon Verifying
Nomad Troubleshooting
PXE EveryWhere Verifying
Shopping - Troubleshooting
NightWatchman Enterprise - Troubleshooting.
Client certificate issues
If the Tachyon Server has been configured to require client certificates, clients must be running on devices where a valid device certificate has been applied. If this is not the case, the following symptoms will appear:
The device where the client is running will not be able to connect to the Tachyon Server
A warning similar to the following will appear in the Tachyon.Switch.Host.log file (the default location for all the Tachyon Server logs is %AllUsersProfile%\1E\Tachyon folder on the server where Tachyon Server is installed):
WARN - Error receiving data from [tachyon.test.local]:4000 : An established connection was aborted by the software in your host machine
On the Tachyon client device, you will see an error similar to the following in the 1E.Client.log file (the default location for the 1E Client log is %AllUsersProfile%\1E\Client folder on the device where the client is installed):
Received WS message: SwitInfo{"SwitchId":1,"SwitchName":"","WorkerNum":0,"SlotNum":3,"DisconnReason":"No Certificate"}
If you find log entries similar to these appearing in the log files, you can check that Tachyon is working correctly for the device by manually requesting a device certificate. If the device can then connect to the Tachyon Server, you should contact your network PKI administrator.
Note
Each client/agent in 1E Client uses certificates independently of each other.
Platform clients search for a client certificate so they can be authenticated by Tachyon servers.
Nomad clients search for a suitable client certificate so they can be authenticated by CM Distribution Points, and for use with Peer to Peer sharing. They can optionally use Nomad CertIssuer/CertSubject configuration settings to help find suitable certificates.
Shopping and WakeUp clients each have their own CertIssuer/CertSubject configuration settings that determine which client authentication certificate they each use. These are only needed if their websites have an HTTPS binding that is configured to require certificates.
PXE Everywhere Agent does not use client authentication certificates.
Manually requesting a device certificate on Windows 10
The following steps show the manual process of requesting a certificate (enrolling) for the computer on which the platform client is installed. Although these instructions cover Windows 10 the general approach of using the Certificates MMC snap-in can be extrapolated to cover most Windows Operating Systems.
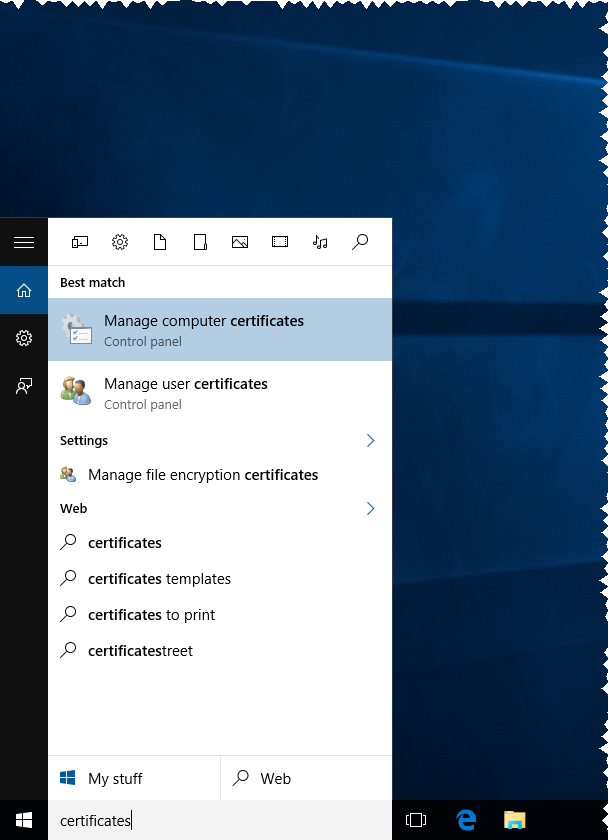
Run the certificate mmc snap-in. For example, by finding the Manage computer certificates application, as shown in the following picture.
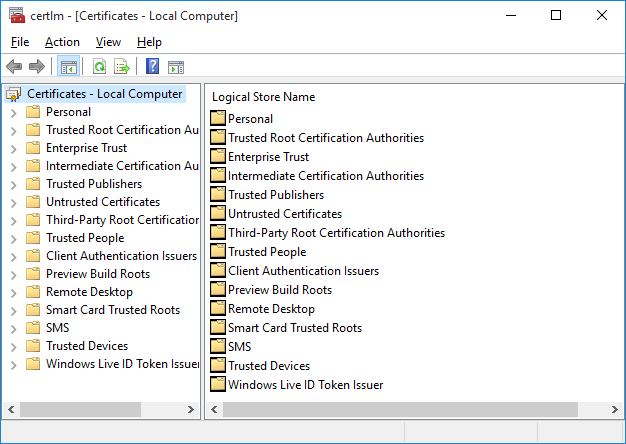
Doing this displays the certlm MMC snap-in, as shown in the following picture.
Right-click on the Personal folder and select the All Tasks->Request New Certificate... menu option from the right-click menu, as shown in the following picture.

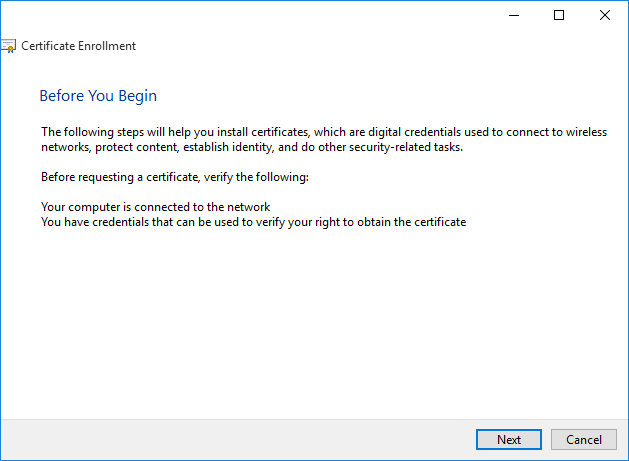
Doing this displays the Certificate Enrollment wizard. On the Before You Begin screen click Next to continue.
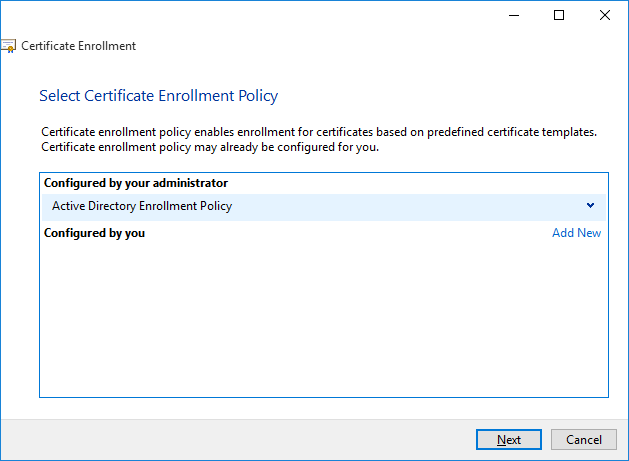
On the Select Certificate Enrollment Policy screen select the Active Directory Enrollment Policy option, as shown in the following picture.
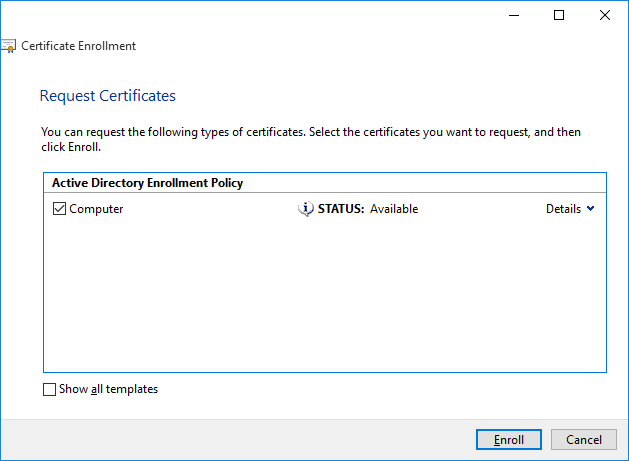
On the Request Certificates screen select the Computer certificate checkbox, as shown in the following picture, then click the Enroll button.
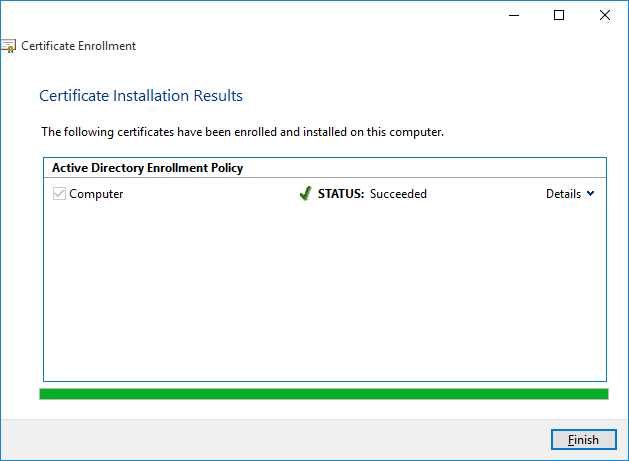
The Certificate Installation Results screen shows whether the certificate has been installed correctly. When it has, as shown in the following picture, click Finish to exit the wizard.
Once the wizard has completed you should see the new certificate under the Personal->Certificates folder, as shown in the following example.

Enabling SHA-512 to work with TLSv1.2
Tachyon uses TLSv1.2. On new installations of some Windows OS, SHA-512 is disabled when using TLSv1.2, as described in KB2973337. This means Windows cannot use TLSv1.2 with certificates that have a SHA-512 signature hash algorithm, including those in the certification path (trust chain).
One method of seeing whether your installation is affected, is when Chrome browser refuses to connect to a website, but Internet Explorer allows the connection. Unlike Chrome, if Internet Explorer cannot use TLS 1.2 it will downgrade to TLS 1.0 or 1.1 if enabled in the Advanced tab of Internet Options. If you disable these check-boxes then Internet Explorer will refuse to connect. This issue occurs only when one or more certificates in the trust chain is using SHA-512 as a signature hash algorithm.
To resolve this, you must install relevant updates on each OS as described in the KB, which may already be installed by Windows Updates. However, you may not have updated a new installation, for example in a lab. The table below is a guide only, and you should read KB2973337 first and apply prerequisite updates. A restart is required after each update.
1E Digital Signing Certificates
As described in Digital signing certificates, the root signing certificate is DigiCert High Assurance EV Root CA and the root timestamping certificate is DigiCert Assured ID Root CA. These must exist in the Trusted Root Certification Authorities store, which contains a replica of the Third-Party Root Certification Authorities store.
Issue
If the relevant certificates are not available on a Windows computer, then the 1E Client will stop shortly after starting up, and the 1E.Client.log file will show an error similar to the following.
INFO  - Loading providers...
ERROR - Unable to verify signature for 'C:\Program Files\1E\Client\Extensibility\1E.Client.Provider.Cli.dll'
ERROR - Unable to verify signature for 'C:\Program Files\1E\Client\Extensibility\1E.Client.Provider.Http.dll'
ERROR - Unable to verify signature for 'C:\Program Files\1E\Client\Extensibility\1E.Client.Provider.Json.dll'
ERROR - Unable to verify signature for 'C:\Program Files\1E\Client\Extensibility\1E.Client.Provider.Nomad.dll'
ERROR - Unable to verify signature for 'C:\Program Files\1E\Client\Extensibility\1E.Client.Provider.PowerShell.dll'
ERROR - Unable to verify signature for 'C:\Program Files\1E\Client\Extensibility\1E.Client.Provider.Registry.dll'
ERROR - Unable to verify signature for 'C:\Program Files\1E\Client\Extensibility\1E.Client.Provider.TcpIp.dll'
ERROR - Unable to verify signature for 'C:\Program Files\1E\Client\Extensibility\1E.Client.Provider.Wmi.dll'
Cause
This occurs when 1E Client is unable to validate the code signing signature of the executables or libraries. This can happen if one or more of the following is true:
the trusted root certificate of the countersignature is missing from the Windows Trusted Root Certification Authorities certificate store - this may be because Automatic Root Certificates Update is disabled
other certificates in the trust path are missing, and Windows is unable to connect to the Internet and dynamically download them during validation.
In either case, the failure to download trusted certificates may be due to the computer being disconnected from the Internet, for example in a lab.
The issue can also affect installation and patching because MSI and MSP files are also countersigned, but that depends on your organizations security policies for software installation.
The issue may not be apparent until after installation, when restarting and not able to connect to the Internet, for example if the computer has been moved into lab.
The root CA certificates are normally automatically provided by Microsoft's Update Root Certificates feature, however this may not be present for legacy OS. You can tell if the root CA certificate is present as follows:
view the properties of the 1E.Client.exe file
select the Digital Signatures tab
select the sha1 signature and click Details (this may take some time to respond while Windows is trying to check the certificate revocation)
click View Certificate
select the Certification Path
if you do not see Digicert at the top of the certification path, then you do not have the root CA certificate
In a lab environment that is not connected to the Internet, the computer may not be able to automatically obtain intermediate CA certificates.
Resolution
Ensure that your Root Certificates are up-to-date. The Update Root Certificates feature is enabled by default but its configuration may have been changed or restricted by Group Policy. You may see DisableRootAutoUpdate = 1 (dword) in HKLM\Software\Policies\Microsoft\SystemCertificates\AuthRoot.
If disconnected from the Internet, then manually import the certificates for:
Root CA into the Third-Party Root Certification Authorities store or Trusted Root Certification Authorities store.
Issuing CA into the Intermediate Certification Authorities certificate store.
You can distribute certificates to client computers by using Group Policy, as described in https://docs.microsoft.com/en-us/windows-server/identity/ad-fs/deployment/distribute-certificates-to-client-computers-by-using-group-policy.
The table below applies to software and hotfixes released in 2020.
2020 | Signing certificate | Timestamping certificates |
|---|---|---|
Certificate | 1E Limited | TIMESTAMP-SHA256-2019-10-15 and DigiCert Timestamp Responder |
Issuing CA | DigiCert EV Code Signing CA (SHA2) Thumbprint: 60ee3fc53d4bdfd1697ae5beae1cab1c0f3ad4e3 | DigiCert SHA2 Assured ID Timestamping CA Thumbprint: 3ba63a6e4841355772debef9cdcf4d5af353a297 and DigiCert Assured ID CA-1 Thumbprint: 19a09b5a36f4dd99727df783c17a51231a56c117 |
Root CA | DigiCert High Assurance EV Root CA Thumbprint: 5fb7ee0633e259dbad0c4c9ae6d38f1a61c7dc25 | DigiCert Assured ID Root CA Thumbprint: 0563b8630d62d75abbc8ab1e4bdfb5a899b24d43 |